
Terry L
-
Content Count
9 -
Joined
-
Last visited
Reputation Activity
-
 Terry L got a reaction from CNew in Tiny Tiger gas tank repair
I figured out how to remove the bottom of the Tiny Tiger gas tank and wanted to share how I did this.
First make sure all the fuel is out of the gas tank and no flamable vapors are in the tank that could ignite.
I used a heat gun to heat the bottom metal plate and the aluminum around the bottom of the tank to about 350 degrees. I was able to use a wooden dowell to push from the inside of the tank push the cover off.
The filter on the inside of the tank is rubber and will most likely be deteriorated. I removed the rubber filter and shortened the brass tube about 3/4 of an inch and used a chain saw fuel filter that fit over the tube to replace the disinegrated rubber filter.
I made a new paper gasket to replace the original paper gasket for the bottom cover.
Pay close attention to cleaning the bottom cover where the bottom cover and the aluminum housing fit together. It must be exceptionally clean for the adhesive glue to seal well.
I used "Seal All" adhesive which was recommended by the manufacturer for this type of application. "Seal All" may be purchased at most automotive stores.
Apply sealant per instructions on the package and assemble the cover to the tank. I also put a little sealant around the outside of the tank cover after I assembled it.
Some people mentioned the use of "Yamabond" which I am sure could be used as well.
"Seal All" was only $4 a tube which I believe is cheaper than "Yamabond".
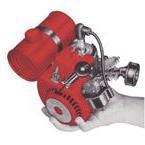
I have attached pictures as a reference of how I accomplished this.
-
 Terry L got a reaction from factory in Tiny Tiger gas tank repair
Hi John,
These are the pictures of the rubber fuel tank pickup filter. You are correct about the rubber hose. I did consider your idea but this was the filter I had and I believe it will pickup fuel within a 1/4 inch of the bottom of the tank. I wanted to post some pictures of the final product as well. I did have to make a new air filter which I copied from one I saw on this site. It seemed to work out well. Is the orientation in the top of the cyclinder critical? My book doesn't reference orientation but I have read that it should parallel the crank shaft?All in all the project seemed to turn out well.
Thank you to everyone for all your help and guidance on this project!
Terry
-
 Terry L got a reaction from factory in Tiny Tiger gas tank repair
I figured out how to remove the bottom of the Tiny Tiger gas tank and wanted to share how I did this.
First make sure all the fuel is out of the gas tank and no flamable vapors are in the tank that could ignite.
I used a heat gun to heat the bottom metal plate and the aluminum around the bottom of the tank to about 350 degrees. I was able to use a wooden dowell to push from the inside of the tank push the cover off.
The filter on the inside of the tank is rubber and will most likely be deteriorated. I removed the rubber filter and shortened the brass tube about 3/4 of an inch and used a chain saw fuel filter that fit over the tube to replace the disinegrated rubber filter.
I made a new paper gasket to replace the original paper gasket for the bottom cover.
Pay close attention to cleaning the bottom cover where the bottom cover and the aluminum housing fit together. It must be exceptionally clean for the adhesive glue to seal well.
I used "Seal All" adhesive which was recommended by the manufacturer for this type of application. "Seal All" may be purchased at most automotive stores.
Apply sealant per instructions on the package and assemble the cover to the tank. I also put a little sealant around the outside of the tank cover after I assembled it.
Some people mentioned the use of "Yamabond" which I am sure could be used as well.
"Seal All" was only $4 a tube which I believe is cheaper than "Yamabond".
I have attached pictures as a reference of how I accomplished this.

