| |
-
and I mean the big farm tractors. I'm just wonderin because a guy on MyTractorForum is cryin that the forum is only for the small "lawn mower" type lawn and garden tractors. What does everyone else think? In my opinion its ALL a matter of opinion. Haters are gonna hate no matter what it is, thats all. MOST folks however (like me) have lawn and garden tractors that they show or use and could have questions or comments on... and are also happy and proud of. Those folks also may not have the storage space, and a big bank account for the big tractors, and can't store em or buy em, and these folks also may not work on a farm... also like me, but still appreciate the big stuff. Not to mention the small machines take up less room on a trailer if your haulin em somewhere and you can fit more of em on there, and the small machines COULD also do big tractor work too lets not forget. They can till, and they can plow. I'm sure i'm missing a lot more. I thought the tractor community was friendly and helpful no matter what kinda "tractor" you got, but apparently I thought wrong. I thought whats cool, is whats cool. It seems like some if not most of the big tractor folks don't like the small machines and got a big "haha I'm better than you" ego, and thats what this certain member is coming across as. I thought big tractor folks still had appreciation for the small stuff because maybe it brings back a memory or 2 for em. I'm sure you or a family member musta had a small machine at one time before you moved on and got a bigger one, like some if not most people do. Or heck use em for daily stuff right now if they don't use a big tractor, I'm sure you have a lawn mower you use now at home. This type of attitude he is presenting reminds me of some, (although not too many) car people who own a certain brand of car and want nothin to do with the people who own other brands. Me for example, I like old classic cars from the early 1900s to the late 1990s, and maybe to mid 2000s. But I like all the brand names. Brand new 2010 and newer cars though, don't wow me and I think they should be in dealer showrooms so I don't even look at em and I walk right by. But anyway, we got forums for all types of machines here BUT so do most IF NOT all of the other tractor forums. Just look. It don't mean you gotta look at em, just look at the ones your interested in. We don't discriminate here... or at least I don't THINK we do. I don't believe the other forums do either. I love the big tractors don't get me wrong and I would love to have one, but I can't. Certain circumstances DON'T allow me, and thats why I'm happy and proud of what I got and what I can store and can afford. Anyways, this is an opinionated post, NOTHING more. That is all, rant over. I know its been a Looonngg time since I posted on here, but I'm still here and hangin in there.
-
Hi Everyone,
I got a lot of updates on the tractor which I will hopefully post soon, but I just wanted to let everyone know that today is the 1 year anniversary of when I bought it from the member of MyTractorForum. Thanks again to him for letting me buy it before he sold it to someone else, it means a lot. Here is what it looked like on his trailer below before I bought it and started tearing it apart as shown on page 1 of this post.......
Here is the tractor a year later below almost all torn apart and ready for sandblasting, and priming, and painting. I can't beleive it went from the above photos to the below photos in just a years time, and I can't believe that much progress has been made in that short of time looking back at it. Granted there is a lot more to do and take apart. I hope to and the plan is to have the tractor completely restored and back together late 2023 early 2024......
-
Hi everybody,
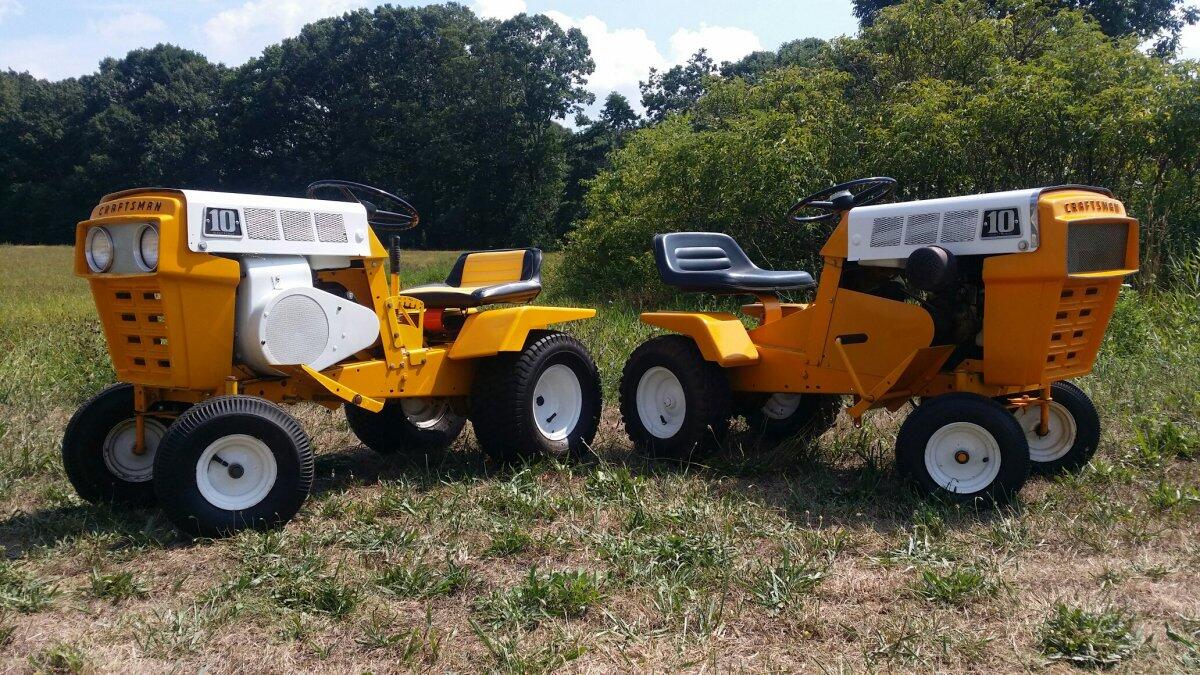
Not much of an update on the tractor. I just ain't done much to it lately because I ain't had time with work and working on the 10 horsepower Craftsman and everything else goin' on. Nothin has changed on the tractor since my last post so you maybe wonderin' why the heck I'm postin, well I'll tell ya. This is the reason here below in the pictures, and a special thank you goes to my stepdads brother for this. It's an NOS SW amp gauge from Napa with the bracket, nuts, instructions and everything. Sad thing is it goes to 30 where as the original one to the tractor goes to 10, but that is ok. The plan for this right now is to store it for a spare in case I need it if the original doesn't work or won't shine up when I polish the chrome edges where you will see it, or use it for another project. This is all for now, more to come hopefully soon......
-
This is all for now, more to come soon.
-
Hi folks,
I got somewhat of an update on the tractor, and there is story behind this one. I took the seat off the tractor a month ago to work on the voltage regulator and the battery box and just left it off to eventually sand it down, primer it, paint it, and have it reupholstered. I thought to myself a couple weeks ago when it was a very warm temperature and sunny day out that "today is gonna be that day", OR so I thought. I was taking the nuts and bolts out of the seat with a ratchet and socket to sand it down with my stepdads DA or dual action sander/polisher, and my stepdad says to "just grind them off it will be faster" so we did. When we grinded the nuts and bolts off the seat we noticed that the crack in the middle of the seat just so happens to be so to speak "bondoed" or patched with brass, I say it is bondoed or patched with brass because we took the grinder and put the wheel on and it did not create any sparks. See 1st photo below.
Anyway as a separate note if you look at my 2nd picture, when we grinded the nuts and bolts off the seat there was a non original plate that the nuts and bolts were holding onto. I say the plate is not original to the seat because I looked at the bottom of my 10 horsepower Craftsman seat and it is different like in the 3rd picture, and just to verify if it is like the 3rd picture I looked at my stepdads 10 horsepower Craftsman and it was the same thing. That said right now the plan of action is to......
1) Sandblast the whole seat from the tractor,
2) Have the local fabrication shop I had make my battery box pieces fix the seat and make the correct piece for the bottom,
3) primer, then paint the seat black,
4) then have it reupholstered in the same pattern as my 10 horsepower seat.
Wish me luck!
What the bottom of my seat SHOULD be, (photo courtesy of a seller on Ebay 2022)......
-
LATEST battery box update. As mentioned a couple posts ago this past Tuesday I brought the rest of the battery box to my local fabrication place where I am having the top piece for the box made, I am now very happy to report that those pieces are made and I brought them home today and I think they came out great! Just the littlest things can make a big difference. Now we just have to cut the old rusty pieces out and weld the new pieces in......
This is all for now, more to come soon......
-
Here is an update on the voltage regulator, it's off now but 2 screws broke off in the process.......
-
Hi folks,
I got a few more updates on the tractor since my last post. A couple days ago this past Tuesday I got it out for the very first time since I bought it this past December to have my stepdad help me get the battery box off and to also get the voltage regulator off to see what it looks like, because I could not get them off myself as mentioned in post 45. That day after the rest of the box was taken off I brought it down to my fabrication place I am having make the piece for the top of the box. Let's start with taking the rest of the battery box off, which we sadly had to grind both the screw heads down to nothing to get it off......
-
This is all for now, more to come soon.......
-
It's time for the ignition switch comparison that I mentioned in post 50. You can see what I am talking about when I say that the new one is different because it is a 5 terminal and a click/snap in type of terminal and smaller in size and diameter, and when I got my old original one out I noticed it's a 4 terminal and a screw in type and it's bigger in size and diameter. See my 2 pictures below......
-
One more picture of the switch being taken out......
-
Another older update...... it's time to take the old original ignition switch out! I took the switch out the next day or 2 since I got the new switch from ISaveTractors. I would use it to save a little money and to keep as many original parts as possible and I'm sure it is still good, BUT there is a rusted piece of key that is stuck and will not come out in the key hole so it has to go. To get it out was a "nightmare" for me with so little room to work with the steering column in the middle of the switch. I also had to take the starter generator out too. Here are some pictures.....
-
Hi folks,
I got another update on the tractor, but it unfortunately is not a good one. Going yet again back to post 35 on this page; about a week ago I got my new ignition switch I ordered from Norman at ISaveTractors, and unfortunately in my opinion it's wrong. My stepdad however says we could possibly make it work if I can't find a new one like the old original one in the worse case scenario; but positively speaking I think I may have located a VERY close match if not the same one from O'Reilly Auto Parts. (See my link below.) I say the new one from ISaveTractors is wrong because it is a 5 terminal and a click/snap in type of terminal and smaller in size and diameter, and when I got my old original one out I noticed it's a 4 terminal and a screw in type and it's bigger in size and diameter. A comparison on that will be in a another thread.
Here is the link for the one from O'Reilly Auto I'm thinking about buying below.....
https://www.oreillyauto.com/detail/c/standard-ignition/engine-sensors---emissions/switches/switches---specialty--universal-/daed438bf33a/standard-ignition-starter-switch/std0/us77
The one from Norman at ISaveTractors below. It is a switch for a Magneto ignition like mine BUT you will see the comparison in another post......
-
More measurement pictures. Again, I will have more to come on this project hopefully soon .....
-
Again going back to post 35 on page 2 here, now with taking the rusted screws out to get the battery box off. Here is why below; the "culprit" being rust which I do not believe I noticed before when I first bought it from the previous owner. I could not get the screws out even with PB blaster and letting it sit so I will probably end up drilling them out. The fabrication place I am having make my other piece for the top part of the box I will have make me this piece as well; I called them this past week and they said they will have the person making my other call me BUT I still have yet to hear back. That said I will call them this week. The sides have a little rust also BUT not nearly as bad as this though. On a separate note, while I was at it I also measured the part where it is rusted and it measures 5"X10.5". More to come on this project hopefully soon.......
-
More of the regulator cap.....
-
Hi folks,
I'm back with a little older update on the tractor that is going back to post 35 on page 2 here with trying to take the old voltage regulator off. I had to take the seat off to get to it because in my opinion with the seat on, would of been a little bit too tight of a space to work in which explains my 1st an 2nd pictures. As you can see from my photos with the cap off, it is the original regulator as it says "Delco Remy Made In USA" on it and the inside actually looks pretty good in my and my stepdads opinions. I will 95% MAYBE end up just buying a new one for reliability reasons BUT we will see because I want to and will also test the original here to see if it works, and if it does just keep that one on as I like originality......
-
Thank you, i'm not perfect by any means and i'm trying my best. I just want to take my time and as much as I need on this tractor and do it right the first time.
-
This is all for now; more to come soon.......
-
I sanded a part that had a bunch of rust pits in it down with 120, 220, then 320 grit sandpaper then primed it then sanded it again 3 times then painted it the same day I drained the oil out of my engine......
-
Good news; I get to save a little bit a money on this engine build as my stepdad gave me a "new" to me (but used) magneto/coil he had lying around. It looks in good shape and he said it came off a running engine. I believe he said it came off a snow-blower. On the front on the bottom in the 4th picture it says "Ezee-Start Magneto Tecumseh"......
-
Now that the engine is off, I vacuumed up the rest of the nest in the 2nd to last picture of my previous post. Now that it's time to drain the oil, I put the engine on a ol milk crate we had lying around and let it drain out. When it was done fully draining for about 5-10 minutes I tipped the engine a bit to see if there was anymore oil left. Since this post on the engine I only took parts off it that is all, I have NOT yet started to rebuild the engine. More to come on the engine soon......
-
Here is the engine now that it is off the tractor. The puddle of diarrhea lookin' stuff in the 2nd picture is what came out of the muffler when it was first set on the ground......
-
Hi folks,
since my last post I have taken the engine off the tractor, drained the black oil, and took some parts off it so I can start the rebuild. I however have NOT started rebuilding it yet though. I also attempted to take the voltage regulator and battery box off the tractor too, but the screws are so rusted they won't come off even with PB blaster on them for a half hour to an hour. That said I will spray the PB on everyday and let it sit all day for a week, and if that does not work I will just end up drilling them out. Here are some pictures......
Man does it look different now without an engine......
-
After you said this I went onto the website I mentioned and you would be correct, I don't understand why they have the sign out front of the building then if it says no upcoming auctions. I honestly would try calling them.
Best of luck
|
|