Anyone seen or know where to find information on one of these? I found a small amount of info searching on the web but nothing other than old ads and a brief description. Has a 5hp Briggs.
Trying to decide if I'm going to do anything with it or pass it on.
The generator wiring has rubber insulation, very common in the 1950's, 1960's & earlier for lots of stuff, this either turns hard & crumbly with age or sometimes turns into a sticky gooey mess. It's rarely used these days, last failed rubber cable I came across was in a circa 2006 Weller soldering iron, the insulation of the inner cores had gone hard & crumbly after about 10 years and ending up shorting out the supply.
The CNC router did a very good job at making those, are there lasers that will cut sheet steel? Seem to remember seeing sheet metal cut using a plasma cutter & using a water jet too at an engineering trade show many years ago.
David
Agreed on the unwanted tracking aspects of FB. Unfortunately, it seems to be the best way to find things for sale lately.
I've seen deteriorated rubber/cloth insulation before. The copper wire strands were mostly corroded away inside what was left of the insulation. To replace the leads, I ended going all the way back to the windings on most. Ended up having to use red "liquid electrical tape" and some head shrink to cover everything back up.
There are co2 and fiber lasers that will cut most metals but I think they would be too much for the .004. The router is a better choice as there is little to no HAZ to change the temper of the steel. I think I had the feed rate too high on that last run of springs. Slowing it down more would probably yield a finer finished edge.
On 5/25/2021 at 7:42 PM, Wallfish said:
That's a fair price considering the condition of it and it looks complete with baffles etc. Paint isn't bad. It's a later model with the 13B engine and square recoil type starter. No need to be near TN as it shows free shipping too.
I would like to rehab a older gas powered drill at some point. Guess it doesn't particularly matter who the manufacturer was.
Thanks for the compliments. After looking at pictures of other similar units, mine is it in pretty nice shape overall. Think the generator head leads were the most rotten out of everything. I can't remember ever seeing wire disintegrate like that.
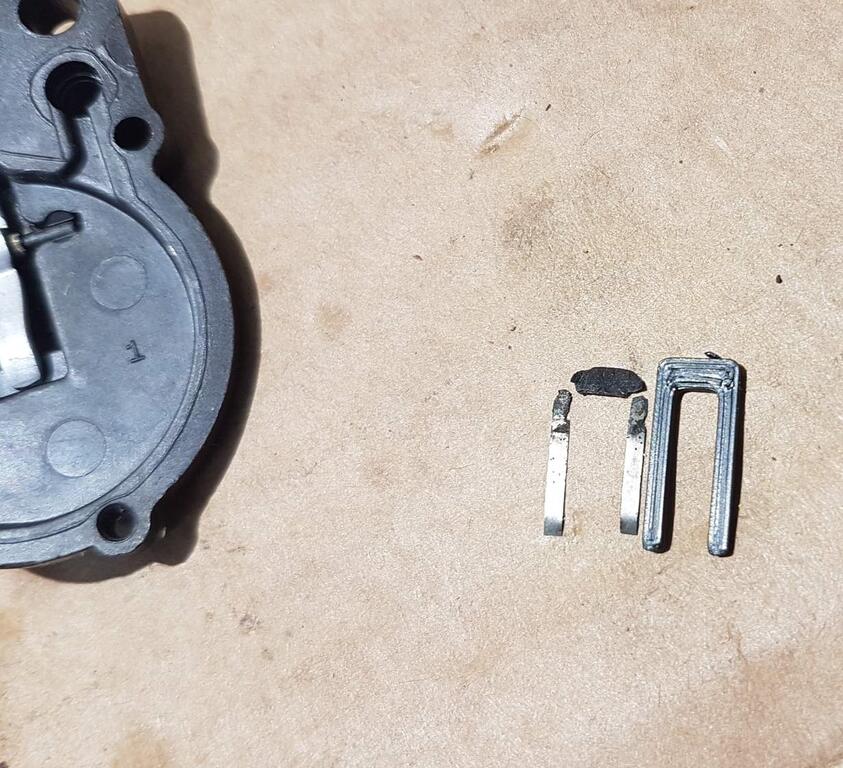
I ended up using a CNC router after the laser wouldn't touch it. I cut six of them for spares in case I mangled couple reassembling the carb. Didn't need them. Wasn't all that bad. I did not read through the carb thread's instructions but I did use the idea of fishing it in there with dental floss.
Took a break on this for a little while to fix the ignition on a Tecumseh powered Blue Star welder.
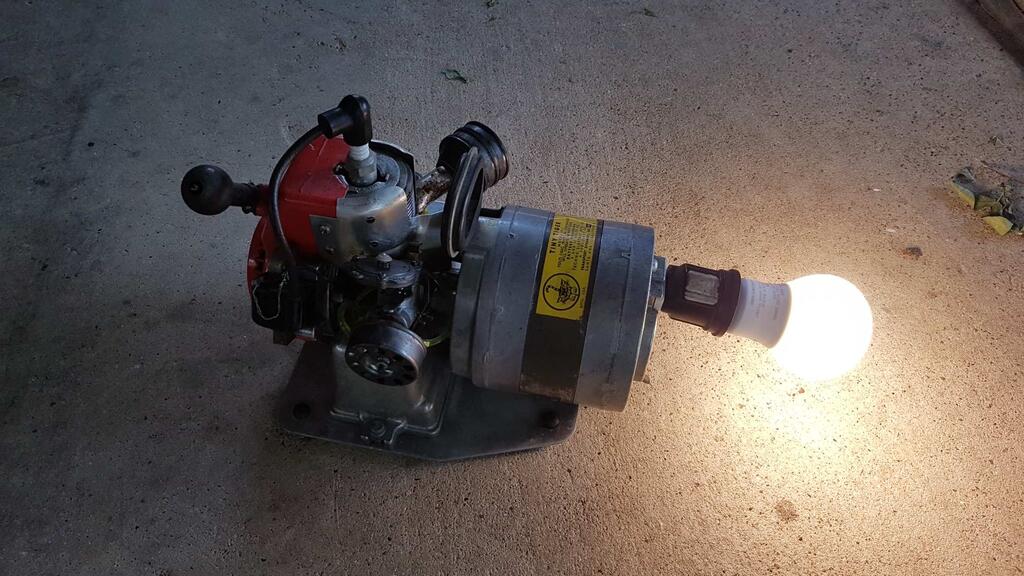
So I was able to cut the carb spring shape from the spring steel material. Edges were sightly rough but a little filing took care of that. I reassembled the carb with the new spring and reproduction carb diaphragm and check valve. It fired right up after priming the lines with fuel using a little air pressure! Only adjustments I've made is the mixture screw to get the rpms right for the correct voltage.
Calling this one done for now I guess. Might need to keep an eye out for another OR tool to rebuild!
I’ve not had to replace rings yet on any of mine but I also don’t run mine all that often or under normal use conditions. Can you add a couple photos of your pistons and rings?
Were the little rubber induction case shaft seals in ok condition? When those fail it throws everything off.
I reassembled the engine after posting last night, convincing myself that the piston/rings/cylinder were serviceable and I didn't want to go on a wild goose chase to find parts.
I'll look to see if I took pictures that included the piston. The crankshaft seals were rock hard and not sealing against the crank. I removed all three and replaced with nitrile o rings. The fit will work but wasn't exact. Way better than what was there though.
12 hours ago, factory said:
Unless it's had a lot of use or ingested the old crumbly air filter foam them it's unlikely the rings would need replacing.
What condition was the engine in when you took it apart?
They will either be the narrow type with a chromed edge, or the later wider type.
The narrow chromed type were designed so that when they worn through it showed the iron underneath, at this point they would have recommended replacement.
NOS rings are a finite resource and unless they are obviously worn out we wouldn't suggest replacing them.
There is a seller in the UK has been offering reproduction rings of the wider type for many years, but none of the narrow type.
To add to the confusion the first batch of O&R engines (approx 6000) used an in-between sized ring. Becoming unobtainable in the early 1960's they would have recommended replacing a whole bunch of parts to ungrade it the standard version.
You will find the original cylinder gaskets will leak all over your cleaned up engine if not replaced, I was making my own replacements but as we haven't had any engine shows in the UK for some time I've not had the opportunity to pickup some more offcuts of gasket material.
David
10-4. It appeared to have little run time. It did look like it ingested some of the filter but wasn't in terrible shape. Someone must have removed the rest of the foam because the air filter housing was empty.
I have the narrow rings. They did look shiny so one would think that the plating is still intact. The top ring was more worn than the lower. I did not replace the exhaust gaskets as they still looked surprisingly well. I guess we will see if they leak. I did substitute a thin film of yamabond for the tiny induction paper gasket; also an experiment.
9 hours ago, CNew said:
Parts like this don’t come up often so you’re definitely working on this at the right time. If you want a cylinder gasket kit like David mentioned there is one on eBay right now. The seller also has a piston/rings set but it’s the one with the larger style rings. I’ve only seen these on the 13B style engines myself. Not sure if this can be used on the earlier engines.
Wow, good thing I don't need that piston! I have similar gasket material to cut new gaskets from. I guess I could do that by hand or draw it up and use the laser.
Was working on reassembly and not sure if I need to replace the piston rings or not. I searched and did not see any spec on piston to cylinder or rig gap clearance. Anyone have input on when to change the rings and better yet, are any rings out there?
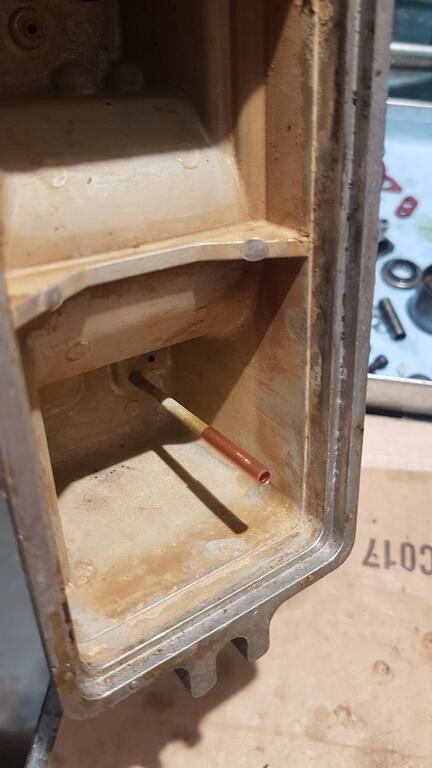
Decided to extend the fuel pickup tube in the tank with some copper tubing and fitting a filter like David describe earlier.
I ordered a few RC glow filters but all required larger fuel line. Seems like 3/32 fits the best so hoping that is what the barbs on Sullivan 187 are for.
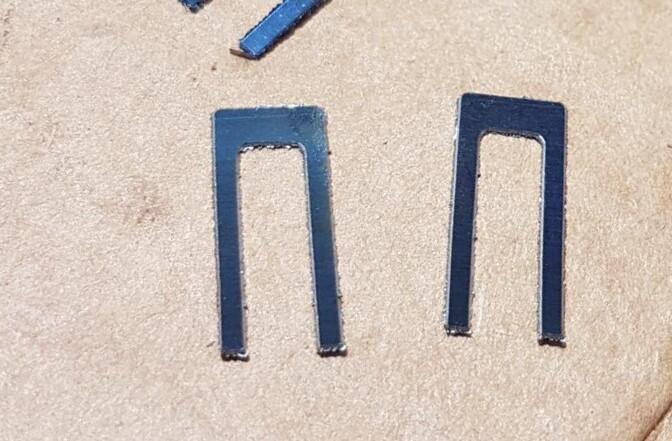
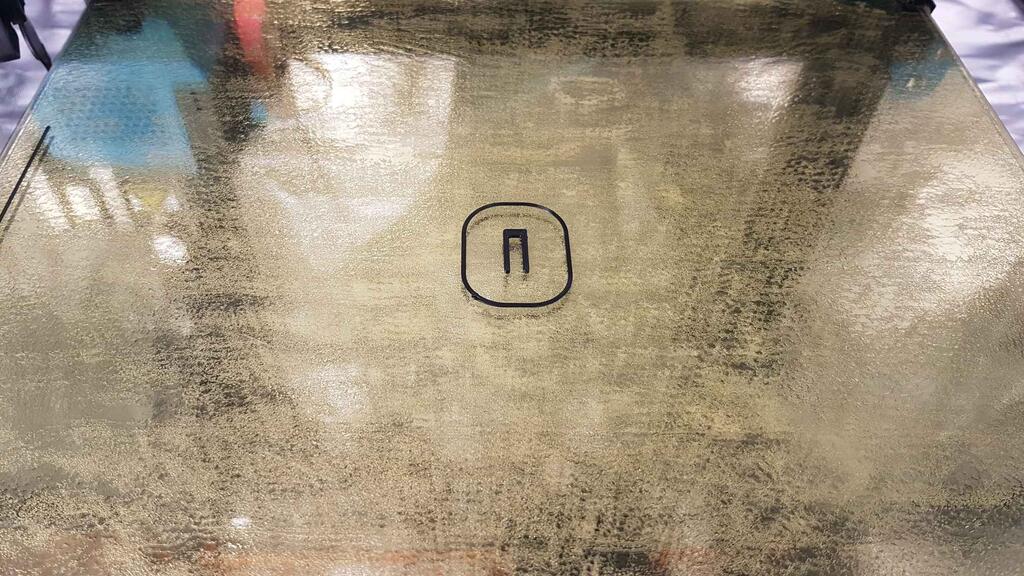
While waiting on material, figured I would get the shape of the spring down.
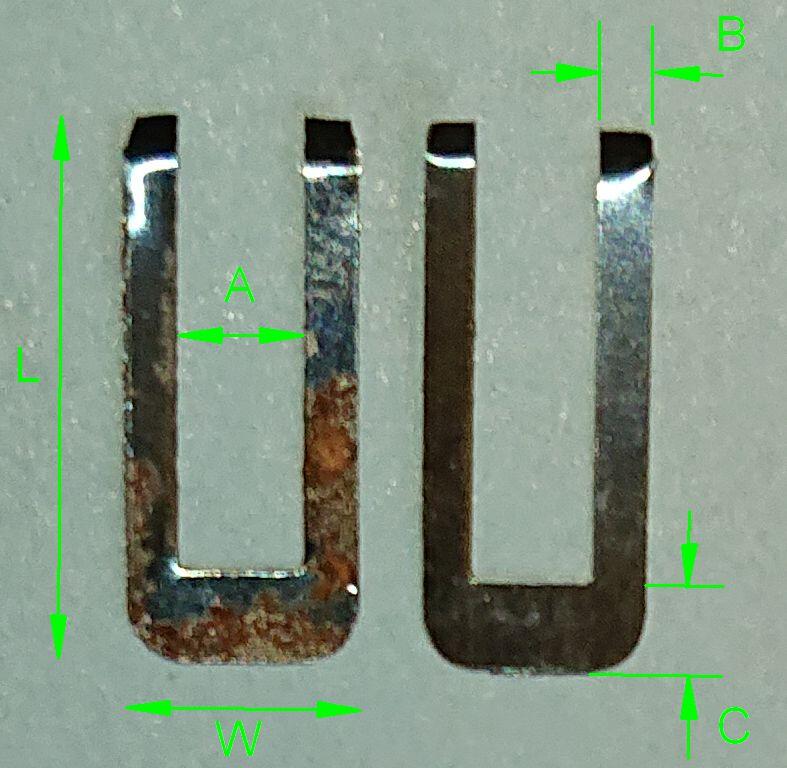
Printed a couple trial and errors and think I have the shape close but seems a little long when compared to the original pieces. Anyone have measurements or could measure a good factory piece? Thanks.
Been awhile since I posted on the cutoff saw. After the hand surgery it’s been a little slow but I did make a little progress the other day and started getting the engine back together.
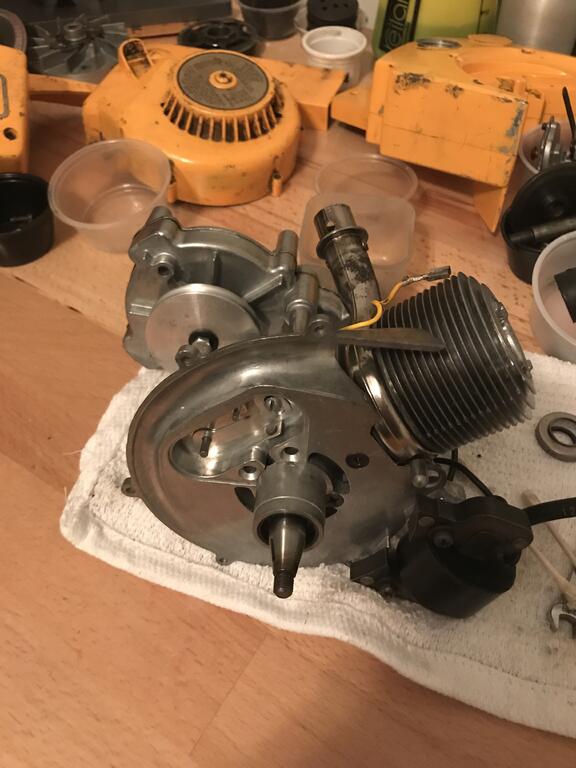
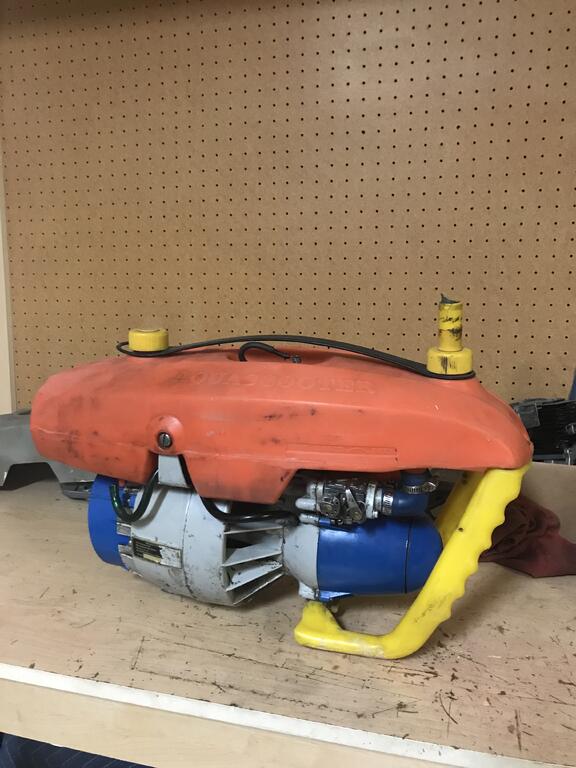
I also took a little break from O&Rs to work on a vintage Aquascooter. I’ve got it completely torn down now for a full rebuild. It’s an interesting engine...
Did you ever finish your rebuild of your Aquascooter? That one looks like a 400 with a Tillotson HS.
I've rebuilt completely rebuilt three of them. Stripped and powder coated the frames even. Odd little things but isn't that why we are on here? Ha!
Thanks for the links. I haven't dug around much on Ebay for parts. Looks like I need to. Will need to get one of those gasket sets for the diaphragm. My other pieces seem fine but would like to replace the plastic check valve also.
Think I'll try my luck with making the rod. I have some other things to order from McMaster.
I hadn't seen that thread on the springs but had the same thought about cutting one out of 1095 spring steel material. My original pieces measure about .004". I have access to a 40w laser as well. Not sure if it will cut shim material or not. Should at least make a nice pattern to trace using dykem.
Hello all. Very interesting forum. Lots of valuable info.
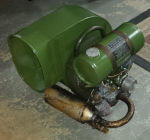
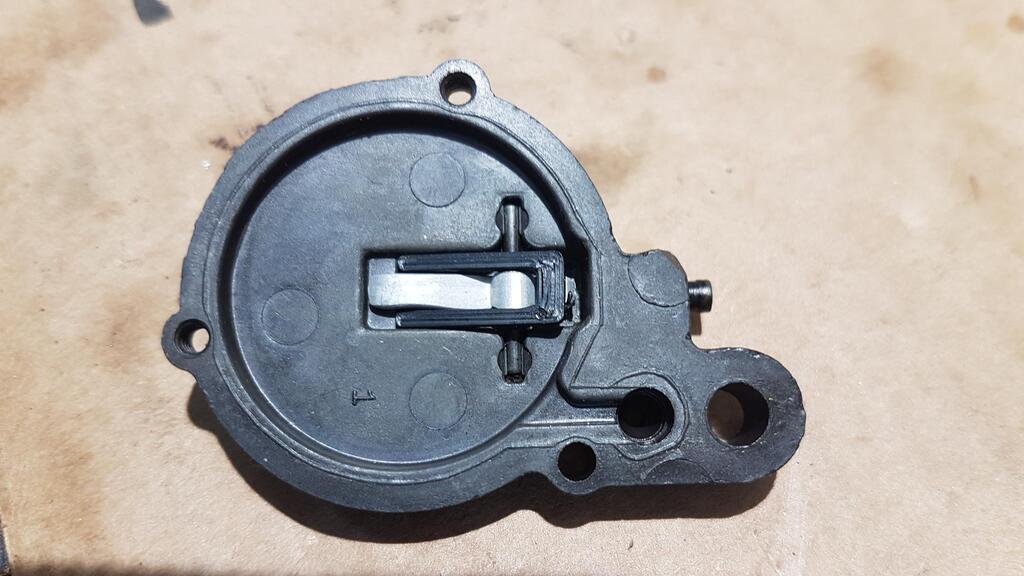
Have a Tiny Tiger generator that I bought at a garage sale years ago that I have started to take apart and clean. Between ingesting the foam filter and having mix gas left in it, there has been quite the mess to clean up. I have it totally apart and clean but had a casualty or two. I am looking for a carb lever spring and possibly a points push rod. I see from another thread that I need to PM another member for a carb diaphragm.
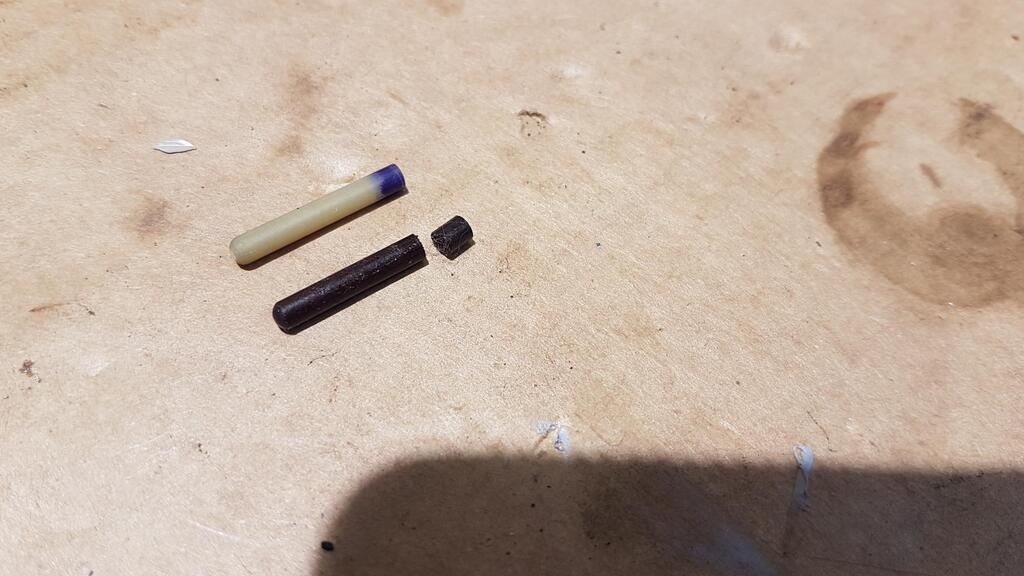
The spring was embedded in the oil/varnish mix and was mostly eaten away. After soaking the assembly in an ultrasonic cleaner, I finished the part off with an inspection pick.
The push rod was my own fault as I didn't remove the points cover before trying to separate that housing from the crankcase which broke the rod. I can make a new push rod if needed. It looks like .125" OD garolite(bakelite) rod to me. Pretty easy to find.


1950s Toro pony/starlawn
in Ride On's
Posted
Anyone seen or know where to find information on one of these? I found a small amount of info searching on the web but nothing other than old ads and a brief description. Has a 5hp Briggs.
Trying to decide if I'm going to do anything with it or pass it on.
Thanks