I’ve actually had that air filter assembly in my Watch List for awhile now and even asked the seller to send more photos, but nothing yet. I may try again. I want to make sure it’s in decent condition.
Yes, that’s the 149 I bought - you’re good. It is overall a very clean saw except for the tank. It needs a good cleaning for sure and I haven’t checked the gear box or anything yet. I did have to dismantle and thoroughly clean, oil and re-tension the recoil spring. Interestingly the corrosion in the tank doesn’t look like typical junk or the white discoloration typical of alloys. Rather, it’s all black and yellow inside - almost what you would expect for burnt oil residue. I tried everything to get a good photo but just could get good lighting inside one pic isn’t of the oil chamber and the other isn’t the fuel/oil chamber. It’s basically a charred black inside and all the fuel lines and filters are rotted.
I’ve been researching some 1/5 scale RC air filters and I’m hopeful I may be able to find something nice to add to The Groomer. These larger RC trucks and Baja buggies use 23cc 2-stroke engines and the carburetors look very similar in size to the Tillotson HU38A. It still might require an adaptor plate or something so I’ll have to continue investigating. I’ll keep you all posted if I find something.
I agree with you David. I was disappointed that combining shipping was all for the dell. I asked about the mounting hardware as well. I think I’ll keep looking for a parts saw since I’m not in a huge rush and can rig up some green filter foam temporarily on the carb just to test the engine once I completely go through it- rebuild the carb, do something about the fuel tank, etc. I’m really not looking forward to splitting the fuel tank but it’s so corroded I think I have to. I’m wondering if the previous owner did something wrong with the gas/oil mixture or something. The oil reservoir looks really clean, it’s the fuel side that is in really bad shape.
The first one was local on Craigslist from Oakslayer. This other one I randomly came across but I haven’t been able to close the deal yet, sure hoping it works out.
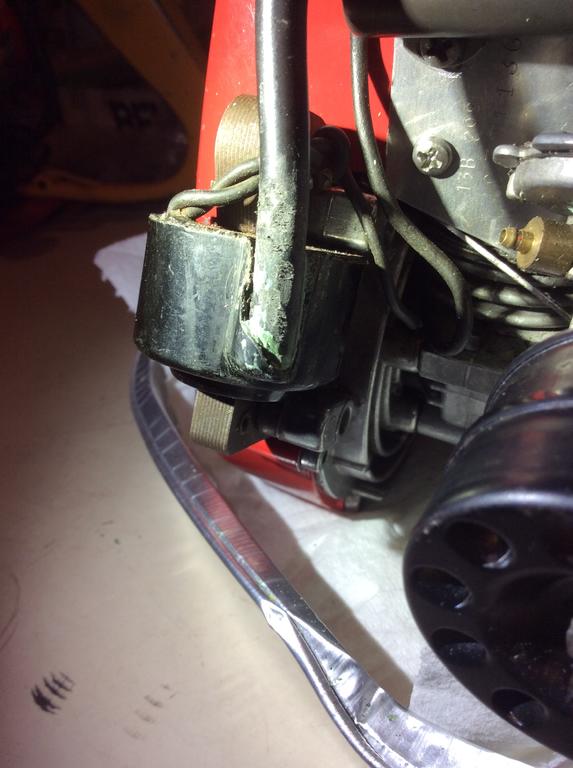
That was my guess too- I was a little surprised that there wasn’t more damage to the coil or the engine in general. I’m looking at some Locktite 1999131 All Purpose putty as a possible option.
Thank us David, these are great! The little O&R outboard is on my dream list. I saw one online a couple weeks ago and have been kicking myself ever since. At the time I didn’t know how rare most of this stuff was- same goes for a Little Wonder trimmer and a Drillgine. I may have a chance at getting another ice auger like the one Webhead posted. Still waiting to hear back from the guy and I know I’ll have to pay up for it and it’s not in quite as good a condition as the one Webhead posted. It might be kind of like the General Ice Aguer in the article you sent. If I end up with it I’ll be sure to post some photos.
That’s good to know... and a bit of a bummer. Well!
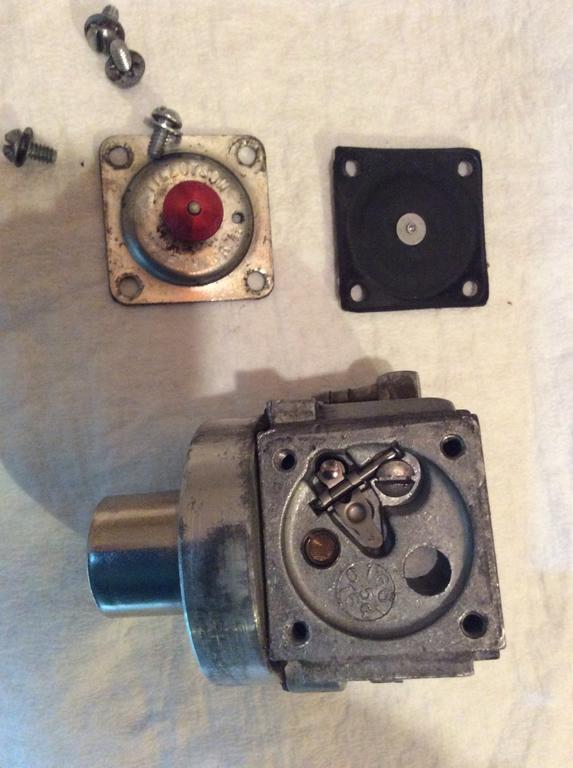
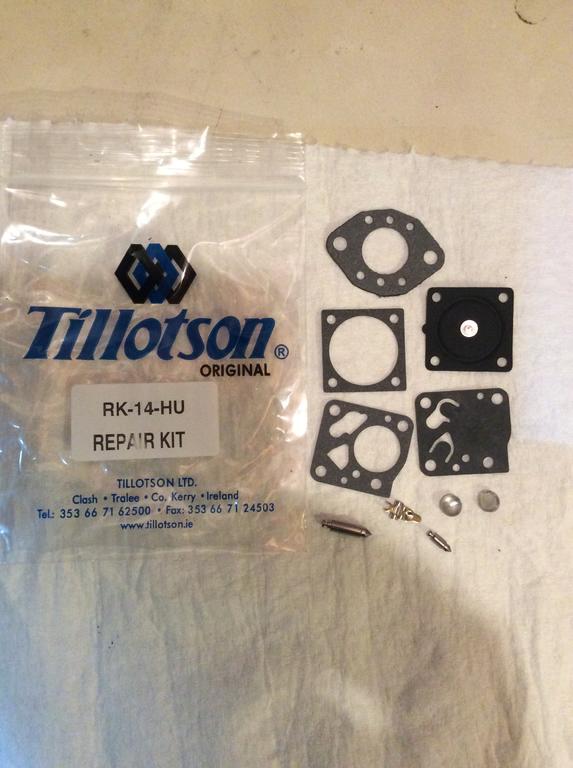
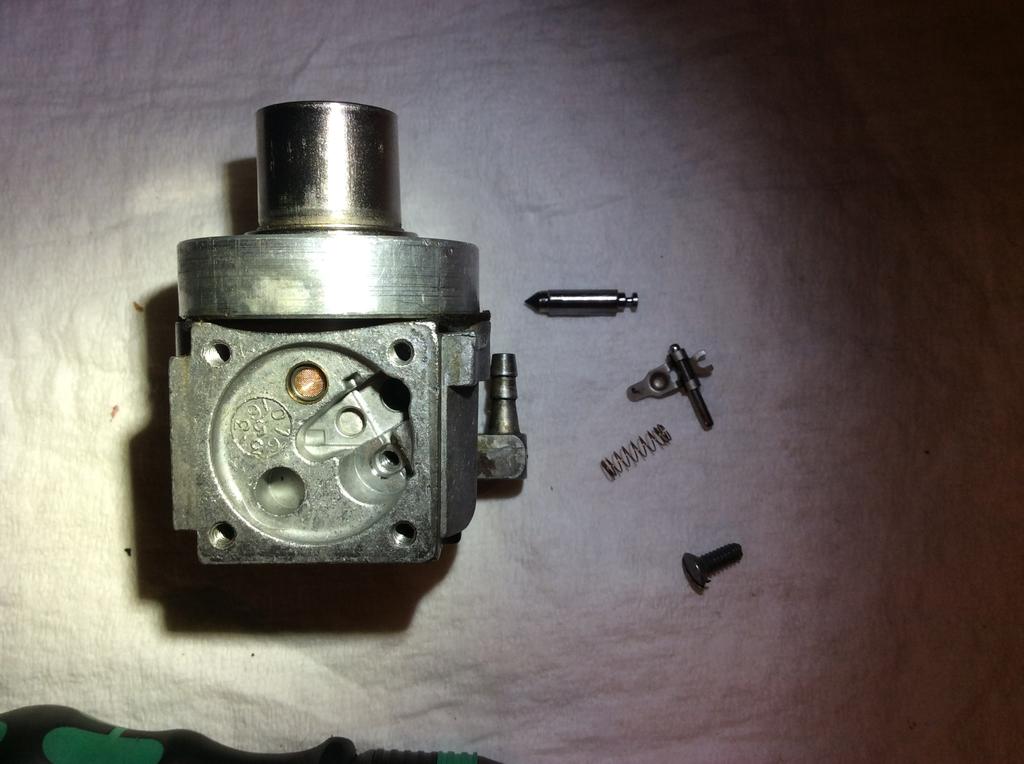
I’m getting close to doing my first open carb surgery I’ll be following the detailed rebuild process posted here; I’ve been studying it quite a bit lately.
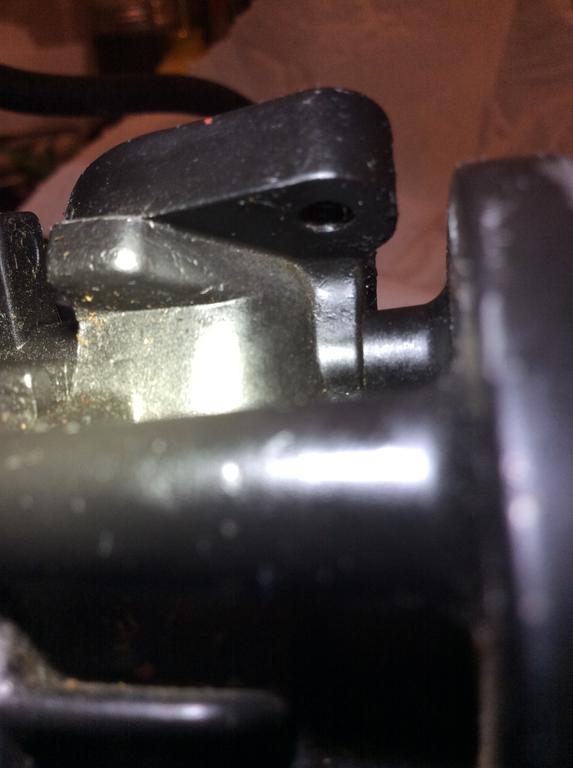
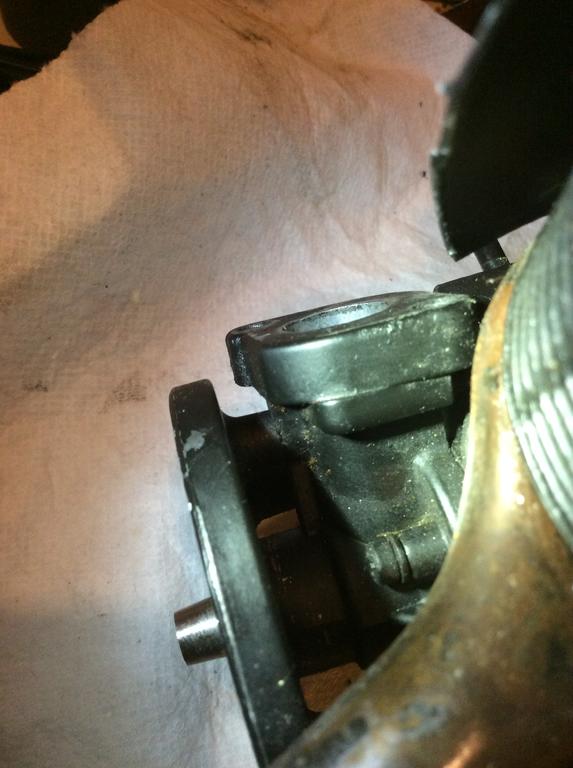
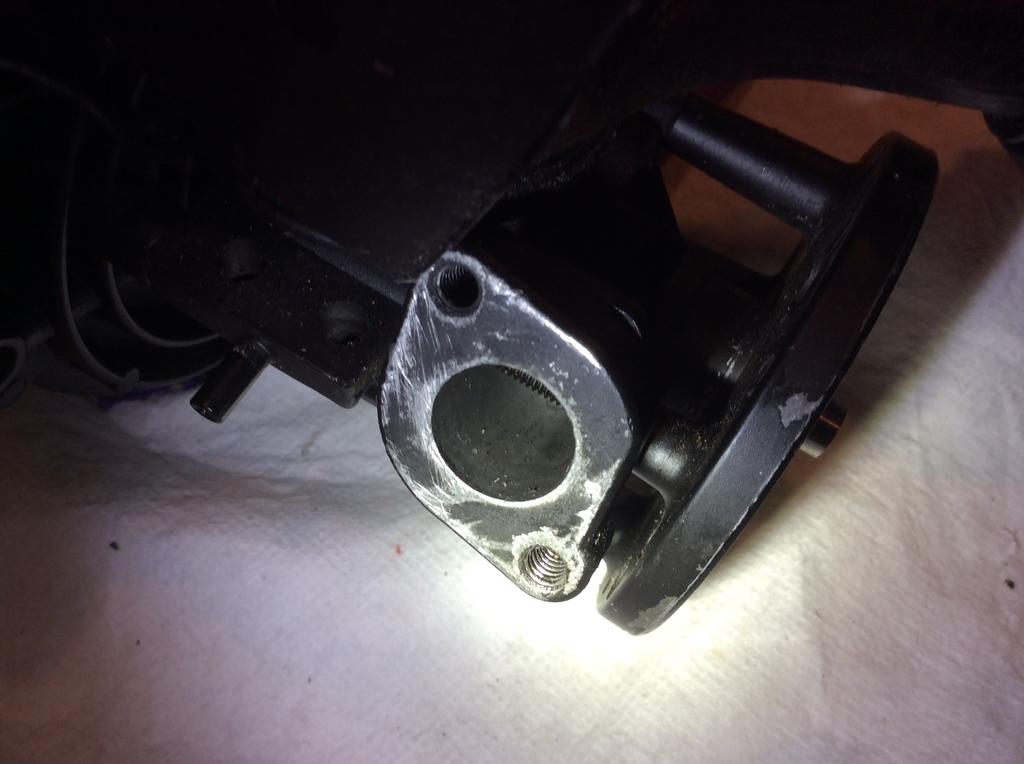
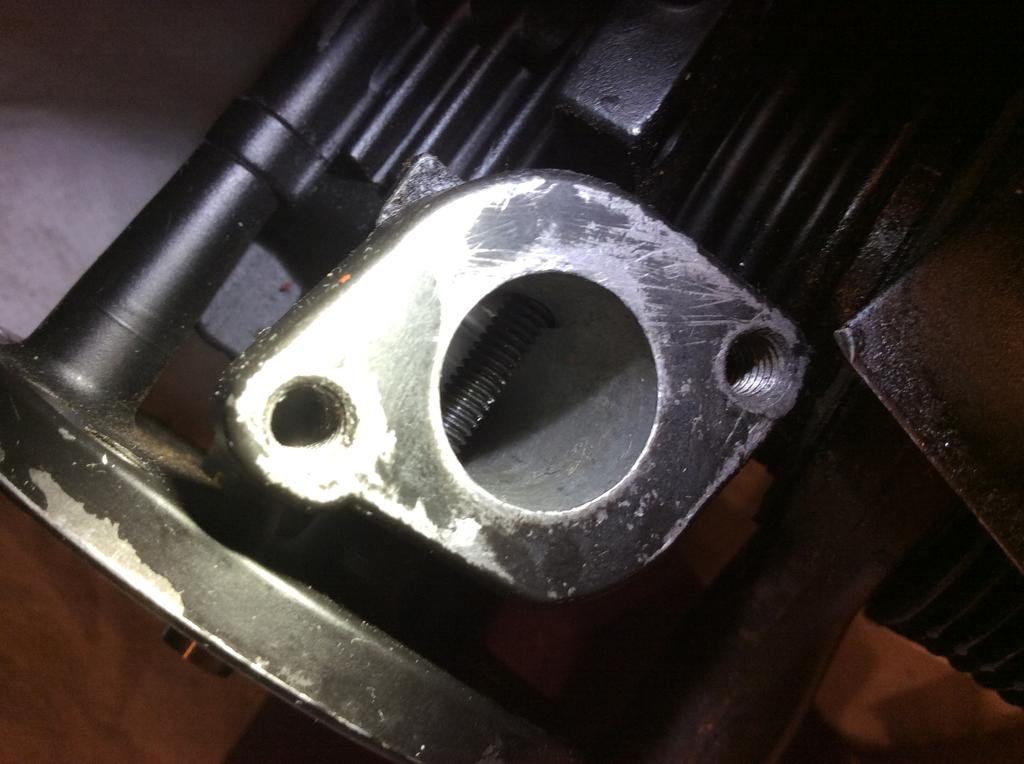
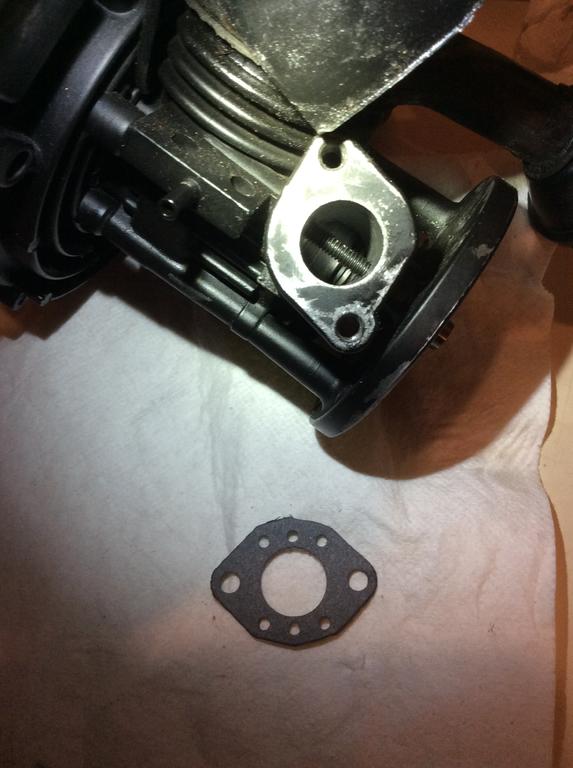
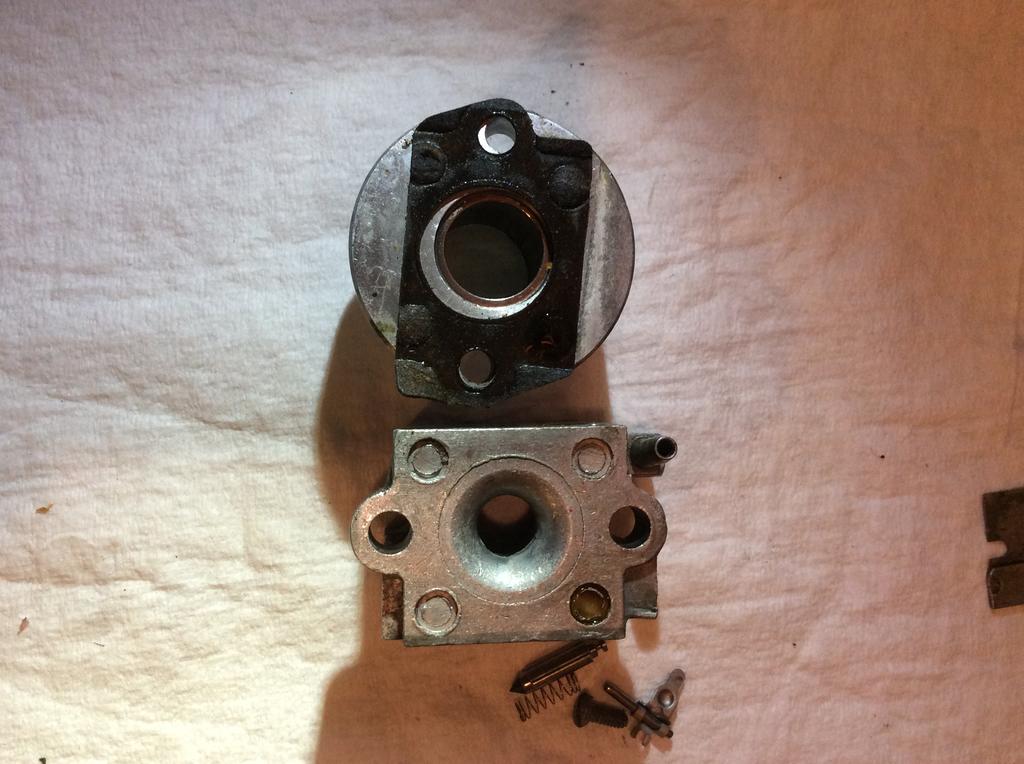
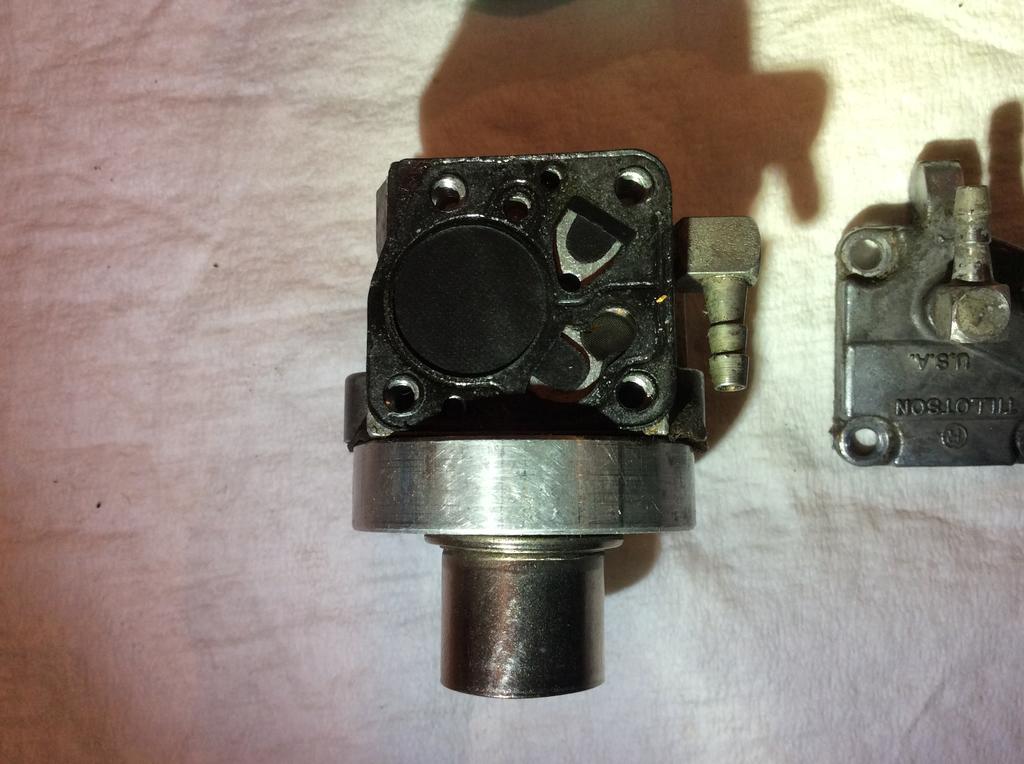
Yes, I believe you’re correct. The flange looks to be part of the casting. When I was first taking this apart I was expecting the flange to be an adaptor plate that was fastened to the induction housing mating surface but was quickly surprised only to find that it is all one piece.
After some painstaking carving and clean-up I think I’m just about ready to try my own hand at repairing the coil. I was able to remove most of the old putty stuff that wasn’t done well at all. I’ll go back in with some Locktite epoxy putty or some such concoction to see if I can get it shaped better and looking more original.
I agree, i prefer to buy complete items as well. This was a bit of a newby mistake on my part since I’m still learning the details of all these tools that used the O&R engines. When I was looking to get this particular saw I didn’t realize it was missing such a unique air cleaner set up. I had seen other photos of the Mustang Model 149 on the web that had the more standard air filter assembly so I didn’t even think twice. I just assumed it was missing the more common air cleaner and I thought I’d be able to find one of those or harvest one from some other parts engine. Learning my lessons
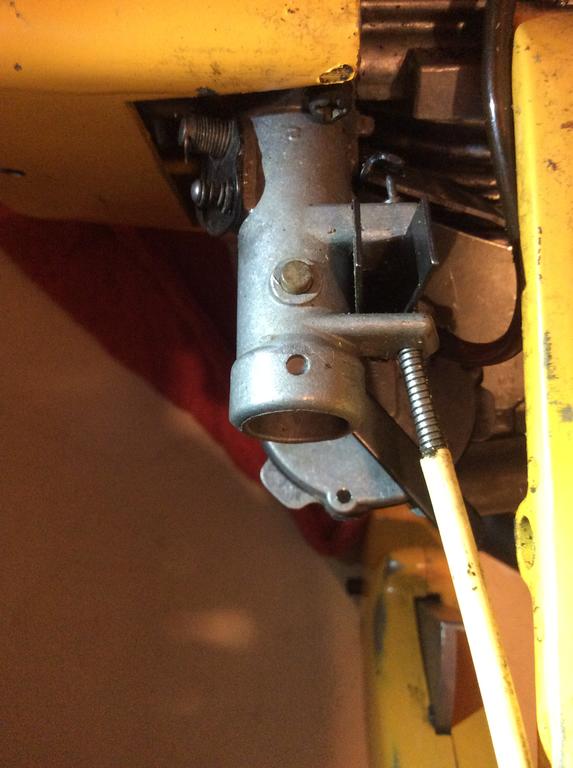
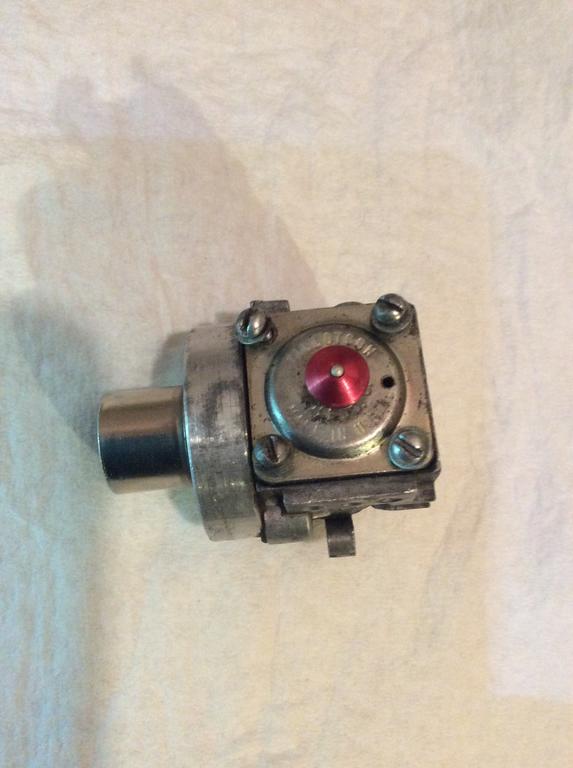
I’m in the process of trying to find a suitable clamp-on filter to fit the flange. I’m wondering if maybe even one of the larger RC car engines might have something. I hadn’t thought about the hose idea which would make it closer to the original setup. I’ll have to noodle on that a little more and see what I can find.
Thank you for the links. I’ve seen this guys parts listed before and also thought they were a bit on the high side. I will contact him and see if he might combine the pieces. No worries on the parts, I’ll be here and in always in need - I hope I’m able do the “all in one”.
I’ve been contemplating in the worst case drilling a hole in the carb lip to install an older style air filter with hook screw on the 149 if I can’t find a reasonable priced assembly or maybe even another parts saw over the course of the next few weeks and months. There is actually a small semi-hole that is cast into the carb body that looks to be where they would normally mount the old style hook screw.
I’ve got a long way to go to being any sort of “Master”! I am learning a great deal from you and David and appreciate you both sharing your knowledge with a new enthusiast like me.
Ok, so finally some success. Perhaps this is known and understood by other but I found the solution to be a little odd. Basically I pulled the recoil starter off my Groomer engine and attached it to this 13B engine. Wah-la -beautiful blue spark! I’m understanding this to be due to rotation speed needed by the flywheel to g t the coil going. Simply spinning the engine by hand wasn’t sufficient to generate enough speed. Does this make sense to others? What led me to this was I was cleaning up the points on my Mustang 149 and ran into the same issue, no spark no matter what I tried. As soon as I put the recoil back on it gave me hot blue spark.
Thanks David! My oversight, I didn’t think to look at that spec sheet you sent. You’re absolutely right- it was right in front of my eyes the whole time
Thank you! I was just researching Three one, Yamabond, Permatex Motoseal and AllSeal as possible gasket makers when your note came through. The inside of my my 149 tank is completely black, looks like dried varnish or something. The fuel line inside is also trashed so I don’t know if I have any other choice but to open it up. There’s no way to get a new fuel line in there and hooked up to the pick-up filter. I’ll check out the thread you linked as well.
You’re amazing. Well that’s not what I was expecting, very interesting air cleaner. I’m a little bummed because that doesn’t look like a common part and it will probably take me quite some time to find one, if ever.
Another question, it looks like the fuel line/pick up tube inside the tank is not metal and has the original rubber fuel line which has all but degraded. I doubt I’ll ever find a NOS gasket for the tank. Have you had tried or had any success using RTV type silicone gasket from a tube on these types of applications?


") I’ll be following the detailed rebuild process posted here; I’ve been studying it quite a bit lately.
I’ll be following the detailed rebuild process posted here; I’ve been studying it quite a bit lately.


")


Ohlsson & Rice: Mustang 149 Chainsaw - No Air Filter?
in Ohlsson and Rice
Posted
David,
I’ve actually had that air filter assembly in my Watch List for awhile now and even asked the seller to send more photos, but nothing yet. I may try again. I want to make sure it’s in decent condition.
Yes, that’s the 149 I bought - you’re good. It is overall a very clean saw except for the tank. It needs a good cleaning for sure and I haven’t checked the gear box or anything yet. I did have to dismantle and thoroughly clean, oil and re-tension the recoil spring. Interestingly the corrosion in the tank doesn’t look like typical junk or the white discoloration typical of alloys. Rather, it’s all black and yellow inside - almost what you would expect for burnt oil residue. I tried everything to get a good photo but just could get good lighting inside one pic isn’t of the oil chamber and the other isn’t the fuel/oil chamber. It’s basically a charred black inside and all the fuel lines and filters are rotted.