I think you’re on to something there. Given the location of the hole it is right above the mounting of the bar as you suggest. I bet you’re right on about the repair. I was hoping to spend some time getting in there today but it didn’t happen. Maybe this week I can get it cleaned out and get some photos. I need to stare at it a bit to figure out how the components come out - and as Wallfish pointed out, not lose any of he bearings!
Nice work coming up with the theory, I suspect I’ll prove you right once I finally get in there.
I opened up the Little Wonder gearbox cover and unfortunately I still can’t see the hole. It looks like I’ll have to remove the entire mechanism inside in order to gain visibility to that area of the box. More investigating ahead... I may decide to work on the engine first and make sure I can get it working before going much further on the gearbox.
They do make for a nice way to mount and display these engines. I just recently saw an O&R that was converted to glow. It also had an interesting water-cooled head jacket. I think it was modified for a large racing boat or something. It was pretty neat!
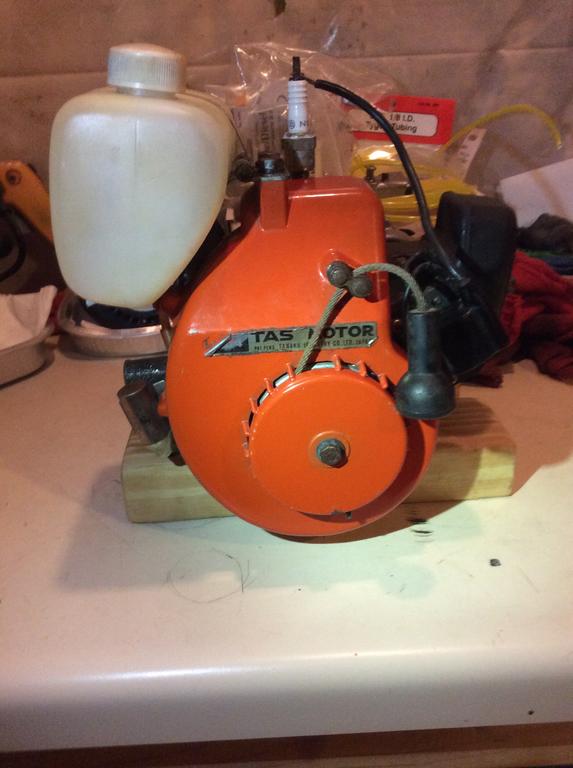
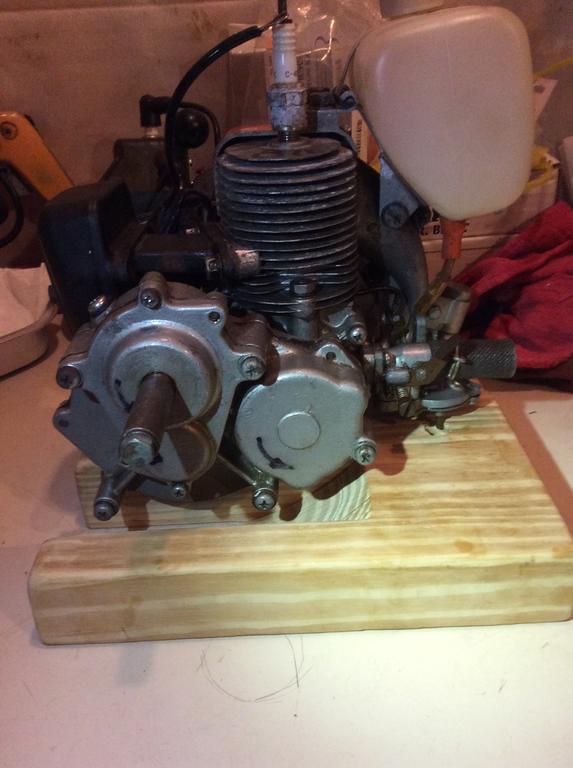
Picked up an old TAS Motor P-5. Needs to be gone through top to bottom. Has a gear reduction unit. I’m guessing this was originally used in a tiny mini bike. If anyone has any parts or technical information for these, please let me know.
I sent the seller a generic question about the tank so if they respond I will reply and inform them of the discrepancy and actual intended application.
Thank you for the photos, now I’m really intrigued to open up my trimmer gear box to see what that hole is all about. Seems like a very strange place to drill and tap a through hole. At first I thought maybe they wanted a simpler way to add grease or something but since there isnt a way to access the inside from it and there’s no screw head or zerk fitting, that theory went out the window....
ps I fired up the little green military engine this morning. It doesn’t have a muffler or air cleaner so I only ran it for a few seconds. Ran really strong and loud! I think it was used very little or not at all prior to me getting it. The original carb diaphragm was even still functioning.
By the way the tank with the blanked off vent tube I posted a picture of yesterday is used on the Orline Yard-Arm according to my info (something that's not turned up yet, are any left?) it's part # A-32-26, it also has no mounts at the bottom so can't be used for anything where it needs to attach to a base plate.
David,
I agree, $150 seems way way too high. Without the mounting tabs I’m curious how this tank was originally attached to the Yard Arm.
By the way the tank with the blanked off vent tube I posted a picture of yesterday is used on the Orline Yard-Arm according to my info (something that's not turned up yet, are any left?) it's part # A-32-26, it also has no mounts at the bottom so can't be used for anything where it needs to attach to a base plate.
David,
Turns out there is a NOS Orline Yard Arm Fuel tank A-32-26 currently on eBay. It’s listed as Buy-it-Now for $150.
Well I just happen to be a R&D engineer for a 3D printing company so I have access to the tools, just don’t ever seem to have enough time to have fun with the technology.
I think you’re right about the hole- it definitely looks like it was drilled from the inside of the gearbox. Seems very strange and I’m hoping it’s not some odd attempt to repair something inside.
Great minds think alike. I’ve already been testing various caps off older cans. The one that fits best so far is off a can of Kroil but it has a spout in the top. This gives me some hope that a fairly standard 1” cap might work, especially off an older oil can similar to the picture you posted.
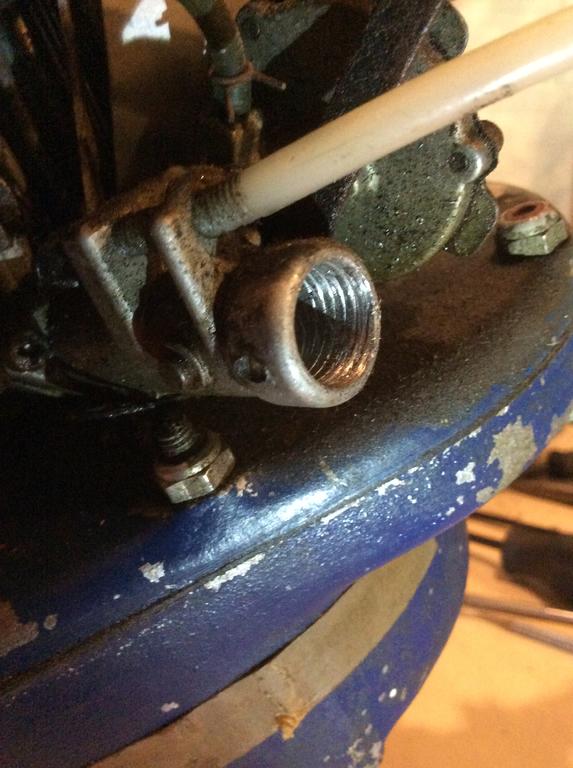
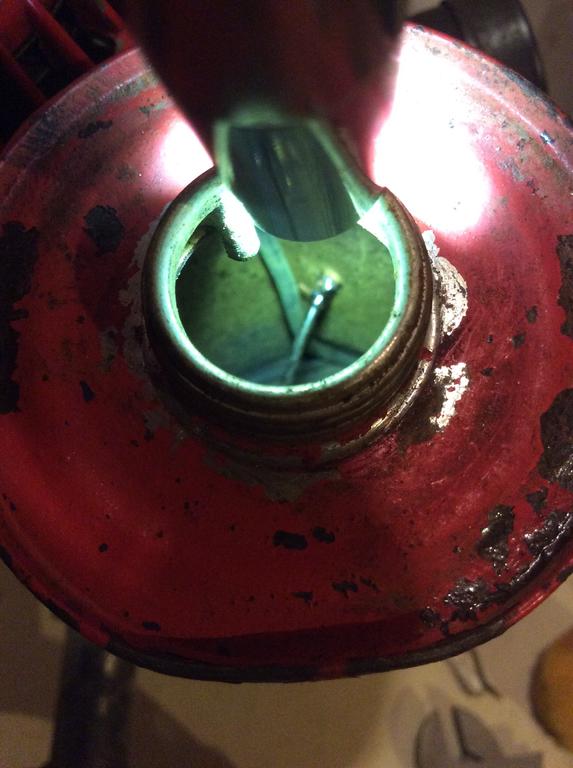
Thank you both for all the great advice and suggestions. It’ll be fun to go through this tool. I noticed another odd thing today which I’m not sure if original to he unit. It appears someone drilled and tapped a hole on the side of th gear box housing. There isn’t a screw head on the outside so I’m curious to see what this is for once I take he base plate off th gear box. There is something partially threaded in the hole but no idea what they did this for. Thank you for the links to the manual as well, that’ll be really helpful!
Maybe if I can ever get some time I can have a buddy CAD up the vent bottle geometry and then it 3D printed with FD! T I chnology in ABS, ASA or PPSU material.
Clint
Sorry, some bad typos in the last message. That should have been “3D printed with FDM technology”...
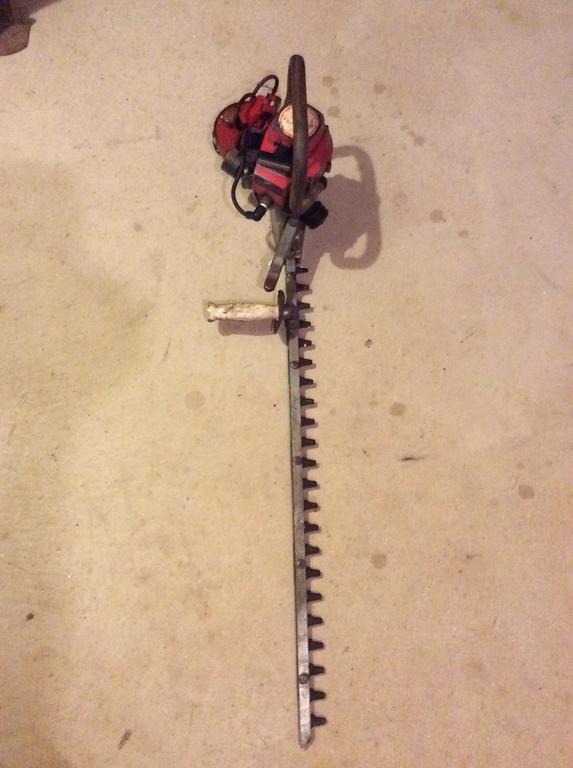
One of the nipples looks like it’s barely hanging on. I’m guessing it will probably break off completely if I try to replace the fuel lines, which are hard as rocks. I think it was in good condition prior to shipping. In the photos when I bought it everything looked in the correct position and when it arrived the bottle and bracket had been jarred loose. The unit also got a pretty good dent on the edge of the tank during shipping. O’well...
I received my Little Wonder Trimmer this afternoon. It needs a fair amount of clean up work and probably a few parts replaced that are missing. I have a couple general questions: is the metal handle supposed to flex when you pick it up? There looks to be a rubber bushing on each end to allow it to wiggle but I would have expected it to be a rigid handle. Also, what is the little red plastic bottle that sits between the gas tank vent tubes? This one is cracked, will it still serve its purpose?
There are definitely 3 nipples on the tank. After playing with it a bit I’m pretty sure I know which ones are vents and which one is the fuel inlet. The fuel inlet was pretty clogged up but I think I got it sort of cleared up now. I’m anxious to use this tank but I’m still on the hunt for a gas gap.
Thanks John, that sounds like a great tip for the fuel line - I’ll definitely try it! Also good to know what to expect as I open the gear box... it makes sense oil would be used in the larger auger boxes.
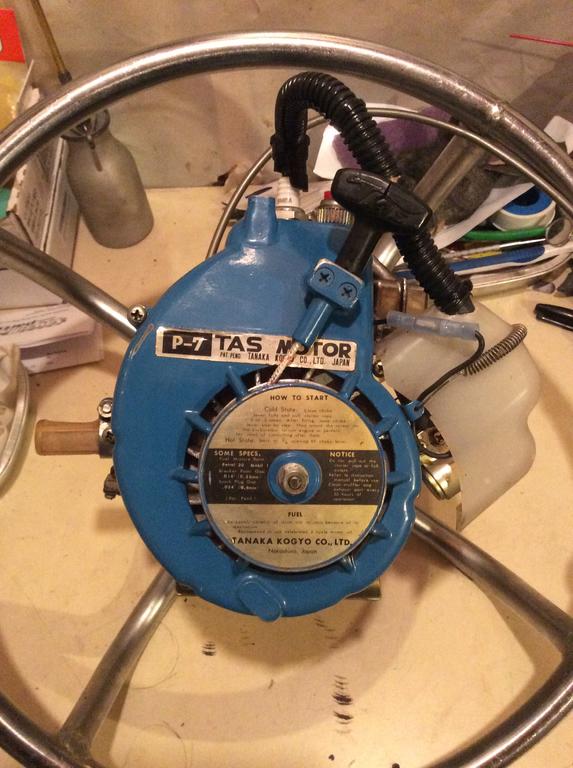
I’m interested in TAS Motor P-5 or P-7 Engines or tools like drills and chainsaws that used these engines. Looking for engines, parts, tools or any technical manuals or advertisements.
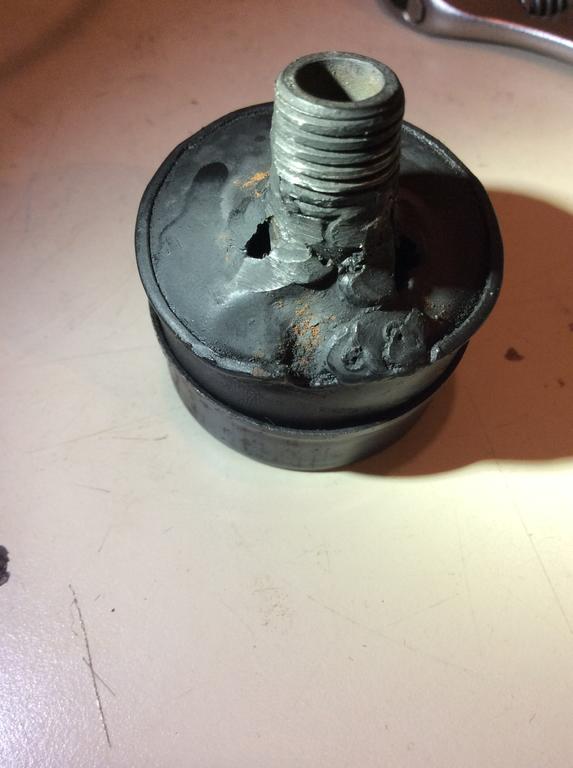
I agree, very strange attempt at a repair. The really strange thing is there seems to be no reason to come up with this approach at all. I’m guessing they lost the little hook screw that holds the air cleaner housing and then decided to weld and thread instead of just making a new hook. The holes are huge and the tiny piece of foam that I pulled out wasn’t doing anything either. I’m definitely on the lookout for donor engines just for that purpose. I’d really like to get this auger up and running again. In order to pull the engine off it looks like I have to open up the gear box to get to the mounting screws. Having never opened one of these I’m wondering if it has oil or grease inside. Seems I’ve read somewhere that some gear boxes used Lubriplate as the grease but that may have been a chainsaw.
Finally got the coil wiring fixed, the kill switch installed and the recoil back together on the TAS P-7. Attempted to start it and it sputtered quite nicely and looks like it wants to run. It will need some carb adjustment and maybe a new diaphragm but overall it cleaned up nicely and should be a fun addition.
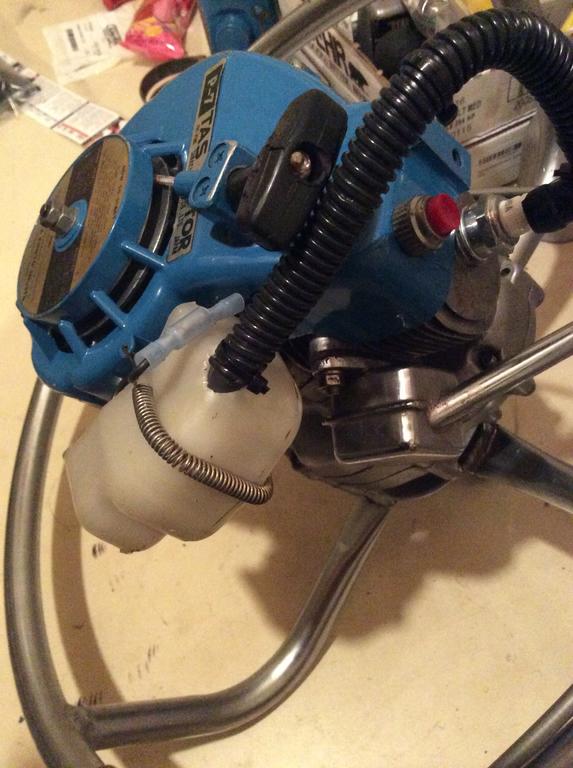
Thank you for all the suggestions. I’m definitely going to give these a try. The bushing idea is great, that should help take out a bit of the slop. I haven’t tried the vinegar approach for gas tank rust but certainly will give it a go. It’ll be fun trying to attach new fuel line to the pick-up filter and nipple inside. It’s just low enough in the tank to make it really trick to reach. Here are a couple more photos... I think the air cleaner is junk. The welding melted holes in it. The threading job on the inside of the carb throat is also pretty bad. I suspect with a fresh air cleaner and some minor clean up to smooth down the threads it might still work but certainly swapping out the whole carb would be nice.
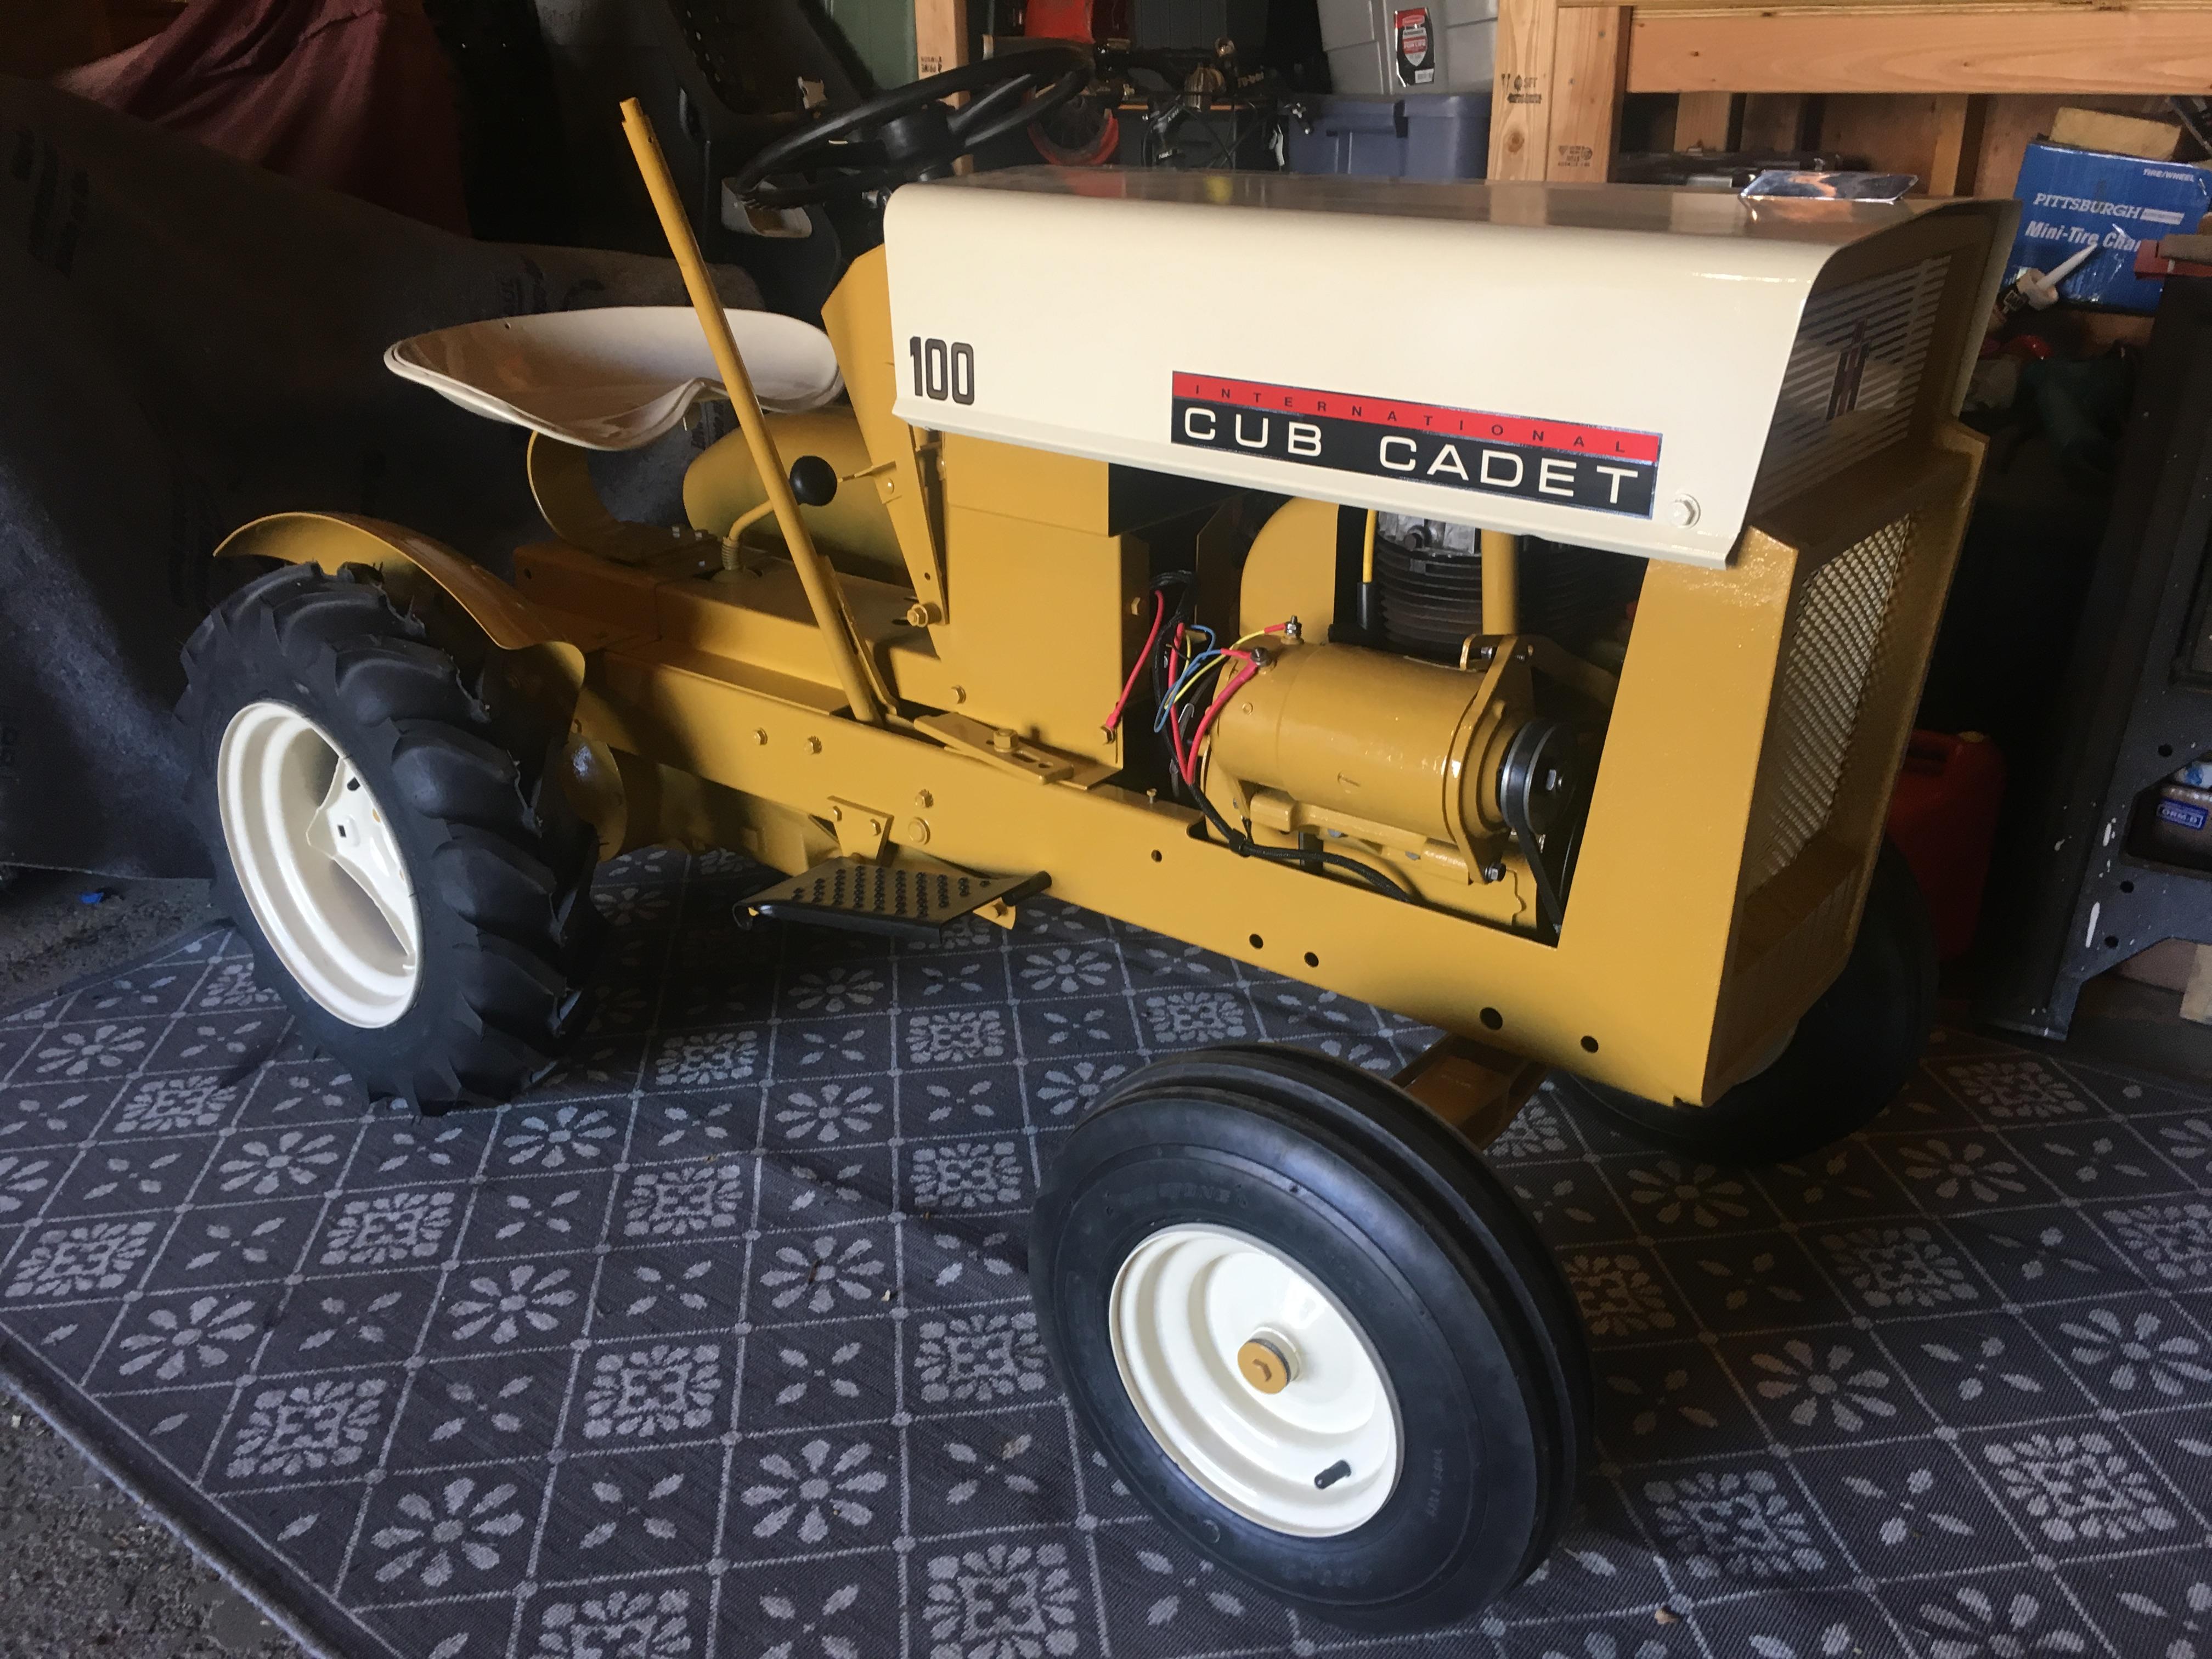


Ohlsson & Rice: Little Wonder Trimmer
in Ohlsson and Rice
Posted
David,
I think you’re on to something there. Given the location of the hole it is right above the mounting of the bar as you suggest. I bet you’re right on about the repair. I was hoping to spend some time getting in there today but it didn’t happen. Maybe this week I can get it cleaned out and get some photos. I need to stare at it a bit to figure out how the components come out - and as Wallfish pointed out, not lose any of he bearings!
Nice work coming up with the theory, I suspect I’ll prove you right once I finally get in there.
Clint