Anglo traction, I've just been on a website 'keysandpins.com'. they quote:
Imperial BS46 Part 1 1958Standard stock material Woodruff Key
I've found my tester,an Electromatic Rangemaster hiding in the back of a cupboard,flat battery of course! I'll pick up a new battery and se what I can do.
Yep, thanks, familiar with those specs.
Problem with BS46 is that it is not as comprehensive a list of available sizes compared to the US ANSI B17.2 1967 specs
#811 on that list is one of the sizes Wheel Horse used (1/4 x 1 3/8").
Tempted to go for 1/4" square and cut a long slot in the Shaft when I get to make them. I still have my old Key Steel Stock from the early 80s to fall back on.
The softer ones on my tired C-120 Tranny are holding well, despite pulling a few Wheelies off the Clutch.
Whatever you can produce in the way of Testing info would be greatly appreciated.
That's interesting Ranger and out of curiosity, I just dug the 1.3/8" Woodruffs out of my early 80s 103916 Tranny and checked them. They are as you say... harder than the soft 1" ones I took out of my early 70s 5091 8spd?-
Would be very helpful if you can hardness check an Axle over it's length, as I would like to make some 1.1/8" dia once I establish that, Steel grade and the Module size for the Spline Cutter. I would have to pay a Local Engineering Shop for the testing and final Heat Treatment .
Hi Ranger, I went down the road of making my own from Free Cutting Mild Steel .
One thing you need to double check is that I don't think the Keys should be the same grade as Key Steel.
They should be Mild Steel in order for the keys to shear before the Keyways on the Shafts and Hubs do (we all know they don't).
The originals I removed were definitely only mild steel. Your call really.
I'm still hoping to get time to break into my spare WH Tranny and get the Shafts Hardness Tested, but I suspect they are only about Rockwell 27, so pretty soft compared to Auto Drive shafts.
Revisited this machine about 3 weeks ago when I had some time, wanted to get the Carb off for a service before trying to run it.
Found that someone had tried to get it running in my absence . They laid it up on it's opposite side (Carb/Exhaust down) and I found the Carb, Filter and cylinder filled with Oil !!!.
Worse still, the fuel they put in just ran straight into the Crankcase via the Breather pipe because there was something wrong with the Float or Valve.
All this has set me back a few weeks getting it sorted.
'Any Road Up' , I had to find and order a full Carb Rebuild kit and a new Air Filter. Cleaned it up and stripped the real dirty Carb to find that the Float had been eaten away probably by the 'Galvanic' process-
Never seen one this bad, so I had to find one of those as well !.
So I'm now back to where I started, but now have a nice clean rebuilt Large Flo-Jet Briggs Carb-
Doing the Clutch, Drive and Blades next week and a test cut hopefully. then It' s clean up the framework etc.
I believe you are having problems with the pull start clutch engaging that is preventing you from starting the engine?, as you say that when it does engage, the engine starts easily.
I've just finished a 4hp version upper end rebuild in the 1972 Genset Post above that has some pics of it.
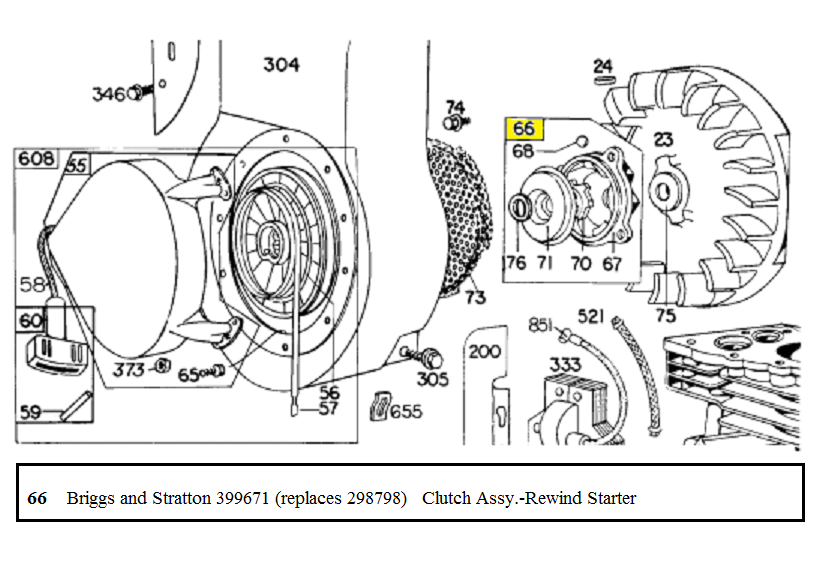
Your engine is a 1975 13 cu inch Alloy Engine (5 hp ish) . The rewind Starter Clutch has 6 ball bearings inside it and drop into segments (by gravity) as it rotates when you pull the Cord. It is not doing that now for some reason.
You can remove the whole Cowling (3 bolts) with the Rewind unit attached, and remove the 2 little hex head screws that hold the Perforated mesh Screen to the Clutch unit on the Flywheel.
The Clutch unit acts as the Flywheel nut and is tightened to 60 ft lbs, so if your very careful, you can leave it in place and prise open the Clutch plate from the rest of it to inspect the inside.
Be very careful and ready to catch the 6 Ball Bearings, as they will probably (should) drop out.
Clean out the whole unit and re-assemble it dry.
If you can't get the Bearing Balls to remain in place during re-assembly, apply a very small amount of oil or light grease to retain them in place while you refit the outer cover, then lightly tap back in place and finish re-assembly.
If the Clutch is chewed up and needs replacing, they are available on the Auction sites as ' Briggs and Stratton Starter Clutch' and will quote the part number in this diagram-
Let us know how you get on, or if you need further assistance, as it may help others.
Note also that Bolt head sizes are imperial and not metric.
Good god richard you'll need sunglasses or even an welding mask to look at that engine! Job well done for shure Koen.
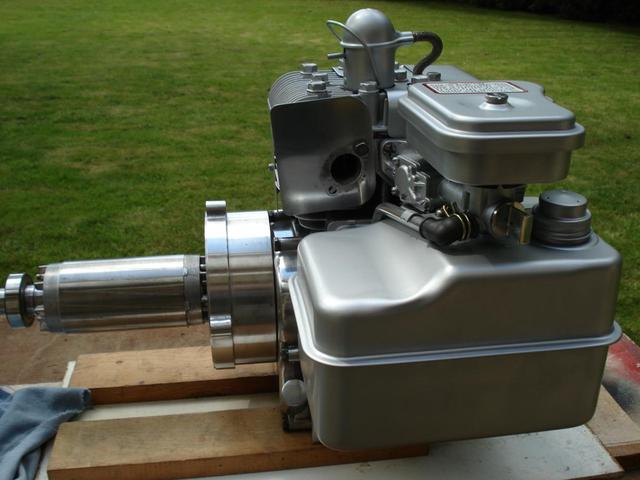
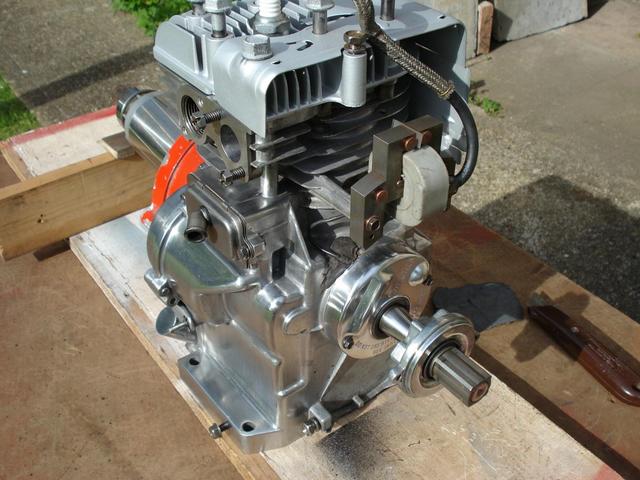
Yeah , it is a bit on the bright side Koen......... even brighter now ! Engine finished, except for finish cleaning up the Muffler-
(click images to enlarge if req'd)
Rewind Starter spring end needed repairing and works perfect now.
Had the wiring out of the connection box on the Generator today to look for anything obvious. Found some corrosion, but nothing significant, so going to check all the cables out. I'm going to put this all back as a Generator and see if I have any luck.
Found a replacement cooling fan which should do the job properly, but has to come from china !!!, also need 2 anti-vibe mounts, as found a few cracks in them.
The Cradle will get a quick clean and paint, may put some transport/lock wheels on too.
You will find a copy of the Manual that covers your Model (and others) in the Downloads Section now.
There was little change in the designs from 1965-1990, so If there are any parts that can't be fabricated cheaply, you may still be able to obtain them from the States.
You may prefer to go down the route that Stormin suggests, but depends what your plans are for it, if you want to keep it to original spec, then you will need this info-
There is another part number for the Unit that has a 14 3/8" long HT Lead, but suspect yours will be the shorter one.
They are still common-ish available online i.e. Bay of E, but one will set you back about £30.
Before you write the Coil off, have you checked-
1-The strength of the Magnet on the Flywheel.
2-The Air Gap between the Flywheel and Armature pick up Legs (should be 0.006"-0.010" or 0.15-0.25 mm).
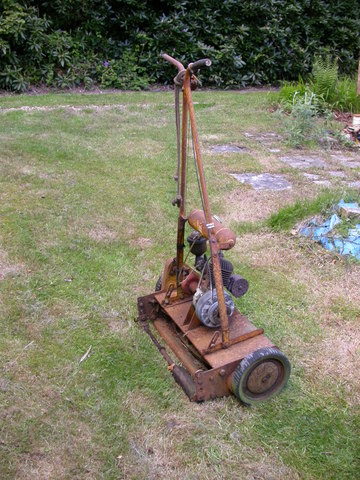
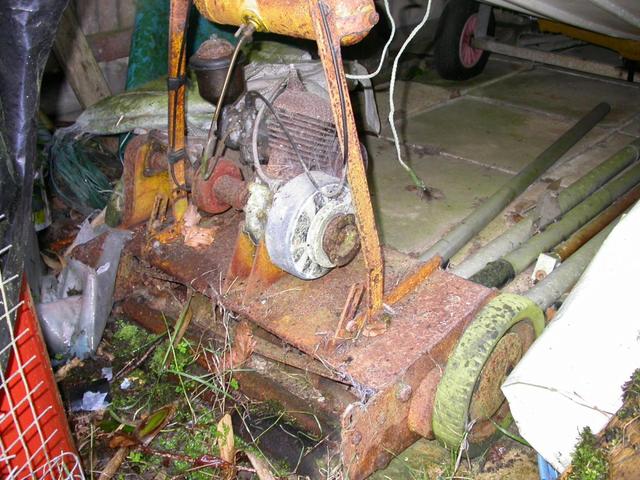
I've been offered this to work a miracle and bring back to life by a good friend of mine, but only seen it in the pic form from this angle so far and don't know how far gone it is, or if it is a push or self-propelled -
Purchased new by his father.
Believe it is an Atco of late 50s- early 60s. Look's like a 98cc Villiers Midget 2 cycle. Grass Box was believed to be of Ali and Canvas. Hopefully the Box and the manual for it will be located.
So, I'm hoping someone will come up with some details on it, as I need to know if it is worth the challenge, time and cost.
Wow, that looks fantastic Richard! I love the way you take the time to polish the aluminum up. I'm curious as to what was wrong with the generator, as it really looks quite good inside, and with the crosshatch still showing in the engine, it can't have much time on it. Matt
Thanks Mark and Matt,
These not-so-new light - med duty B & S engines are growing on me. I'm shining up the Ali Crank Case to avoid having to paint those parts. Not a great deal of effort or super polished finish, rather a service wipe clean, blow the dust off type of finish. I Iike the result though -
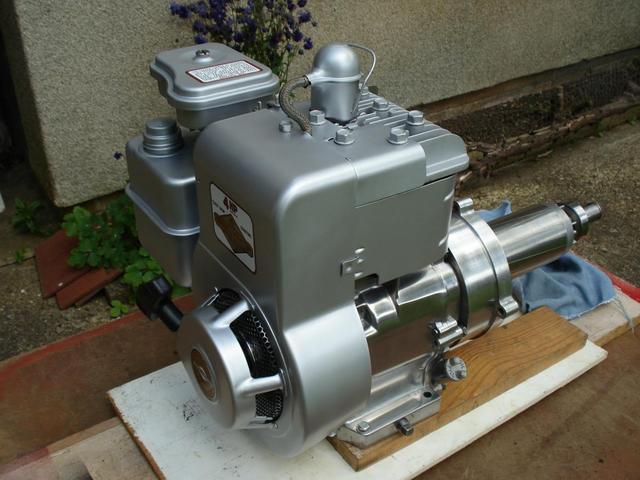
The generator part stopped producing juice while in use for some reason over 30 years ago (according to daughter of the original owner). I'm still hoping to find the fault (not me) and see if it can be repaired, hence the shaft being still attached to the Engine.
The plastic centrifuge cooling fan is a gonner, as it fell apart when I got the cover off, so need sort that somehow .
Collecting parts to finish the engine tomorrow, shroud is going in the E- Bucket tonight .
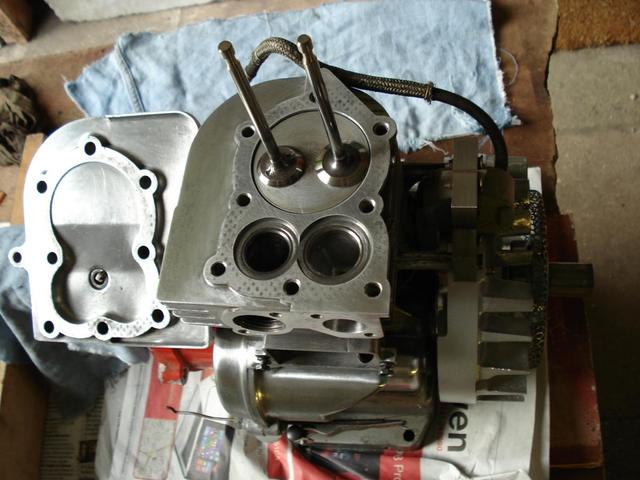
Managed to put a few hours in over the weekend and did a full top end check and clean up on the Engine. All in great Spec condition, even has the Hatch marks still visible in the bore from the original Honing. Valves and Seats are real good and just need to lap and refit them-
Top of the Block and Head mating faces were levelled/trued up for a good fit and some time spent fettling the Fins etc to improve airflow. Well worth saving this one.
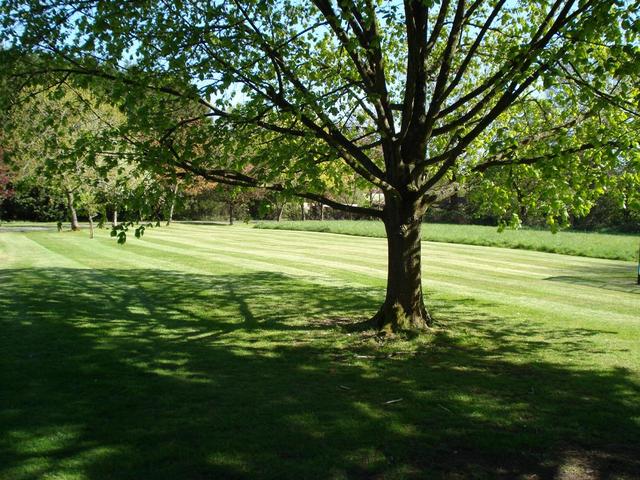
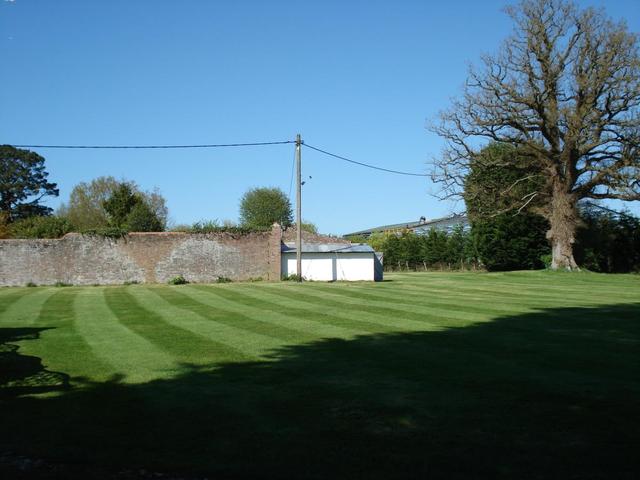
Spent about 5 hours helping out tidying the grounds down in Billingshurst, West Sussex yesterday.
Got the 42" cut Mower put back together and cut half of the 3 acres of lawns. Another very pleasant sunny day. Everything is growing at a fast pace now. Here's just a fraction of the grounds-
looks brilliant richard, what are you going to do with the jenny part? Koen
Not sure yet Koen, it would need a bearing support where the Engine's shaft enters if it is to be used on something else.
There isn't a lot going for it at the moment if separated, as it has a large heavy 'Ballast Resistance Box' attached to it, presumably to absorb 'No Load' current, but then I know nothing about Generator Electrics. There are no isolation switches, so it produces power to sockets etc as soon as the engine is running.
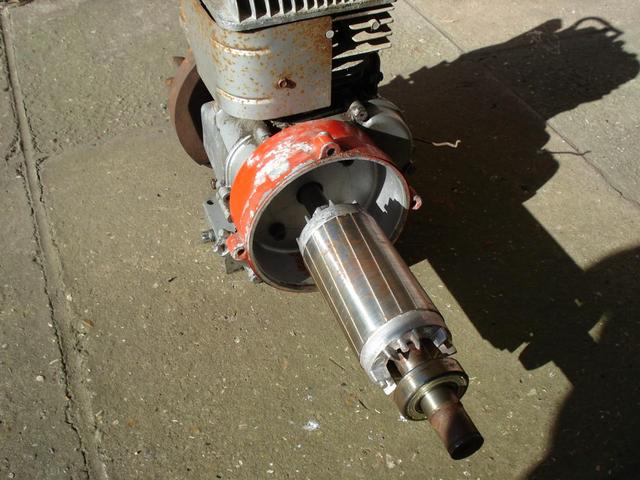
A bit of progress with 'Operation Dynamo' separation. Managed to withdraw the shaft and engine with care and very little effort, once I realised that the rear Bearing will just move with the shaft and the Woodruff Key removed-
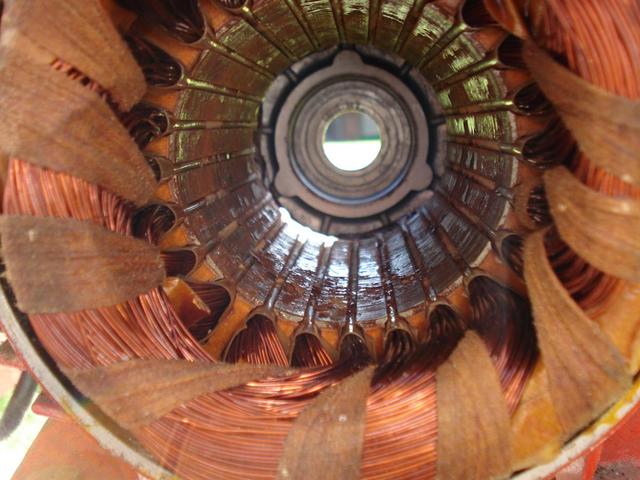
The Casing/Windings are real heavy with all that Copper in it and look's good inside, except for a few flakes of varnish from the Bandings-
Big Dyno for a 1.5KVA output. Before I scrap the Dyno part, I'll speak to a 'Sparks' friend I know and see what can be done.
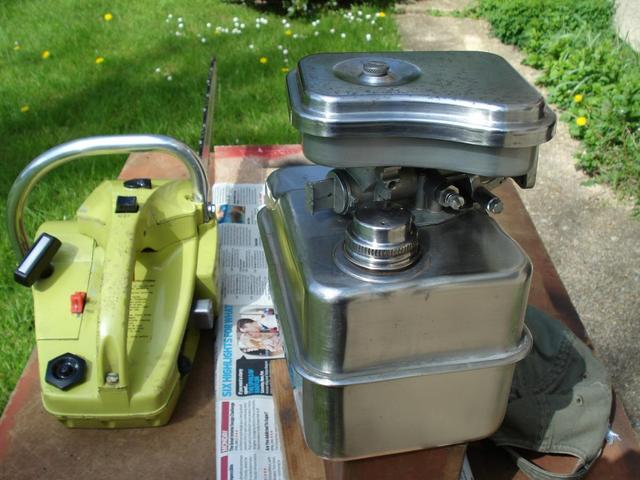
Having a bit of a struggle with this Unit Matt . Tank cleaning has reached the limit of my attention now and will do. Even rescued the Cap, but will replace the Breather Washer in it with a leather one. I also attacked the Air Filter, which is also a mess-
So all the Fuely bits are prepped -
But maybe I should have prioritised the separating of the Engine and the Generator part first. I'm struggling to find out how to separate them. they just don't want to part, so more head scratching is required and will put this back on the 'To - Do' list, as I want the engine to run my Vintage Jabsco Water Pump.
P.S. The long grass seen in the pic was cut this morning .
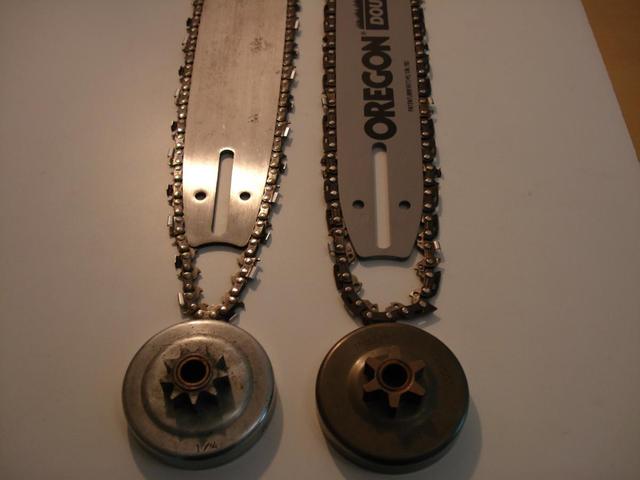
The part for the 3/8" chain option has arrived and seen in this image (right) for comparison, along with the new Bar-
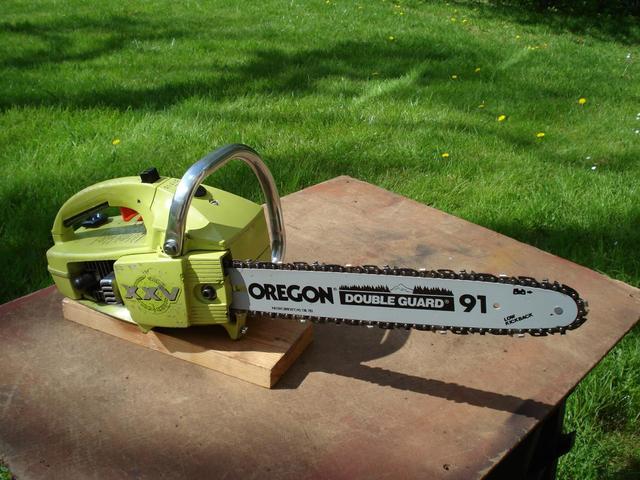
Fits perfectly. The original Chain Bar is being restored to the black painted finish. Original 1/4" Chain is now as new and will I'll carry out a test to see how each chain size performs. Meanwhile it is all ready to do some cutting, hopefully tomorrow -


 . They laid it up on it's opposite side (Carb/Exhaust down) and I found the Carb, Filter and cylinder filled with Oil !!!.
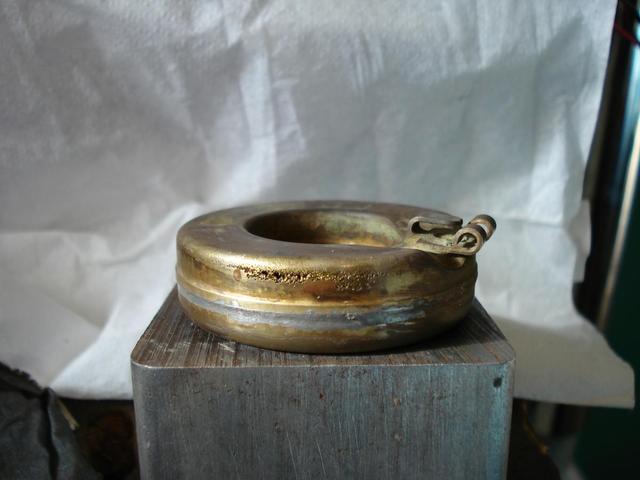


 Engine finished, except for finish cleaning up the Muffler-
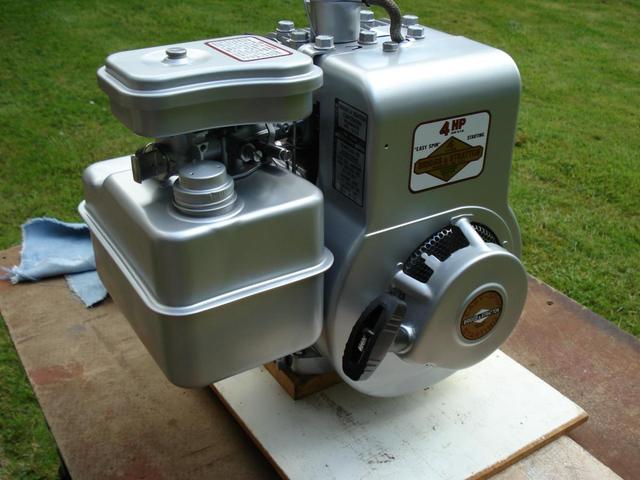


 .
.
 . Those NPT threads on U.S Engines are not easy to accommodate and BSP are not a proper match.
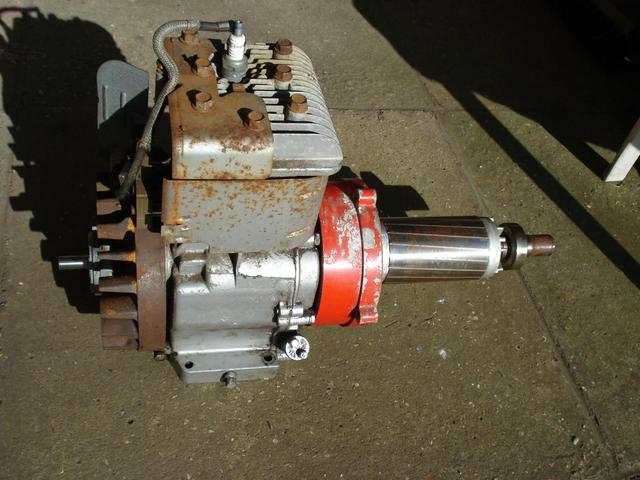
 . Tank cleaning has reached the limit of my attention now and will do. Even rescued the Cap, but will replace the Breather Washer in it with a leather one. I also attacked the Air Filter, which is also a mess-
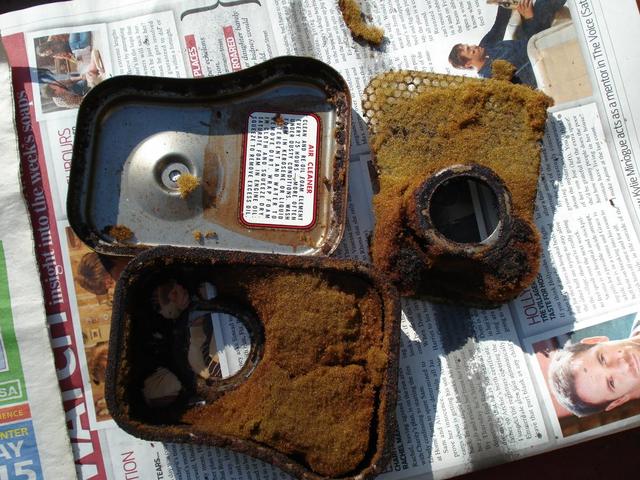
 .
.
Had a run out to a hot-rod do
in Off-Topic Discussion
Posted
I wondered what all the traffic noise was as the London to Brighton Mini Run was on yesterday and some didn't sound like Minis.
They all pass my place in Horley, as I'm only 80yards off the A23 (Great position for the Veteran Car Run).
Nice pic Chris.