Made some enquiries today with regards to 'metal spraying' to build up the worn sections of the shaft so it can be machined back to 1" diameter....... Hmmmm, £350 plus the VAT........ I think that'll be a 'no' then!
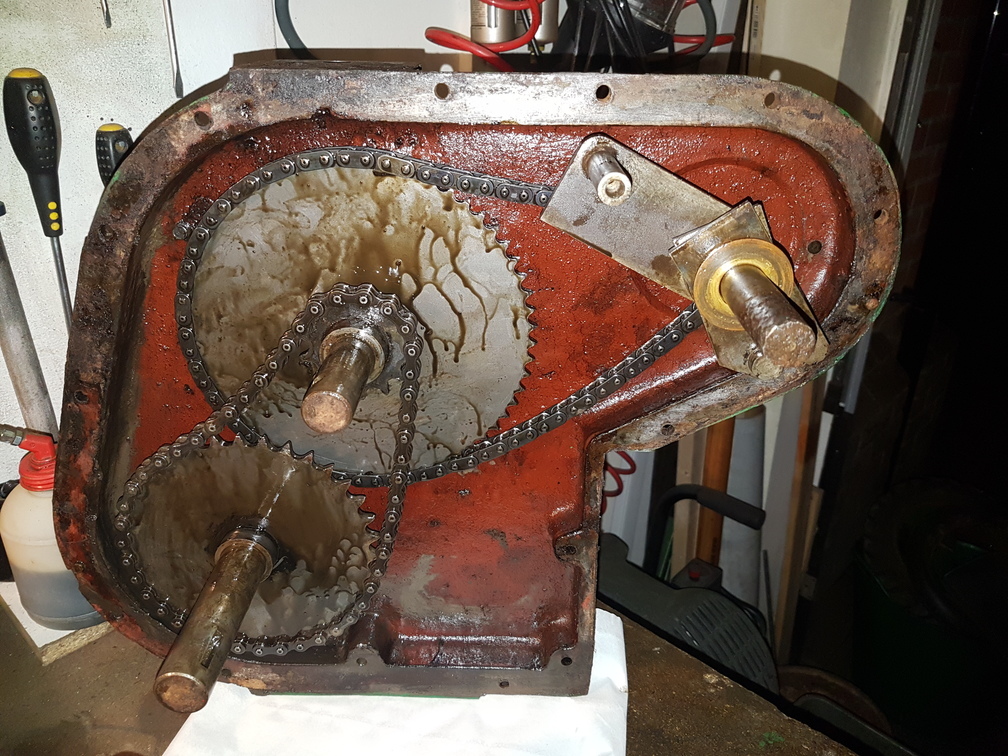
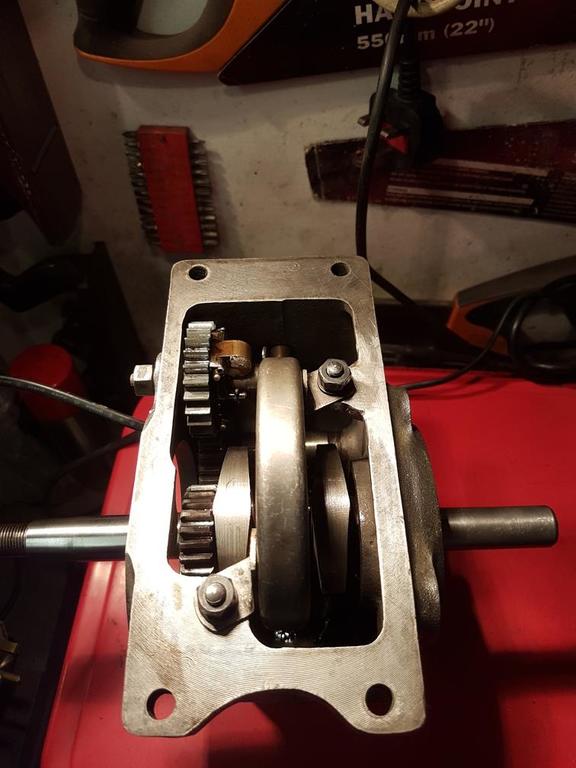
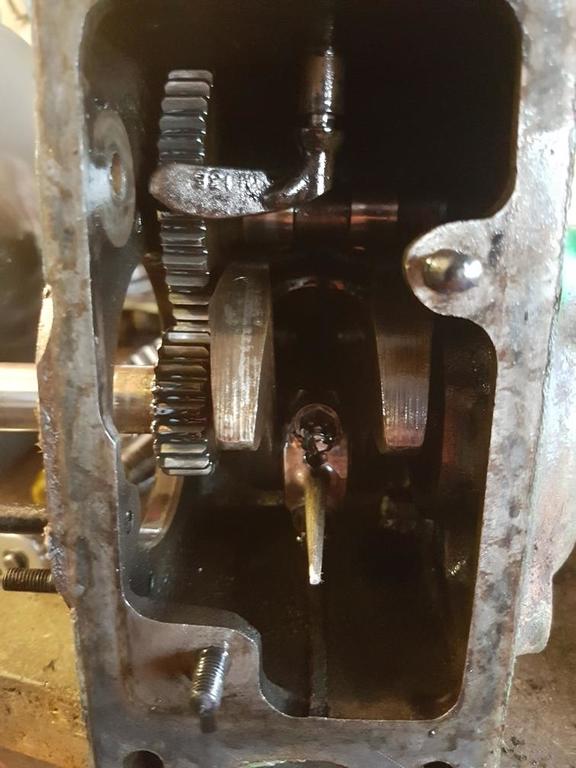
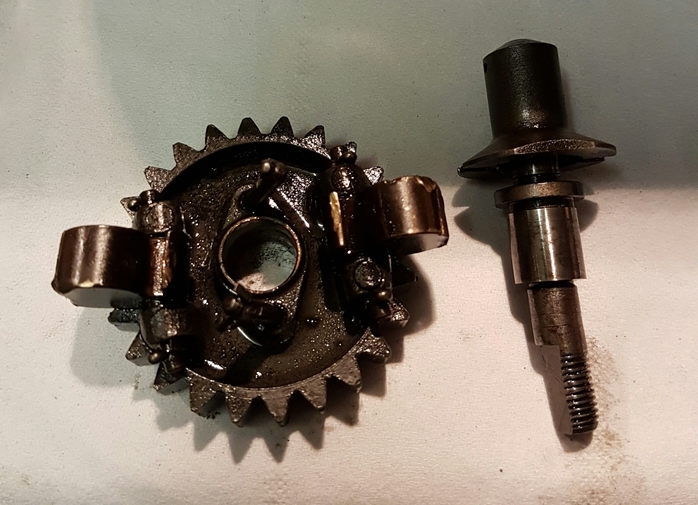
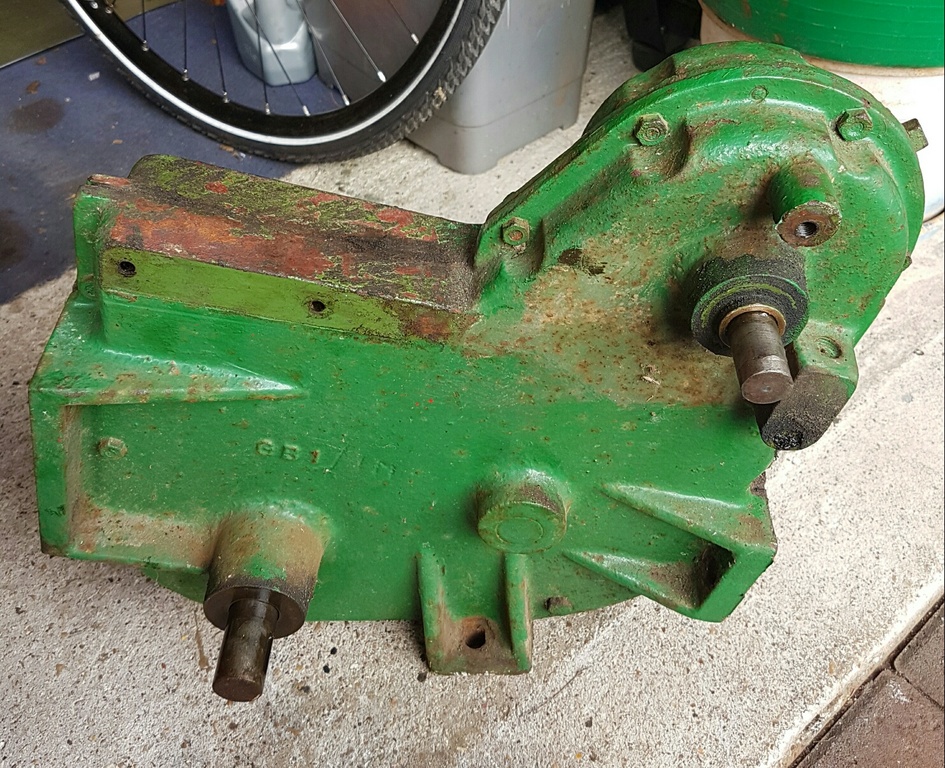
Also cracked on and into the gearbox this afternoon...... Quite clean internally, a little sludge, but overall not too bad. The bronze bushes on the drive axle are quite badly worn as well as the axle itself........ Damn!!! Axle was originally 1" diameter, now measures 0.985 at the most worn point. Bushes should be 1.125 o.d x 1.0 i.d x 1" Jim Beacon is going to help me with this issue! Maybe turn the shaft down and make bushes to fit? Will then need to make some spacers to make the wheels fit again!!!
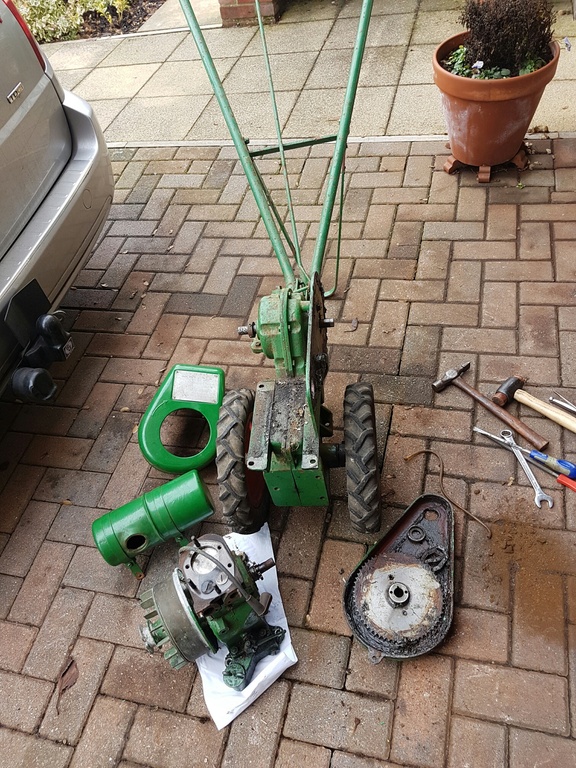
In the meantime will strip the handlebars down, dismantle the ploughing wheels and get them to the shot blasters.
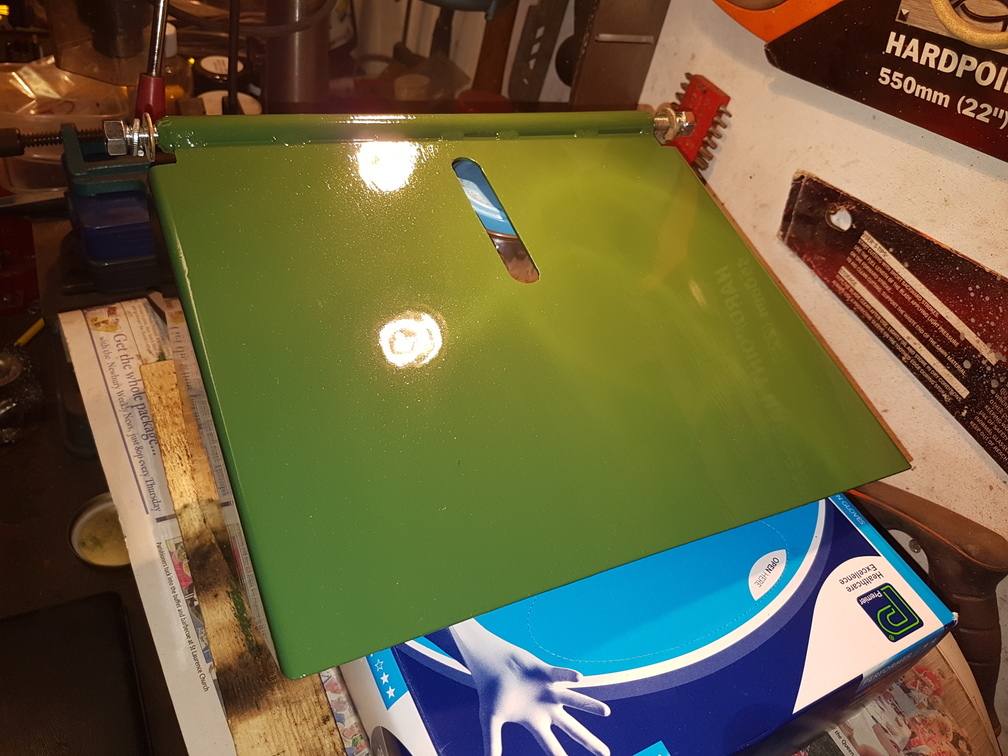
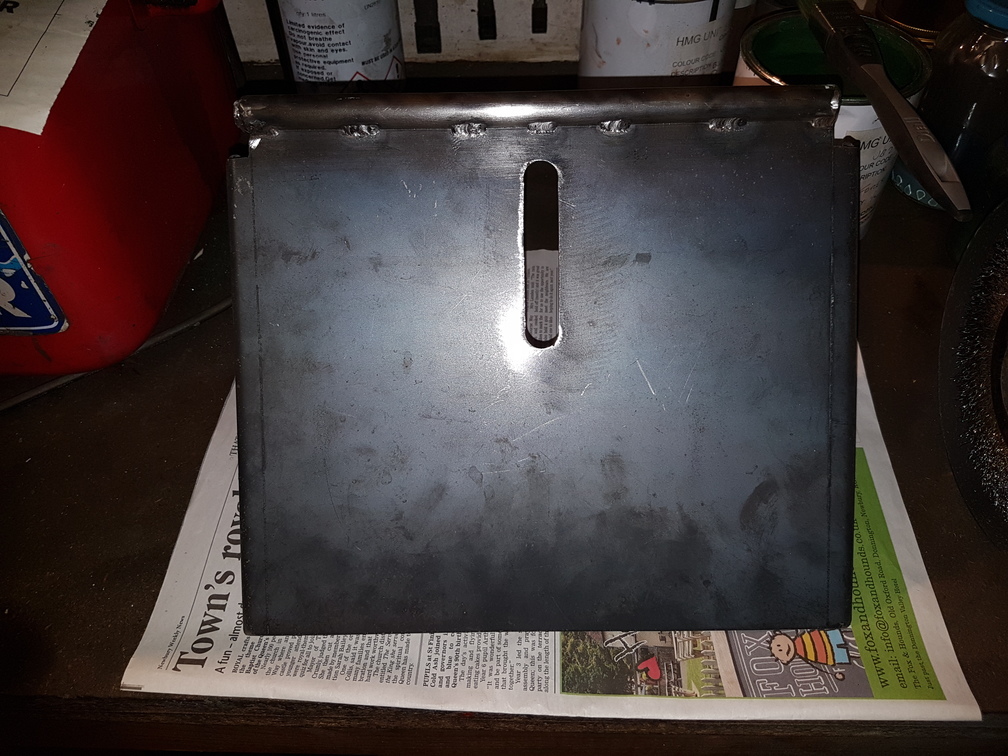
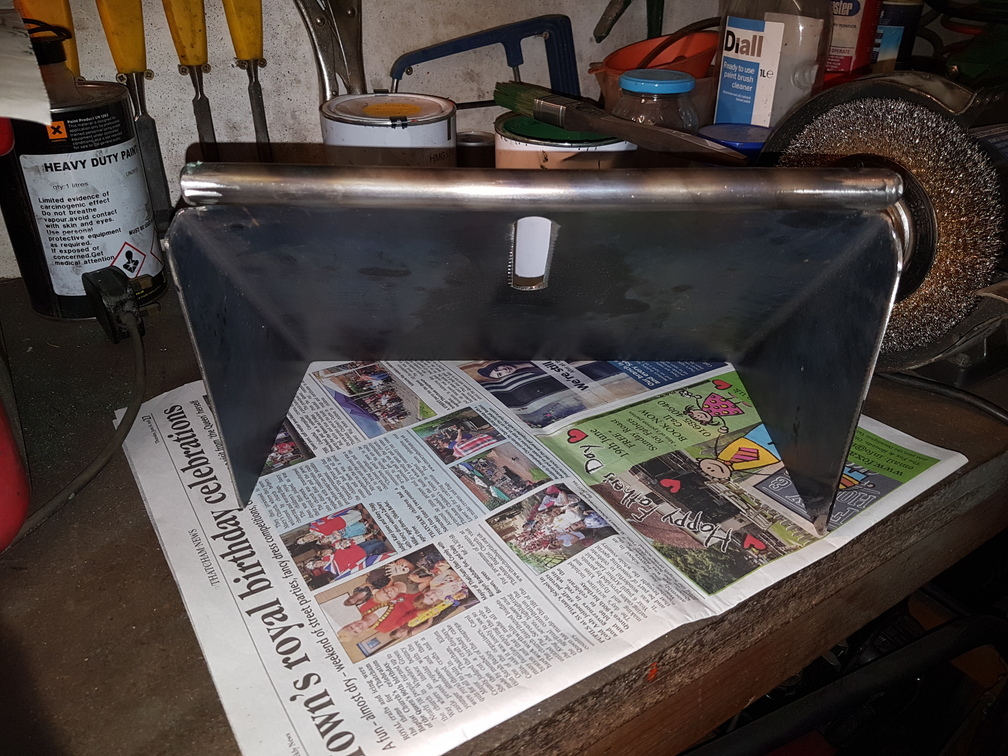
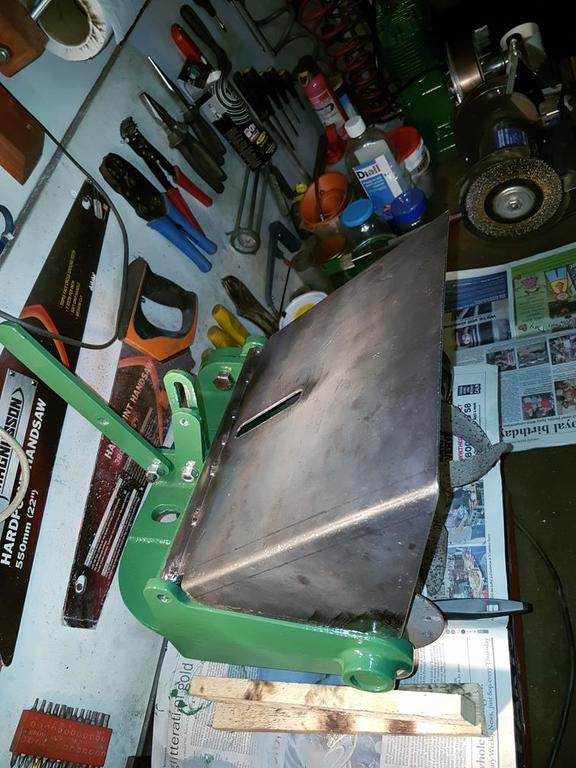
Received a call from the steel fabricator today, saying the rotor cover was ready for collection...... Very pleased with the result!!! 3mm folded and cut to my exact cardboard template and the hinge tube welded on. It fits perfectly..... just needs painting!
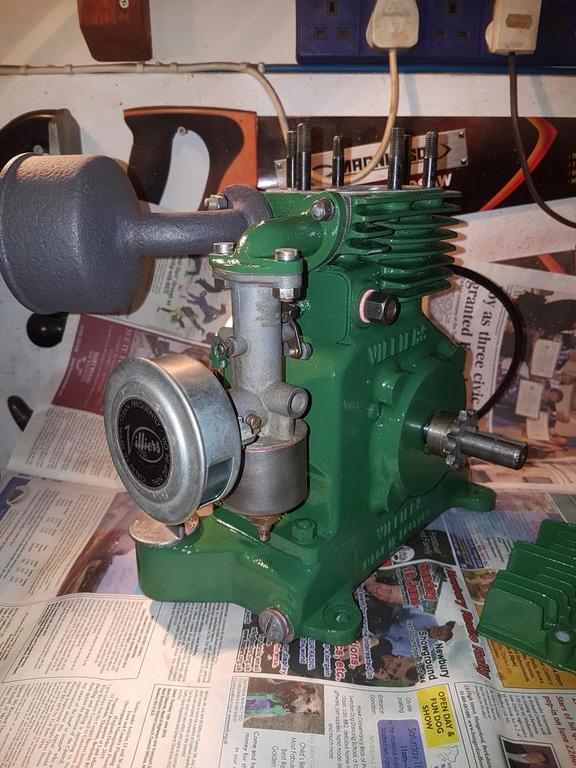
Put the ignition system back together and refitted the back plate, refurbished the carburettor, fitted the new air filter and then the exhaust. just the flywheel timing and the cylinder head left to do and it should be a runner?
Making good progress Darren, as the paper says " game over " well not quite but won't be long ,
The gearbox will be the biggest test Chris, the bronze bushes on the main drive axle are shot....... there's about 3-4mm play each side!!! Its ready to strip down, just building up the courage to tackle it.........
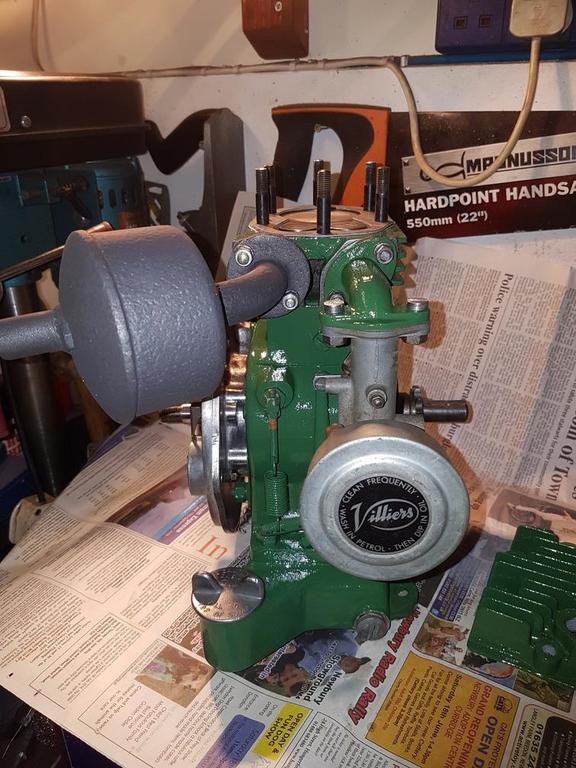
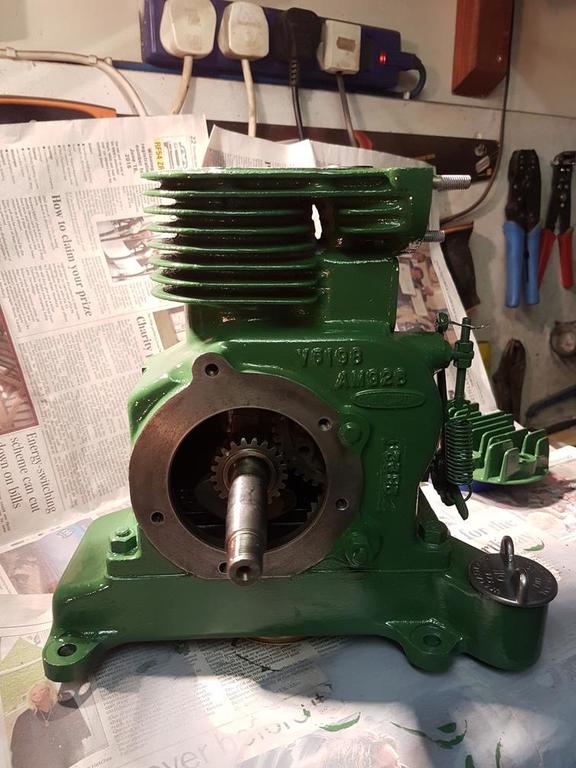
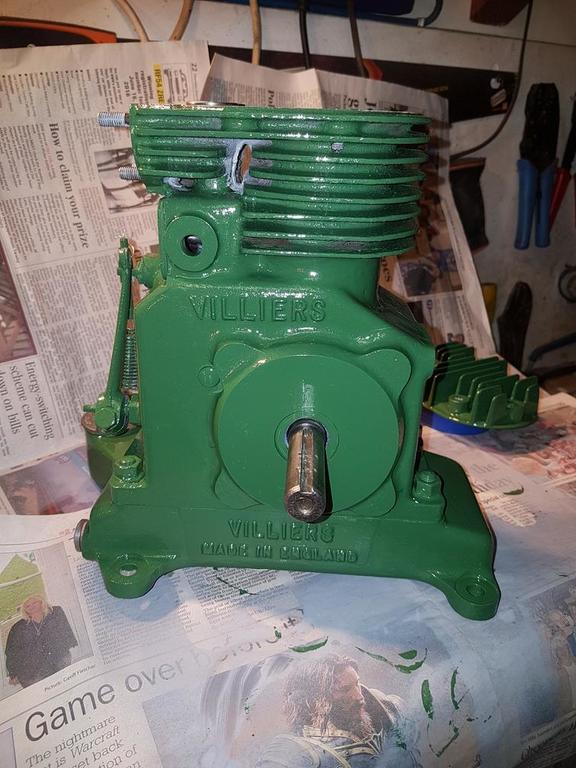
Well I cannibalised the spare MK12 today to recover the governor assembly, am pleased to say its exactly the same! Have also removed all the old paint and then reassembled the engine. I then etch primed it and once dry gave it a coat of top coat.......
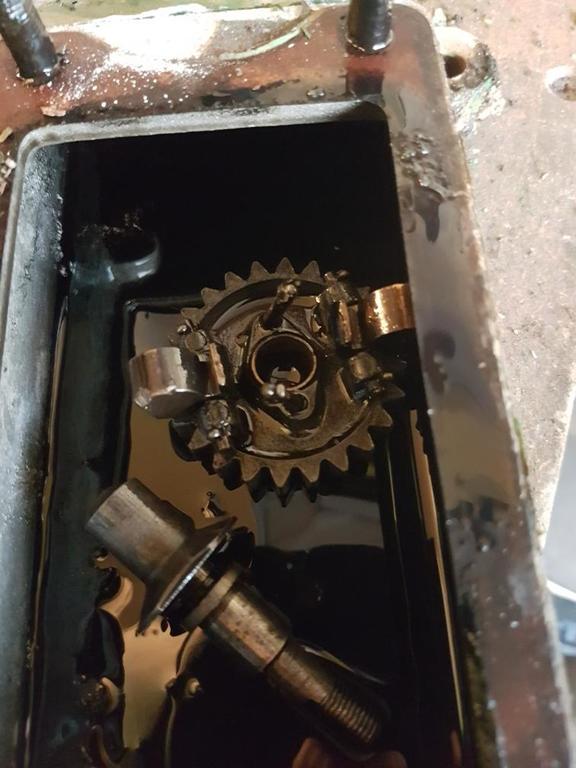
I made a start on the Villiers Mk12 today, I noticed the governor had been broken off where the spring for the throttle connects. Whilst this didn't really worry me that much as I had the engine running like it. However, after removing the sump this afternoon I was greeted by some loose parts sat in the bottom of the engine! It would appear that the governor had possibly been snapped at some point whilst the engine was running, this then allowed the engine to 'run away' causing the governor gear and counterweights to self destruct! The brass counterweights are bent and twisted on the pivots and the 2 centre pins are bent over to about 20 degrees......... Thankfully the only damage these loose bits have caused is some very light scoring to the crank lobes. The crank and all other internals are perfectly good to use again.
It's a good job Alan and Chris persuaded me to take the spare MK12 sat at Johns! At least I have a source of spares!!!
Yes, most probably...... I could do the calculations...... but my brain hurts!
I will have to measure the circumferences and see what the difference is for every revolution of the wheel!
I think the clearance issue might possibly resolve itself? Those tyres have been on a shelf for a while and they were quite flat, pushing the centre of the tread upwards....... Hoping that if I get them warm and leave them inflated they will relax a bit???
Sat the engine back on and refitted a wheel and tyre to check for clearance issues........ It's close, really really close! about 2mm close!!!!!!
I think I will make up a spacer plate and lift the engine by 5mm, there is enough slack in the chain and plenty of room in the chain case to allow for a 5 mm lift. if that doesn't work then maybe make up some wheel spacers and move them out by 10mm or so?
Of course the 'bodge' would be to dent the cowling in a little...... I won't be doing that!
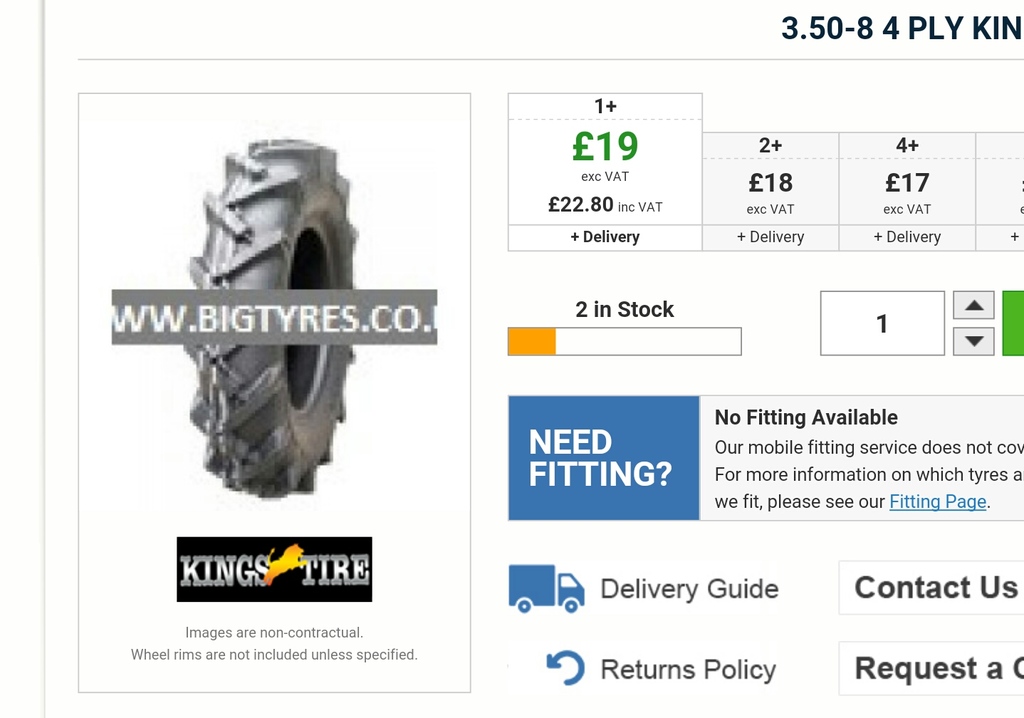
I want to keep this project as close to original spec as possible. Unfortunately the 2.25x8 tractive tyres became obsolete quite a few years ago. A lot of internet time has been spent looking at the USA and China for alternatives........ So, after a long conversation with Bigtyres.co.uk this morning have decided to order a pair of 3.50x8 tyres. These are the closest we could find for sensible money at £18 each plus £15 a side for innertubes. There was another option available with 3.00x8 tyres through Allterraintyres, but at £49 per tyre, plus tube, plus delivery and VAT........... almost £150😲😲😲.......
I've decided the cheaper option will have to do!!! Hoping there won't be a clearance issue? There is a little room to play with, the tyres are roughly 1.25' wider overall, if I have to make a wheel spacer then so be it!!!
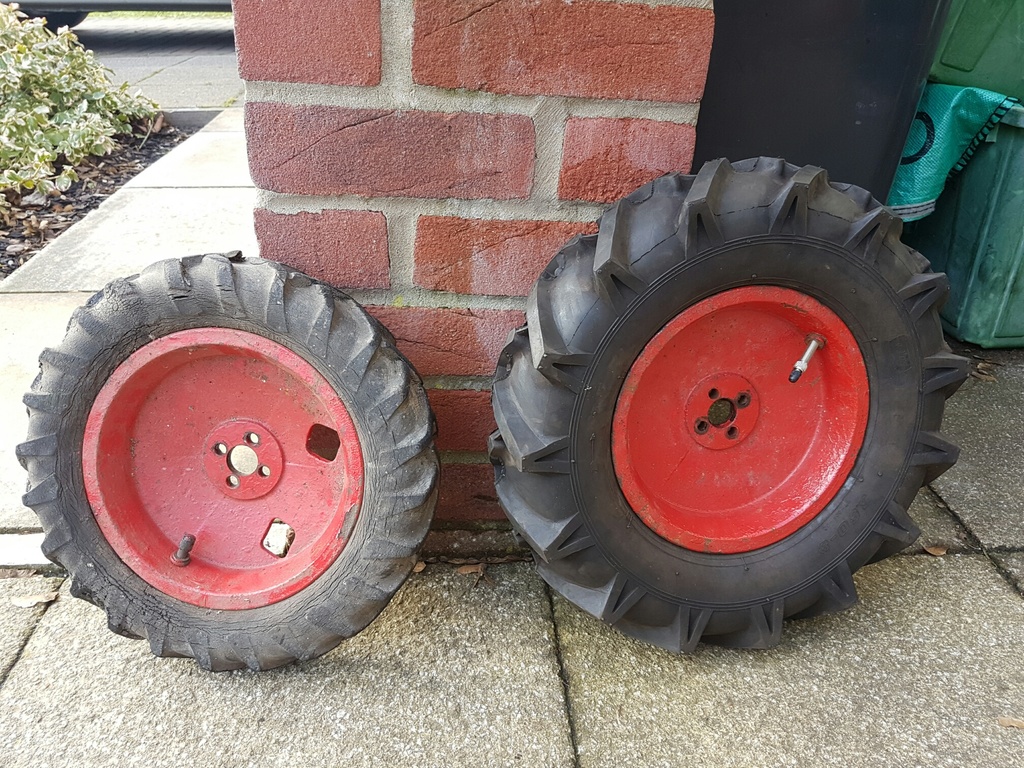
Hmmm? Do you think they will fit ok? 2.25 to 4.00 is quite a big jump? Mine are a bit smaller than those shown above..... This is mine at the mo, they are shot! Splits right through to the tubes and crumbly!!!
Can anyone help me with tyre advice........? This machine has 2.25x8 tyres fitted with the standard tractive tread pattern. All I can find in this size is something like those fitted to 'sack trucks'! Smooth almost NO tread! The closest I can find is 3.00x8 tractive...... my question is will they fit? My other concern is at £49each..... they are more expensive than the tyres on my Gem!!!!
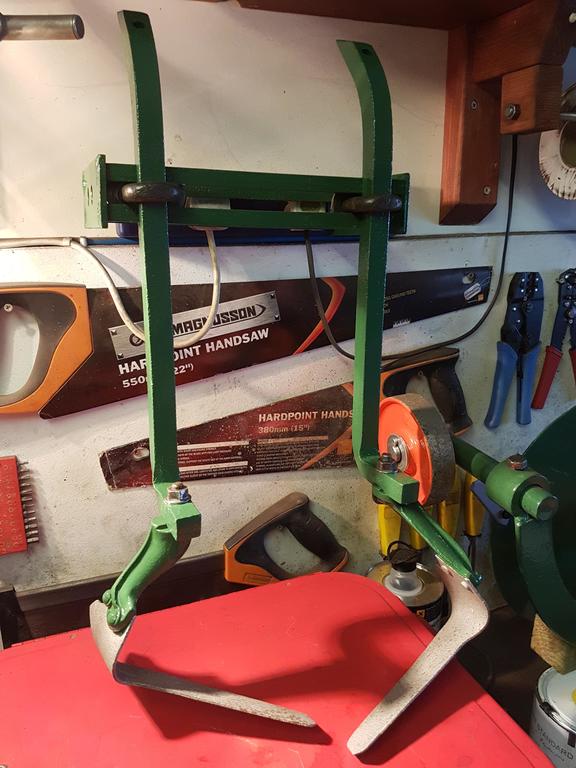
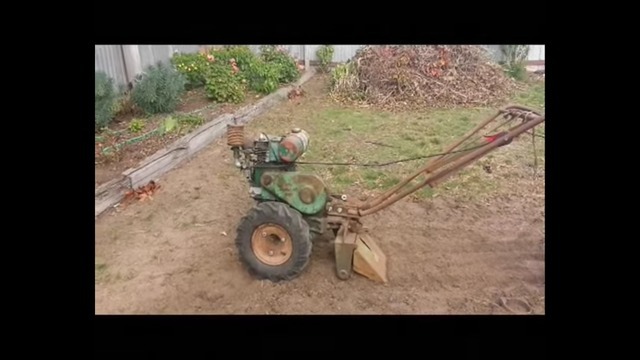
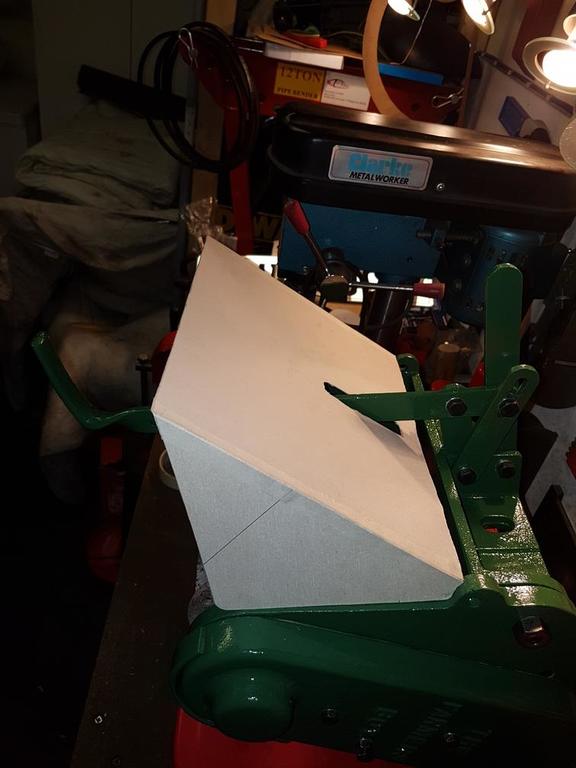
Have moved on to the rotovator attachment now......... had to replace the felt seals on the rotovator shaft with a modern nitrile equivalent, also needed a blank to protect the shaft end and bronze bushes. Next on the to do list was the remanufacturing of the rotor cover. This was missing and my only resource were a couple of photos screenshots from youtube! I have made a cardboard template 1st, and will get the steel cut tomorrow for this......


 Seems a shame to paint it.


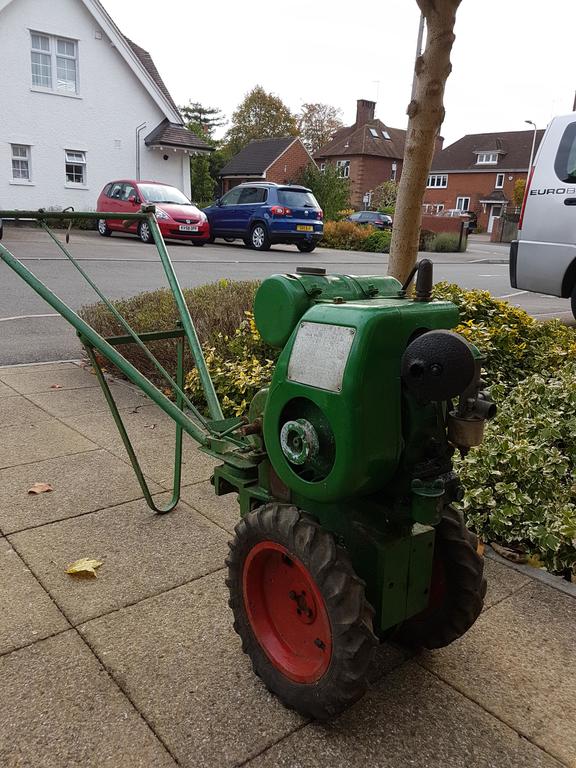


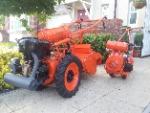
Farmer's Boy Light Tractor and Attachments
in Pedestrian Operated Machines
Posted
Made some enquiries today with regards to 'metal spraying' to build up the worn sections of the shaft so it can be machined back to 1" diameter....... Hmmmm, £350 plus the VAT........ I think that'll be a 'no' then!