Cool, I’ve never seen a sprayer with a 20A. Definitely keep me posted once you open it up and check it out. I’ll see if I can scrounge up some used parts, hopefully in decent shape.
Yeah, not too bad considering.
I was thinking about brazing as well, I just don’t have much in the way of experience. I’m going to have to break down one of these days and learn to weld and get a unit.
Making some good progress… I sent a few messages to some metal fabricators just to see what it might cost to have the 10” ring roll formed before I got too deep into trying it myself. A couple got back to me and the cost for a one-off was outrageous. One local shop emailed back and said he actually had one of his guys give it a go just to make sure it would turn out ok (before quoting me). I went to look at it today and it turned out well. It cost a little more than I had planned but overall not too bad considering he did have his shop guy do some labor to test it out. I fabricated the mounting bracket this afternoon. I ended up shaping the bracket to follow the contour of the interface between the handle and the body of the drill rather than just a rectangular piece. All I need to do now is make a couple more cuts on the ring handle to get the size right and then have the mounting plate welded to it. I think I’m going to cut it such that I can place the triangular end sections inside the tube and then flatten the tube to pinch the mounting plate and then weld it.
Can you add a photo of the switch? My drill didn’t have any sort of wiring attached. I’m assuming the trigger on the handle is just for a kill switch and not a throttle, is that correct?
That’s the 13B. I think there is supposed to be a thin plastic disc (as opposed to paper) that the recoil slides on. I’ll have to see if I have an old unit that is open and can take a look. If I recall it’s just thin plastic, might be able to cut one out of a piece of disposable Tupperware, milk carton, or some other packaging.
Thinking about it… I have one other small project in front of it. One of these days I’m going to have to just buy a welder, not sure how I’ve made it this long without one. Great idea about the sand. I got all excited yesterday because I thought I found a metal fabricator online in TX that sold 10” x 1/2” steel tubular rings as a standard product but when I called turns out they only make them out of square tubing.
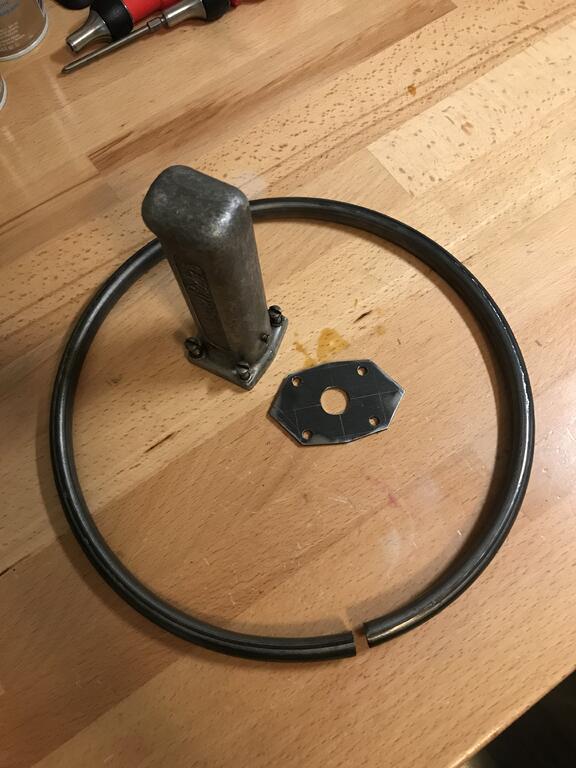
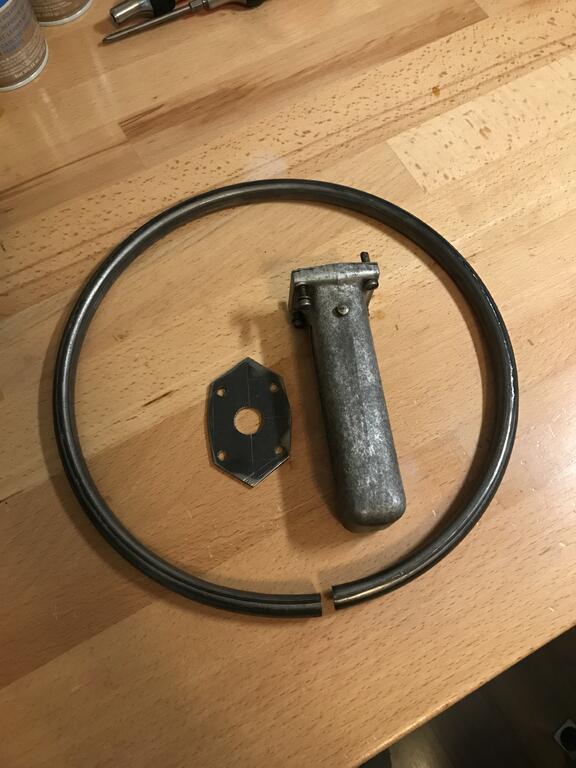
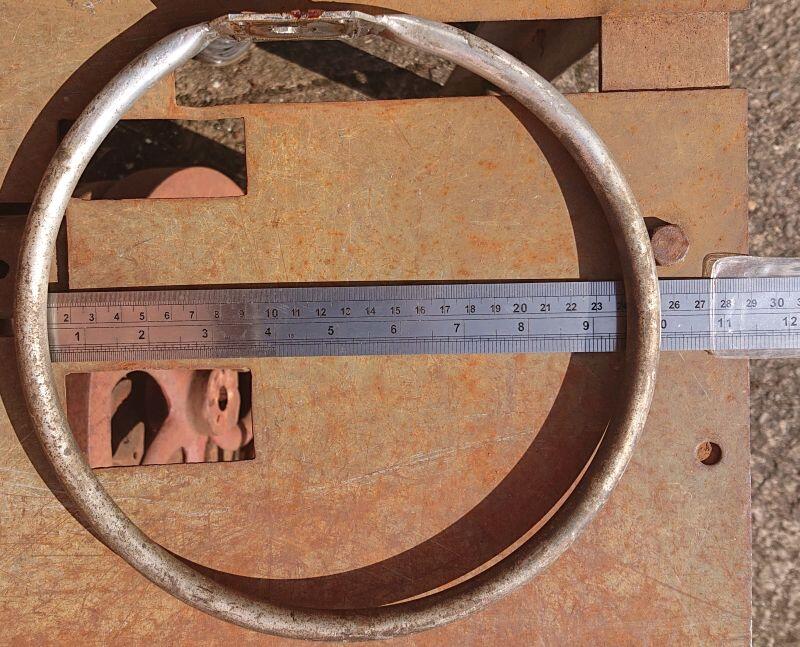
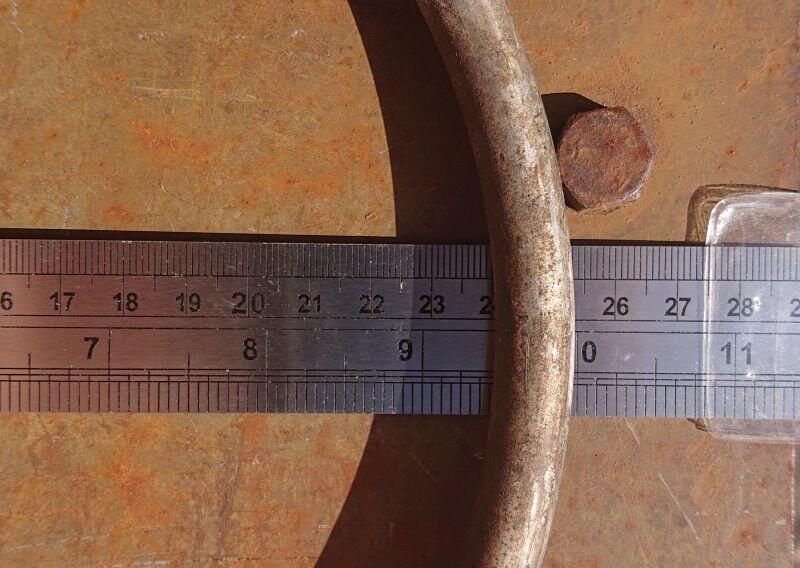
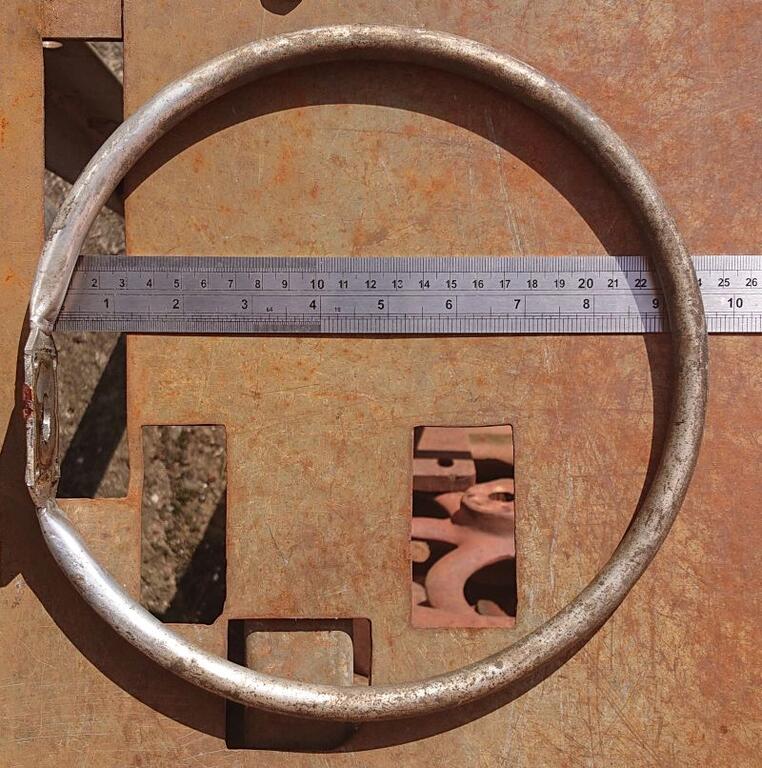
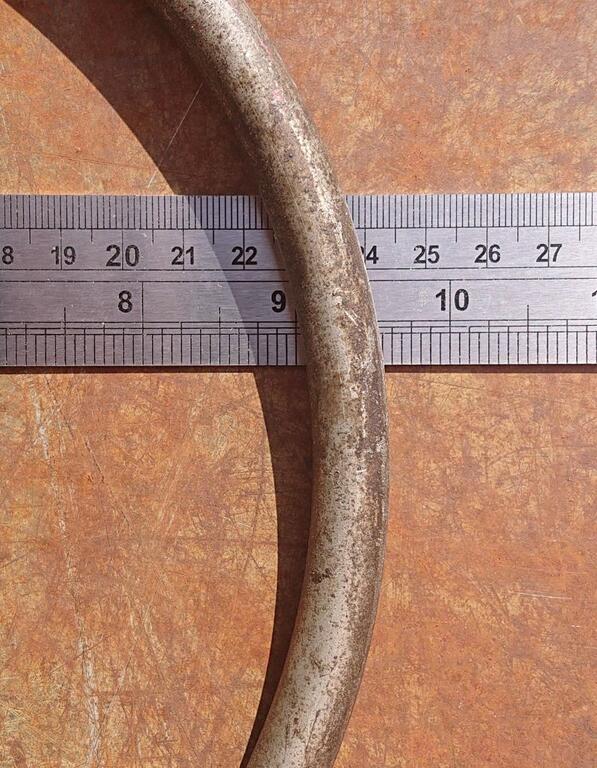
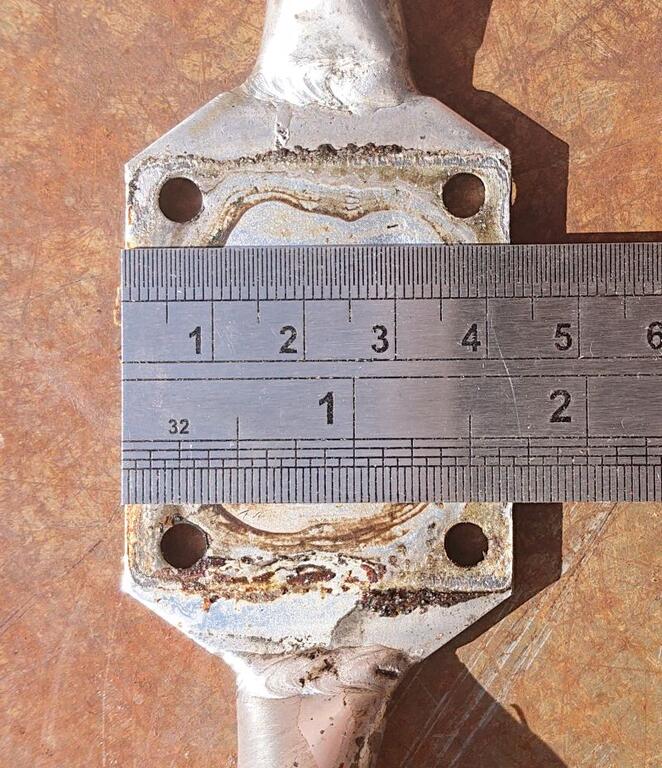
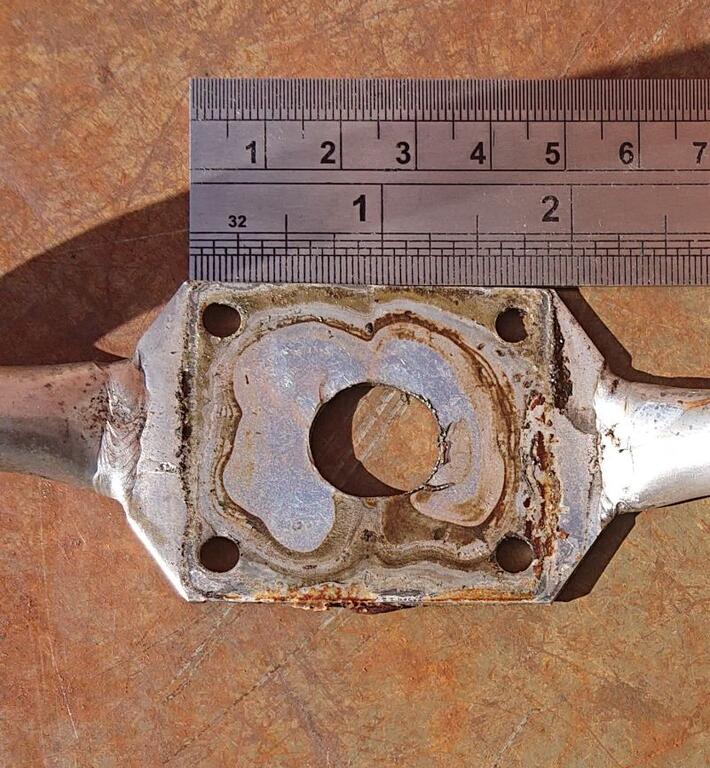
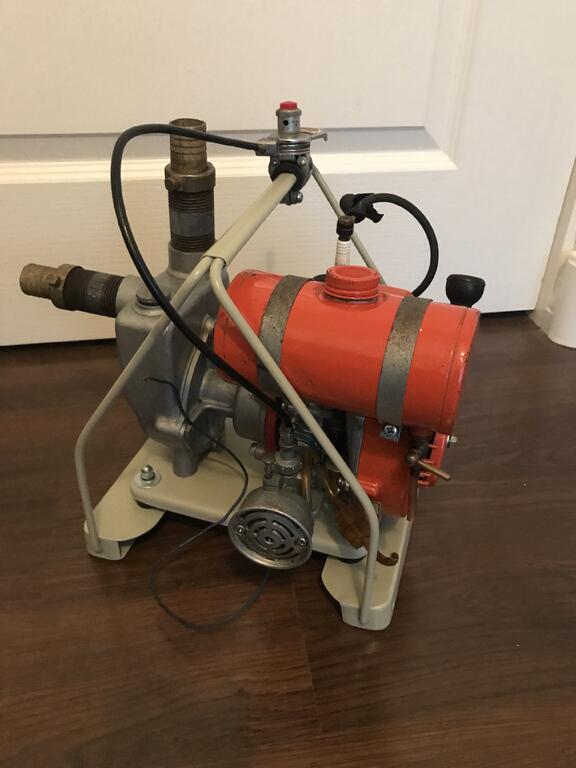
Some more pictures of the handle, outside diameter is approx 10", the height from the flat section is approx 9½" and the tube is approx ½" diameter.
The flat section is approx 1, 15/16" by 1, 11/16" with a hole to suit the switch fitted, I suspect my switch has been replaced judging by how chewed up the nut is.
David
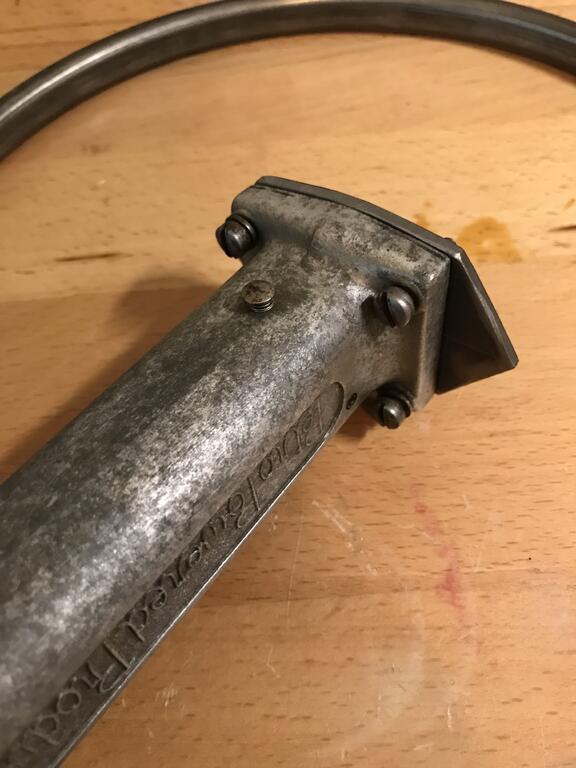
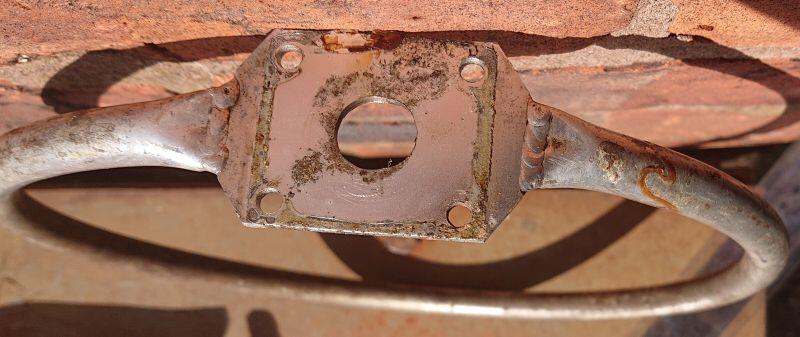
David, do you think the handle is made from steel or aluminum? The corrosion would suggest steel but the welds and shiny areas kind of look like aluminum.
Yes, I’m not good at linking pages on here but if you go to the main Ohlsson Rice page there is a section title Brochures, etc that has parts list and other info.
I looked up that part number and it looks like it’s the Roller Retainer for the later 13B engine. Go to this page and pull up the info on the 1970s engine.
That is odd, initially I was thinking maybe the little aluminum disc that contacts the primer button and lever arm might not be making good contact but since you’re able to blow air that must be working. Still scratching my head…
I think this is a one-way valve, so you should be able to blow air with the button pushed down but Not sure you should be able to suck air. That little steel ball would seat in the hole I think and prevent air from passing when you’re sucking. I might have to see if I have a working carb somewhere I can play with to test this idea.
There are a couple used coils and condensers on eBay right now.
when you checked the spark after cleaning and setting gaps did you put the starter housing back on and pull the rope or did you just turn the flywheel by hand to check for spark? I’ve had engines where if I used the starter rope it helped turn the flywheel fast enough to get spark whereas if I just tried to spin the flywheel by hand nothing would happen.
also, when you cleaned the points did you clean the little posts they fit on? I’ve had cases where the slightest corrosion or oil on the little posts messed up the spark.
What is the safest way to remove the flywheel and not damage it? I have a Tiny Tiger generator with no spark and I need to figure out why, thanks!
i usually just loosen the flywheel nut and unscrew it until it’s about flush with the end of the threaded shaft. Then give it a sharp tap with the end of a wrench (or very small hammer) and it always pops right off. The rapid shock from the impact is what loosens it from the tapered shaft. You really don’t have to hit it very hard, more of a firm tap.
I agree with John, best to try to clean the fuel tube and filter from the top off possible and make removing the bottom plate of the gas tank a last resort. I’ve removed a couple before and it’s a bit of work, takes down patients, consistent heating and finesse. Plus you need a good adhesive/sealant to re-install. It can be done but it’s a pain that’s better avoided when you can.
Hi Guys new to the forum and to O&R engines in general,I have an outboard motor from the 1970’s I believe and it’s in great condition really other than the cowling is a bit past it,she has spark and I’ve had her running briefly on brake cleaner just to confirm she’s a goer but I really need a carb kit for it to be of any use on my fiberglass dingy I know it’s a long shot but are there any about?
Welcome to the forum! Can you add a couple photos of your outboard? I’m curious if it’s the Aquabug style or if it’s from the 1970s it could be the later version that used the larger 20A engine (Clinton and Wards made a version, sometimes referenced as a K150). If it’s the later version some had a more common Walbro LMB carb and you can still get complete rebuild kits.


Looking for 20A Engine parts
in Ohlsson and Rice
Posted
Cool, I’ve never seen a sprayer with a 20A. Definitely keep me posted once you open it up and check it out. I’ll see if I can scrounge up some used parts, hopefully in decent shape.