Leaderboard


Popular Content
Showing content with the highest reputation on 02/26/2019 in Posts
-
3 points

A Mystery Roaring Twenties Refurb.......hopefully!
Stormin and 2 others reacted to Anglo Traction for a post in a topic
Brief update. Wasn't happy that the outlet bushing in the tank would solder properly, so I removed it to clean it up and re solder it- Prepped and painted a few parts, tank and straps finished. A lot of work involved to reach this stage. Also one of the control levers finished, where I had to make a new limit strap and rivets, as it was too rusted (see 3rd pic in post #13) - . Tank and straps have had a coat of fuel proof lacquer to protect it and I'll give it a final 'shake up' with stones, kerosene/redex to swill the residues out. I've got 2 tank lids, one original and one a few years younger with it's own measure for the correct oil to petrol ratio !. Fuel line will be done near the frame completion stage. Shaft bearings next and look's like I'll have to make several fixings including 'Butterfly' Wingnuts as several of the originals have had the wings broken off, now unobtainable. tbc -
2 points

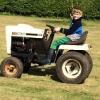
My Gutbrod 1032 with new attachments
Joseph and one other reacted to rolloman 1 for a post in a topic
Hi All here is some pictures of my 1032 with Busatis finger mower and rear Rotavator which came with The Callender ploo-mans new 1030 He bought the tractor I bought the tools for my own 1032 Tractor hope you like -
1 pointNorthern Classic Trial today. I was Section Controller on a section in the morning. Sorry no photo's as I was setting the competitors off. The term Classic has nothing to do with the vehicles taking part, but to the rules under which classic trials are run. Any age and type of motorcycle or car can compete, except four wheel drives. I did get a few photo's at another section in the afternoon. This was a steep, wet and muddy climb, though it doesn't look it.
-
1 pointSome of you guys may remember the Bolens stash that we acquired about 2-1/2 years. The tractor that appeared to be in the best condition was a blue painted Bolens 1054 which looking like it needs very little to get working. We got that assesment wrong as it has taken us a long time and lots of new and replacement parts to get it running. We still have a few more jobs to do but we would like to use it a bit first and see what other problems appear. Video of some of the work and the test drive Alan, please pass on our regards to John and he may enjoy the video
-
1 point
A Mystery Roaring Twenties Refurb.......hopefully!
Stormin reacted to Anglo Traction for a post in a topic
Thanks Norm. I won't keep the mystery for too long now, as I will need to start on the frame etc soon. I'm sure some visitors/Members will know what it is. Cyril Grange's book was a significant reference for many years. first published in 1929 and the ninth edition in 1954 (mine's the latter). I have the 2nd edition (I think) as an 'E' book which revealed the clutch info. Brief update- Working through the power unit and associated parts, I started checking out the Fuel Tank. An irreplaceable item for this machine, so I was pleased to find it bone dry inside. A thin layer of dried up petrified fuel/oil was able to be scratched away from the inner surface. I went to my 'Scope on a Rope' to check it out. Images are not great quality as copies, but gave me a good view- So I started to check the outside soldered joints and the level of rust penetration to ensure no perforations- Nothing that can't be put right cosmetically and with only 2 small/shallow dents in one end and the dents/marks where it is fixed to the frame. Only thing to repair is the outlet boss, where the Tap/filter must have been hit at some time and bent/cracked the old lead soldered joint- Tinned Steel plate is not very thick, but certainly the plating helped keep the bad rust at bay and happy with the initial external clean up- So started on inside using pea sized shingle dry to start with and does it well - Will do several more 'shakes' with this, then when I've sealed and repaired the external bits, I'll change to fluids with the shingle and a final washout. The tank is 1/2 imperial gallon (2.27 ltrs). Fuel pipe is 1/4" copper pipe which I will need to replace (to save repairs and cleaning)......tbc -
1 pointGot another day in the workshop. Sorted and replaced the bonnet. All that's left now are the tach-o-matics to paint and fit. Touch up some bits of paint work and order graphics. Another exhaust will be made later. May not be a stack though. That's it. Horse ready to be put back into harness.
-
1 pointI had a local firm make the decals for my other power packs , and was very pleased with the end results. However after getting pi*%^d about scince July with the ones for this machine I have resorted to making them myself using off the shelf labels. Just waiting for the Panther animal sticker to come in from the states and have got to get a fine needle to pierce the couple of air bubbles.