

S1g
-
Content Count
789 -
Joined
-
Last visited
-
Days Won
28
Reputation Activity
-

 S1g got a reaction from howardman in Howard Gem Jap Magneto
Here's some photos from when I timed up g206 the only difference is that it's a bth mag.
-
-
 S1g reacted to Stormin in Wheel Horse SD Deck
Some more assembly done today.
Tensioner assembly and wheels on.
Bracketry for attachment to tractor assembled.
That's it for now. Some bits and pieces to make, beg or steal next.
-

 S1g got a reaction from Darmic1 in Farmer's Boy Light Tractor and Attachments
It did look awesome in the flesh, particularly with all the different attachments. Good luck with building the trailer. First place very well deserved.
-

-
S1g got a reaction from the showman in Newbury tractor world
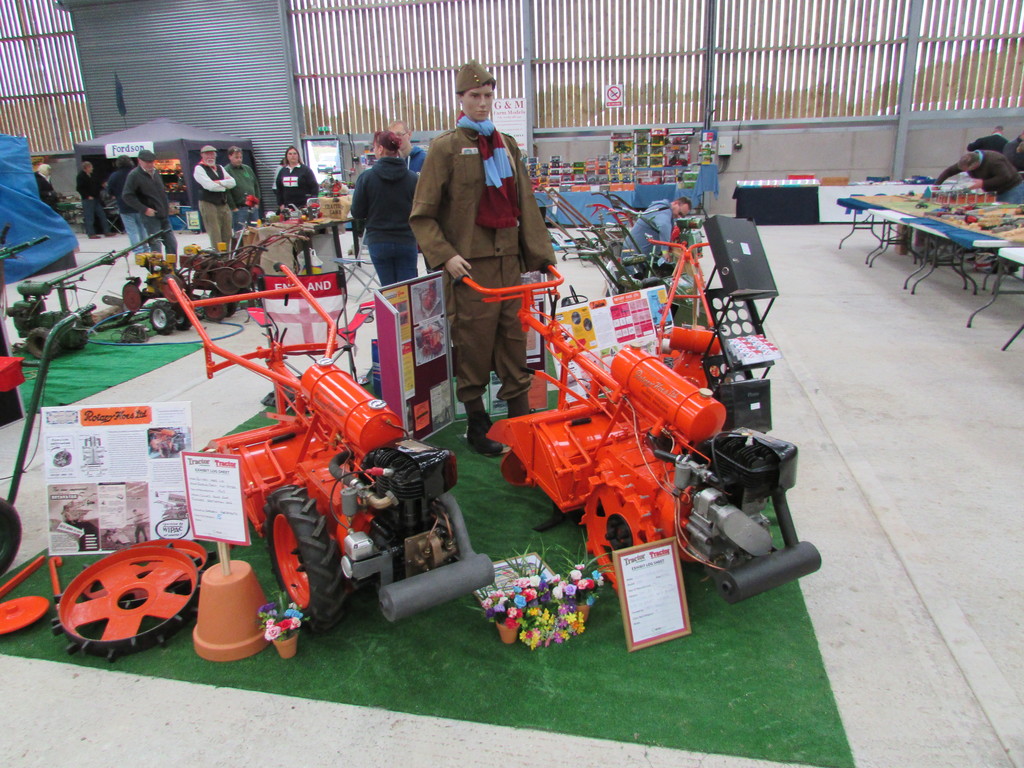
And heres the 4th machine. The idea is to show how little the design of the Gem changed over the years by having an example from the 1940's, 1960's and 1980's.
-

-
 S1g got a reaction from nigel in Newbury tractor world
That'll have to come once I've done one, 20 year gaps will have to do for the next year or two.
-
-
-
S1g got a reaction from nigel in Newbury tractor world
And heres the 4th machine. The idea is to show how little the design of the Gem changed over the years by having an example from the 1940's, 1960's and 1980's.
-
S1g got a reaction from Stormin in Newbury tractor world
And heres the 4th machine. The idea is to show how little the design of the Gem changed over the years by having an example from the 1940's, 1960's and 1980's.
-
 S1g got a reaction from Alan in Newbury tractor world
And heres the 4th machine. The idea is to show how little the design of the Gem changed over the years by having an example from the 1940's, 1960's and 1980's.
-
-
 S1g got a reaction from Stormin in Newbury tractor world
It's always the same, you leave a couple of gems together and they breed, lol.
-
S1g reacted to Stormin in Newbury tractor world
I like the little fellow at the end. Hope you do well.
-
S1g got a reaction from Stormin in Newbury tractor world
3 out of my 4 machines ready for this show.
-
S1g reacted to Alan in HALF a HORSE.
The fuel tank, non working, was bent up around a scrap wood former. The measurements were again supplied by my man with the tape, Iain, along with good side view photo's which showed the radius of each corner ! Although the base of the tank was wider than the top, all corners were the same radius. The original idea was to bend the alloy around the former then remove it which left the question, how to fix it all together. The obvious solution, apart from alloy welding, was to screw the panels to the wood which would be left in place hidden from sight.
Odd bits of wood were dug out, cut to size, and screwed together after first using the ends to mark out and cut the alloy outer plates. These were bolted to the wood with countersunk BA bolts, the heads blended in with filler. The main panel was cut to size and after carefully lining up, was screwed to the underside of the former. Then it was bent around one face at a time, securing with screws before moving on to the next, and finishing on the underside. Where else. All the screw holes were countersunk, the screws again being blended in with filler.
The filler neck was a short piece of alloy bar, screwed into place, and finished off with a cap from an oil can. Rubber edge trim was fitted after painting.
-
-
S1g reacted to Alan in HALF a HORSE.
Not many photo's of work on the hood. A slightly larger than required alloy sheet was cut and a shallow fold made on the center line. A board with a curved edge was clamped over the sheet, after carefully guesstimating where the side fold should start. Hope that makes sense. The sheet was then bent around the board forming one side of the hood. This was repeated for the other side resulting in a shape which was not far off the required result. What luck. A little tweaking with a rubber mallet and a length of round bar persuaded the front and rear of the curved folds to line up with the headlamp surround and dash.
A lot of time was then spent trimming the oversize edges to get the best fit I could manage, followed by clamping to the headlamp surround and drilling for the pivot bolts.
-
S1g reacted to Alan in HALF a HORSE.
The footrests were another item I had a few attempts at before finishing up with something that looked right in comparison with the rest of the build. One pair looked too long and narrow, another try ended up with the fold overs not being deep enough. Fairly quick to mark out and make so not too much hair pulled out. Again, made from the scrap 1mm alloy panels. The first attempts found a use elsewhere after being cut up.
How to make the fenders. ? Simply bending up on the brake press wasn't thought viable due to the curves at each end, although I now think it could have been done with a bit of NON press work included. Also the corners would need alloy welding etc. Another possibility was making a plug and moulding in fiber glass. I decided to make these using built up layers of plasticard sheet reinforced with alloy. I already had a good stock of this plasticard. This resulted in very strong fenders. The plastic, welded together with liquid polystyrene cement, was thick enough to sand the curves on ends and sides. The alloy inserts were a very tight fit after making a few short trial sections to get the bends in the correct place. Also bolted at the corners although they wouldn't come out easily. The top of each footrest slides into the slot at the front of the fenders and will be bolted in place when finished.
-
S1g got a reaction from Alan in Dowdeswell 650
Just realised that I haven't updated this project in a while. With
Tractorworld only a week away, heres where it stands at present.
Just a bit of touching up todo with a few minor adjustments.
-
S1g got a reaction from nigel in Dowdeswell 650
Just realised that I haven't updated this project in a while. With
Tractorworld only a week away, heres where it stands at present.
Just a bit of touching up todo with a few minor adjustments.
-
 S1g got a reaction from ranger in Dowdeswell 650
Just realised that I haven't updated this project in a while. With
Tractorworld only a week away, heres where it stands at present.
Just a bit of touching up todo with a few minor adjustments.
-
S1g got a reaction from nigel in Kubota 7100 1978 project
From memory in 99% sure the same engine is used in the applied 414 pedestrian sweepers (Green machine), which can often be picked up for
no money at ex council sales. May be easier to get a head from one of those?