You’ve come to the right place and if anyone is going to have the cross reference, it’s David! I’m assuming you’re trying to track down that AEP gasket set, part# 400376 I inquired about???
Finally got it running today. It won’t idle but at least it’s back to life. The carburetor adjustment screw may be the culprit, it doesn’t seem to have any impact on the idle no matter how you adjust it. The needle looks fine and no damage so I’m not sure what’s going on with it.
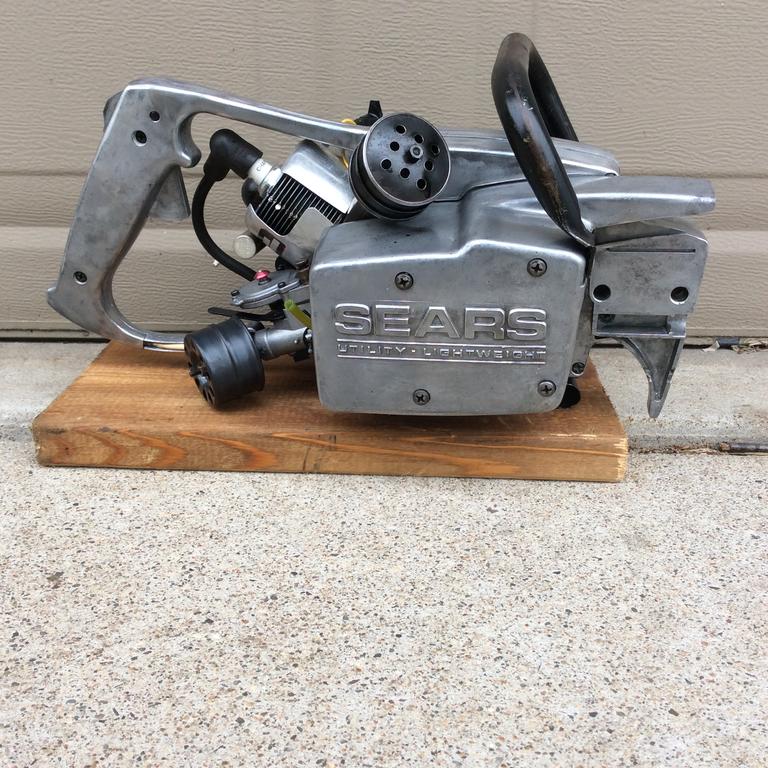
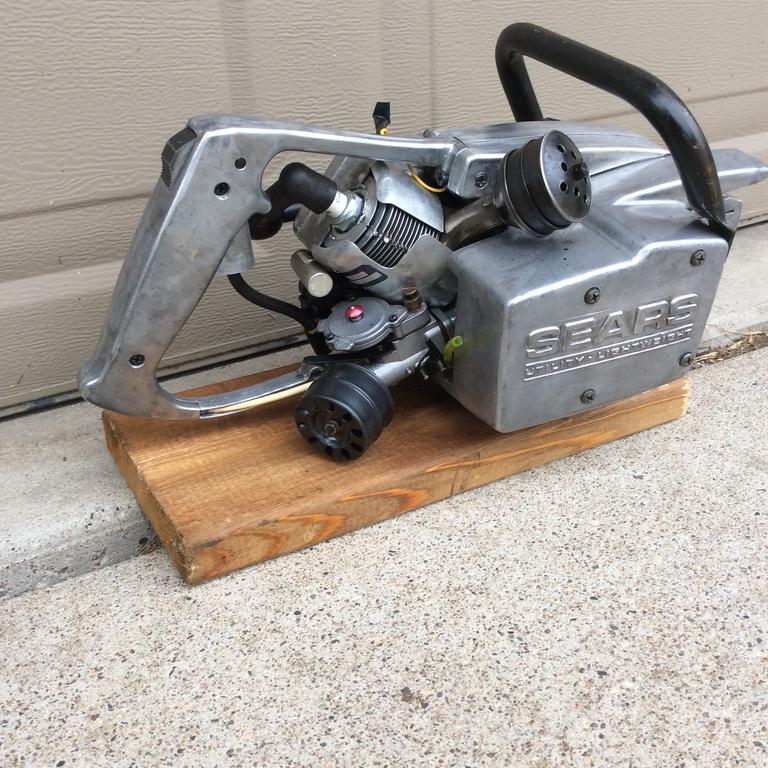
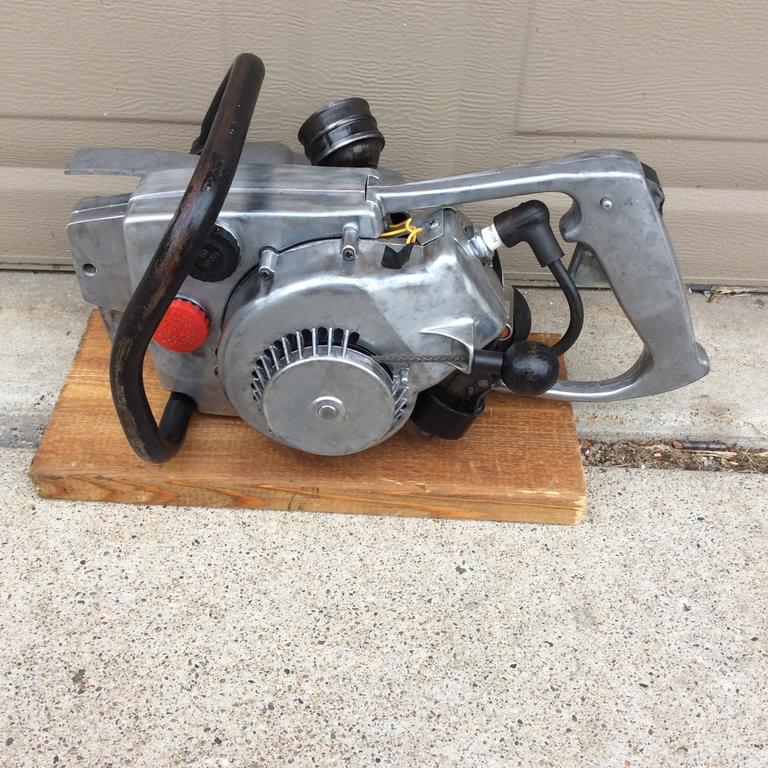
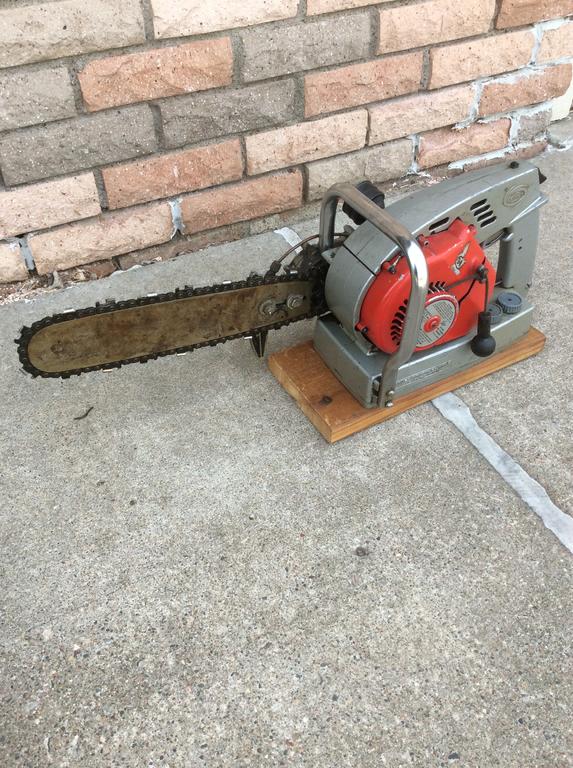
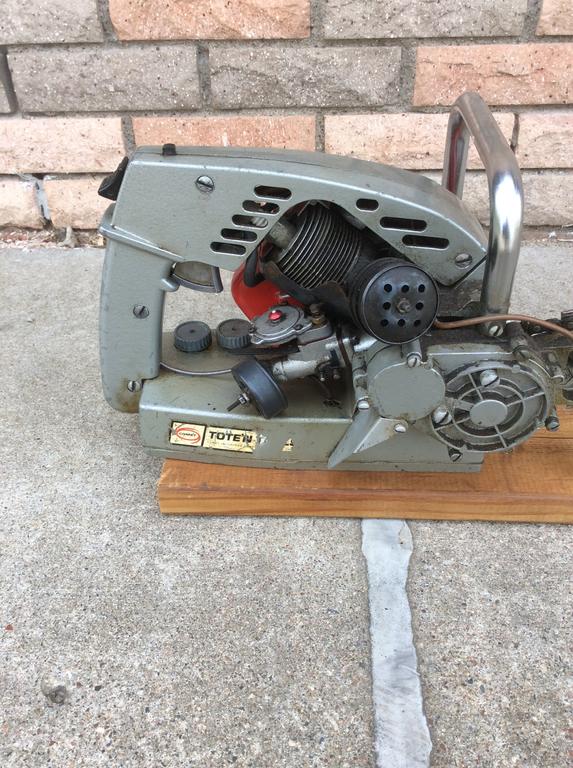
I think it looks kind of neat in bare metal but I’ll likely paint it some day.
Cool - I contacted this seller weeks ago to let him know that he had an O&R on there. I recommended he realist it with O&R so that maybe he could get a bit more interest. It’s a neat plane but too much $$ for me.
If you could email me a price and picture at sheldongeorge55@gmail.com that would be much appreciated!
Just sent you an email.
5 hours ago, factory said:
Carb primer conversion kits were available from April 1962, so wouldn't be out of place for this saw, in fact all the others I have pictures of have primer buttons.
David
Wow, that’s early. I didn’t realize the primer was offered so quickly after these engine switch came out.
Yep, Eric was awesome and cut me a few that I plan to experiment with and test. I’ll probably arrange to send him some more material at some point to cut a larger batch if they end up working out well.
I have a few. They may not be the exact brand material that Wallfish used but it should be very similar. I tracked down this material specifically for thin diaphragms. It is the correct thickness as well. I tested a small piece in some fuel for a few weeks and it seemed ok but I haven’t officially got any hours of use yet in an O&R engine.
2 minutes ago, factory said:
Looks in very nice condition, those early saws aren't that easy to find, I'm still looking.
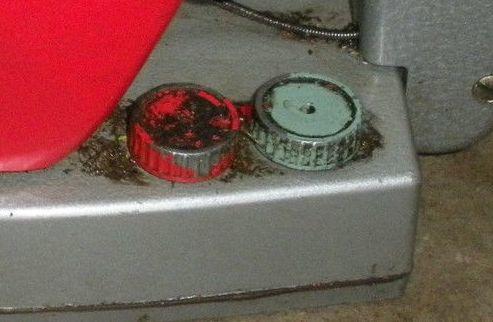
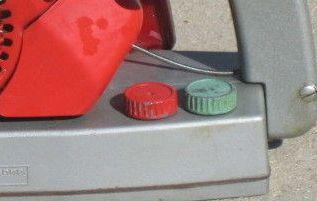
It's had the carb replaced at some point, the quadrant control isn't found on the early ones, also one of the filler caps should be red (maybe the paint has fallen off).
David
Thanks David - I was thinking the same thing. Given the age I was expecting the carb that has the flat top with no primer button. Indeed one of the caps has one or two small specs of red paint remaining on it. I’m assuming red is for gas and the aqua cap is for oil. If so, a previous owner may have made the mistake of putting oil in the gas side and fuel in the oil side. I’m still investigating...
Newest addition to the collection, just picked up this Comet saw this morning. Pictures are as-purchased condition. I’ll add some more photos once I’ve had a chance to clean it up and go through it a little.
Thank you very much for taking the time to capture this wealth of great information - this is indeed very kind of you and an amazing resource to all of us that enjoy collecting these O&Rs!
Fascinating - nice detective work David! Amazing the level of info you’re able to access. This is all part of the fun exploring and learning about these things. I’ve seen some parts listed on eBay for the Sears Mighty Light. That decal is indeed perplexing.
Yes, very strange. I can’t believe anyone would pay that amount for just an engine, even if it was mint condition. When I look at the photos closely it looks like the engine has been cleaned up very nicely and perhaps has low hours of run time but it also looks like someone may have painted it again and added reproduction decals. I’m not convinced it’s “all original”.
Curious, I’ve been watching (not bidding) this eBay listing and I’m baffled why this particular engine is in such high demand. I don’t see anything unique about it vs other similar new ones I’ve seen come up for sale and stay well below $200. The ends of the gas tank look a little bit different but everything else seem so pretty standard. Is this an ultra rare model or something?
Thanks John - I’ll have a closer look at the ball valve and see if maybe the ball is worn or getting stuck. I used a new lever during the last rebuild so hopefully it’s engaging properly.
That foam is nasty! I just removed a similar mss from one of my air cleaners.
Your post on the trimmer inspired me again and I was finally able to get my Orline trimmer running this weekend. I ended up having to swap carburetor diaphragm assemblies even though I rebuilt the original one that was on it twice. I’m going to have to open it up the diaphragm again and see what’s going on in there and causing it to malfunction. I know I put it back together correctly but it just doesn’t pump.


O&R parts list
in Ohlsson and Rice
Posted
That’s the one!