


Ian
-
Content Count
2,952 -
Joined
-
Days Won
193
Reputation Activity
-

 Ian got a reaction from Stormin in Honda MadTrax V Twin Quad.. Nearly Finished.. Woo Hoo
Now, back to the wiring...
This isn't what's left of the loom, it's all the bit's I didn't need mostly chopped from wires that were too long!
As I went along all the crimp connectors were removed and the joints soldered up before being wrapped in tape.. At least I know the loom won't pull apart now
Battery end of things.
This bit of the loom was a massive mess with lots of crimp connectors!
It looks way better now
The front end splits nicely into two, it will split nicely into three when the headlamp is wired in..
Speaking of the headlamp, these "not yet connected" wires go to the Quadzilla switch gear and are the very wires that give life to the lighting circuit. And the horn
Monday was spent turning this mess....
Into this non mess...... A day well spent
-
Ian got a reaction from Stormin in Honda MadTrax V Twin Quad.. Nearly Finished.. Woo Hoo
The wiring isn't too bad (well it feels that way now most of it's sorted), only 2 fuses and 2 idiot lights, but I do have a lighting circuits and the 4 wheel drive mode circuit to add.. And as the horn switch works I might as well try and find something loud to wire into it
Thanks Ewan, I wasn't sure what she would sound like, but I like what I hear
With the wiring (mostly) sorted I couldn't tidy the loom up without knowing where all the wires would run to...
All of which means I had to find somewhere to mount the battery!
The only place for it to go was just infront of the rear R/S wheel (no pics as it's hard to hold a battery in place and take photo's at the same time), no ideal but it just would not fit anywhere else!
I had already built a battery box, but hope to mount it???
This TB mount looks a good start
Lot's of chopping and welding later it looked like this
Inside view.
Outside view.
Checking the battery box fits..
TB/Batt mount bolted back on to MadTrax
Battery plonked in place.. It feels nice and strong with no movement and will hold the battery in place no problem
-
Ian got a reaction from Stormin in Honda MadTrax V Twin Quad.. Nearly Finished.. Woo Hoo
Having already mounted the voltage regulator the wrong way ie bolted directly to the frame, I needed to find a good way of rubber mounting it..
Which is where the random bit of Quadzilla comes into play as it has a few holes already with rubber isolating mounts in it... Just not quite in the right places.....
Soooooo..
Chop of the unwanted bits.
Slice 4mm from the middle.
Weld the two halfs back together.
That should be strong enough
Drill a hole.
Bash the bend flat.
Drill a second hole then test fit.
Cut and grind the bracket to shape.
Bolt the regulator back on to the bracket.
Bolt the whole thing back on to MadTrax, plug the wires in.... Job done
-
 Ian got a reaction from Cub Cadet in Honda MadTrax V Twin Quad.. Nearly Finished.. Woo Hoo
Now, back to the wiring...
This isn't what's left of the loom, it's all the bit's I didn't need mostly chopped from wires that were too long!
As I went along all the crimp connectors were removed and the joints soldered up before being wrapped in tape.. At least I know the loom won't pull apart now
Battery end of things.
This bit of the loom was a massive mess with lots of crimp connectors!
It looks way better now
The front end splits nicely into two, it will split nicely into three when the headlamp is wired in..
Speaking of the headlamp, these "not yet connected" wires go to the Quadzilla switch gear and are the very wires that give life to the lighting circuit. And the horn
Monday was spent turning this mess....
Into this non mess...... A day well spent
-
 Ian got a reaction from Alan in Honda MadTrax V Twin Quad.. Nearly Finished.. Woo Hoo
Now, back to the wiring...
This isn't what's left of the loom, it's all the bit's I didn't need mostly chopped from wires that were too long!
As I went along all the crimp connectors were removed and the joints soldered up before being wrapped in tape.. At least I know the loom won't pull apart now
Battery end of things.
This bit of the loom was a massive mess with lots of crimp connectors!
It looks way better now
The front end splits nicely into two, it will split nicely into three when the headlamp is wired in..
Speaking of the headlamp, these "not yet connected" wires go to the Quadzilla switch gear and are the very wires that give life to the lighting circuit. And the horn
Monday was spent turning this mess....
Into this non mess...... A day well spent
-
Ian reacted to Cub Cadet in Honda MadTrax V Twin Quad.. Nearly Finished.. Woo Hoo
Looking good! Sounds good too
-
Ian reacted to Stormin in Honda MadTrax V Twin Quad.. Nearly Finished.. Woo Hoo
Don't you just love modern electrickery.
Oh for the days of three fuses, no idiot lights, gadgets and gizmos.
-
-
Ian reacted to Stormin in Wheel Horse C-101
Pity your at t'other end of this Septic Isle to me, Ian. I could have helped you out with body work and carb.
-
Ian reacted to the showman in Wheel Horse C-101
Another interesting project to watch in the hands of the master
-
 Ian got a reaction from 4x4forks in Wheel Horse C-101
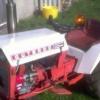
Even though I bought a C-312-8 from Chris in the not too distant past, It's missing a couple of vital parts like the engine and trans, so I needed to get something I could use..
This C-101 popped up very local at quite a good price
Unfortunatly the boonet/hood isn't part of the deal so anyone have a spare C/Raider bonnet going spare?
The fender pan is in good condition, but once again it's not part of the deal... Another fender pan has been thrown in (no pic's of it yet) but it is missing a bit of metal from the middle and needs a bit of work..
Engine.... It has one and it is part of the deal
10hp Kohler that spins freely but had no compression!
Those with sharp eye's will of noticed a couple of bit's missing from the engine... Yep no carb or...
Starter motor!
I might have enough incomplete carbs on the shelf to make a good one, and I'm sure I have a starter for it somewhere but so far all I've found is a starter for a Kohler twin.. Think it might of come from a KT
The trans is an 8 speed which is nice..
Last Friday Rex popped in for a coffee and the engines lack of compression got the better of him and he just had to have a look..
Problem found... The exhaust valve was stuck open, that large gap shouldn't be there!
Head off to have a look... Followed by lot's of penertrating oil and some gentle taps with a rubber mallet saw the valve close again.. (not quite closed in this pic)
Spinning the engine with a bit of pressure on the valve soon had it moving freely up and down again..
The cylinder wall has a bit of scoring, but not too bad though the engine may be a "smoker" when it's running..
Someone has been in this engine in the not too distant past, the head has been cleaned at some point as all the crud/carbon is only a thin layer..
Other than a wipe with a cloth the piston is as found... Someone has cleaned most of it!
The plan for this machine???
Find the missing parts, get the engine running and just use it
-
Ian got a reaction from Alan in Honda MadTrax V Twin Quad.. Nearly Finished.. Woo Hoo
Although the wiring was operational enough to get the engine running, for some reason I just could not get the two warning lights on temp guage to work...
These three!
The one place where the lights/temp guage connect wiring wise is the voltage regulator which should (or so I thought) power the lights etc..
Now I will admit to to getting the power leads to the battery around the wrong way once, that coupled with finding out the regulator should be rubber mounted to the frame (so it doesn't earth through the frame) rather than bolted directly to the frame as I had done once!
So... Everything pointed to a fried regulator being the problem, a replacement with correct mounting bracket with the rubber bits was ordered..
The result???
No Change!
The problem is this black wire from the regulator, there should be power in it but it was missing!
Time for a coffee and a bit of research on the internet to find out exactly what the blasted black wire does..
As it turned out it's the wire the regulator uses to keep a check on the voltage and should be connected to a live..
At the front-ish of the loom is this connector that has been taped up as I thought it wasn't needed... Yes it's the other end of the black wire and it should of been connected to a live feed form the ignition switch! "Bangs head and has one of those Doooohhhhhh moments"!
With that black wire connected to a live this was the result
I know that in the grand scheme of things a couple of warning lights isn't a big deal, but it was really bugging me as to why they were not working!
-
Ian got a reaction from Cub Cadet in Wheel Horse C-101
Even though I bought a C-312-8 from Chris in the not too distant past, It's missing a couple of vital parts like the engine and trans, so I needed to get something I could use..
This C-101 popped up very local at quite a good price
Unfortunatly the boonet/hood isn't part of the deal so anyone have a spare C/Raider bonnet going spare?
The fender pan is in good condition, but once again it's not part of the deal... Another fender pan has been thrown in (no pic's of it yet) but it is missing a bit of metal from the middle and needs a bit of work..
Engine.... It has one and it is part of the deal
10hp Kohler that spins freely but had no compression!
Those with sharp eye's will of noticed a couple of bit's missing from the engine... Yep no carb or...
Starter motor!
I might have enough incomplete carbs on the shelf to make a good one, and I'm sure I have a starter for it somewhere but so far all I've found is a starter for a Kohler twin.. Think it might of come from a KT
The trans is an 8 speed which is nice..
Last Friday Rex popped in for a coffee and the engines lack of compression got the better of him and he just had to have a look..
Problem found... The exhaust valve was stuck open, that large gap shouldn't be there!
Head off to have a look... Followed by lot's of penertrating oil and some gentle taps with a rubber mallet saw the valve close again.. (not quite closed in this pic)
Spinning the engine with a bit of pressure on the valve soon had it moving freely up and down again..
The cylinder wall has a bit of scoring, but not too bad though the engine may be a "smoker" when it's running..
Someone has been in this engine in the not too distant past, the head has been cleaned at some point as all the crud/carbon is only a thin layer..
Other than a wipe with a cloth the piston is as found... Someone has cleaned most of it!
The plan for this machine???
Find the missing parts, get the engine running and just use it
-
Ian got a reaction from Stormin in Honda MadTrax V Twin Quad.. Nearly Finished.. Woo Hoo
Although the wiring was operational enough to get the engine running, for some reason I just could not get the two warning lights on temp guage to work...
These three!
The one place where the lights/temp guage connect wiring wise is the voltage regulator which should (or so I thought) power the lights etc..
Now I will admit to to getting the power leads to the battery around the wrong way once, that coupled with finding out the regulator should be rubber mounted to the frame (so it doesn't earth through the frame) rather than bolted directly to the frame as I had done once!
So... Everything pointed to a fried regulator being the problem, a replacement with correct mounting bracket with the rubber bits was ordered..
The result???
No Change!
The problem is this black wire from the regulator, there should be power in it but it was missing!
Time for a coffee and a bit of research on the internet to find out exactly what the blasted black wire does..
As it turned out it's the wire the regulator uses to keep a check on the voltage and should be connected to a live..
At the front-ish of the loom is this connector that has been taped up as I thought it wasn't needed... Yes it's the other end of the black wire and it should of been connected to a live feed form the ignition switch! "Bangs head and has one of those Doooohhhhhh moments"!
With that black wire connected to a live this was the result
I know that in the grand scheme of things a couple of warning lights isn't a big deal, but it was really bugging me as to why they were not working!
-
Ian got a reaction from Cub Cadet in Honda MadTrax V Twin Quad.. Nearly Finished.. Woo Hoo
Time to sort the steering..
The problem I had was the Quadzilla steering column didn't fit the mount on the frame, and the gauge pods I made would not bolt on! But I still needed the bottom of the column as it does the steering bit!
So I needed the Honda top half and the Quadzilla bottom half, of course they are not the same diameter and one would not slide into the other!
A little bit of lathe work later had the solution to joining the coulnms together and keep them straight..
A close up.
To make sure nothing would move lot's of holes were drilled so I could plug weld through to the adaptor thingy..
My Murex Mig welded won't go all the way up to "Spinal Tap", so I turned it up a notch to 6 and zapped the parts together..
Cleaned up..
The good news is the column ended up exactly the right length, straight and the top and bottom halfs lined up, so it was bolted back in..
To celebrate the light and gauges were also bolted on..
MadTrax looks kinda strange with no wheels, tank or seat on!
I would
Now onto something fun, or not.. Wiring!!!
I had already removed anything not needed from the Honda CX loom, but I also needed to splice in some of the Quadzilla loom!
With the Quadzilla loom trimmed back to what I actually need things didn't look that scary!
I now need to find an "easy to read" early Honda CX 500 wiring diagram to double check which wires do what as the loom had been hacked about before I started at it!!
-
Ian got a reaction from Cub Cadet in Honda MadTrax V Twin Quad.. Nearly Finished.. Woo Hoo
Morning all, back to the metal work..
The removable bit needed to be made bolt-in-able, so some more metal was added..
Some captive nuts would be handy to bolt it on, but I didn't fancy burning my fingers trying to hold the nuts in place while welding...
So may I introduce to you all the sacrificial pencil
Not only does the pencil screw into the nut very nicely, any pencil that burns off is easily removed from the thread
Welded in with not a welding splat on the threads in sight
Ok, this pic may be of the opposite side to the above pics, but it does point out the big hole in the end of the tube where it's been cut off..
To fill the holes I found a couple of washers about the right, cleaned them up and clamped them onto a bit of brass plate.
THe holes in the washers were then welded up, the weld won't stick to brass..
Then a couple of "trimmings" were tacked on to give something to hold on to.
Once removed from the brass they looked like this..
Or this!!!!
Washers welded in..
And once the welds had been cleaned back the removable bit was bolted back in..
-
Ian got a reaction from Cub Cadet in Honda MadTrax V Twin Quad.. Nearly Finished.. Woo Hoo
Not much to report, I have made a good start on the left side with the suspension mount strengthening..
When I put the TB in I had to cut a bit of tube out, so back in it went..
A close up. The captive nut is for the TB side mount.
Only a couple of small plates to go in at the bottom and a lot of welds to grind down..
-
Ian got a reaction from Cub Cadet in Honda MadTrax V Twin Quad.. Nearly Finished.. Woo Hoo
As you can see the shifter stick er... Sticks a fair way out from the gas tank.. A bit too far out for my liking..
Before I could narrow it I needed to find out why the stick just fell to one side under the weight of it's self.
Once cracked open I found two springs were missing that that should hold the gear stick in the middle..
Not being able to find any compreession spring in the workshop that were the right length, width and strength I found a couple of bit of clear fuel pipe work just as well
Just over an inch removed from the shifter.. Both halves were V'ed before welding back together to give maximun strength.. It looked quite nice once the welds were ground down nice and smooth
Bolted back on to the frame, but I don't like the look of the shifter knob, it's more "Montego/Maestro" than MadMax, but thanks to Nigel I have something a bit er... Different to graft on...
Yes it is what you think it is... A titainium hip joint
-
Ian got a reaction from Cub Cadet in Honda MadTrax V Twin Quad.. Nearly Finished.. Woo Hoo
Morning all, time for a long over due update, though not a great deal has been happening..
I needed a better looking bracket to mount the transfer box shifter stick as the Quadzilla one was too big and very ugly.
I'm sure you can guess which one is the new one
Shifter bolted in.
Still not quite sure where to mount it on the frame at this point, so I welded a couple of bolts to soe blue steel bar.
Very long bits of bar
With the "bolt ends" of the rods stuffed through the frame and bolted on the TB levers, I could see there was a fairly straight run to connect the rods to a "next to tank" mounted shifter...
But then I found out all the shifter marlarky fitted nice just above the exhaust, tucked into the frame a bit..
Just enough space to get the connecting rods on
With one shifter box mount thingy done, the rods were shortened a bit, had a few bends put in and a bolt welded on the other ends..
It's a bit crude, I may re do the rods with rose joints, but for now the shifter works very well, and you get a reasuring "thunk" sound as the TB goes into gear
-
Ian got a reaction from Cub Cadet in Honda MadTrax V Twin Quad.. Nearly Finished.. Woo Hoo
It is indeed Norm, the cleaner and faster the gasses can get away from the engine the better
It will look a lot better once the welds are ground down and it's all been wrapped in heat proof tape sort of stuff
The solution to joing the two bit's of pipe together was this ear trumpet shaped bit of pipe.
It's a tight fit around the transfer box, a very thick ally heat shield will be going between the exhaust and the black electrical gizmo with the word up, upside down.. Don't want to melt it!
Apart from grinding down lot's of welds that's the exhaust system done
Next on the hit list to sort is the shifter for the transfer box..
It needs to go somewhere around here, also the bracket looks really ugly so a new one is being made..
The fun bit is going to be making the rods that connect it to the transfer box, but luck might be on my side as I found an easy route through the frame, above the carbs that will require minimal bends to the rods..
Oh, a scrap pile raid produced all the rods I could need
To finish off this update have a moody smokey picture of the MadTrax
-
Ian got a reaction from Stormin in Honda MadTrax V Twin Quad.. Nearly Finished.. Woo Hoo
Morning all, back to the metal work..
The removable bit needed to be made bolt-in-able, so some more metal was added..
Some captive nuts would be handy to bolt it on, but I didn't fancy burning my fingers trying to hold the nuts in place while welding...
So may I introduce to you all the sacrificial pencil
Not only does the pencil screw into the nut very nicely, any pencil that burns off is easily removed from the thread
Welded in with not a welding splat on the threads in sight
Ok, this pic may be of the opposite side to the above pics, but it does point out the big hole in the end of the tube where it's been cut off..
To fill the holes I found a couple of washers about the right, cleaned them up and clamped them onto a bit of brass plate.
THe holes in the washers were then welded up, the weld won't stick to brass..
Then a couple of "trimmings" were tacked on to give something to hold on to.
Once removed from the brass they looked like this..
Or this!!!!
Washers welded in..
And once the welds had been cleaned back the removable bit was bolted back in..
-
Ian reacted to the showman in Honda MadTrax V Twin Quad.. Nearly Finished.. Woo Hoo
I think there's gonna be a shortage of grinding disc's in the south soon, I'd better stock up before everyone runs out,
-
 Ian got a reaction from the showman in Honda MadTrax V Twin Quad.. Nearly Finished.. Woo Hoo
Morning all, back to the metal work..
The removable bit needed to be made bolt-in-able, so some more metal was added..
Some captive nuts would be handy to bolt it on, but I didn't fancy burning my fingers trying to hold the nuts in place while welding...
So may I introduce to you all the sacrificial pencil
Not only does the pencil screw into the nut very nicely, any pencil that burns off is easily removed from the thread
Welded in with not a welding splat on the threads in sight
Ok, this pic may be of the opposite side to the above pics, but it does point out the big hole in the end of the tube where it's been cut off..
To fill the holes I found a couple of washers about the right, cleaned them up and clamped them onto a bit of brass plate.
THe holes in the washers were then welded up, the weld won't stick to brass..
Then a couple of "trimmings" were tacked on to give something to hold on to.
Once removed from the brass they looked like this..
Or this!!!!
Washers welded in..
And once the welds had been cleaned back the removable bit was bolted back in..
-
 Ian got a reaction from slf-uk in Flat pack Wheelhorse
It was good to catch up with you again Chris, thanks for selling me er.. 3/4's of a Wheel Horse..
It's nice to have something red back in the workshop, being WH-less for 1 1/2 days was hard to cope with
-
 Ian got a reaction from HeadExam in Project Wheel-Vo... The Build has Finally Started!
Thanks for noticing mate
Somehow I don't think Wheel-Vo will be ready by August mate, but please feel free to drop in the workshop when your down this way
Thanks dude, it's going to be a while until anything really starts on this project, but starting it certainly will do