Just trying to get the bad jobs out the way first. I want to get on with stripping the paint off the main gearbox/frame assembly but needs to be done outside and it hasn't stopped raining for nearly a week with us. Being realistic I can see the budget hitting £150 but this will still be cheap for a diesel Gem.
Had a bit of luck today, whilst rummaging through my one shed for some car shampoo, I came across 6 brand new blades for a gem that I didn't even know was in there. Hopefully with what ive got at my work I should now be able to make a complete new set for no money. Should help offset the cost of having the injector done.
The shot blasting unfortunately is likely to remove the circle. When I first got interested in Villiers engines you could write to Ron Valentine at the factory and he would write back with the age of your engine. Unfortunately when they ceased trading around 2000 all the records went in a skip which I only found out about a few years later. A great shame.
The other places that Villiers engines have dates is stamped very faintly into the air shroud near the spark plug hole and on the underneath of the fuel tank. Again it's a circle with the letters A.J.H be warned though these stamps are very faint and corrosion or damage can easily remove them. Carefully removing the paint with stripper or sanding will often show them up. J.a.p s before Villiers bought them out also had this stamp on them, maybe the same factory pressed up the shrouds for both companies?
Thanks, the cooling fins in places were a bit battered, I've straightened them the best I can. I did consider a new core, however decided against it firstly on the grounds of cost, but mainly because it was still the original one after 56 years.
The rear end is actually in a better state than the last gem i rebuilt. This was still being used till fairly recently by a landscaping firm but good old health and safety meant the boss decided to discontinue using it.
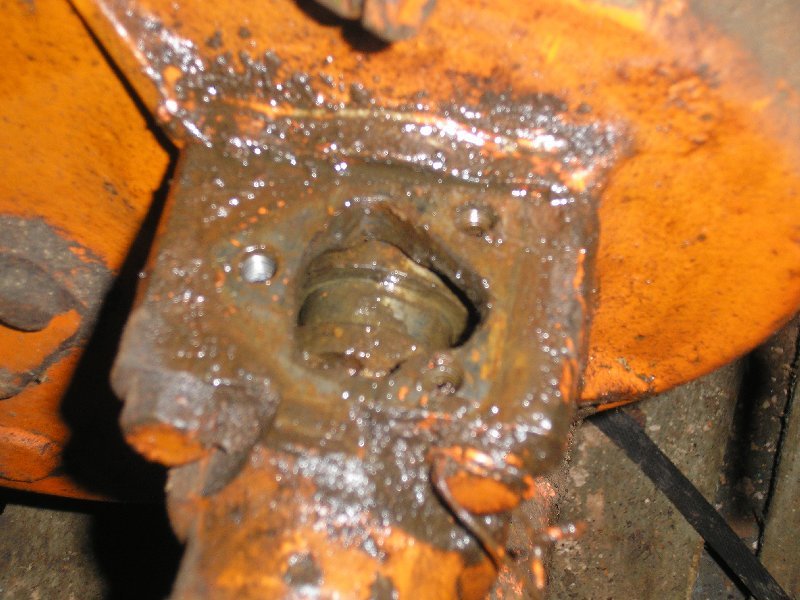
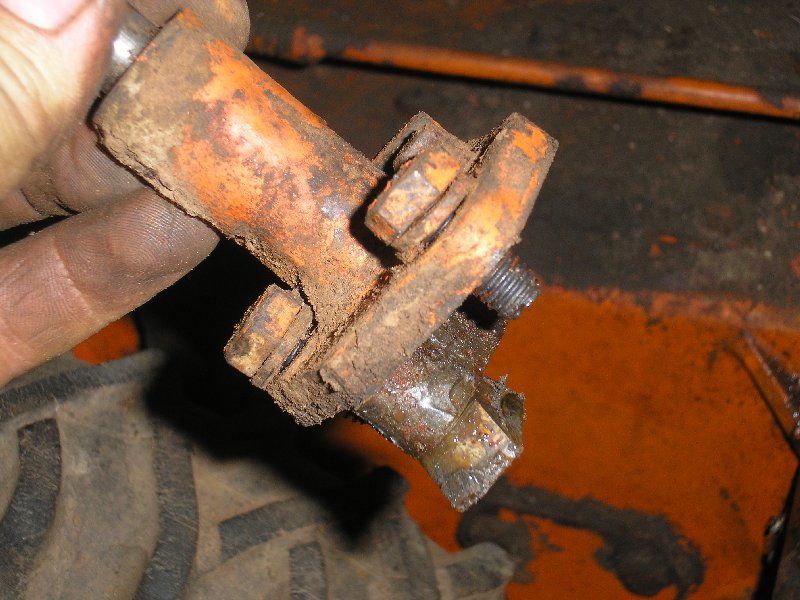
I'm guessing that the pulley is like that to alter the gearing, as the belt grips in a different place it technically makes the pulley bigger or smaller. I'm sure the one I worked on just had a standard centifugal clutch but it was nearly 20 years ago.
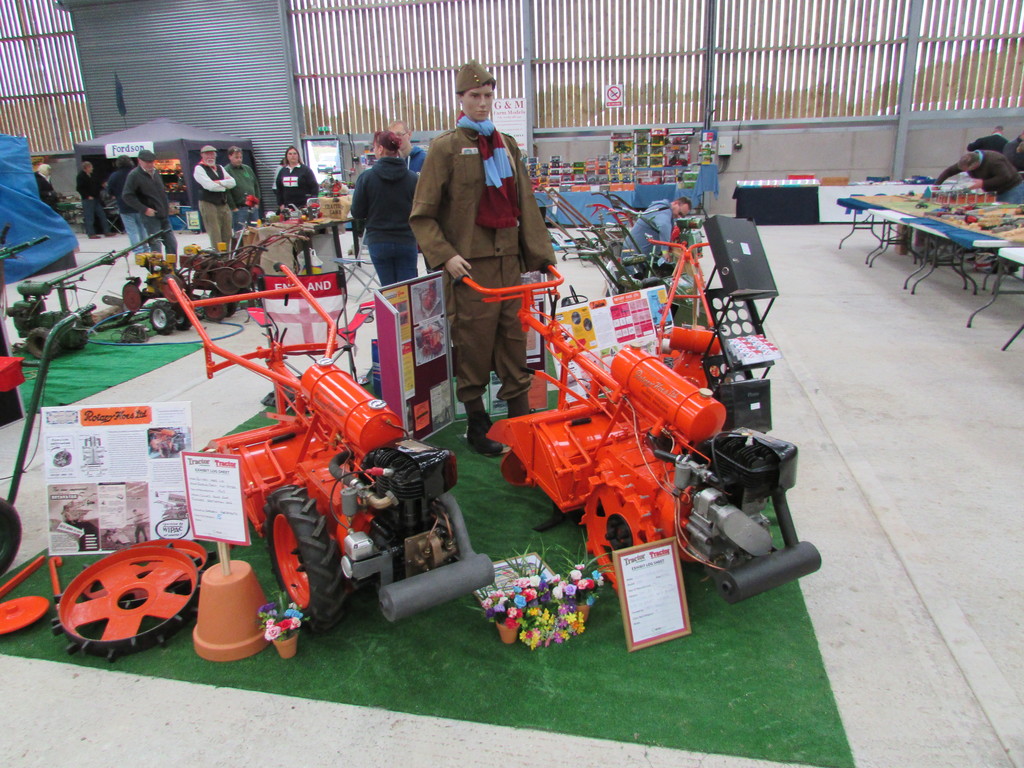
Hi Pat, I worked on one of these many years ago. I seem to recall that
it may of been made by Stothert & Pitt? Had a lot of trouble stopping the carb leakin due to the angle of the engine, in the end I had o resort to a new carb for the customer.
Thats in good order. I had one the same a few years back.
Always a total pig to start until I had the injector rebuit. Ran a treat after & always started
I sold it but wish I kept it....
This one doesn't start to bad but I've got arthritis in my body so when I caught it wrong the other day going over compression it hurt. Where did you have the injector rebuilt as I've been told in the past that these couldn't be done and would like to seeing how much a Hatz was improved years ago.
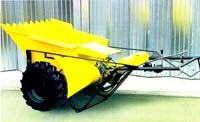
Cant blame youfor going with those tyres at the price difference, I know I would do the same. Do you think it will alter the traveling speed being a bigger diameter?


![IMG_1860[1].JPG](https://myoldmachine.com/uploads/monthly_2017_02/5894e5104d884_IMG_18601.JPG.3205ad54cded1c033d72ee40544b1f45.JPG)
![IMG_1858[1].JPG](https://myoldmachine.com/uploads/monthly_2017_02/5894e53eaed1e_IMG_18581.JPG.55a4b57cbac079e3c4a4b54da7a8f8e3.JPG)
![IMG_1859[1].JPG](https://myoldmachine.com/uploads/monthly_2017_02/5894e57b5d0b9_IMG_18591.JPG.af0eda955665eaa2f8135126ad1811c3.JPG)
![IMG_1855[1].JPG](https://myoldmachine.com/uploads/monthly_2017_02/5894e5a550142_IMG_18551.JPG.cfbf89bb510d640b8913239053c16531.JPG)
![IMG_1829[1].JPG](https://myoldmachine.com/uploads/monthly_2017_01/588f929b32664_IMG_18291.JPG.162c7634ca69a70f44583f88a1bf6d7c.JPG)
![IMG_1830[1].JPG](https://myoldmachine.com/uploads/monthly_2017_01/588f92cd8d083_IMG_18301.JPG.23d813f4eadfaeec489afcc3a423df74.JPG)

![IMG_1813[1].JPG](https://myoldmachine.com/uploads/monthly_2017_01/588b998698d91_IMG_18131.JPG.699a707cbc9b693b754af1cce191d418.JPG)
![IMG_1814[1].JPG](https://myoldmachine.com/uploads/monthly_2017_01/588b99c5024a7_IMG_18141.JPG.b99cf5cd54d8ca5a52742cef9d2a5a8b.JPG)
![IMG_1819[1].JPG](https://myoldmachine.com/uploads/monthly_2017_01/588b9a12a137c_IMG_18191.JPG.0681f752c023fe7c7660b2483fd758bd.JPG)
![IMG_1820[1].JPG](https://myoldmachine.com/uploads/monthly_2017_01/588b9a53d93df_IMG_18201.JPG.d54f65ea26e872e696d7c777953a805b.JPG)
![IMG_1823[1].JPG](https://myoldmachine.com/uploads/monthly_2017_01/588b9a84af122_IMG_18231.JPG.23293d2feaafbda405ccdcd1e2f34324.JPG)
![IMG_1818[1].JPG](https://myoldmachine.com/uploads/monthly_2017_01/588b9ab5a9948_IMG_18181.JPG.50d442a099dc2877493e123e978e5eef.JPG)
![IMG_1811[1].JPG](https://myoldmachine.com/uploads/monthly_2017_01/588a55e21fb6c_IMG_18111.JPG.fd215b13c873f2fdee28d414c7f482f3.JPG)
![IMG_1799[1].JPG](https://myoldmachine.com/uploads/monthly_2017_01/5887a49b915b4_IMG_17991.JPG.65f7eded3f847400e1c194de51045f45.JPG)
![IMG_1801[1].JPG](https://myoldmachine.com/uploads/monthly_2017_01/5887a5473c88a_IMG_18011.JPG.c6240cfe8fc97952c0fe54375361d0c0.JPG)
![IMG_1804[1].JPG](https://myoldmachine.com/uploads/monthly_2017_01/5887a5bb1782f_IMG_18041.JPG.fa3a62d20dd2db7560d64f42f8e9edc2.JPG)
![IMG_1802[1].JPG](https://myoldmachine.com/uploads/monthly_2017_01/5887a609dd7ef_IMG_18021.JPG.c0ed62f4256b90d100d2c0e2a8bbee19.JPG)

![IMG_1784[1].JPG](https://myoldmachine.com/uploads/monthly_2017_01/58866d72285ea_IMG_17841.JPG.000056f451352521db017fb655d7142d.JPG)
![IMG_1783[1].JPG](https://myoldmachine.com/uploads/monthly_2017_01/58866da3a163b_IMG_17831.JPG.6fdc31b5a00d950bc5b2c48918dfa0ed.JPG)
![IMG_1785[1].JPG](https://myoldmachine.com/uploads/monthly_2017_01/58866dbd56d58_IMG_17851.JPG.68cc074a50fb31aeb286de14c254a7f8.JPG)
![IMG_1782[1].JPG](https://myoldmachine.com/uploads/monthly_2017_01/58866df97b349_IMG_17821.JPG.af74497118cf6c2e49aa502eda1d502c.JPG)
![IMG_1776[1].JPG](https://myoldmachine.com/uploads/monthly_2017_01/58866e2d76223_IMG_17761.JPG.f1667c8ae5c6b07de361e1e8f6c54b18.JPG)
![IMG_1777[1].JPG](https://myoldmachine.com/uploads/monthly_2017_01/58866e5cc6bcf_IMG_17771.JPG.8d400dd29d6069818cabdac0a0e47f09.JPG)
![IMG_1778[1].JPG](https://myoldmachine.com/uploads/monthly_2017_01/58866ea4c7b98_IMG_17781.JPG.8c3a72b5d4b21a17e23e02c4243c8e9a.JPG)
")
![IMG_1765[1].JPG](https://myoldmachine.com/uploads/monthly_2017_01/58834d250766e_IMG_17651.JPG.1a5b78aeeb985e0b658acec441e54c86.JPG)
![IMG_1767[1].JPG](https://myoldmachine.com/uploads/monthly_2017_01/58834d61e67a9_IMG_17671.JPG.12ed909008670b2a56b48b197623546d.JPG)
![IMG_1769[1].JPG](https://myoldmachine.com/uploads/monthly_2017_01/58834d96e1f0b_IMG_17691.JPG.a0e77874ac0e2c5290246eb0e4c0b9a0.JPG)
![IMG_1749[1].JPG](https://myoldmachine.com/uploads/monthly_2017_01/58825c0977ac4_IMG_17491.JPG.1defc4fa4b0ee940f30e1f93bc076aae.JPG)
![IMG_1751[1].JPG](https://myoldmachine.com/uploads/monthly_2017_01/58825c332704e_IMG_17511.JPG.382df1384e54dd9ab11e6cb5c7b3dacb.JPG)
![IMG_1752[1].JPG](https://myoldmachine.com/uploads/monthly_2017_01/58825c61dfc45_IMG_17521.JPG.4022a3b807d4f3dd41fe4ba3dc370f40.JPG)
![IMG_1753[1].JPG](https://myoldmachine.com/uploads/monthly_2017_01/58825c91b86e1_IMG_17531.JPG.bfc484fc418aeeed575147fe362afea9.JPG)
![IMG_1758[1].JPG](https://myoldmachine.com/uploads/monthly_2017_01/58825cca9b659_IMG_17581.JPG.34d39f61e46fa6f34d3c0840310cdf1c.JPG)
![IMG_1759[1].JPG](https://myoldmachine.com/uploads/monthly_2017_01/58825d02f3625_IMG_17591.JPG.f1f71434847a577a4faa8399f6b8f2e0.JPG)
![IMG_1760[1].JPG](https://myoldmachine.com/uploads/monthly_2017_01/58825d258e243_IMG_17601.JPG.e0d65dba845ab1f8de5cda7caccec834.JPG)
Project Budget Sachs Diesel Howard Gem.
in Step by Step restoration
Posted
Just trying to get the bad jobs out the way first. I want to get on with stripping the paint off the main gearbox/frame assembly but needs to be done outside and it hasn't stopped raining for nearly a week with us. Being realistic I can see the budget hitting £150 but this will still be cheap for a diesel Gem.