


Aidan
-
Content Count
2 -
Joined
-
Last visited
Reputation Activity
-
 Aidan reacted to Wallfish in Tractor Bike
A short video of a test ride. Weird engine noise is the flywheel hitting the blower housing.
-
Aidan reacted to Cub Cadet in Transport Box
I got most of the frame work done yesterday and started to fabricate the sides.
First I cut the back and then the sides
I hope my dad doesn't notice I've stolen some of his gate
-
Aidan reacted to Stormin in Project Raider 10.
Today I collected this rather sorry, engineless Huskvarna. Straight of the trailer and onto the bench.
Started on it at 2pm and by 6pm I had the parts I want.
The gearbox is a 6 speed and I believe you can change on the move. The wheel is being stubborn to remove, so has been give a good does of releasing fluid.
-
Aidan reacted to moogie in Silage Harvester
Not much progress to show as i am having a few problems finding a blower/leaf vacuum at a reasonable price so this project will have to be put on hold, in the mean time i have started to collect parts for my next build. See topic "Ploughing tractor build".
-
Aidan reacted to moogie in Silage Harvester
This one is a bit of a work in progress, so it may be sometime before it gets finished.
So, started of with half a rolling chassis from a Yardman AN5175.
After a couple of hours cleaning and stripping it looked like this.
Removed rear section of chassis as it isnt required, found a 12hp engine to power it and a 42in deck.
The white masking tape sections are where the out riggers will go to carry the wheels. The yellow handle is where the drawbar will go.
One of the out riggers attached and a lift handle to adjust the deck height made.
This is as far as i have got. The swan neck is fully adjustable to allow transporting behind the tractor or cutting to the side.
Next step will be to find a garden leaf vacuum to help blow the grass up the delivery spout. Mount a battery,make a dash pannel, get a better fuel tank, and tidy it up a bit with a few body pannels.
Well that it for now, might be a while before any more updates as im having problems finding a leaf vacuum at a decent price.
-
Aidan reacted to diggerjames in Project C1-4x6
It's becoming a regular daily update rear axle and rear frame back on I've had major problems as nothing wanted to line up I don't no weather this due to the extra welding i put in and it warped or weather it got dropped st the powder coaters or the heat as warped it but hey ho with help of the drill and grinder I've managed to get it close
-
Aidan reacted to diggerjames in Project C1-4x6
Evening all a little bit more progress done the transfers are on Cheers Mark good job there ( bff ) led lights on and wired in gauges fitted some wired in some not one head light in other will be fitted when it arrives filters changed diesel tank fitted rear load box made and fitted Cheers Sam loads of bits still left to do yet but have a look
-
Aidan reacted to diggerjames in Project C1-4x6
Evening all another update another full day in the workshop still loads to do yet but the pile of bits is getting smaller
-
-
Aidan reacted to the showman in The Trachorse Story And Build
The next day i spent a while working out how i could operate the gearstick from the front. looking at the gearbox / front axle i noticed that it was held on with u bolts, simple all i had to do was turn the engine and transmission around the other way, so the next 4 photos so the progress
-
Aidan reacted to the showman in The Trachorse Story And Build
once the skip was of i just had to have another drive round before i backed it up the drive, the first photo shows where i think the seat will fit, the next shows my daughter trying out leg room, next engine cover off and the last shows the gearstick sticking out the front.
all this was done on the same day august 8th 2009
-
Aidan reacted to the showman in The Trachorse Story And Build
This project was something I had in my head for a while. Being a lover of Wheelhorse's and tracked vehicles having driven diggers and alike for years, I looked at a few MG's but didn't like the metal tracks
One day a friend gave me a Wheelhorse A 90, it came from a school and had a seized engine and had been partly dismantled to stop the children playing with it, this started me thinking, all I had to do was find something on rubber tracks, narrow enough to go through a garden gate and have forward and reverse gears rather than hydromatic.
-
Aidan reacted to the showman in Home Built Wheel Horse 654/ 704
Make your own rear fenders Ewan, i made some for a Trojan I restored ( thread on here somewhere) I'll dig the photos out for you and load them when my internet has been repaired, its easy and cheap.
you need a spare wheel well from a scrap car ( boot floor ) i used a vauxhall vectra , i can make you a cardboard template from the rowcrop that has the rear fender kit on, just mark them out and cut them to size
-
Aidan reacted to Cub Cadet in Home Built Wheel Horse 654/ 704
Thanks Neil!, That looks awesome! I like the use of the raider fender support thingy as a front bumper. Its been a while since I restored the C-121 that I bought from you and have been itching to get another Wheel Horse, I'm currently trying to source some fenders and then the next task will be to make a rolling chassis, need to narrow some wheels first
-
Aidan reacted to neil in Home Built Wheel Horse 654/ 704
i was in the same situation as you Ewan , I wanted to have a round hood but they were rarer than hens teeth here in UK so I desided to build my own using the frame from my old commando 8 shown below , I had a hood stand ,fuel tank and other parts shipped over from US but most of the parts you have will already work for what you are trying to do .
sadly I never got round to finishing the round hood and is now in bits in my work shop , Mabe one day I will get round to finishing it.
good luck with your project
-
Aidan reacted to WestwoodGazelle in Ride ons.. what to do??
Hi Aidan, nice collection there! I really like the old MTD Lawnflite, always thought they had a really cool look.
-
 Aidan got a reaction from WestwoodGazelle in Ride ons.. what to do??
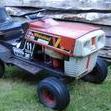
I am new to all this and have aquired a few different old mowers over the past few years. Ill post some pics of them and you can tell me what you think and if you have suggestions id love to hear them. P.s the names Aidan
-
Aidan reacted to Ian in Honda MadTrax V Twin Quad.. Nearly Finished.. Woo Hoo
Not a great deal to report as I've not been up the workshop apart from a few hours Friday where my body needed a break from all the festive sitting around!
Trying to follow a wiring diagram on a smart phone (printer out of ink) was interesting but I did manage to remove a few more un-needed wires from the loom...
It's starting to look less frightening now
Just before silly season hit I pulled the gauges out of a box to finish them off..
The glass "eyebrow"/top/bit that actually holds the gauges in (the pods were make from ride on mower headlamps remember) needed a little something to stop them from flying apart during high speed jumps/crashes (delete according to taste/fear/bravery).
A bit hard to see from this photo snatched from video footage, but there is a small Allen key bolt that screws through a hole in the lip thingy into a threaded insert welded to the pod body.
Gauge pod body's and trim/eyebrow top ring thingys hit with the black stuff..
To finish this update off here's the latest MadTrax video where I play around some more with special effects and a few sound effects as well..
I even do some work on MadTrax
-
Aidan reacted to Ian in Honda MadTrax V Twin Quad.. Nearly Finished.. Woo Hoo
Yesterday was spent cleaning and painting the engine.. Once the radiator and mountings plus the carbs were off the engine looked a lot smaller..
And a lot cleaner after lots of time with wire brushes on a drill
Parts like the fan shroud were very rusty..
But after a lot of cleaning, priming and top coating it looked good along with the radiator..
And the radiator/front engine mount thingy.
The engine looks quite good too
-
Aidan reacted to Ian in Honda MadTrax V Twin Quad.. Nearly Finished.. Woo Hoo
Thanks to Nigel I now have a nice pair of Spax adjustable coil over shocks...
Shorten the springs a little bit and some new top mounts on the frame and they should work
-
Aidan reacted to Ian in Honda MadTrax V Twin Quad.. Nearly Finished.. Woo Hoo
Morning all, after a short break from MadTrax to build the camera panning jig thingy I'm back on the case now..
With the frame painted it's time to start on the smaller parts, starting with these nice crusty A arms..
After thinking for a while I decided the best way to clean the crud off was to use one of these.......
Well, use a Hoover as dust extraction for my blasting cabinet
Unfortunately, due to the cabinet beings so small and bad arthritis in my shoulders the pain got too much after just a min's use, so I had to clean the A arms up the old fashioned way with a wire cup brush on the grinder!
The very shot ball joints in the upper A arms came out without to much of a fight..
The lower ball joints however refuse to come out despite plenty of WD40 and huge amounts of pressure in the vice.. I think I'm going to have to grind the base of the ball joints away and try and bash them up through the A arm rather than down as normally would be done.. I'm sure my 12 ton hydraulic press is going to some in handy
Four (mostly) cleaned up A arms waiting a few mods..
With the A arms having quite a bit of rust pitting I don't 100% trust the strength of them especially as they will have to cope with a lot more power and forces.... So template time it was.
Which turned into a couple of these..
One of which fit's in here..
I didn't like the look of the inside straight bit, so something had to be found I could draw around to give a nice gentle curve.
You can also see the lip welded to the underside of the strengthening plate to er... Strengthen it
Fully welded up and hit with some Red Oxide.... I think they should be strong enough now and will hardly notice after a coat or two of satin black
And so onto the lower A arms.......
-
Aidan reacted to Ian in Honda MadTrax V Twin Quad.. Nearly Finished.. Woo Hoo
If there was more than one Nigel I'd never get anything done
Thanks Norm.. A bit more of the same in the next video with a splash of "how did he do that?"
The strip down continues..
Right side A arms and hub.
Left side and rear shock... Quite amazingly I have had no problems getting any bolts out, a few were very tight to say the least, I think only 2 small ones have broken and they only held the original bodywork on anyways so they are not needed now.
Lot's of welding has been happening, you may remember the sump/engine guard mounting brackets that I couldn't weld on upside down..
Ground back... Ok, this is a different bracket but you get the idea
And fully zapped up.. It ain't gonna move now
Speaking of welding, you will now see why I didn't want to get the engine running before fully welding the frame up... Lot's of bit's to weld that just couldn't be done with the engine in!
There has only been two bolts that were a right pain to get out, but that was only because I didn't have the right tool was the swing arm bolts with "big ar$e" 17mm Allen key bolts!
But yesterday I was able to borrow the right tool, a 17mm Allen key thingy that fits on a ratchet (Thanks Karl) and after a lot of force that bolts freed up with a loud crack..
Of course the swing arm bearings are shot..
An almost naked frame.. The sump guard is doing a great job of keeping the frame steady on the bench
-
Aidan reacted to Ian in Honda MadTrax V Twin Quad.. Nearly Finished.. Woo Hoo
The foot peg mounts needed some strengthening.. They won't move now but I will add a bit more strength underneath.
Due to the engine being offset to the left, the frame rails are not the same which meant the left side foot peg stuck out a bit more than the other side..
Chopped..
Push the ends together..
And weld it up.. I have welded the joins inside as well.
With the foot pegs now sticking out the same amount both sides I needed to think about something to stop me running over my own legs with the rear wheels...
So more recycling, some steel mesh and a mower handle.. The section of small louvers I will use later..
I needed to bend a couple of slight but long bends in the tube (mower handle now swapped out for a better one which also turned out to be Honda.. In keeping eh ).
Running it over with the quad and even my Gt-14 didn't work, so something heavier was needed..
Please note Nigel busy eating to add to the weight
I'm sure there was a length of tube there a second ago
I think Nigel's truck did the bending trick
As it turned out we decided not to use the long bends in the end and went for something shorter.
Mostly welded on each side. The photo's do make the angles look a bit strange.. The tube heads towards the wheel before bending up..
It's hard to tell but I think they both look the same each side..
Once some steel mesh is welded in the feet shouldn't go through.
And that's this thread up to date again..
-
Aidan reacted to Ian in Honda MadTrax V Twin Quad.. Nearly Finished.. Woo Hoo
Making the head lamp bowls 1 1/2 inches longer has been fun, here's the second one after tack welding.
And the first one part way through having the welds cleaned up..
As well as a temperature gauge the pod on the right will have a couple of warning lights fitted.. Neutral and low oil.
Only balanced in place here, but the shape and look of them do make me grin
-
Aidan reacted to Ian in Honda MadTrax V Twin Quad.. Nearly Finished.. Woo Hoo
Evening all a bit of a MadTrax update for you..
The coils, regulator etc have been mounted under the gas tank, you might say space was tight! Photo's to come when I remember to take some
To make enough space to get the ignition barrel in the right place and to stop my thumbs being crushed between the bar and the gas tank I made this handle bar riser thing..
The riser thingy in place.
While in the handle bar area I thought I should have a look at getting a rev counter, temp gauge and a couple of warning lights mounted.
With a bit of trimming of the mounting plate the temp gauge shrunk a bit in size.
Some thick-ish flat steel was needed so I decided it was time the last remaining part of my first Mig welder found a use.. I do have plans for the louvers
Not a bad fit..
The plan was to mount the temp gauge in a box, I even started to mark out the sheet to do so..
Then Nigel asked if I had thought of fitting the gauges in tube?
Not a bad idea I though and went of the search for a couple of big enough bit's of steel tube..
It was at that point that I found a pair of Gutbrod headlamps that have a rather nice shape to them.
Who would of thought a Honda rev counter would be such a good fit in a Gutbrod headlamp!!!
I just need to make them a bit longer