I had a chance at a cool speed boat with an O&R back when is was in MN. The guy wanted just a bit more than I could spend at the time but I’ve been kicking myself ever since. It was in great condition and complete. Had a nice metallic paint job from the 1960s and everything. Maybe one of these days I’ll see if I can get back in touch with him to see if he sold it. Now it’ll cost an arm and a leg to have it shipped. It was a 54” long c 18”
Just heard back from Eric. He’s up for making us some gaskets, just need to send the NOS gaskets along with the materials. I mentioned to him we’re also looking into the cylinder head gaskets once we identify some good material.
I found this site and it looks like they carry a few styles in smaller sheets. Might be worth getting a couple to 15x15” pieces to evaluate. They have at least 4 styles that seem comparable.
Unfortunately I’m not finding anyone that sells the Flexseals FMI 280 gasket material in the 0.03 range. Seams 1/16 or 1/8” are the common thicknesses for that one.
I did find this other material from Thermoseal (C-4401) that might be a candidate and it’s more readily available in 1/32”.
Just took a peak at the parchment baking paper soaking in the gas and so far no visual changes. I’m going to leave it in there for a couple more days. I may also try to remove it and heat it gently just to see if it reacts at temperature after soaking in gas (I’ll do it over a bucket of water)...
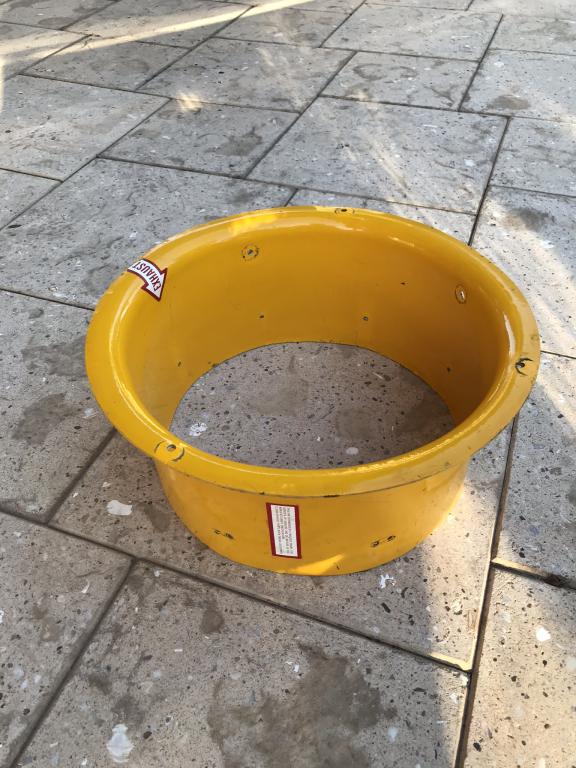
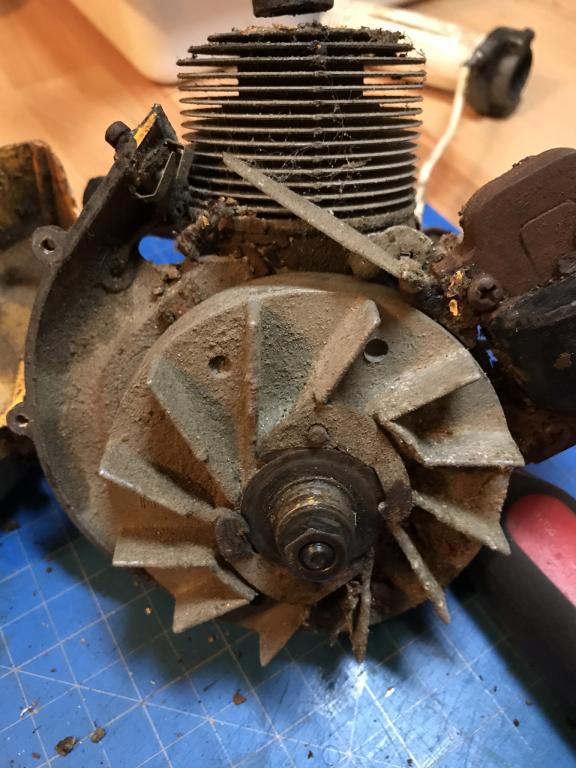
I’m afraid this is about as clean as this shroud is going to get without messing up the paint. If it was metal I might go after it a bit more but seeing it’s fiberglass I’m going to play it safe.
I’ve got a small piece of parchment paper and the vegetable fiber gasket material soaking in some gas/oil mix. I’ll check it periodically to see what happens.
Looks like we might be able to get the vegetable fiber/detroiter gasket material in the right thickness. They have some that is 1/200”. Not sure yet if this place will sell direct to individuals but I’ll try sending them a note.
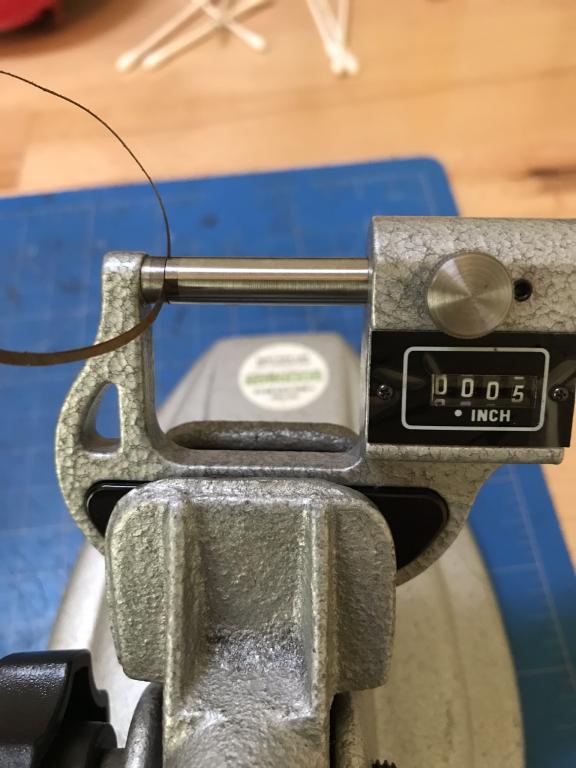
Ok, did some quick measurements. The used gasket was anywhere from 0.004-0.005”, kind of a tricky one to measure. Not sure but a new gasket might be closer to 0.003-0.004” since it’s dry and hasn’t been exposed to gas and oil.
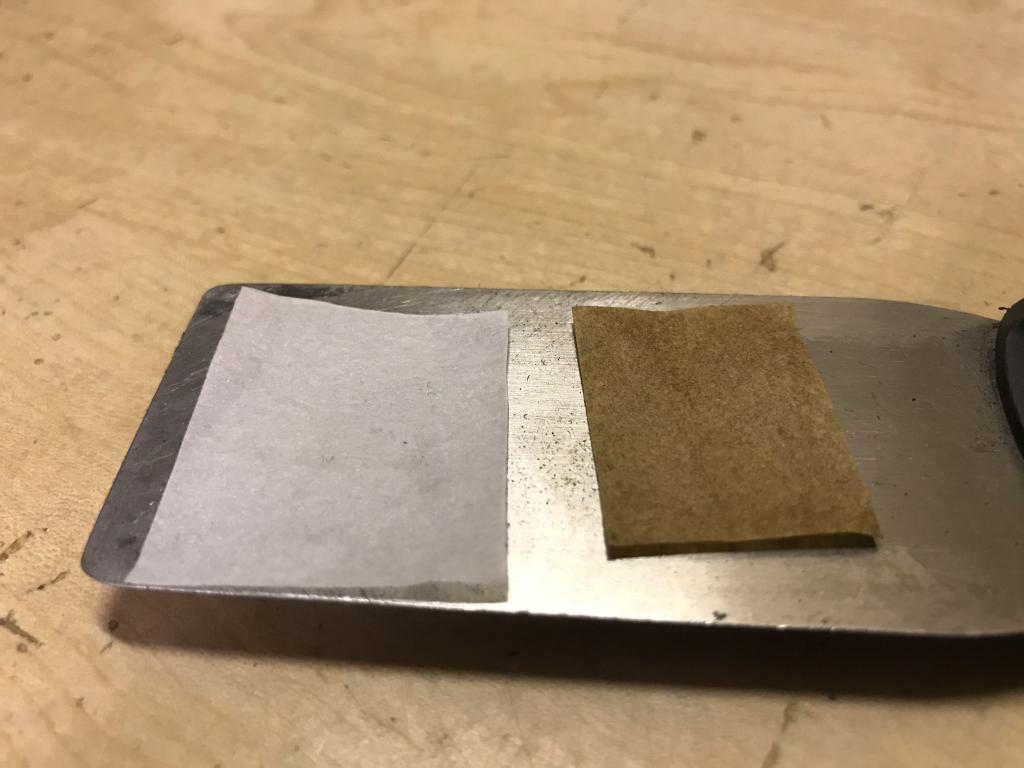
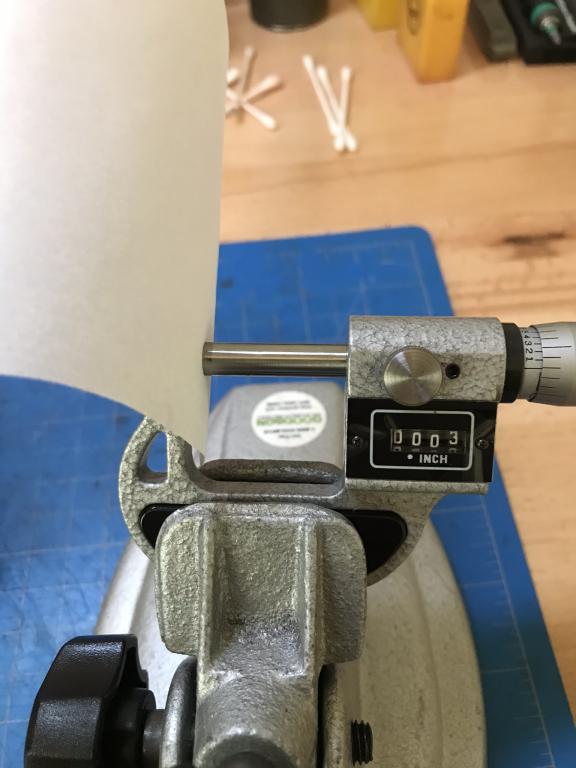
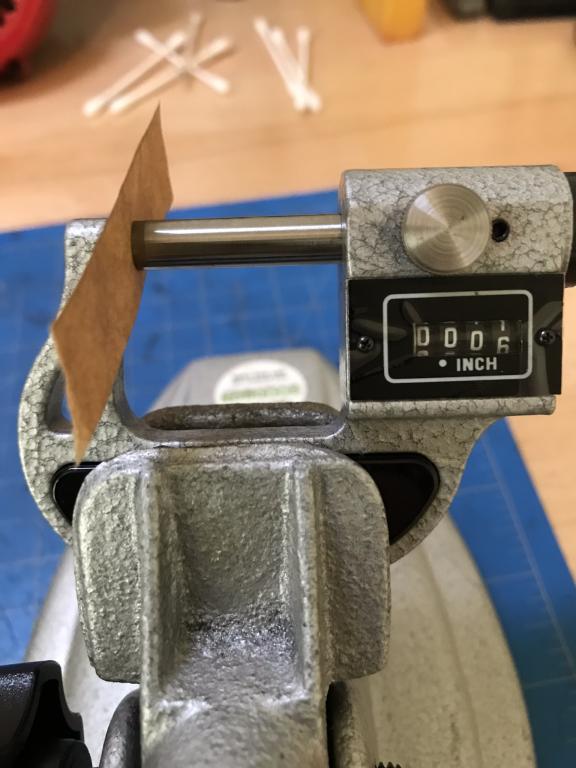
The Parchment paper I have is 0.003 and the vegetable paper gasket is 0.006 as advertised.
Funny thing is there is a thin brown oily piece of paper packed with each of my micrometers to help prevent rust and corrosion. It’s exactly the right thickness...
Parchment paper is an interesting idea. Yeah, that one gasket is just so dang small. By the way that one tore when I opened up the engine on the fan...
I’ll look to see if we have some parchment paper here - if so I’ll measure it this afternoon and we can decide. I wonder how stable it would be to gas and oil? Should we soak a piece in gas for a couple days to see what happens? I don’t mind coordinating with Eric since I’ll need to cut more sheets of the 0.006” material anyway.
I think this cable will work ok. I’m going to try some white heat shrink at the kink where the cable exits the grip to see if that helps tidy it up a little.
Whatever this was used for the crap it was sucking and blowing was nasty and corrosives!
Started doing some cleaning on the parts. Wow, not sure what got splattered all over the main fan shroud but it is glued to it like tar. It’s taking some serious elbow grease but I think I’ll be able to get it to a presentable state. This black gunk stuff also stained the paint a little. It won’t be perfect when I’m done but I’ll get it looking nice.


Water cooled glow engine
in Ohlsson and Rice
Posted
I had a chance at a cool speed boat with an O&R back when is was in MN. The guy wanted just a bit more than I could spend at the time but I’ve been kicking myself ever since. It was in great condition and complete. Had a nice metallic paint job from the 1960s and everything. Maybe one of these days I’ll see if I can get back in touch with him to see if he sold it. Now it’ll cost an arm and a leg to have it shipped. It was a 54” long c 18”
wide boat. Live and learn...