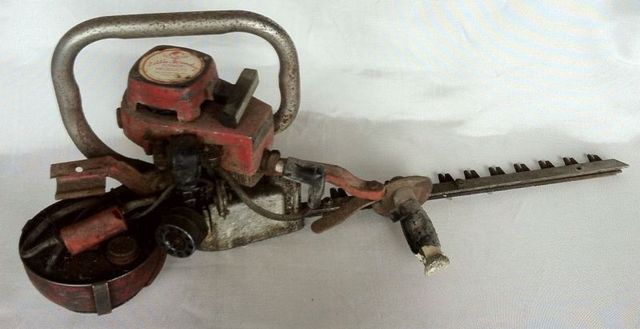
I think that's an eyebolt in whatever the hedge trimmer is resting on, John.
Don't think those are maggots, Koen, unless something dead is in there. Moth or butterfly larvae maybe.
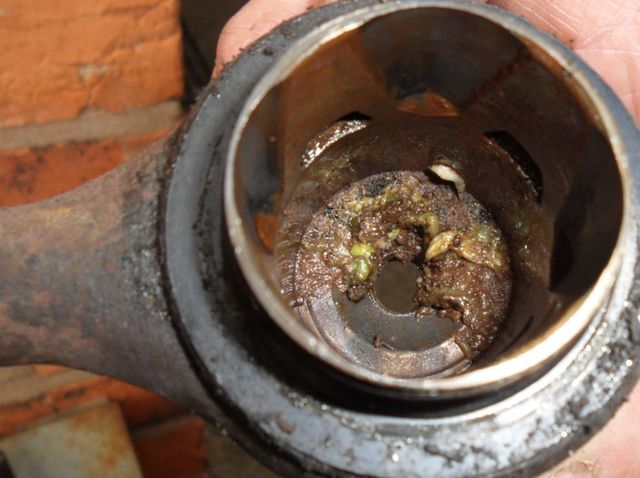
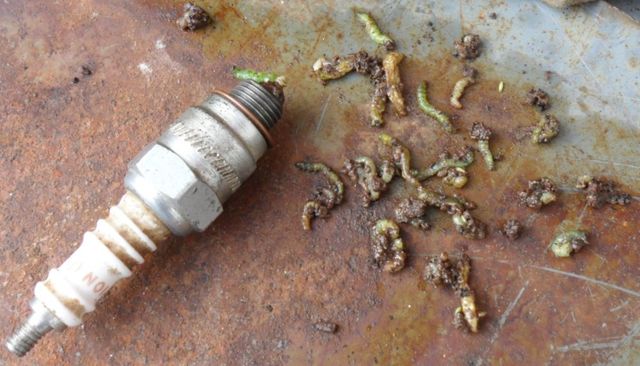
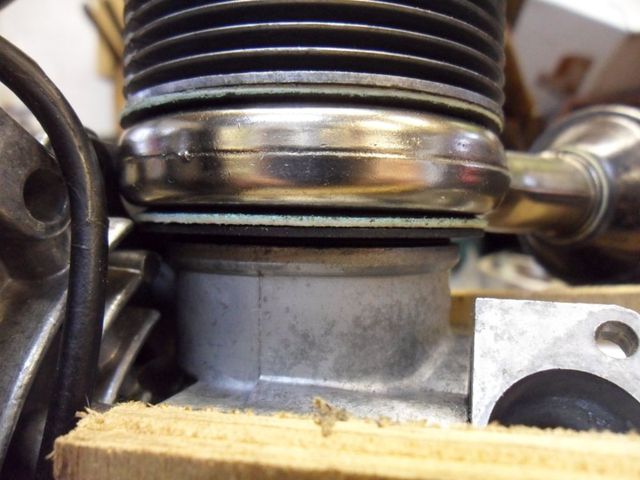
I was surprised finding them in there, it just looked like a bit of mud or dirt had got in through the spark plug hole before I removed the cylinder.
And as I thought it was seized I poured a little oil & left it overnight, which is why they are discoloured. Here is another picture of a couple more and the mess they made of the spark plug I fitted!
From Wallfish "Haven't seen that exact style of trimmer before. The handles are a bit more crude than the newer style so that's also an early model. Also appears the top handle can be moved to mount horizontal behind the gearbox which is something I've never seen"
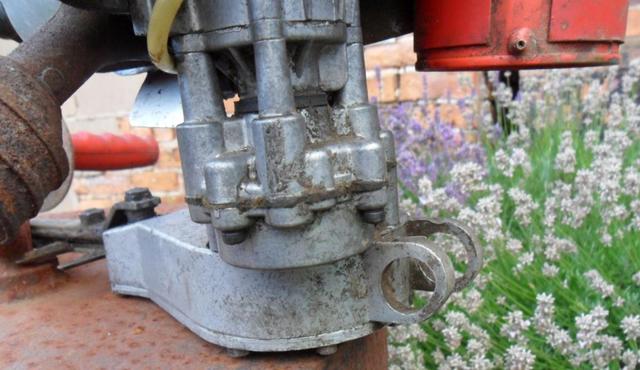
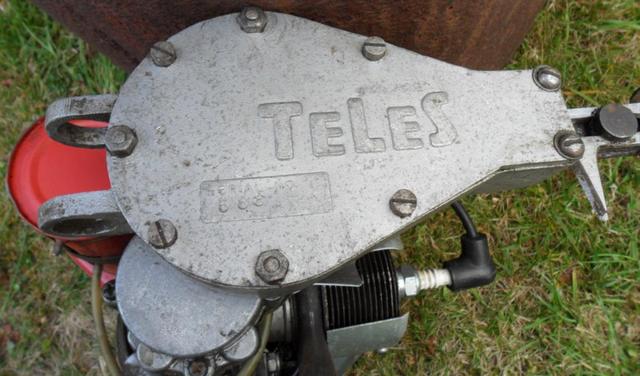
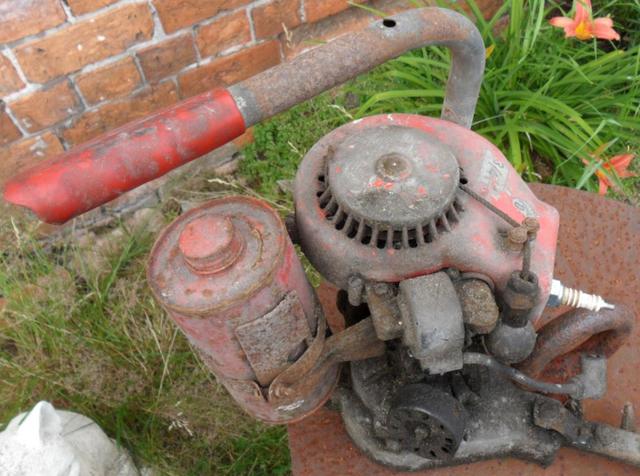
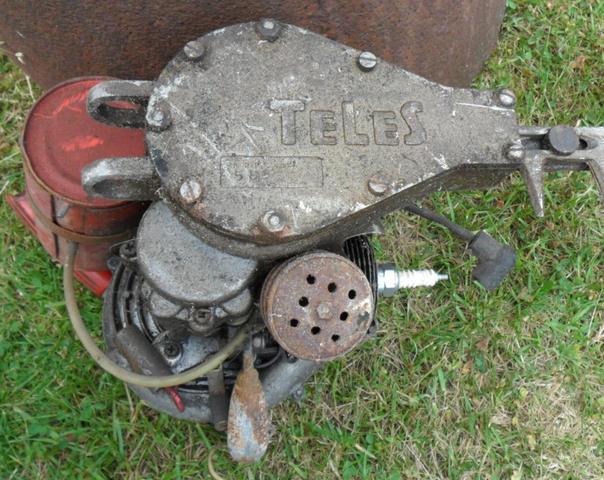
I have recently acquired one, it is very similar to the Orline hedge trimmer but with extra mounting holes at the back of the gearbox, the top handle cannot be fitted there though as its bolts to the engine and also contains the stop switch. The Teles name is cast as raised letters into the bottom cover.
Here are some pictures of before cleaning.
The spark plug was missing when acquired and the engine appeared to be stuck, lucky this turned out to be the magneto coil being stuck to the flywheel magnets. I also had to remove the cylinder to evict some livestock! Anyone know what they are?
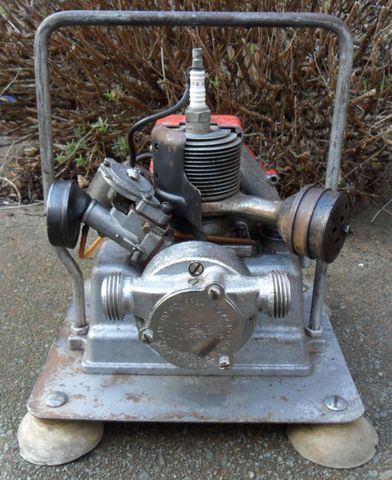
Just dug this out from John's stash. Have been trying to see what the engine was for years, but buried too deep. Now I know.
A hand push sprayer with the engine driving a small pump. The two spray arms rotate to the horizontal position. Looks complete apart from a petrol tank.
It does have the petrol tank, the base under the engine is the tank.
I agree keep it together, there can't be many of these left due to its size, its certainly the first O&R with a pump that I've seen in the UK, the pump I have was bought from the US.
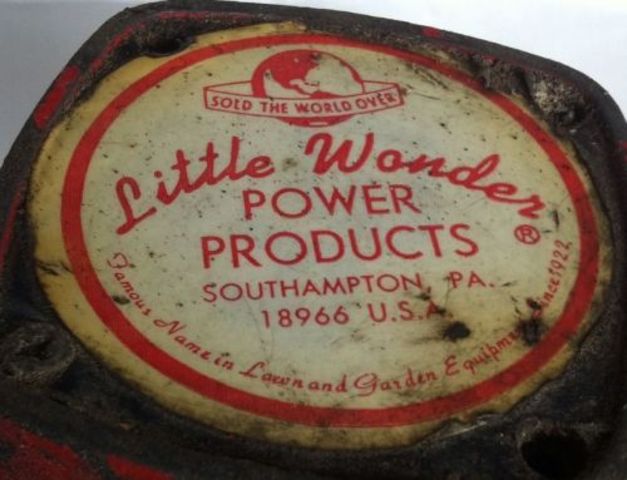
Yours looks like a Little Wonder version to me, the Webb ones are relabelled with a UK address on the sticker as shown below on mine.
Unfortunately its very faded so I can't read all of it: Webb Lawnmowers Ltd and the address should be Tame Road, Witton, Birmingham. The logo is the same as this from a lawnmower booklet.
I also have a Little Wonder version with the later 13B engine.
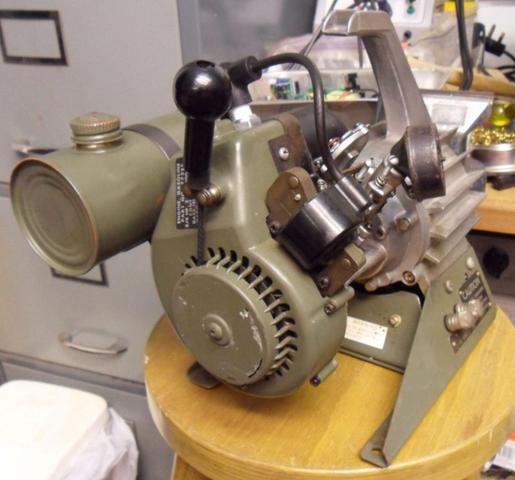
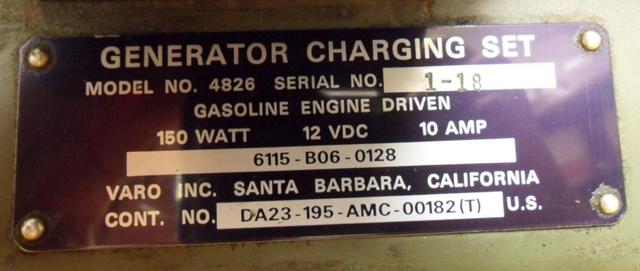
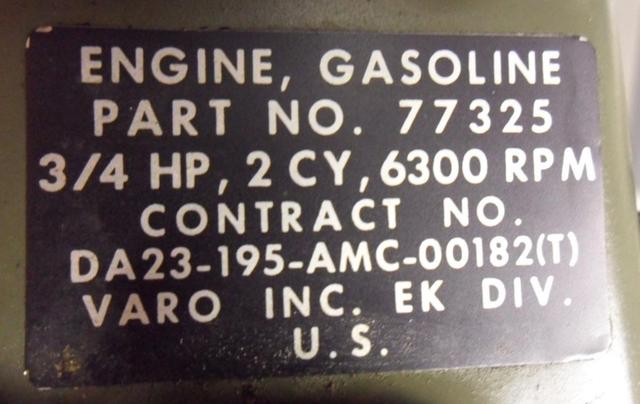
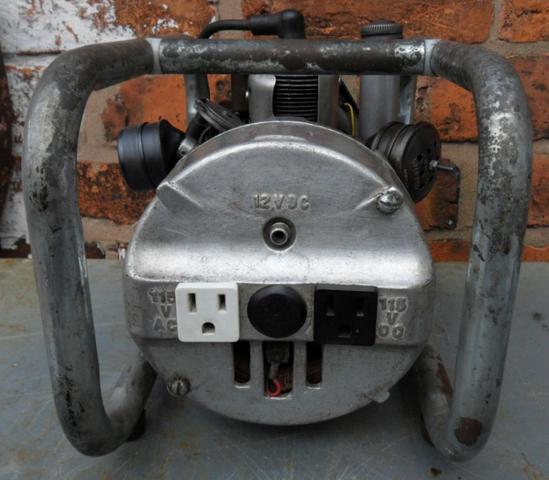
Here another Champ that I have added to my collection, its a 12V only version made for the US military. Unusually the engine serial number has been ground off, I don't know if all the ex-military ones were.
Since taking the pictures I have removed the incorrectly fitted NGK long-reach spark-plug and fitted a Champion UY6, this isn't the first time I've had a seller fit a new plug of the wrong type just before they shipped it.
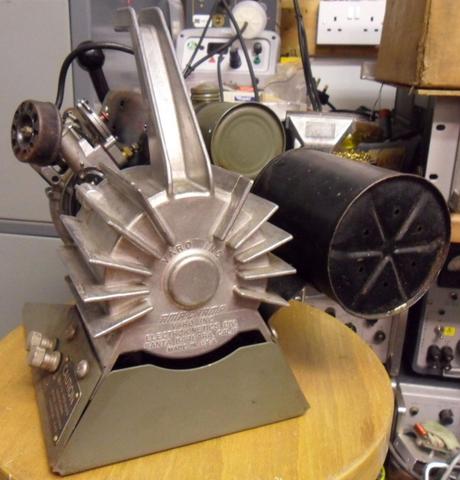
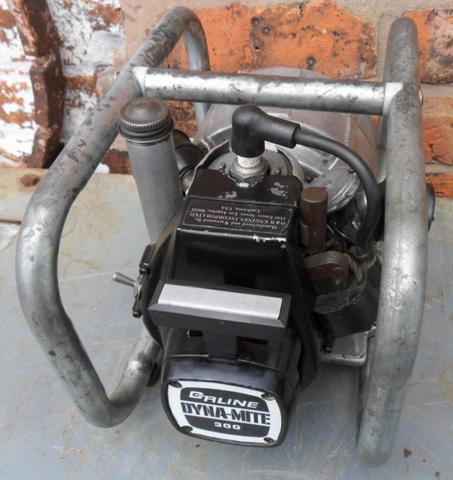
There was a Chicken Power sold last year with a 13B engine that also had no primer button, which I also thought was wrong until I had a look at the manual posted here: http://myoldmachine.com/topic/1452-chicken-power-manual/ , no primer button & no mention of it in the instructions.
Perhaps my carb was originally on a Chicken Power, as the other two Dyna-Mite generators I have seen definitely had the primer button.
It is also a good idea to pour a small amount of oil into the cylinder through the spark-plug hole before storage. Distribute the oil by pulling the starter rope slowly, with the engine held at various angles. This is recommended in the challenger chainsaw manual.
One of the already restored engines I bought, ended up with a struck piston presumably from storage without oil. Some oil left to soak in the cylinder over a few days freed it up OK though.
There are contact cleaners/lubricants available that claim to prevent corrosion, although I don't know how long they last.
The O-rings I bought for the cylinder are made from Nitrile rubber, which is generally resistant to oils & fuels, the disposable gloves I use at work are also made from Nitrile rubber for the same reason.
According to wikipedia the higher the oil resistance, the less flexible it is.
The shaft diameters are different for early & late engines, I haven't actually changed any of these seals yet. But I intend to find out what is available locally, as I have an early engine with all the seals & gaskets missing.
Its usually obvious if they have been run without removing the foam, bits of it are usually stuck to the inside of the carb intake & can be seen in the reed assembly in you remove the carb.
The carb diaphragm should be flexible, they are usually stiff & need replacing, although engines that were never run from new may still have a flexible diaphragm.
I had to remove the crankshaft to remove the damaged key, These early engines aren't as bad to strip down as the later ones though, the bearings don't escape as easily. I will need to made to a custom flywheel key for this engine, as it needs one smaller than the original but bigger than the later one.
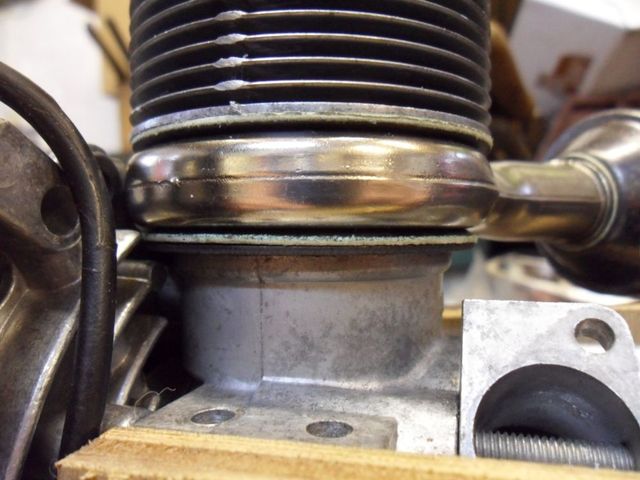
The cylinder was all the way in before I started the repair of this engine, as can be seen in this picture.
This is as far as I can get the cylinder with the .105" O-ring, the gaskets were made from Klingersil C-4324 1/32" that I bought at a local engine show last year.
I bought some O-rings the next size down at .079" (2mm) earlier this week, I managed to get the cylinder all the way down, but the cylinder tool T-bar got bent in the process.
The engine will have to be stripped down again though, as it has lost spark. This is due to me fitting a later aluminium flywheel key when I replaced the flywheel with a later one. The flywheel must have turned when tightened. The key slot is deeper than the later crankshaft & the damaged key is now stuck.
Thanks for measuring an original, the ones I have are about .105".
It's for the early engine from the Petro pump, the part no (33-2) used is the same from 1962 to 1972, maybe my home-made exhaust gaskets are slightly too thick, or perhaps the modern O rings don't crush enough. O rings are available in lots of different thickness on ebay, should I try some slightly smaller?
Does anyone know the correct thickness of the original cylinder O rings?
I have a box of assorted O rings but the larger diameter ones seem to be too thick and the cylinder won't screw down far enough to allow the starter cover to fit.
Don't forget to remove at traces of the original air filter foam, which always crumbles to bits. If an engine is run without removing the filter foam, it would get sucked into the engine and a complete engine strip down, clean & rebuild would be needed.
Both Webhead & Wallfish on here have spares for these engines should anything be missing or damaged.
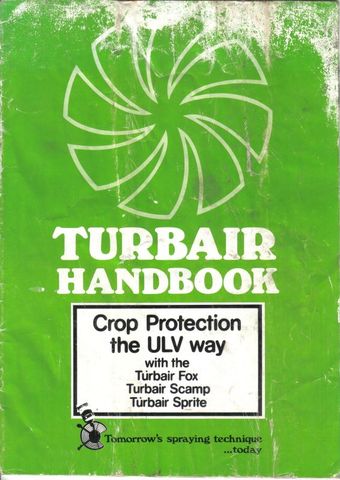
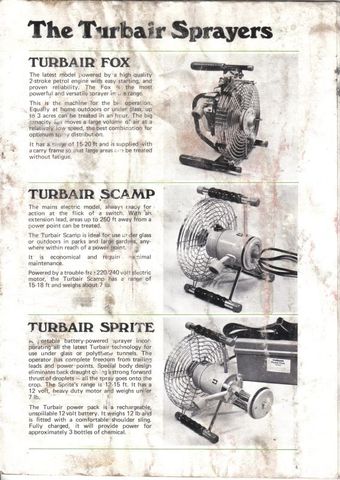
Here are some scans of the later Turbair Handbook with should help you with finding one of the plastic chemical bottles. The book must date from before 1984, as DDT was banned in the UK then. One bottle (1.14 litres/1 quart) lasts for about 20 minutes use.
I also did a bit of research and found out that the electric version is still being made, it is sold as the Electrafan in the UK by Micron and as the Turbair Electrafan in the US by Dramm The new ones seem to come with an empty bottle (may be different size) but I can't find anywhere that sells new spare bottles.
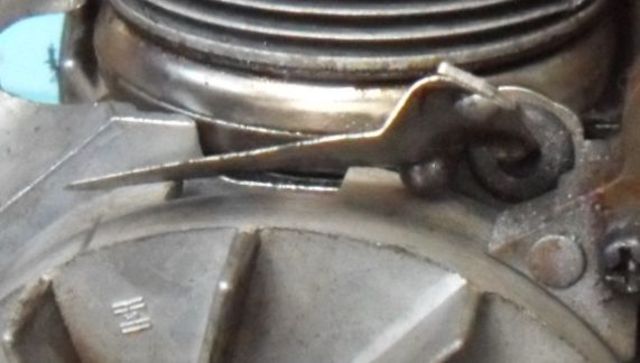
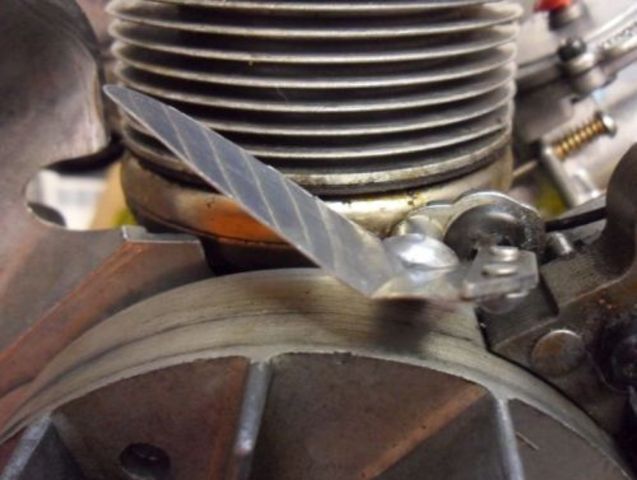
I had governor vane trouble with the first engine I repaired, it kept vibrating loose out of the butterfly valve on the carb, resulting in in the engine over-speeding.
The engine got put to one side until I joined the previous forum last year, after posting about it I compared the vane to one borrowed from another engine (damaged vane on the left).
The cause turned out to be governor vane shaft being bent & the vane having an extra bend. The incorrectly bent vane section had also been in contact with the flywheel.
After straightening it to match the borrowed one, the engine ran without the vane falling out.
I also have two outboard motors which a previous owner had removed the vanes, I don't know why they removed them. Luckily they were found in the tin of bits that came with them.
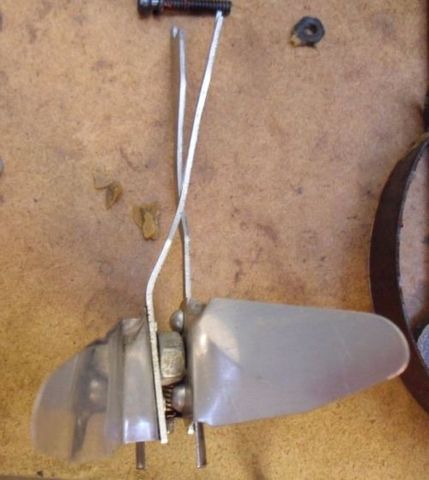
The chemicals are gravity feed from a bottle, in use it would have been held by the two foam handles with the engine upside down.
I have a handbook for the later Turbair Fox version (not O&R powered) and two electric versions the Scamp & Sprite. Will try and scan a few pages at the weekend.
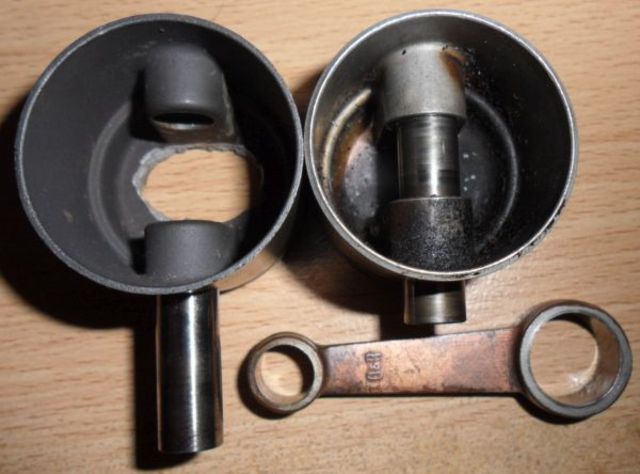
Finally got round to measuring the gudgeon/wrist pin, the size is 0.312" I guess O&R used a standard 5/16" rod the make these. The later one measures 0.317".
The picture shows the damaged piston together with a later one.


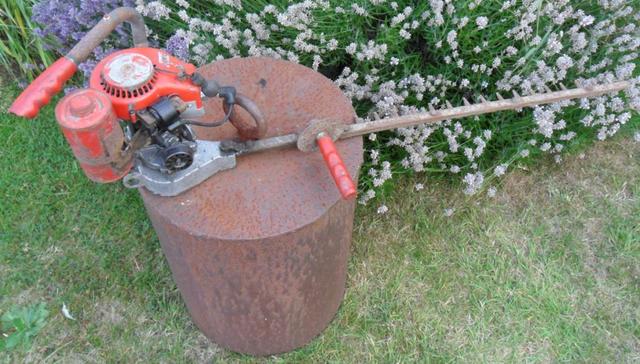


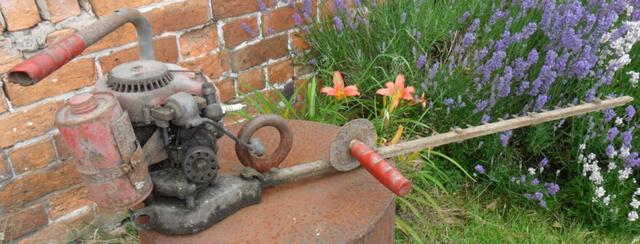
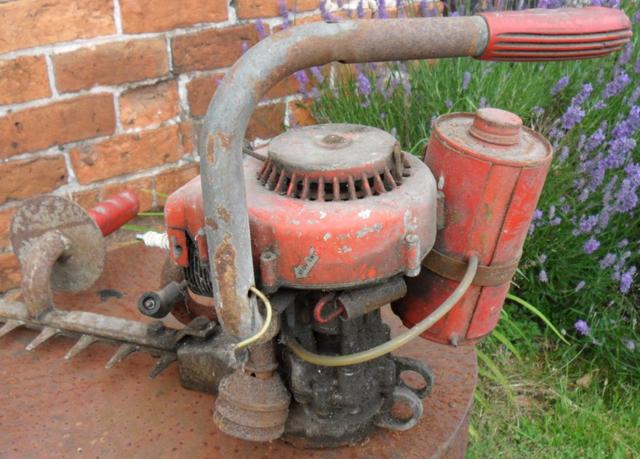


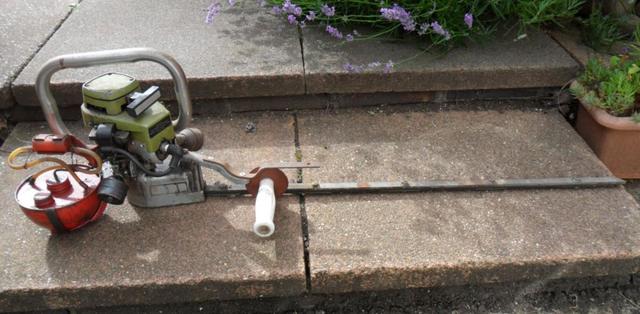


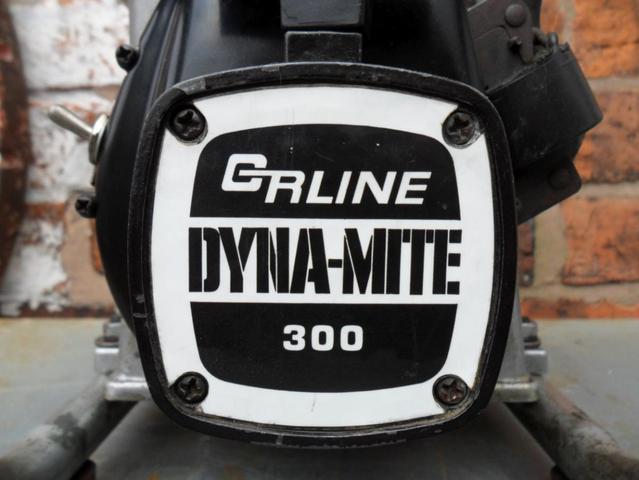


Teles Clipper Hedge Trimmer
in Ohlsson and Rice
Posted
I was surprised finding them in there, it just looked like a bit of mud or dirt had got in through the spark plug hole before I removed the cylinder.
And as I thought it was seized I poured a little oil & left it overnight, which is why they are discoloured. Here is another picture of a couple more and the mess they made of the spark plug I fitted!
David