

Cub Cadet
-
Content Count
483 -
Joined
-
Last visited
-
Days Won
21
Reputation Activity
-


-
 Cub Cadet reacted to Anglo Traction in A Mystery Roaring Twenties Refurb.......hopefully!
Hi Ray, Afraid I never heard of it . A bit ignorant of the various products floating around these days. I'm rather suspicious of the old 'Snake Oil' type claims for them, but in reality they turn out to be basic compounds or chemicals that you can buy and apply for very little. That stuff is not cheap.
I tend to be content with processes that may take longer, but cost very little. Electrolysis for example.
A good example Ewan. just a few other different ingredients so they can claim it's their own unique concoction, as you say a bag of citric is obtainable from places like Wilko's .
I admit to using a rust converter (trustan and kurust) if I can't get it all off.
The Exhaust is done. Surprised myself after patiently tacking and building weld bridges and joining up using 1.6mm rods. Very few spots made it through the thin wall of the neck-
Had to break the old spring washer from the captive end cover and replace it with a wide thick copper washer cut and opened to fit onto the rod, then silver soldered the joint.
Didn't need to add a seam of weld on the riveted joint, it's good and gas tight. finished it with several coats of BBQ paint.
Rubbed it down in between coats and then finally burning it clean with a gas torch to dull red heat-
It will do and should last long time !.
Not much progress, as still making odd bits not worth mentioning and prepping for paint. The all important original seat actually cleaned up well.
I was unsure how it would turn out with the level of corrosion. It still had traces of paint and or primer which could be grey primer and white top coat.
Plan is for a light grey top coat until it can be confirmed what colour it was. Very few of these machines still around-
Hopefully will make significant assembly progress over the next week.
-
 Cub Cadet got a reaction from Anglo Traction in A Mystery Roaring Twenties Refurb.......hopefully!
I have used deox-c and it was brilliant, I then found out it is actually just citric acid and its much cheaper to just buy a bag of this online.
Great work Richard!
-
Cub Cadet reacted to Ian in Project Wheel-Vo... The Build has Finally Started!
Morning all, a long overdue update for you all...
I have been thinking about the suspension, but for a machine who's main roll in life will be to smoke the rear tyres/tires away, I'm not 100% sure it's going to be needed.
with the low height I need there also wouldn't be any real suspension travel, maybe 2-3 inches!
Also no suspension would make the build a tad easier!!
My current thinking is something I saw on a racing mower which I am told works very well and saves a lot of back pain!!
From the front it's hard to spot..
A bit of a give away at the back though
Anyway, I'm not quite at that point in the build yet, but not the far off..... Yes work has finally started on Project Wheel-Vo
I havn't quite finished my MadTrax quad build yet, but I had got to the point where I needed a few bits to finish it but no cash to buy them.. (Ordered this morning by the way)
But MadTrax had reached the point where it could come off the bench... And as the bench was empty of course I needed something to put on it
Engine, trans, a few wheels and the bonnet plonked in place..
Although the look is rather grin worthy, there are a few problems such as the bonnet is too short, too wide, and not long enough to not onlt fit over the engine but also cover the radiator, intercooler and tran oil cooler!
Sooo best add 12 inches to the length and 4 inches to the width..
At this point I am not sorting the bodywork out, I just need to stretch things a little until Wheel-Vo looks right hence all the random bit of tube and box holding the bonet together..
The fender pan got a bit of a stretch as well..
"Now with an added Nigel" to help you work out the scale..
This is a good point to drop in a video as it kinda covers all of the above.
What it doesn't cover is the fender pan getting lengthened a bit..
Seeing the fender pan just resting on the top of the tyres was bugging me, so to get it to stay in the right place and height it gained some legs..
Only one thing for it... Get the ladder out and climb aboard to see how it feels..
The view down the bigger bonnet from the seat is amazing.. You will see it in the next video..
Yes the seating postion looks a bit high, the middle of the fender pan will be chopped out and lowered to get the seat and my vast weight lower..
A couple more pic's without the fat bloke...
And that's as far as the build has got, the next job is to copy the fender pans lead and makes some legs/stands to hold the engine/trans in the right place and screw it down to the bench.
I still need to tweak the panels around a bit, but I'm not that far off of thinking about the chassis..
-
Cub Cadet reacted to Ian in Honda MadTrax V Twin Quad.. Nearly Finished.. Woo Hoo
Thanks Richard, the tank isn't perfect but I'm quite happy with how it looks..
Not much to report, since the below pic's were taken the exhaust has been painted, wrapped to tray and keep the heat in.. Oh, and installed
The final bit's of wiring have been done..
Clutch, rev counter, choke and throttle cables installed..
Rear drive shaft joints have been greased up and the gators fitted.
A front gator was replaced as it had split..
One brake pipe moved as it was rubbing on a rear wheel!
Jobs left to do..
Move a brake pipe as its hitting the exhaust!
Make and install a chain guard so no body parts are sucked in and chewed up...
Finish making a lid for the battery box..
Check oils.
Fill the cooling system..
Put some petrol in the tank.
Connect the battery..
Turn the key..
Hit the start button and see what happens..
If all goes well, then make a quick video followed by putting MadTrax up for sale...
It's been a fun project, but the time has come to move on the the next mad project.... Oh, and the money from the sale wouldn't hurt
Anyway, have some pic's
The AA van wasn't anything to do with MadTrax, I just thought the yellow would make some nice contrast in the photo
Oh.. I had to drop in the workshop Saturday only to find NIgel had given MadTrax the horn!!
-
Cub Cadet reacted to Ian in Honda MadTrax V Twin Quad.. Nearly Finished.. Woo Hoo
Morning all, well the MadTrax build (or should I say rebuild) has been flying.. Not quite finished yet but not far off
Lot's of parts have been painted and bolted back on to the frame..
A pile of painted parts..
The finish on the fuel tank isn't perfect, as is the way once the top coats go on you can see all the missed bits!!
But overall I'm happy with it..
I needed to do a few bit's before the O/S footrest thingy could be bolted back on, one such bit the the 90'd drive in the photo.
The big bolt sticking out the top is the breather.. The trouble is I'm running the unit upside down!
So the big bolt was replaced with something smaller and oil tight..
To stop the drive from blowing oil out through any/all the gaskets I needed to put a breather back in..
This bolt on the bottom (although it's now the top) goes through the casing, so it was drilled and tapped to fit a grease nipple.. The nipple was drilled out to remove the little ball bearing and spring thus making it a breathing nipple?? Handy for putting a bit of pipe on
Not much left to bolt now
To finish off this update, here's the latest video.. enjoy
-
Cub Cadet reacted to Ian in Honda MadTrax V Twin Quad.. Nearly Finished.. Woo Hoo
Hi Norm, I know which plastic toy snakes your talking about, the ones with lots and lots of bendy joints.. Used to have one a a kid.. And yes I see why the exhaust reminds you of one..
You were lucky with the adder, that could of hurt a bit!
Hi John, good to see you back... I'm also struggling to find forum time at the mo.. Why does life has to be so busy???
The finished product isn't too far away now as you will see.
Glad you liked the camera motion thingy, it's gets some more use in the next video
For a few days there wasn't anything I could do on MadTrax until the paint I had ordered turned up, so.....
I had a bit of a tidy and clean up in the lathe corner of the workshop.
The white doored paint cupboard came out from the corner behind the lathe and now lives in a place I can actually reach it.
The "lathe shelf" now looks a lot neater and emptier..
As most of the smaller tools now live in this labeled cabinet..
And to finish off the lathe got a much overdue clean up..
Finally last weekend my long awaited paint turned up, so Monday was paint the frame and engine day
Which made Tuesday "get the engine, transfer box and rear end in" day.. A bit thank you to Rob for all your help with this.. Ta muchly mate..
More parts bolted back on the frame, most of the front end..
A "few" freshly painted parts hanging about the place drying..
And that is where the rebuild has got to as of yesterday..
To finish off this update have a couple of videos..
Enjoy
-
Cub Cadet reacted to Ian in Honda MadTrax V Twin Quad.. Nearly Finished.. Woo Hoo
Thanks Norm
Morning all, more progress has been made which is a good thing..
A pile of cleaned and primered parts stashed under the bench waiting for a top coat..
The rest of the suspension components were buried under a bench behind the engine, so of course the engine had to come out..
Might as well plonk it on the bench and have a look..
After cleaning the engine didn't look too bad, only a small bit of paint has come off..
Unsure it needs repainting at this point.. Will have to think on it.
I also made a start sorting the radiator out..
As you can see a lot of fins need straightening out.. it's one of those jobs that gets done a bit at a time sitting at my desk with the heater blowing at me
The exhaust system has been cleaned up and any pin holes found (each section was pressurised to find any leaks) and welded up..
Just for a laugh I thought I'd bolt the exhaust on to the engine to have a look...
It looks rather mad
-
Cub Cadet reacted to Ian in Honda MadTrax V Twin Quad.. Nearly Finished.. Woo Hoo
With the tank and frame stored out the way I had some space on the bench to fill up with parts that need cleaning and painting.
A wire brush on a drill came in handy for cleaning off all the years of crud. It leaves a slightly bright but rough finish which should dull down with age.
The transfer box.
Front end.
Rear end complete with mounting brackets
A front suspension strut in need of a de-fur and clean up.
A fury front hub..
And a cleaned up rear hub
More wire brushing and painting..
At least the calipers clean up really well
And that folks is about where I'm up to at the mo with this build..
Silly season has left me a bit skint but hopefully I can get some paint next week and start getting this beast of a machine back together again..
-
Cub Cadet reacted to Ian in Honda MadTrax V Twin Quad.. Nearly Finished.. Woo Hoo
The time had come to sort out the only bit of bodywork on MadTrax, the fuel tank..
At some point I welded on an extension to the back of the tank so it filled a gap left below the seat..
Of course this all now needed to be tidied up, so que the body body filler!
Looking a bit rough here still..
Lots of fillering and sanding later I gave it a squirt of white primer as it's all I had that wasn't red oxide primer!
A careful rub down with 800 grade wet 'n' dry later the tank was then hit with 3 heavy red oxide coats...
Once the paint had fully hardened it was them flattened back with 1500 grade wet 'n' dry to get it ready for the top coats.
Carefully plonked on the frame along with the seat to have a look... Me likes
As it turned out the frame was the only "out of the way, nothing can get dropped on it" place I had to store the tank, so a sheet was put over to keep the dust at bay..
Yes I need to adjust the filler cap.
-
Cub Cadet reacted to Ian in Honda MadTrax V Twin Quad.. Nearly Finished.. Woo Hoo
Hi Guy's, sorry it's been a while since the last update..
Life has been a bit er.. busy.. And being "on call" for a month waiting for grandkid No 11 hasn't helped..
Anyway...
The frame now looks like this with all welding finally done (have I said that before?), and a coat of red oxide in the right places.. Yes the bit I missed at the front has been done
You may notice a few bit's of metal bolted to the frame..
The bit's of metal happen to be foot rests and anything that sticks through them or near them..
This is the O/S..
Now skinned with some strong steel mesh and given a squirt of the red stuff.
The N/S foot rest thingy taking shape, it also has to hold a a small guard so your legs can't get pulled in by the rotating driveshaft.. Never fun!
That should do the trick
A few parts have been cleaned up and given a coat of the red stuff.
This plate which bolts in the base of the frame to add some extra strength and protection has a lip welded on each end just to make sure it's strong enough for the job.
A couple of captive nuts welded in the top tube of the frame..
Yes I did re-weld the top nut once this photo was taken.
The captive nuts are for bolting this bracket on which also bolts to the top of the engine and is quite handy for holding up the coils
-
Cub Cadet reacted to Ian in Honda MadTrax V Twin Quad.. Nearly Finished.. Woo Hoo
Morning all, long time no update!
Progress has been rather slow, a lot slower than it should be, but life, illness and having a workshop full of wood tools (don't worry, I havn't given up on metal and turned to wood, most of the wood tools have gone now) has slowed things down.
Life on MadTrax has been grind, weld, grind, weld, chop some metal off, weld nwe stuff in, grind, weld..... you get the idea.
The frame has spent most of it's time on one side or the other and even upside down at times!
I think in this photo I was adding strentghening to one of the transfer box mounts on the frame.
A lot of my "earlier" welds on the frame were done before my Murex Mig welder had an overhaul and a new gun...
And it showed on the welds!
So a lot of time has been spent grinding out bad welds and replacing them with good welds like this.
The pressed steel rear suspension uprights had the outside boxed in a long time ago, the inside has been done now..
Cleaned up with a touch of red oxide..
You may remember this orrible bit of Quadzilla frame that was at the front..
Well, it has been cut out and replaced with some nice tube to match the rest of the frame.. Looks way better
A couple more views..
The engine guard has come in very handy when the frame is the right way up, it keeps the frame upright and makes it very easy to turn around on the bench..
That's all the photo's I have for now. I have slowly been working from the back forwards and have now reached the point where I just have to finish off bit's infront of where the engiine should be..
On the next build I will try and fully weld up everything as I go along... I've had to do so much "finishing" welding and grinding it's quite soul destroying!
-
Cub Cadet reacted to The Fife Plooman in Happy with my results 2019
Very happy with my results two firsts for my ploughing and my finish
-
Cub Cadet reacted to Rayp in A Mystery Roaring Twenties Refurb.......hopefully!
Hi Richard,
I just wondered if you had ever tried deox-c on small rusted parts like the silencer/muffler. I've found it is brilliant for converting rust even inside inaccessible parts and interior seams.
Ray
-
Cub Cadet reacted to Anglo Traction in A Mystery Roaring Twenties Refurb.......hopefully!
2nd Shaft was/is a headache. Lots of problems and have had to do the best I can. The boss that the 52t Sprocket is riveted to is fixed to the shaft by a pin.
This was sheared in 2 places, so I had to remove the old pieces and make a new one.
Strangely, it was nearer to 6mm than 1/4, so I reamed it to 6mm and made a new pin from silver steel and partly hardened.
Bearings were a mess inside as with the other ones-
This one has a cracked inner race, maybe even from when it was first fitted? -
Took an age to clean and flush these out until clean, but when packed with LM grease, they ran quite smoothly considering and they will have to do.
Rpm for this shaft is about 750 max. Had quite a wobble in the sprocket, so I tried to straighten it out and got it down to about 1mm deflection.
Clamped it to a 1 inch thick steel plate and used gentle leverage-
Finished shaft with just a bit of painting to do-
Final job on the Villiers Clutch was to replace the worn felt seal shown in 6th image bottom left in post #16. Thought I'd have trouble, but got the old one out.
Found an identical sized vintage seal in my spares bits, but was too thick, so I had to slice it. Shown fitted with the old one and cut off remnant-
The seal protects the outer cup ball race, which after cleaning and greasing, runs real smoothly .
So clutch is ready for assembly now, when I've sorted the cable and routing.
The Exhaust silencer/muffler was next. Surprisingly, I managed to undo the remnants of the nut that holds the end plates on and dismantled it-
Wanted to to check it over before putting it near any media blasting. Shame one end cap is captive, as I wanted to remove it.
This end cap was nickel plated originally and suffered more from the elements than the other.
After an initial clean up, loads of little perforations appeared in the neck between the flange and cannister, but the welded areas are strong.
I reckoned I could repair this with a new plate wrapped around the neck and weld around the strong points.
I've cut and fitted the plate clamped tight with a Jubilee Clip initially for tacking it down. further joint cleaning to do first.
Got to practice with thin plate, as I'm not skilled in general arc/stick welding practices -
The cannister part is still sound with no holes or thin areas. It's a rolled sheet and riveted with a seam plate inside.
In addition to sealing the inside, I'm also going to run a seam along the end joint to avoid it blowing.... can be seen to the right of this image-
After this, it will be time for frame cleaning and repairs, before I can fit the engine and see if it will start/run..................tbc
-

 Cub Cadet got a reaction from Stormin in Couple of implements.
That deck is in great condition, the plough is a good find!
-
Cub Cadet reacted to Anglo Traction in A Mystery Roaring Twenties Refurb.......hopefully!
It's tiring enough shaking it about without prancing around with as well Norm. ............Maracas! .
Yes, I do tend to understate. I admit I don't seem to learn when to give up either ............onwards I go............
Finished one of the Shafts. Bearings etc were a mess inside-
Combination of dirt and dried grease. Good thing was no rust.
Cleaned up all the bits and had a need to bond them into their housings using loctite 638 while fitted to a 1 inch dummy shaft (25.4mm).
The makers must have drilled one of the Housings (left) in error as 3 of the holes are not tapped. Helped with I.D ing though.
Oil seal plates that carry the felt seals are matched to the housings. Seals are still good ! -
It was good that the bearings are still usable. 97 year old SKF RL8 double row self aligning cleaned out after a lot of work.
Packed them out with some Graphite based CV Joint grease I had laying around.
Quality of the housing castings are not that great, one on the right is full of blow holes
After cleaning up the sprocket and making 2 new Keys, parts were painted and assembled when dry. Finished this one now-
Next shaft will not be so easy......tbc
-
 Cub Cadet got a reaction from Triumph66 in Couple of implements.
That deck is in great condition, the plough is a good find!
-
Cub Cadet reacted to Stormin in Couple of implements.
My rear discharge mowing deck is getting rather worse for wear. I've already replaced the top, but now the tin worm is getting the better of the sides. So today I went to see another I knew of. It was a bit grimy and the paint underneath was flaking due to being in a shed with an earthen floor. Shell is good and solid and everything turns freely. Looks like it has seen very little use as the blades are still sharp and keen.
A good clean and some paint and it should be in service by the end of the month.
After loading it into the Disco, the seller mentioned a plough at the back of the shed. He thought it was a Brinly and it proved to be so. In good condition and the share coated with a good layer of grease. Again looked little used. Needless to say, that ended up keeping the deck company on the journey to their new home.
I declined the offer of the C-125 in need of some TLC, the deck came off. Discretion being the better part of valour. I've promised to put that in the for sale section.
-
Cub Cadet reacted to Anglo Traction in A Mystery Roaring Twenties Refurb.......hopefully!
Behind schedule with the Plummer Block (pillow) bearings, lots of cleaning out. Meanwhile, I looked at the frame items etc that were borderline scrap or broken.
Well , when you're presented with these examples, you wonder how you're going to replace them?, then try and repair-
The Eye Bolts look handmade or Smithy'd and what I would call Agricultural engineering, as opposed to Precision engineering.
The bolts were saved with careful work loosening off and straightening, plus, I was able to cut off the overlong rotted sections.
The channel formed washers on the small eye bolts were virtually rotted away, so I had to think about making replacements.
The problem with broken brass Butterfly wingnuts was solved by finding a stronger 1/4" whitworth steel one .
Making the special washers mentioned were shaped more or less using an old toolmaker's clamp and shown with a partially formed washer bottom right-
A bit of normalising heat and manipulating them to shape produced these washers that should pass as identical to original when fitted/painted-
Another job of saving scrap was the Clutch Lever. I'll post an image of what it was like later when the identity of the machine is revealed.
New pivot pin and cable pinch screw had to be made. The two clamp screws were rotten, and so I replaced them with nickel plated ones of the same age
that came from the drive unit of an old wind up gramophone.
Presumed the lever was nickel plated originally, but just coated with Caliper Paint now-
Should make better progress now and media blasting parts now available. Should be done with one of the shafts and bearings over the weekend......tbc
-
Cub Cadet got a reaction from Anglo Traction in A Mystery Roaring Twenties Refurb.......hopefully!
Looking great!
-
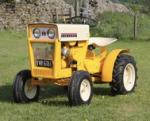
Cub Cadet reacted to Stormin in C-125 Rebuild.
Received a replacement sump Tuesday, courtesy of the Showman. Whipped the engine out this afternoon and fitted it. I also got the tach-a-matics fitted. So all that's left to do is wire up the lights.
-
Cub Cadet reacted to Stormin in C-125 Rebuild.
I'll be getting stickers. Just need to let Mark/Ewan know what I require.
-
Cub Cadet reacted to Anglo Traction in C-125 Rebuild.
+1 for skinny rims. I'm lucky as I have both wide and narrow WH wheels for the 72 Raider now. The track width on the front with the 6.50's fitted is 2 inches (51mm -ish) less than post 75 WHs.
Nice work Norm look's tidy . Are you going to 'Sticker' it up , or leave it naked ?.
-