Nothing lost, as melted fridge frost is not distilled but is just atmospheric moisture that has condensed and been frozen when the fridge door is opened and warm moist air hits the cold interior. Proper "distilled water" is, as the name suggests, water that's been boiled, turned to steam leaving the impurities behind and then re-condensed in a purer form . De- ionised water is something else again......!
Strictly speaking, that is not correct . An extended nose plug may be either hot or cold as may be a plug where the insulator surrounding the centre electrode is more or less flush with the plug body.
The determining factor that defines whether a plug is hot or cold is the length of the insulator in contact within the plug body. The more of the space taken up equates to greater ability to loose heat - a colder running plug; and the bigger the gap the lesser ability too loose heat - a hotter running plug.
I don't disagree re the one degree difference , that's standard practice but in a rebuild situation I'd still lap. A while ago there was someone recommending " ringing in" - his term - each valve by smacking it with a hammer to seat it !
Another good day out is to be had at the Brooklands Museum near Weybridge in Surrey. Motoring history, cars, bikes , buses, aircraft but as far as I know not a mower or cultivator to be seen!
Jumping about from one job to another to keep momentum and interest going I re-cut the valve faces and seats today using a Neway cutter set, one kit cuts the face to 45deg another kit cuts the seat to 46 deg amazing pieces of kit and apparently no lapping required. The complete set costs about 2 grand so I was very lucky to be able to borrow a set. I also cleaned up all the studs and nuts for the crankcases ,timing cover and made a complete set of new gaskets for the barrel crankcase and final drives. A nice quiet day without compressors or grinders running.
Only just read this - Not so sure about "apparently no lapping required" . I bought a set of Neway seat cutters forty years ago and always lap in after refacing valves and re-cutting seats . Would consider it good workshop practice (as opposed to manufacturers assembly ) .
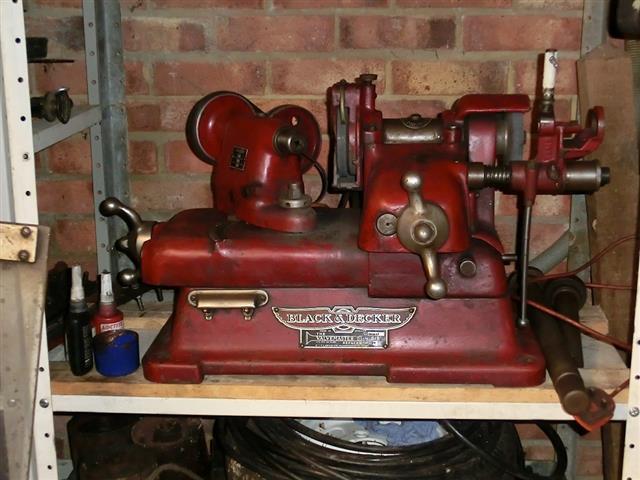
The Black and Decker valve refacer dates back to the days when they made proper tools and incorporates a vernier attachment for grinding valve stems on engines without adjustable tappets.
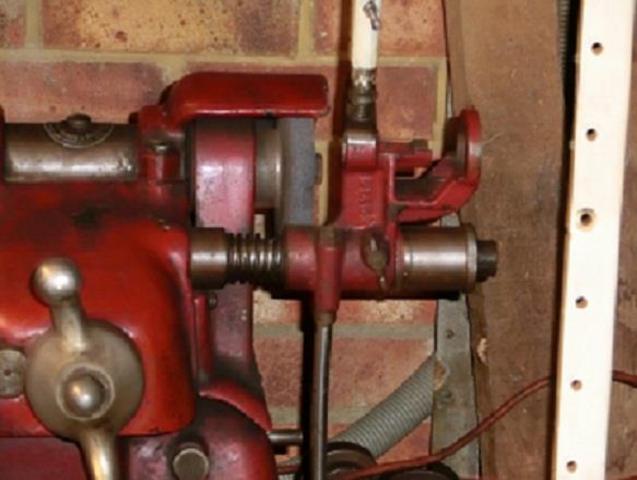
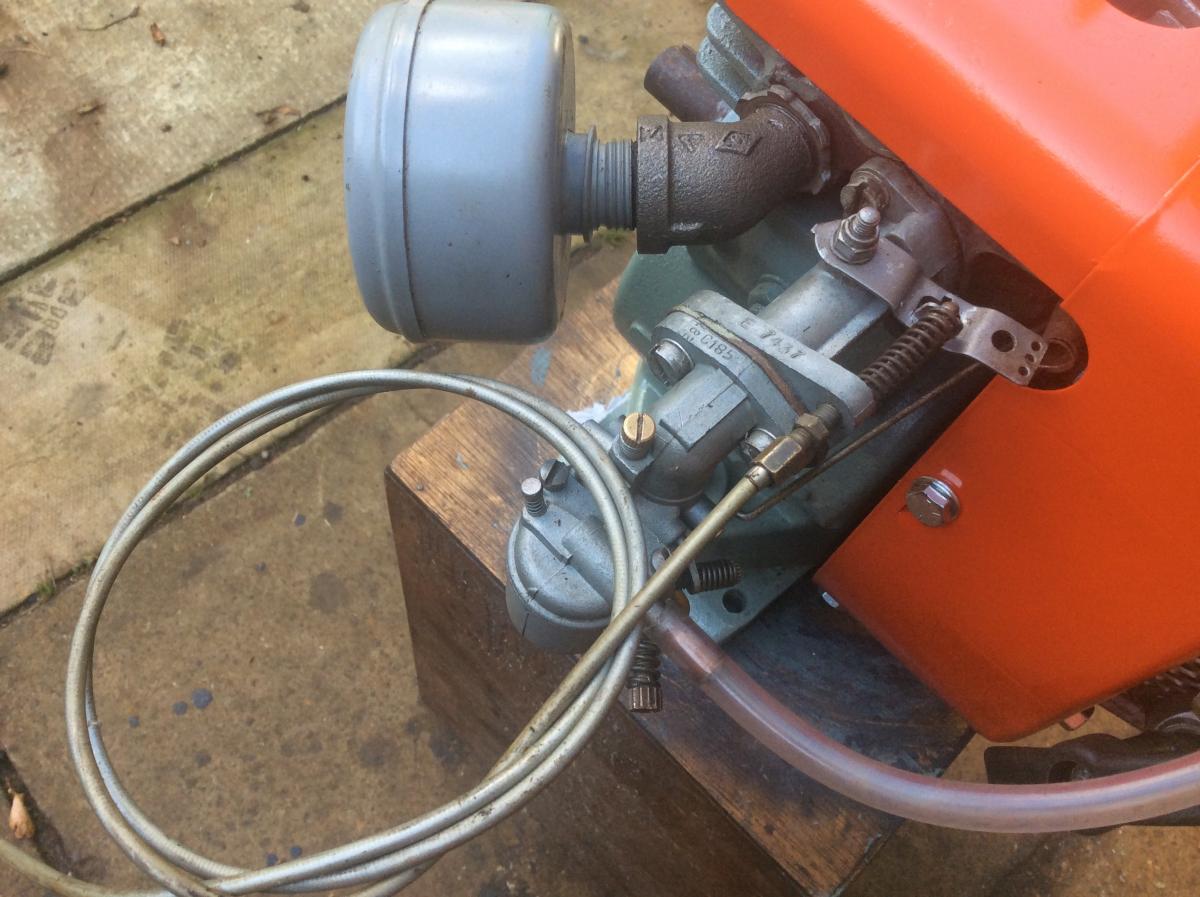
If you read Hillsider's explanation and assuming that your first picture illustrates the throttle cable in the closed position, that is slack enough that the horizontal "relay" lever is fully forward, the governor spring should be unloaded and exerting no pull on the link between the carburettor and governor vane but viewing the image it looks as though the coils may be slightly open suggesting that it is still under tension.
A compression spring in the correct position will ensue that the relay lever is fully forward which will allow the governor vane to act correctly rather than fight your improvised return spring on the carb. You can't expect the governor system to perform correctly unless it is correctly assembled.
eBay . Just enter "Suffolk starter" . 261959754145 Is for a new housing at around £14 but there's complete assemblies for just under £20 which is a bargain as they are well over £ 30 trade.
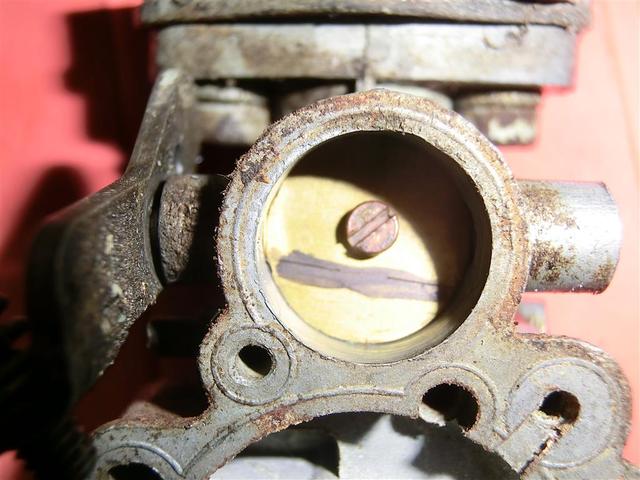
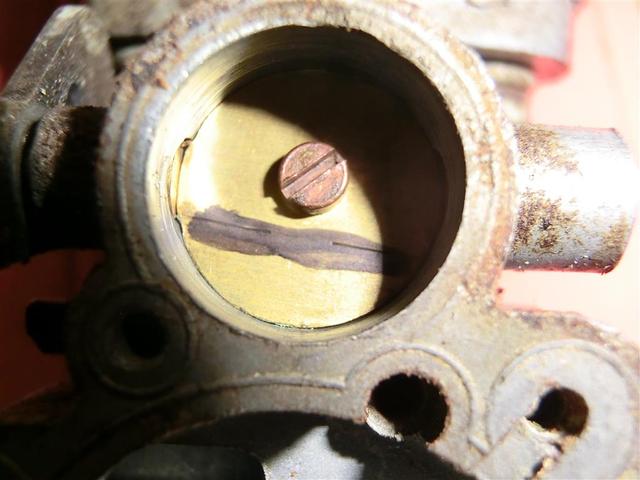
Sounds as though the butterfly may have been removed during the brazing process (one tiny screw) and refitted incorrectly. The hole in the butterfly is not dead centre and the edges are slightly chamfered to allow it to close snugly in the venturi. Start by slackening the screw and seeing if you can align it. If it is the correct way up you may still be able to see an indented mark on it that lines up with the shaft. Also there will probably be a "shadow" where it faces the shaft.
I'll have a look later for the starter.
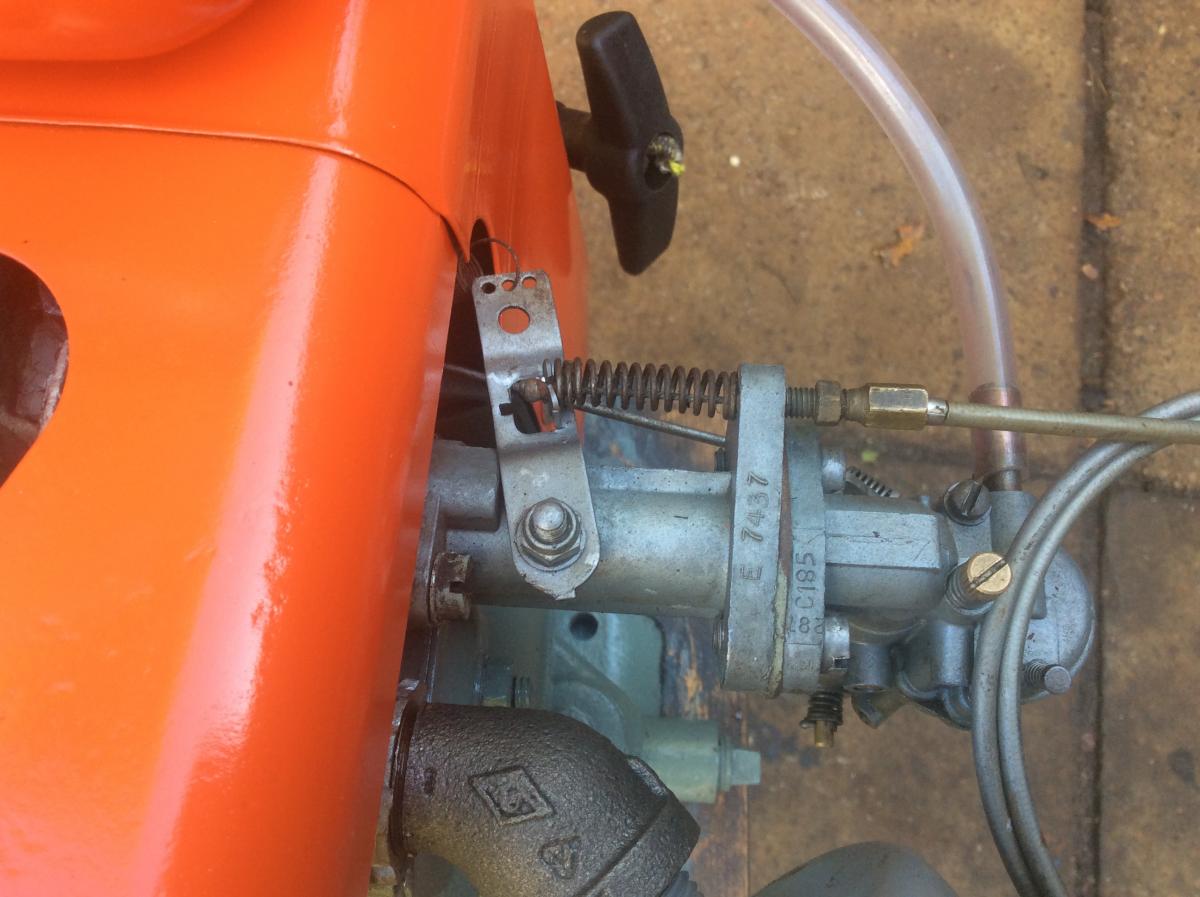
This shows the mark on the butterfly - slightly askew! which should be parallel with the shaft and on the bowl side - and the offset of the hole which should be nearer the manifold than the bowl.
Not the exact same engine as yours but the same throttle and governor layout.
Just noticed in one of your pics that there appears to be a chunk missing out of the recoil start housing. That may allow it to flex and the pawls to slip. Those housings are still available , also there's a fleabay seller offering complete starters at quite a keen price.
When Bosch disposed of the Atco / Qualcast / Suffolk brands the spares stock was bought by The Gateshead Mower Centre so they are possibly the first people to try for parts. May also be worth trying The Mower Centre in Hailsham.
Fairly sure that you have an Atco / Qualcast / Suffolk A 98 engine which has Tecumseh ancestory. The early A 98s did use the same Zenith carb as used on the Suffolk cast iron engines and used the Suffolk flat pan muffler that yours has.
If you have a hot air gun or drop the carb bowl into a pan of boiling water for a couple of minutes and then grip the top of the jet with pliers and give it a gentle wiggle - they usually come out . A bit of grip damage to the top where you grip it won't do any harm as the calibrated bit is down the bottom . Poke through the orifice at the bottom with one bristle of a wire brush.
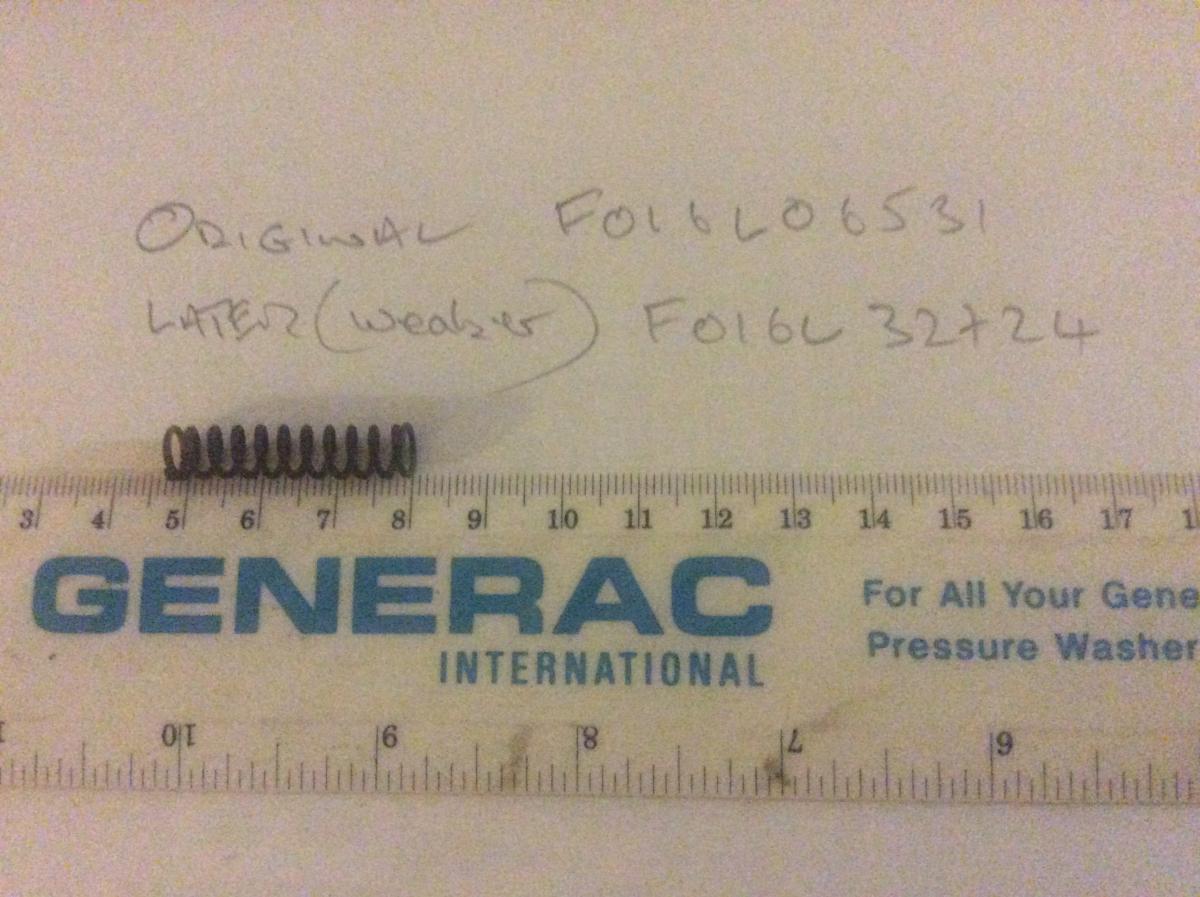
The return Spring is missing from your carb. It is a compression spring that sits between the cable abutment and the horizontally pivoted lever that has the governor Spring hooked to it, the cable passes through the spring.
I will post you a pic of the setup tomorrow , not good light in the shed and no flash on the iPad !
Should add that the early A98s with the Zenith carb had a points ignition system . When the Zenith was replaced by a Dellorto (or was it a Tillotson) the points were replaced with an electronic system.
Don't think you need worry about the brazing to the crank on the throttle spindle as the spindle and butterfly are both brass and if the repair had been done in situ the alloy of the carb top would have melted before any internal damage had taken place.
Here's a reply from the owner, it sounds to me like it could be a mix and match mower.. What do you guys think?
"That's brilliant.
Would suggest it's not as old as I thought then.
There is no tag on the frame that I can see, but I remeber seeing one inside the primary chain case.
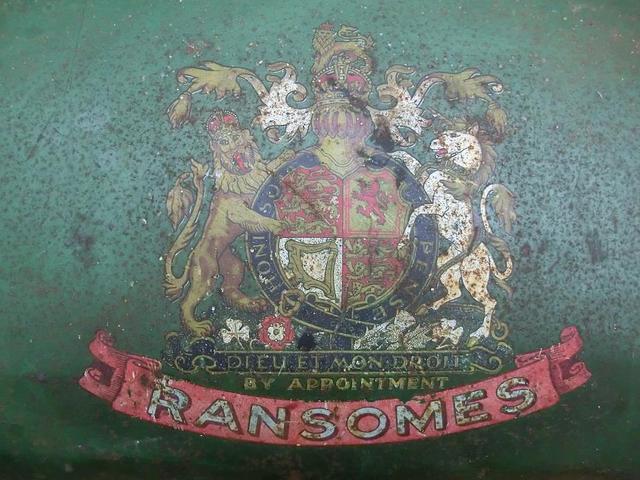
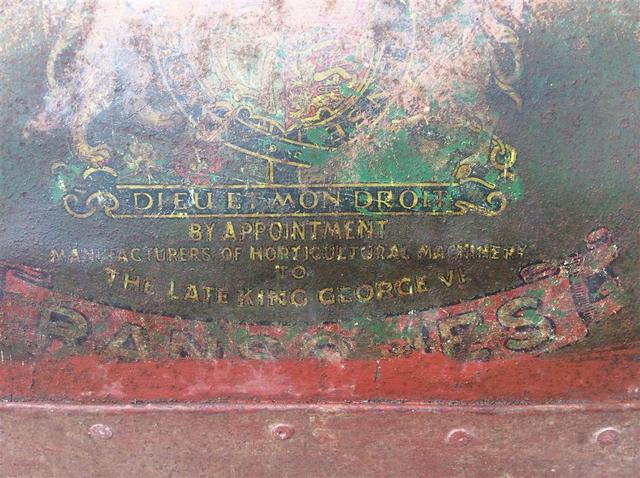
The 'by appointment' transfer is one for George, not Liz.
I arrived at my date from the construction of the mower itself using the old mower website as reference. They state that the steel side plates, rather than cast iron frames, put it at post 1935, but the pressed steel kickstart makes it earlier than the cast pedal used later on ?!
I've also yet to find anymore images than the one I've seen, with the full cast aluminium cooling duct.
I'll happily be corrected on anything though"
I cant remember the exact time (possibly 7 years?) but "by appointments" can be used for a number of years after the initial issue unless renewed so in this case the appointment couldn't be later than 1953 but could have been used for a few years later but at a certain point has to be changed to "...the late King ....) . However, just to confuse things I have a Ransomes with just "By appointment" with no reference to whom!
I like the "over centre" type clamps that Countax and Westwood used to use when they had pillar type batteries. Easy to whip off in an emergency - no tools required.
Thanks for the suggestions. At present my anode is a section of steel grid facing the target area but I'm in the process of obtaining enough to completely line the inside of the drum. The charger that I'm using is around thirty years old and seems to be working reasonably well ; when I was reversing the process to derust the interior of some mower fuel tanks I had to put a twenty watt light in series with it or it would shoot up to ten amps and the trip it's thermal cutout!
I really like the idea of "reverse cleaning " the anodes.
I've just up sized my e-tank from a 20 litre storage box to a 205 litre drum. My power supply is a 12 volt battery charger that seems to be running it at around 2.5 amps. Does this seem about right? Have found some instructions and a circuit diagram for a dedicated power supply on the net but I'm better with a spanner than a soldering iron!
Its running 16:1, but the oil is a 50/50 mix of modern low ash 2 stroke oil and the recommended sae30....... Have been told it would be fine on the modern stuff, but not so sure if any of the bronze eating additives are in it? So used sae30 mixed 50/50 to at least give some of the 'old' protection. Logic or not? It doesn't smoke very much, not like my 14" Atco does on pure sae30 mixed at 20+:1!!!
y
It's my understanding that it's the additive in EP gear oils that may cause a problem with " bronze metal" and only then if run at high temperature.
The Osprey was 7hp and the Twenty One 5hp. They both used the same back end with different engines and front shroud / blade assemblies. There was even a two stroke Osprey that used a big JLO lump.
On the Briggs engined machines I believe that the MagnaMatic system was limited to the cast iron block engines and should not to be confused with the Magnetron system that was introduced around 1979. Early or converted magnetron setups have a clear or white piggy back unit clipped between the left leg of the coil armature and the coil itself . Later units had the magnetron unit encapsulated into the coil in a similar position,The simplest way to check whether you have magnetron ( electronic) or points ignition is to remove the blower housing ( engine shroud) and look at the coil. If there is no module or lump on the coil there will be two wires disappearing under the flywheel and terminating at the combined points and condenser under a shiny cover out of sight under the flywheel.
Can't quite visualise the layout but is there a danger that by "strengthening" a relatively cheap nut the problem could be transferred to a more expensive and difficult to fix component?


Ransomes MG2 number 137
in Step by Step restoration
Posted
Nothing lost, as melted fridge frost is not distilled but is just atmospheric moisture that has condensed and been frozen when the fridge door is opened and warm moist air hits the cold interior. Proper "distilled water" is, as the name suggests, water that's been boiled, turned to steam leaving the impurities behind and then re-condensed in a purer form . De- ionised water is something else again......!