| |
-
Can give you a date for the Engine which is late 1979. Kohler record it as a 'Basic Engine'.
Don't know much about the Bonser Truck history,
.
-
-
-
Afraid the engine (spec 30538) is not original Norm, so won't help with a positive I.D. Listed as a 'Service Engine'. They were probably Bulk Shelf Stock and sent out on Batch short order requests.
Only other possibility is that someone swapped the Tins onto that Engine?.
There should be 10 numbers in the serial number, but as Ranger says, it points to a 1988 vintage.
Most of the Kohler Engines for Wheel Horse over the years were pre specified/ordered and still show in the records.
That Spec number of 30538 does not even show a Starter Motor in the Parts Drawing !!! .
Now if the Spec number read 30518, it would be a Wheel Horse allocation and with a Starter Motor !!.....The mystery deepens.
Regards
-
Certainly look's a good project. Love to do one of those, especially to get a chance to do a total rebuild on the wheels.
Lets hope the summer is good to you, what with your 'Alfresco Workshop' !! .
-
Haven't found Iain's post on RS, but this may be of interest for now-
http://www.wheelhorseforum.com/topic/46796-steering-boxes-ross-in-particular/?hl=%2Bsteering+%2Bbox
-
A bit more info for you, Just to clarify why your old deck/belt don't seem to match up or fit on your tractor, it is because the Deck is a 1972 model which used a different belt size to fit onto WH tractors of that age/era (prt nbr #9360 'A' Duty, 95.63inch long). Note the light duty belt type.
Being fitted to your 80s Tractor, I suspect the belt (102741) was selected based on the 80s style 36" Deck and your 80s WH Tractor. The main difference was the Belt adjuster system on the front of the Tractor, as it differed from the very early 70s and possibly the main Spindle/Pulley position and size.
As for your 42" SD Deck, and you have no info for it, I reckon your Deck Spindle Drive Belt should be WH Prt Nbr #6938 , HA or 4L duty and 86inches long....... (note the heavier duty type).
This belt number is quoted for nearly all mid 70s - late 80s WH 42"Side Discharge Decks according to Wheel Horse and later Toro.
Lets hope your Blades are sharp and balanced for now....that's another ballgame !.
Regards
Richard.
-
No Problem Paul. I've uploaded the Villiers Manual and parts list in Pdf form on here for you to download a copy, click on either Downloads in the header line, or look down the right hand side of the main screen here for Latest Files and click on it.
Good pile of parts there for a Summer Project. Engine parts condition look pretty clean on the exterior. Look's like you have the expensive HT Coil (M1634). Some people have obtained the smaller HT Coil Asian Import and modified it to fit if you want to go that way. Just google Villiers Midget Ht Coil and you'll find a large amount of info on them and other rebuild hints and tips.
Would like to see your progress on this. Pictures always welcome. here's a few links to parts retailers-
www.Villiersparts.co.uk www.Villiersspares.co.uk www.meetens.co.uk . There are several more.
Regards Richard.
-
Version PDF
24 downloads
Maintenance Instructions and Illustrated parts list
-
Thanks Mark, Not a great deal of progress. Prepping the Rollers, a bit like watching paint dry really. They have been Treated with hardener.
After having been dried, they had the blemishes filled with hard filler. I then started to seal the surface with the Varnish.
I don't use brushes to apply it, as I fill the depressions first and build up a smooth surface by sanding in between coats.
Takes 36hours to harden each coat before sanding. Had 3 coats so far-
Should be done and ready to fit by the weekend.
-
Hi Paul, I can help with the Mk3 Engine info, as I've just rebuilt a 50s Villers 98cc Mk4 for my ATCO Mower.
But I can't help with the machine.
Suspect you first need the Engine instruction/Parts Manual-
if this is what you need, I'll upload a copy to the Manuals section on here so you can download a copy.
As for parts, there are several sources which I can PM you a list.
Beware of any Villiers HT Coils for sale that are original Unused old stock, you need the modern alternative.
Depending on which version you have will determine how much they cost ( I just happened to need the most expensive one).
New engine parts are not cheap, but personally I really think these little engines are great and worth the outlay.
If you plan to do a full proper restore or just get it running, would be good to see your progress on here.
Regards
-
Very, Very nice Matt, another fine example of both your work and quality old Briggs Model. Love the Donut Carb Float !
-
Ok Martin, I bow to Andy's experience of 'In the Field' use of types of manufacture/material.
Also Wrispin's Knowledge of Dayco Belt equivalents etc.
But lets try and clear the air of uncertainty and resolve your issue.
So you have a 42"side discharge Deck with no I.D and an early 80s C-125. Forget about the old 36" Deck and it's belt for now.
I've checked as many 42"SD Deck model numbers from 1980 - 1986 and the predominant Belt used/recommended is #102742.
There are exceptions of course, so can't define the belt required exactly.
This Belt Duty is graded (in the U.S) as HA/A. and is 103" in length measured around it's Outer circumference (see image example of list below).
The Belt Section size is 1/2" x 5/16" (also see image example below).
So all you can do is look for a retailer that quotes the Belt part number of an Aftermarket example, rather than look for an example by length. I also suspect the majority of belts are of the conventional standard, which probably would not last as long as an Agricultural Duty one.
It also only needs the slight differences of Imperial to metric measurements to render a belt as ineffective in some installations.
So your situation requires you to fit the deck on your Tractor and lower it to cutting position to check the length required.
You can either trial fit the Old 102741 Belt which is 96.60 inches long and see just how short it is (note - ensure belt is always on the inner groove of the PTO Bell).
Or, use some rope of approx 1/2" (12.7mm) in section and ensure it is taught when you mark it for measuring.
If your check reveals that the Belt #102742 of 103inches outer length is correct or very close, then you will need to order by using Wheel Horse belt number 94-2501. This number supersedes the previous one, but both are still used for I.D.
The other belt number (#108834) highlighted in blue on the Wheel Horse Manual example is commonly used on REAR Discharge Decks and is only to point out just how important it is to refer to Model numbers when looking for parts.
So when you have found which belt you need or length required, there is an Online site that quotes Old Wheel Horse Belts by Part Number as well as Belts by Manufacturer. So here is a link to assist your choice -
http://www.beltingonline.com/
(look down the left for 'Garden Machinery Belts', click on Manufacturer, search for Wheel Horse)
Lastly, before you fit the Deck, check to see if there is a number on the Deck Spindle Drive Belt.
If so, please note it on here and I will see if I can narrow down the Deck Model number.
Hope this helps.
Regards
-
Good progress Norm . The 'Ole Dark Orse' is looking............well dark ! . Tea stains don't show either.
-
The wiring connectors used on Wheel Horse Tractors are the same as used in the U.S Automobile Industry (mainly). The Female Spade connectors are 'Packard type 56' , they have a locking facility when pushed into a connector block.
I meticulously removed, cleaned and reused the ones on my '74' C-120 Loom I fabricated, as I wanted to keep it to spec and not do a Maplin or Halfords Bodge.
The 5 pin connector block for the back of the Ignition Switch I fitted to mine was from the Oregon Aftermarket brand in the U.S.
I will search my records for the part number.
Tractor looks to be in good order, saw it on Auction, so good haul.
Edit @ 1445 - ref 5 way connector. Google these- 5 way oregon 33-350 or Delphi 5 way black 2973422
May be worth asking someone on RS nicely to make up a small parcel of bits......that's what I did.
-
I understand the difficulties with loss and ageing family members, had the last few years of that myself.
I've noted all the Vacuum Bagger versions that use the Dump Carts in the Interchange List and noted they all refer to 32 and 37 inch SD Decks.
When I got to the 80s on the list, the references began to look promising, but still no match.
I'm signed up to several of the WH Yahoo Groups that Garry massively contributes to, and if he can't locate anything on there, I certainly won't be able to. Still, if the info is out there, I'm sure it will turn up.
-
Good to hear from you Andy, but sorry about your loss since I last liaised with you.
An uncommon find and I assume you have already checked the WH Attachment Interchange Tables for this model, but I checked it and haven't found anything up to 1982 that fits the description. I'll keep looking for info on it.
-
Nice project Nigel. Only wish I continued with a similar design/project back in the 80s (1/2 scale Bugatti type 35) for my son. Look forward to seeing your progress on it.
-
Nice addition to a workshop . A Naerok RDM350M ? ... Good machine if so and popular with Model Engineers and University metalwork shops etc. back in 80s/90s.
There are some Ball End Handles missing in the pic, but I assume you have them.
Ignore the fact that the name is 'Korean' spelt in reverse, the quality back then was really quite good. I believe parts can still be obtained, albeit under other makers names. If you need reasonable quality/priced tooling for it, maybe check out Warco online (usual disclaimer).
-
I settled for Halfords stuff, as the old resin/polyurethane based fuel proof lacquer seems to be unavailable nowadays (set like glass and hard as nails).
This stuff is compatible with my paint and decal material/adhesive, and I did not need a large quantity. They (on the instruction label) still have to state that spillages must be cleaned off asap though. I had to do a few tests on various finishes to make sure it was ok before I bit the bullet and used it.
-
Thanks Ian, although work and progress is slow.
Fuel Tank done and finished with Fuel Proof Lacquer. Needs another week to cure fully.
I changed the Pull Start layout again, did away with the inner Plate and made another Spacer Ring, so it is more like the original set up. Had to assume the finish was black.
The original Rope was washed and the ends finished with Whipping to reduce fraying. The Handle cleaned by sanding, impregnated with Raw Linseed Oil and polished smooth-
Throttle Cable routing done and stainless retaining clips made/fitted. It's rather a long 'S' type route, but it's smooth and there's no longer any strain where it enters the Carb. Lever is in good position too-
Made new Blackened/ Oil hardened Flanged Washers for the Roller Shaft ends and the Shaft has been extended as described back at the start of page 3/post nbr #41 -
Struggling with the Rear Rollers, namely finding quality old versions. I've used the ones off the 1954 Donor Mower, as they have the Brass Tube bore inserts, rather than just bored wood and are reasonable condition considering they've had 60 years use !.
I'll give them a good soak in wood hardener, fill some of the hollows, stain and apply several coats of Yacht Varnish.
I decided to cut one (good one) in half and cut the worn ends off the 2 - 8 inch long Rollers.
This gave me 2 Roller sections on each side (original had 1 each side) of the new Spacer Tube.
At least they are the same as the original length and may assist in turning with less drag-
One disadvantage this Mower had was that it had to be tilted back onto the Rear Roller to pull the whole Mower when in Transit to and from Shed to Lawns, so they took a lot of punishment...I have a plan to eliminate this problem, but is another separate small project to deal with.
So as mentioned previously, the Cylinder (Reel) has got to come out to be ground down so I can fix the clearance issues with the Bottom Blade Carrier. Need to save some cash for that, but at least I can finish all the parts ready to assemble and see if the Engine will spring into life ok .
-
I'm not sure if Bob Lewis is still breaking Wheel Horses, but you could try giving him a ring. Here is a link I found, as I've not been down t see him for a long while and I'd lost his email-
http://www.misterwhat.co.uk/company/2145205-wheel-horse-breaker-Swindon
Regards, Richard.
-
Small update and brief in content. Finally got some time on the machines and started making parts for the Pull Start.
The original layout shown here in the Parts Manual, along with the Modified and welded up parts. All beyond saving/using-
Not possible to reproduce parts to original spec exactly, as the Flywheel retaining Nut has been extended, which I find convenient, so I've made parts to accommodate that and so will be a one piece item when ready to fit (there is another Hexagonal bore behind the Rope-Pull Plate centre boss shown on the right in the pic) -
Hoping for an opportunity to do more on this project soon.
-
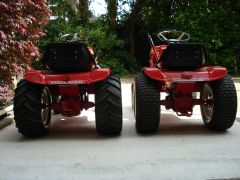
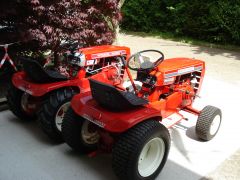
Nice acquisition Darren. Good Tractor assuming it's all there and working ok.
A nice coincidence with it is that it was built just before mine (15 units) as my '72' Raider 12 has the Serial number of 123172 !.
-
Glad to see you've been able to sort the problem. Happy to help and thanks for coming back with an update.
|
|