
Leaderboard


Popular Content
Showing content with the highest reputation on 07/22/2015 in all areas
-
3 pointsBit of modifying this morning. The square bit the pin goes through was cut off the box section. Box section drilled to take a pin. Long bolt procured from the farm and made into a pin while there. Also came back with some heavy duty electric fence wire that was going spare. Fence wire is now lift cable and it lifts the plough nicely. Well it does after I reset it. I fitted it at first with the lift lever in the up position. There now is a bit of swing in the plough as George suggested. Is there enough or maybe to much? I haven't a clue. Anyway, the plough now fits the tractor. Still bits to do yet.
-
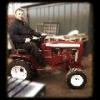
1 pointA few photo's of a local show today.
-
1 point

Project "Why Not"
Ian reacted to the showman for a post in a topic
Those panels really finish it off mate, Put some plastic pipe over the rear tyres, that would make it interesting!!! -
1 pointnot quite as neat a job as i would of liked but i think ive cracked it £4 on a bearing and i think ive done it its not finished but its usable not bad for £4 and a bit of time i might even tickle it with the paint brush lol
-
1 pointThanks Max, yeah the speed runs will be fun Ouch your internet is slow! Do you think I could hire myself out as a muck spreader? Hi Andrew, I'm not sure air horns will be needed... The loud exhaust and manic laughing is sure to get peoples attention It's been a busy few days in the workshop, with Rural Past Times coming up I was even in the workshop Sunday! The wiring was 99.9% done by Sunday lunch time, just one safety switch to fit when I get it.. So I spent the rest of the day fabricating this.. Now you see a mess of wiring.. Now you don't A closer view for you. A lot of template making time went into getting the side panel looking just right.. Speaking of templates, here's the right side template taking shape. Transfer to steel. Bung steel in the sheet metal folder.. Fold a 90 degree bend.. And then forget to take photo's of the other stages, so have an almost finished side panel shot instead I didn't get as much done today as I would of liked, but some more panel work has been done. A top cover for the main body tub was made, and as the fender pan sits a bit lower than the body tub I made a curved panel thingy to help blend the two heights together.. It will also add strength to the front of the fender pan when it's fully welded on. A view from afar.. Pete dropped in for a visit today which resulted in the fuel tank being removed!! The reason? Well, Pete had not heard WN running and as I needed to check my slimmed down wiring loom still worked and I didn't cut out anything that I shouldn't of, we decided to fire her up.. It was at this time that the leak free tank decided it wanted to start leaking, and I started to wish I had put the tank sealer in that I had bought!! Then I had a better idea.. Unless WN's engine is warm she has always had a bit of a starting problem with fuel not getting to the carbs.. The problem is the tanks fuel tap is below the carb fuel inlet.. Even though the actual tank is above the fuel inlet and logic says that gravity will do it's thing and get fuel to the carbs through a looped pipe, gravity seems to have other ideas! Also when I tried to drain the tank I found the vacuum side of the fuel tap wasn't working that well! So the plan is to cut off the old fuel tap, weld the hole up and fit a new fuel outlet at the base of the front face of the tank which is the side facing you.. This will put the tank outlet above the carb inlet The only problem is the tank was half full of fuel today, so after draining and soaking up the last dregs of fuel with a rag, I filled the tank up with a water 1001 stain remover solution... I know washing up liquid is traditional, but I didn't have any.. All being well any fuel vapors will be gone by Thursday when I'm at the workshop next, and I can cut and weld it without fear of being blown up!
-
1 point
Plough.
Stormin reacted to the showman for a post in a topic
What did you have to do that for, now I'll have to do something to mine or use yours 😜😜😜