| |
-
Thanks! If they were easier to source this sure would've been in the skip, but it shall be saved
-
Happy Birthday Doug, have a good one!
-
A few more bits cleaned up, filled and painted.
One of the next jobs was to tackle the rusty hood.
New piece ready to weld in.
The bottom of the hood was in the worst condition, the hole in the middle is only meant to be 5/16"
A new piece shaped
New tank straps, made from part of the original
Got the wheels painted too
-
-
Very cool, wouldn't mind one myself!
-
-
Thank you Yes it wasn't as simple as I may have hoped, but hopefully it will work for many years!
-
Could be an A-81/ A-51, they had a B&S engine. I think someone in the UK on RS was looking for one of those
-
Next job was to make some missing parts, the first being the slot hitch.
I sourced all the pieces of steel i needed at the correct thicknesses taken from Chris' at Newby Hall
Cut to size
Another part that was missing was all of the clutch set up
All welded up
Im pretty happy with how it turned out.
-
Fantastic job on the steering wheel!
-
Cheers Alan, I was lucky that the engine I sourced from Chris had a tank with it as I would've struggled to find one that would've fit under the hood of the RJ.
-
I tackled the fuel tank next which is a small size so harder to find.
As you can see the tank was gunked up, nothing was working to clean it so the only option to salvage it was to unsolder it and clean it properly.
In two halves.
Immaculate now, ready to solder both halves back together, I also found some small pin prick holes which needed fixing.
I thought i'd try using silver solder for the first time, I had to get it red hot in order for the flux and solder to do its job, the solder flowed into the overlap perfectly so i'm happy that its sealed properly.
The cap had a tab missing so I fabricated a new one and soldered it on, Has anyone got an idea about what the seal would've been like and where I can buy one?
Plenty of stainless bought for the reassembly.
The original axle seals were missing and you can still buy them at $20 a piece, that wasn't going to happen so I turned some steel tube down to the correct dimensions and bough some seals to push into them. They fit snugly over the axle so hopefully they'll work
-
-
-
I saw someone advertise this on FB, superb Wheel Horse surburban and 704, in incredible condition. I wish I could be there!
-
Some more progress on the restoration
Original tyres cleaned up and back on the salvaged rims and looking good.
Rolling on four wheels for the first time in many years after previously being butchered by someone.
The tie rod for the steering
I purchased the steering wheel from America which came off a cub cadet, the difference between a CC one and a WH one is that the CC one is splined, I wasn't able to get a drill in to drill a hole for a roll pin so the alternative was to fashion a clamp. It works very well so i'm happy.
The end of the steering column was mangled so a new piece was welded on, this also helped to make sure the steering wheel fit on snugly.
All painted up
-
Looking great! I love the patina on the panels
-
-
-
The focus was on the engine now, I had already stripped the engine down of any unnecessary parts and we had tried to start it. then it dawned on us that the engine didn't actually have any compression. We didn't really want to have to remove the head as the only replacement parts are NOS ones. Anyway we removed the head and Found the exhaust valve stuck open. As you can see the valve and the valve seat is incredibly rusty and pitted, I left the block and valve with my uncle who managed to grind it down to a useable state and the engine runs quite nice now. As for the head gasket I managed to find someone in Greece who was able to make a replacement from a scan of my old one for the cost of £4
We also managed to remove the old exhaust which had rusted in
-
-
-
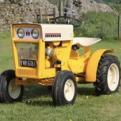
It's been a long time since i've updated this thread, lots has been happening on the restoration, here are some photos.
Next on the list was to try and get the tractor back on four wheels, the transmission had been fixed so next i needed to make a front axle as it was all missing.
All the bits for the steering were remade to original specifications thanks to measurements from Ian taken from Neils RJ
Wheels on and everything worked perfect
-
-
Im glad it didn't go cheap, although someone still got a good deal!
|
|


