Those hedge trimmers are the same type as others and many companies branded them under their own name. The tool part looks complete so that's good and we can help with engine parts if you need them.
It's rare to have a bad coil but yours looks to be missing the primary and secondary small wires.
That type of trimmer used a vertical style fuel tank. Good clean original tanks can be difficult to find but making a replacement might be a good idea until you can find one if it matters.
David @factory should be able to help with dating it.
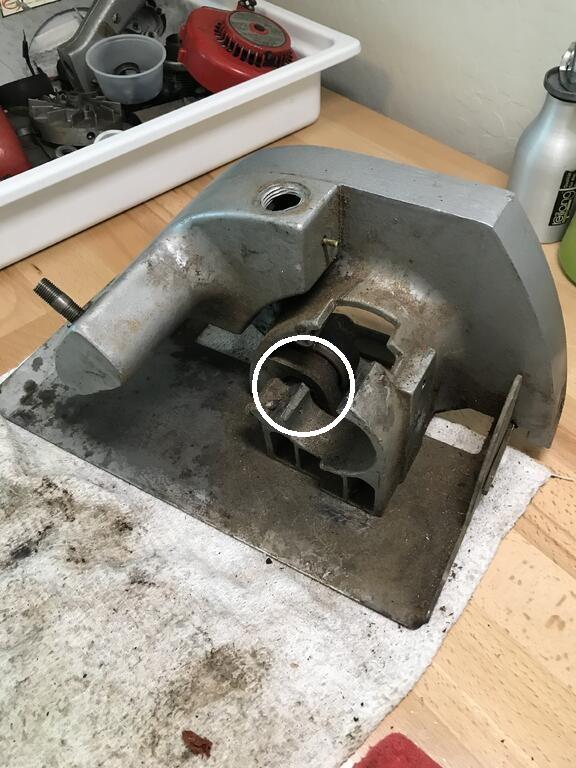
Most likely the poor performance is leaking crank seals.
The case vacuum and pressure pulsing is what flexes the diaphragm for pumping fuel. You can try spraying carb cleaner in the ends of the crank to swell the seals in place and a new diaphragm. The induction side seal can be replaced with an O ring
A sticking ball check valve can be another issue. The weak link in these engines are the carb.
Adding a small RC type check valve should help too. Haven't tried these yet but just placed an order for them
Yes of course it does. But I have no idea how to post any on here. I click on the add image thing & it says something about a url. I am embarrassed to say I don't know what that is.
By the way, I'm just outside Phoenix. Someone said something about location.
@CNew Clint is right in your neck of the woods so maybe he is interested in it.
Direct from Northern Tool concerning the impeller for the pump in that link. Try giving them a call and I doubt that part can be very expensive. I do NOT know if it's a direct fit or not but certainly appears it can work
Another nice find! The box appears it's in great condition. Kind of easy to date that one huh?.
Some curious things on there.
Is that a label on the recoil cover?
Don't remember ever seeing 2 holes in a tank cap before.
Washers on the gearbox cover? Wonder if someone tried mounting it for something but it didn't work out. The pan head screws instead of fillister heads is different too.
Look for a hole in the saw body for a set screw. Twice the set screw stripped on me so never actually got the bearing out. If you do get the set screw out, look inside for another one in case it's doubled up
Didn't have any problem using carb cleaner. Used it to clean out the old gas and oil residue inside the tank of mine. BUT, I didn't leave it sit in there for a very long period of time either, probably less than hour or so total. Then blew it out to evaporate what was leftover too
The line goes straight down and has one of those cone type filters with a screen on it on the end. The cone is too large to fit out of the fill tube too.
Mine was broken off so to repair it a hole was drilled in the tank but on the opposite side of where I marked in the pic. The only solution to fix it so... The circle cutout was glued back in using Seal All. Undetectable unless the engine is removed.
Is it clogged? Best to work on it slowly soaking carb cleaner in it until it loosens up if so.
Looks like it belongs on there. 20 years from now some O&R collector is going to be looking and searching for another one. Good thing the hunt is half the fun.
Pulled the wheels off to do some more work on the little bike. Here's the divot in the tire from the first video when it didn't have enough friction. It doesn't look that deep in the pic but it shaved off a good amount.
Too bad it didn't create any smoke or I would do a video of burning out that whole tire.
Are you going to strap that to your back and go for it.
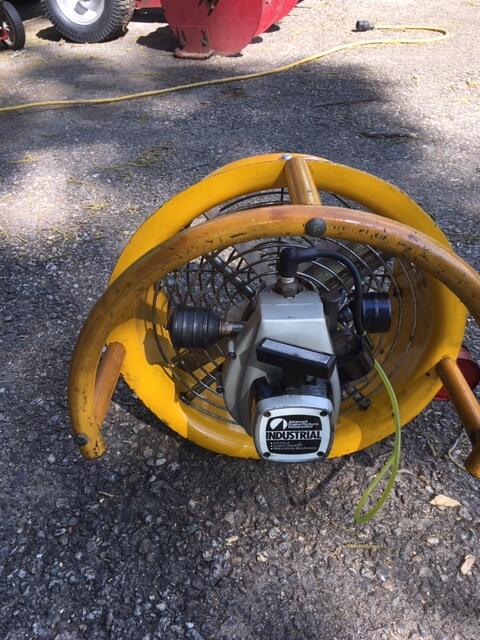
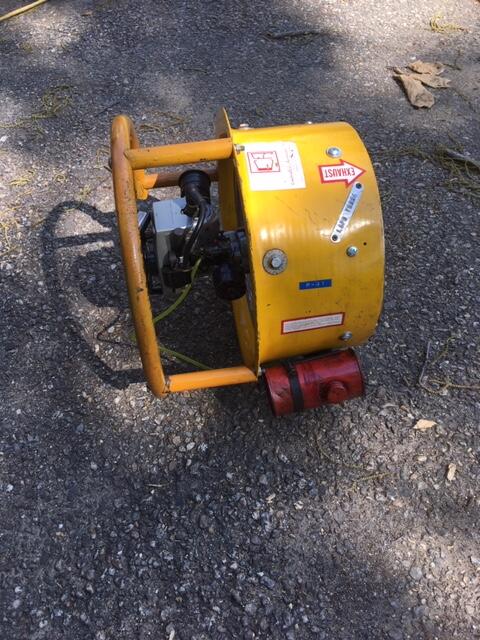
Believe it or not, that's part of the reason I wanted to run it. Doing strange stuff is part of the fun. The neighbors already think I'm nuts so going down the street with a fan and a bicycle would just be par for the coarse around here. It doesn't really blow with the force I expected but definitely moves a good volume of air.
I'm not going to take the generator off of the engine and mess up the wires.
The problem I had was separating the generator halves to get inside of that section for cleaning and repairs. That set up with the clutch connection will let it separate and go back together very easily. Not sure it really needs to come apart but just in case you wanted to open up the engine.


Hedge Trimmer Restoration - parts help
in Ohlsson and Rice
Posted
Those hedge trimmers are the same type as others and many companies branded them under their own name. The tool part looks complete so that's good and we can help with engine parts if you need them.
It's rare to have a bad coil but yours looks to be missing the primary and secondary small wires.
That type of trimmer used a vertical style fuel tank. Good clean original tanks can be difficult to find but making a replacement might be a good idea until you can find one if it matters.
David @factory should be able to help with dating it.
Knowing your location would help too