Be nice and cosy in there, Ian. Don't forget a socket for the kettle.
Hi Norm, cosy it certainly will be, but hopefully it won't feel cramped..
Me!! Forget the kettle!!! As if
On 12/31/2019 at 9:11 PM, Alan said:
Getting there Ian. Keep the updates coming.
Thanks Alan, yep slowly getting there.. Here's another update for you all
On 1/3/2020 at 4:52 PM, meadowfield said:
Looking good Ian, look forward to the next project
Thanks mate, I have a few ideas for smaller projects that will make building other projects easier and possible..
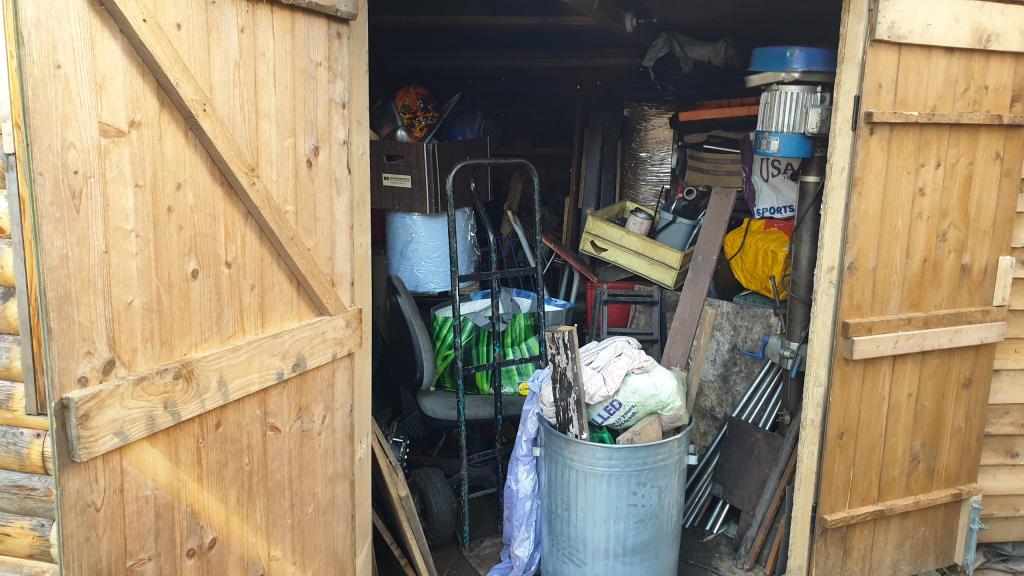
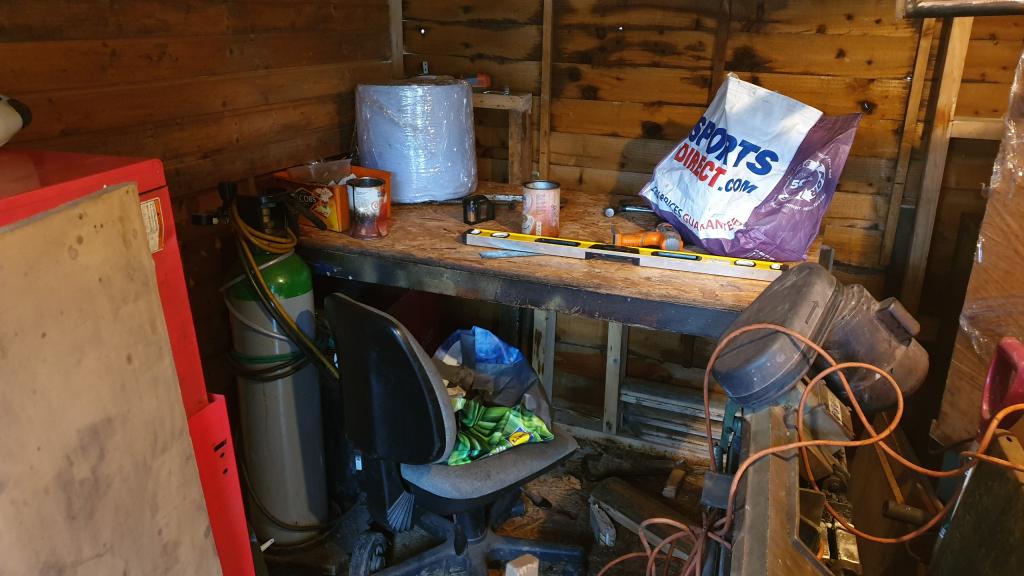
After moving lot's of boxes and bit's about the place some space was found!
Even my tatty but comfortable chair was found..
But most importantly this could happen... A moving moment as the 1st coffee's in the new shack were made
The insides of the double doors have been made more wind tight and strenthened with lot's of bit's of batten. They will get double skinned at some point.
Although I need to order some boards to clad the inside, I'm using what wood I have got at the moment..
So this small panel was clad with fake wooden floor stuff
To be continued shortly, the enter keys have both just died on my keyboard!
The bit sticking out to the left of the window, last photo
Ahhh, the bit that I hadn't got around to cutting off yet... Asd it happens it finally got trimmed down yesterday.
On 11/29/2019 at 10:47 AM, Alan said:
The log cabin effect looks good Ian.
Thanks Alan
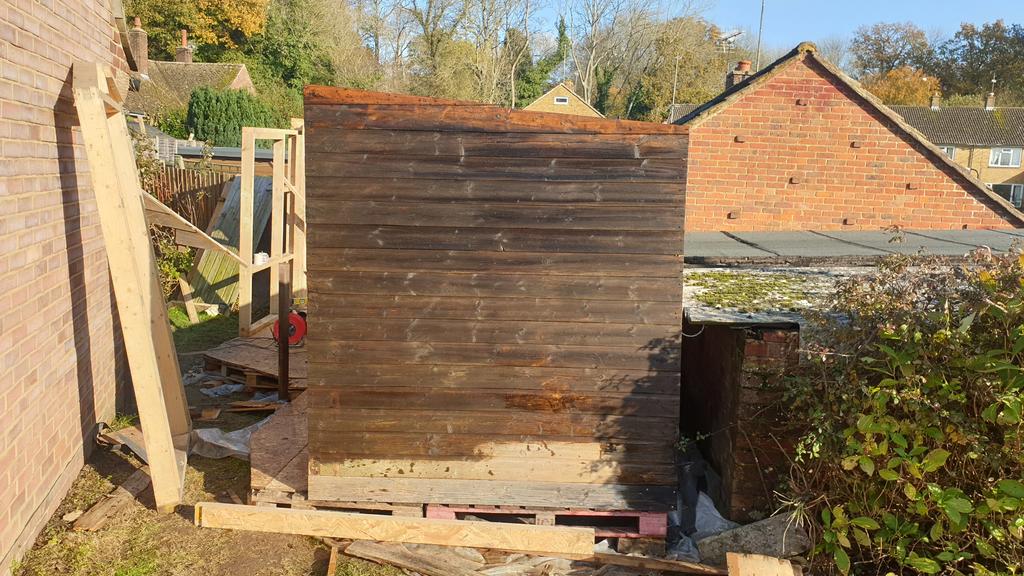
When the cladding was still attached to the demo cabin, no one ever saw the log cabin effect as it was tight against the hedge for years.
It's nice to give it some light after years in a hedge..
On 11/29/2019 at 2:13 PM, Anglo Traction said:
Looks like you've nearly 'got it nailed' Ian !.
Thanks mate, even if it is a corny joke
On 11/29/2019 at 6:43 PM, Stormin said:
The gap above the doors looks a good place for a fanlight.
The gap above the door is no more Norm as you will see shortly.
On 12/5/2019 at 8:28 PM, Cub Cadet said:
Good job Ian, look forward to seeing some wacky projects come out of the shed!
Thanks Ewan, it will be a while before any projects start, but I'm looking forward to building something that's not made of wood
Quite a lot has happened since I last updated this thread..
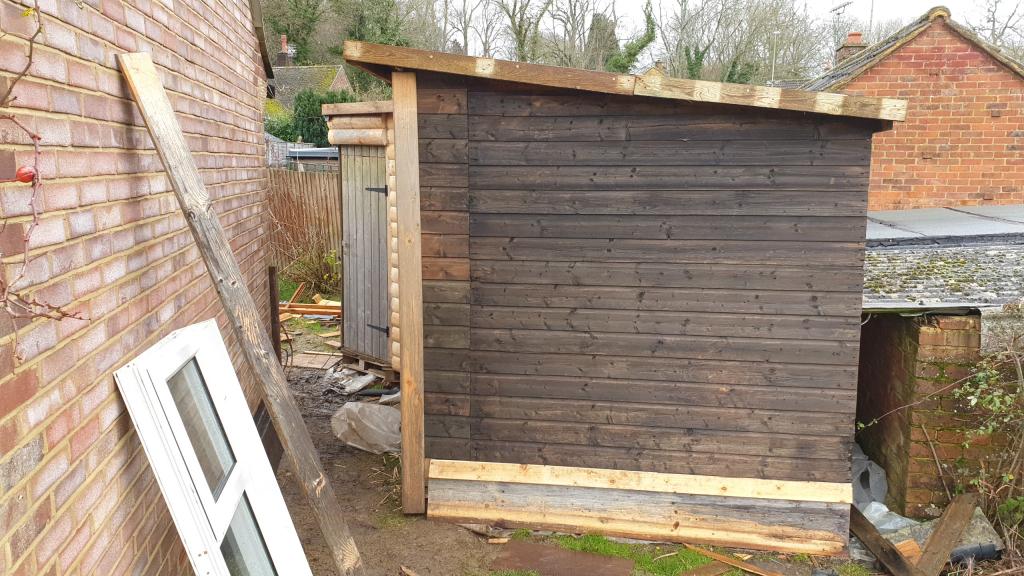
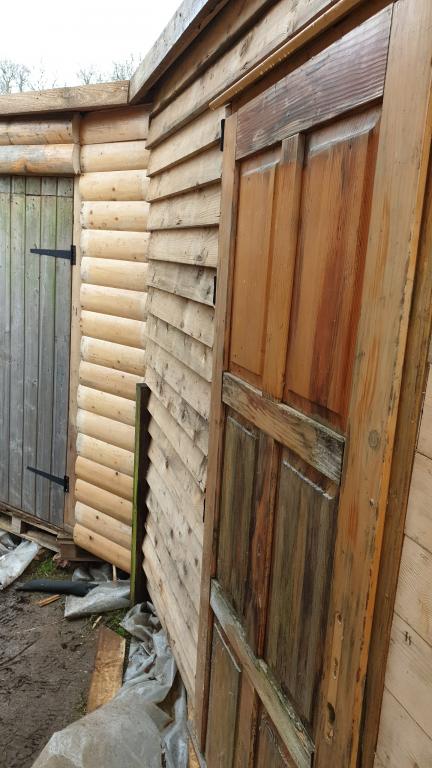
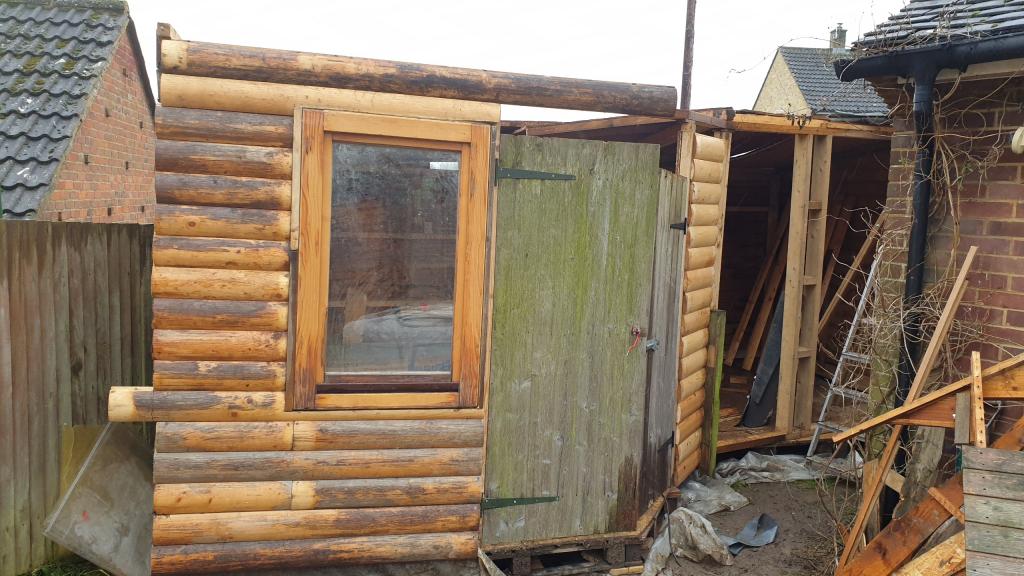
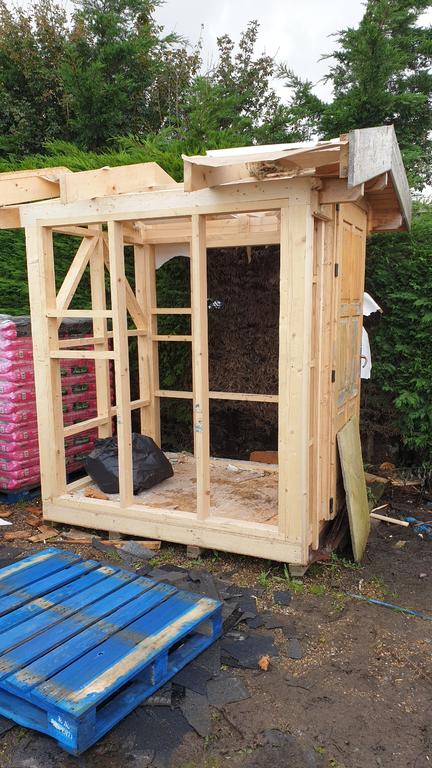
The smallest wall now reaches the ground apart from a small gap at the base so it doesn't rot with damp grass, a corner trim has been added and of course something to keep the roofing felt in place at the edges.
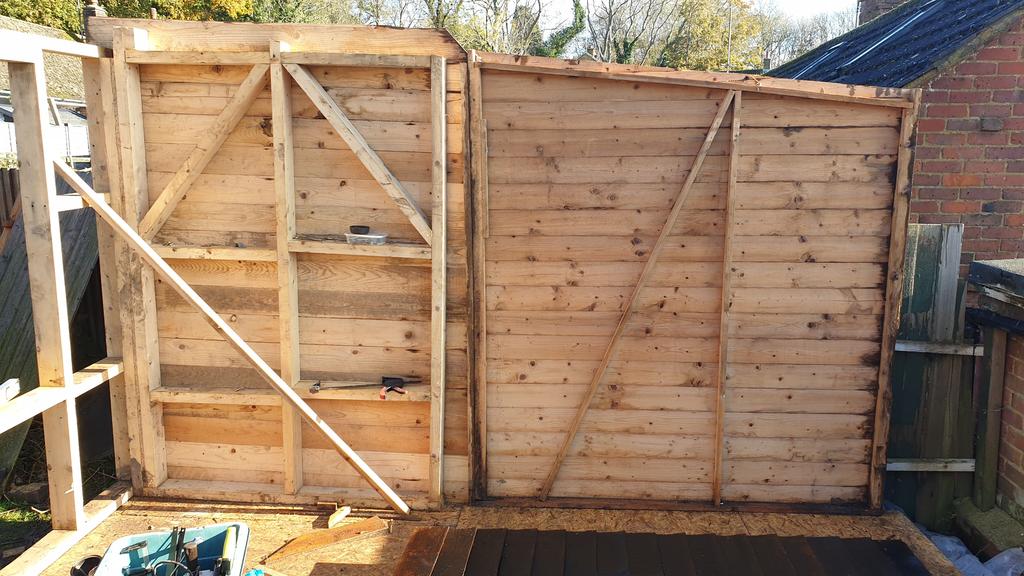
It's really hard to get a good photo down the side as it's so narrow, you can see most of the "shed bit" door, and the two types of cladding used.
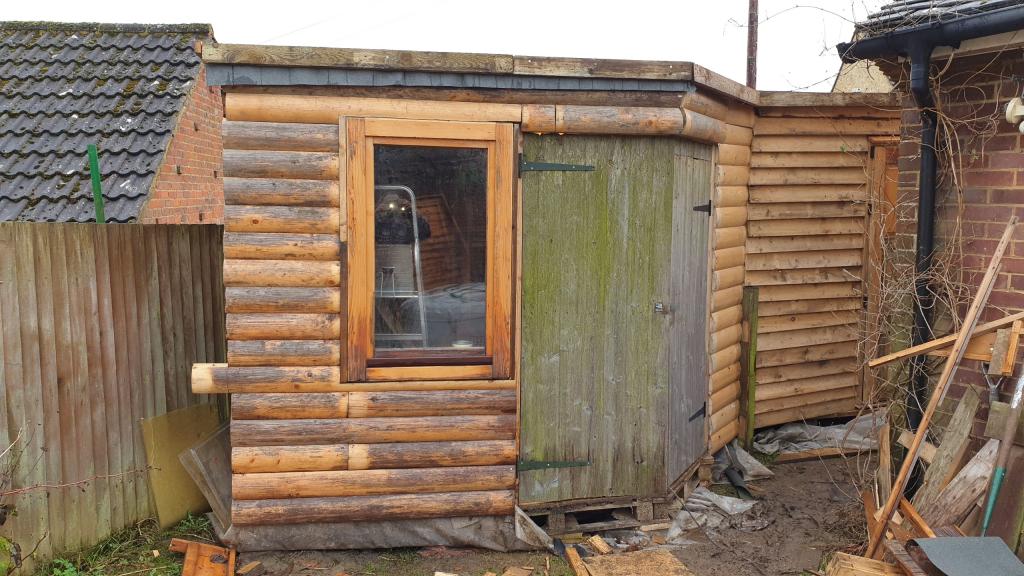
A better view of things from the back garden.. The final bit at the base will be boarded up when the deep mud drys out and goes away.
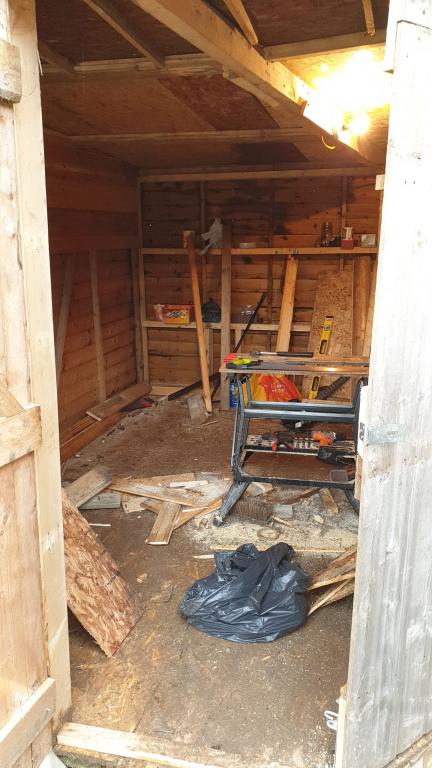
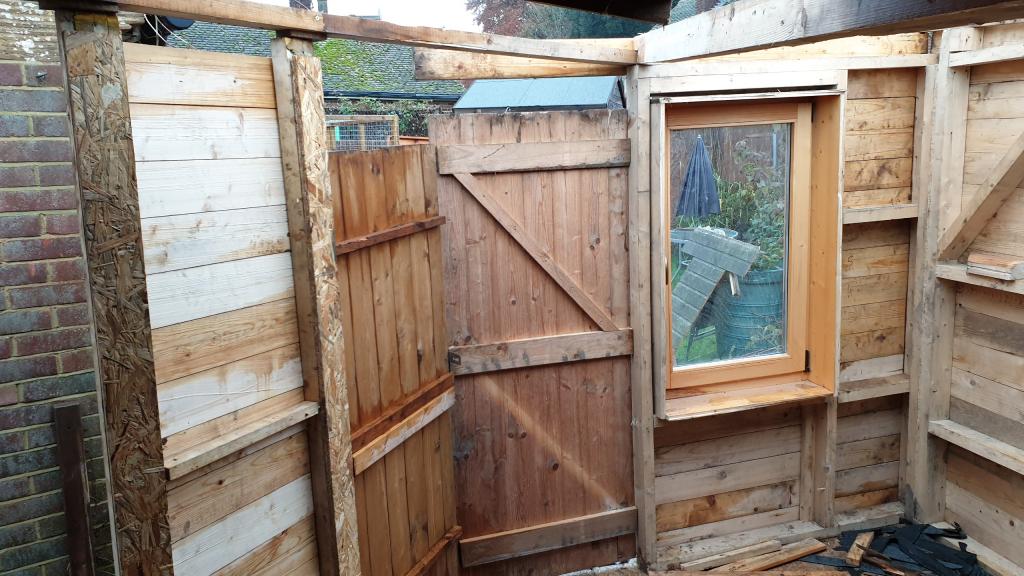
A view through the door.
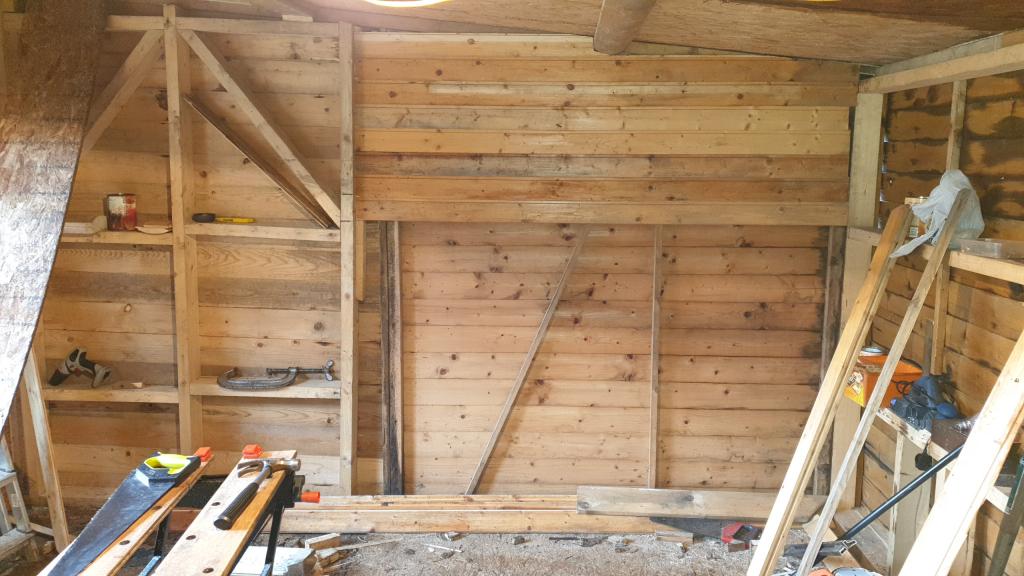
The inside has been clad around the window, apart from the bit below the window it looks rather fetching with some more log effect wood.
Below the window won't be seen once a desk and bit's are put in place.
Hi again Norm, just for you I had a quick measure one boot in front of the other style..
Part of the construction is just for normal "shed use", garden tools, garden chairs etc, but....
The part that will be workshop if it was square (a bungalow is in the way) it would be about 13/14 ft per wall inside measurement.
Well, this workshop building lark is taking far longer that I first thought!
I can fairly blame it on the weather as last week and this week has just been a total wash-out!
That and I have just had to have a small op which means I need to rest for a few days..
But all being well I hope to be back on it Monday, and maybe (just maybe) have it water tight by the end of the week..
We shall see.
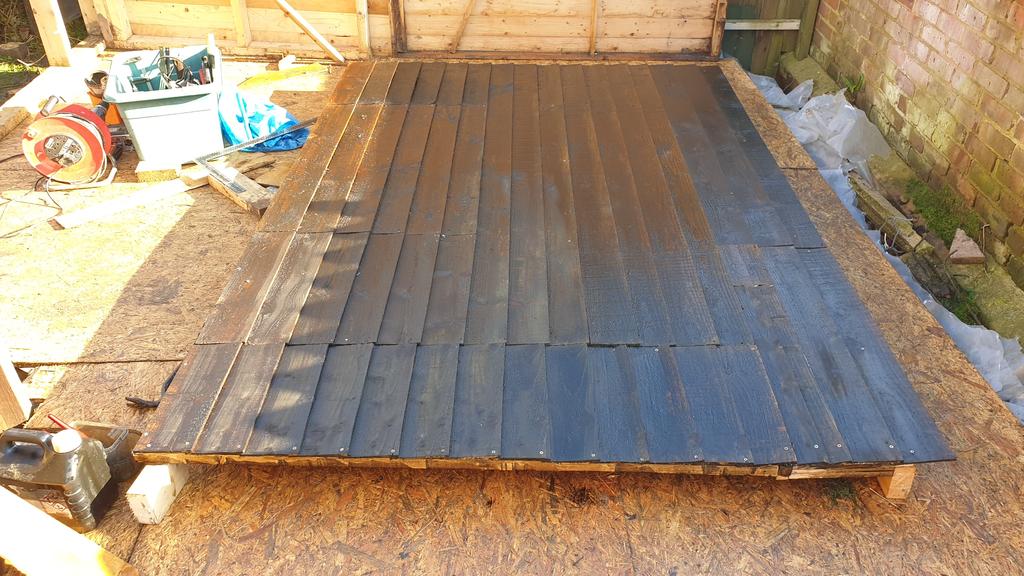
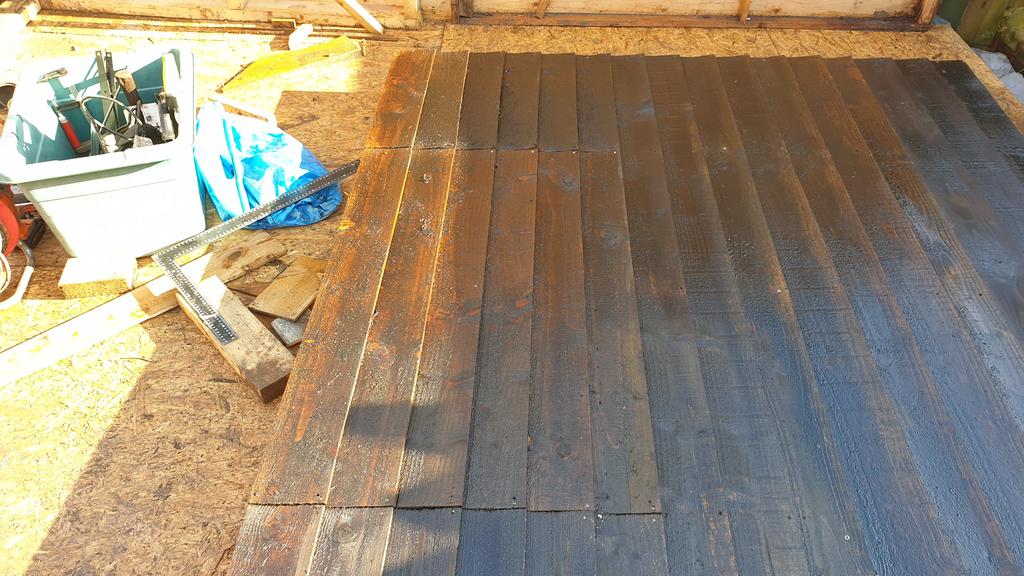
A few more progress snaps for you all.
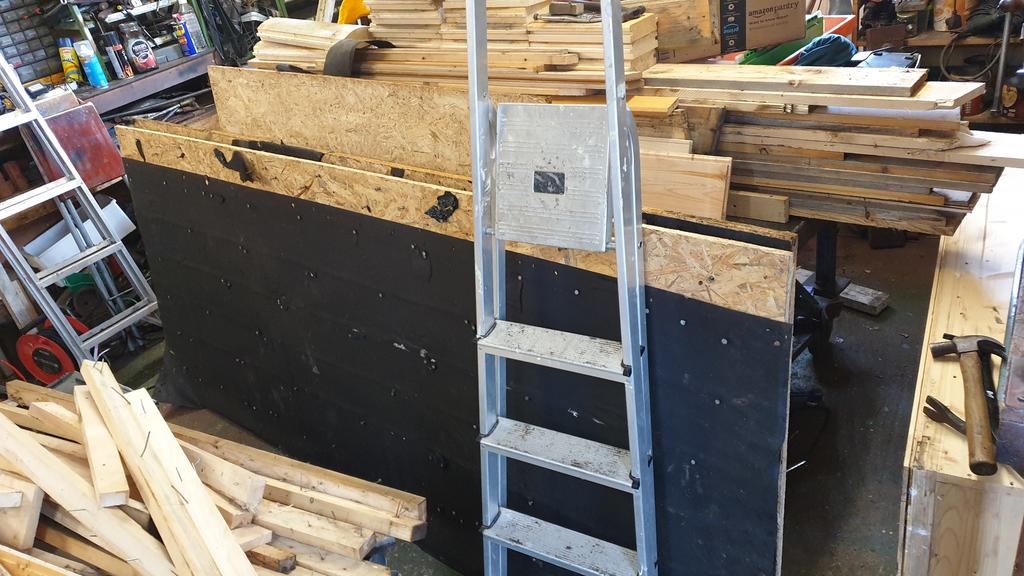
Working out the roofing panels, here you can see two shed panels and a shed floor roughly in place..
This is all just to work out if I had enough sheets of osb to do the entire roof...
As it happens I don't so I will have to order a couple of 8 x 4 sheets today for delivery Monday.
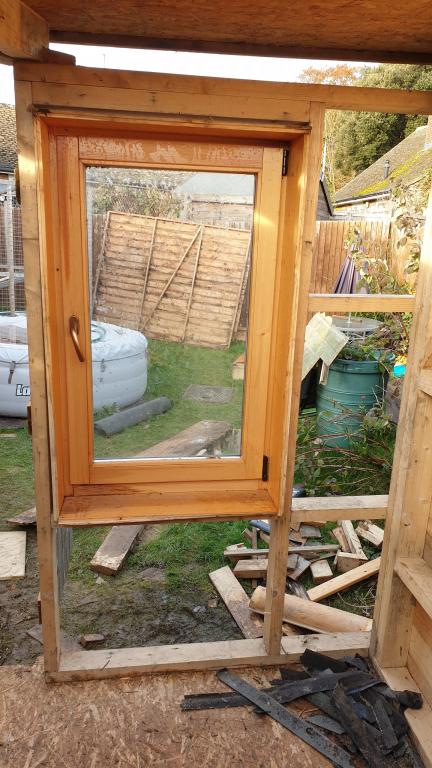
We has window
A couple of snaps from slightly different angles.
Another inside shot, but this time with added cladding.
The log cabin effect
Yes the board on the left side does need to be trimmed down a tad.
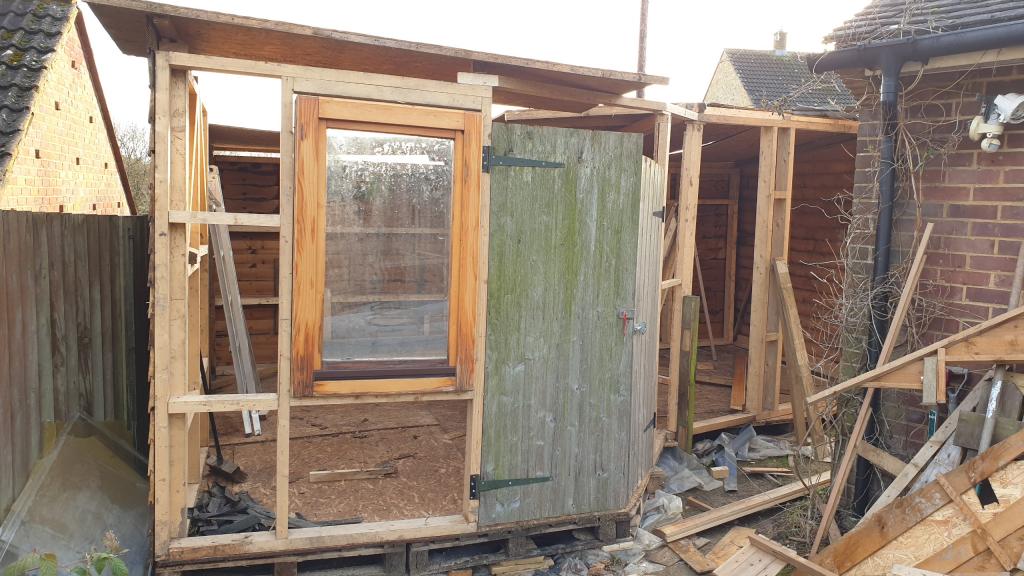
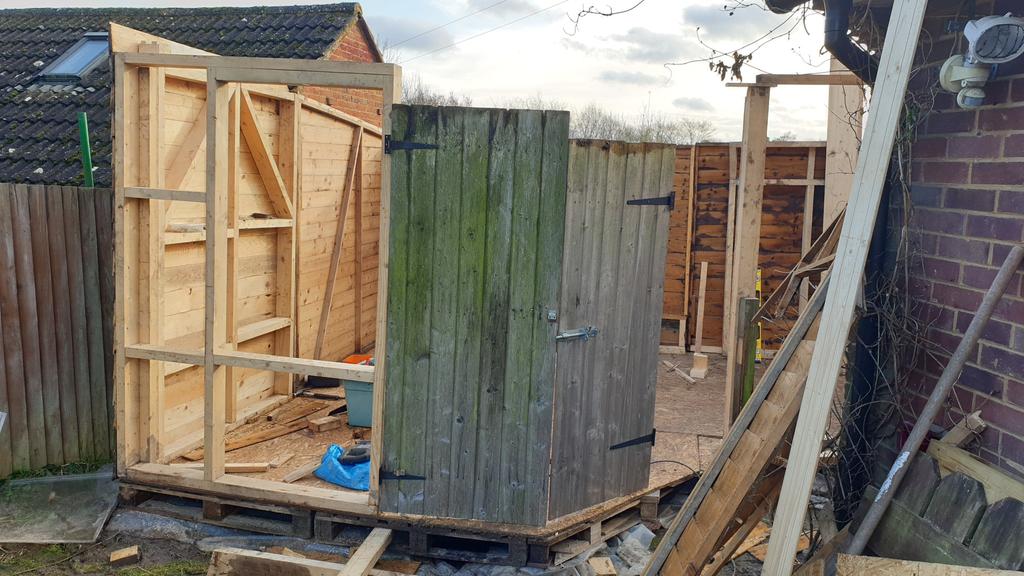
Although it's hard to tell from the above photo all that's left to do "wall wise" is fit a door in the right hand opening and clad the bit on the left..
Might finish the bit above the double doors as well
Hi Norm, not sure on the size, I will have to have a measure though the odd shape will make it intersting to work out.
I should point out that a small part of this will be a shed for all that garden stuff, so I will be losing a bit of space..... But it will keep my Wife happy, so worth it
On 11/11/2019 at 7:17 PM, the showman said:
Looking good Ian, looks like your be in before Christmas
Thanks mate, I hope to be in long before silly season, but that depends on the weather and how much energy I have!
On 11/11/2019 at 10:34 PM, Alan said:
Nothing like having a wooden shed with windows Ian. My workplace is a brick / breeze block garage with no natural light unless the up and over door is open. Internal door into the house is handy though for tea and biccy supply's. Keep the photo's coming.
Hi Alan, yeah you can't beat a wooden shack, without heating they feel much warmer than a brick/concrete garage..
A few more photo's coming.
A small update..
The next bit of frame has gone up, the opening with the two planks fixed accross is where the shed (not workshop) door will go.. well, it will once I've cut a couple of inches off the base and fixed the rotten door bottom.
The last remaining open bit of the small end wall has been clad filling in that gap, but I've not taken a pic of that.
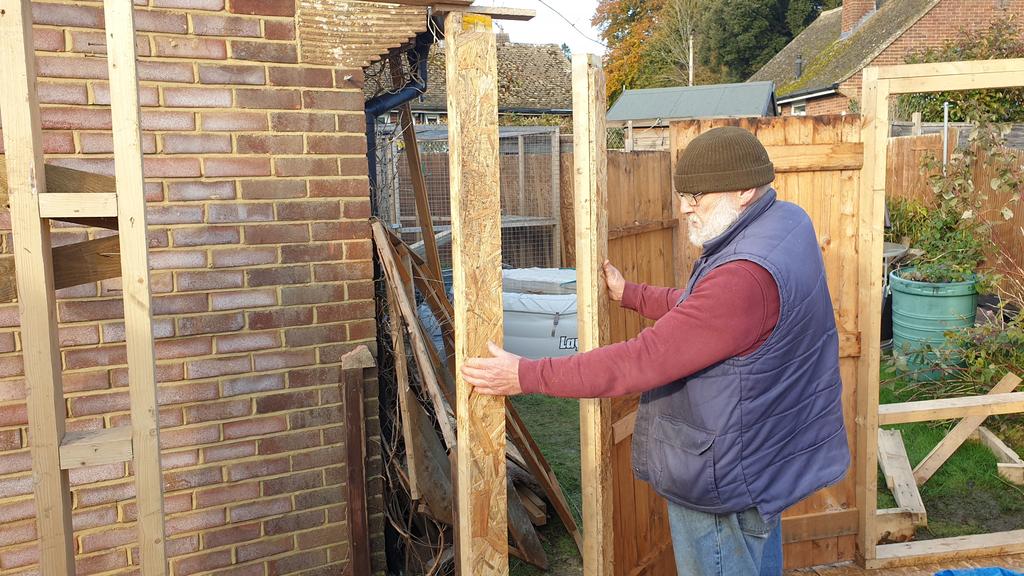
Rob roughly putting the next door post in place to have a look..
Speaking of doors... Here are the two workshop doors roughly in place..
One door isn't quite wide enough, and as there isn't a long enough bit of wall to get the doors side by side without loosing a window, round the corner they have to go
It's amazing what you can get find after a quick chat with the local builder who happened to be walking past..
On the off chance your reading this Sam, thanks for the window
This window will go in the back wall at the top to let the sun and heat in.. Free light and warmth.. Worth the agro of taking the wall panel out to fit the window..
Good to hear from you Ian. Enjoy your construction work.
No doubt Nigel will have transport the timber for you. Free of charge of course.
Hi Norm, I don't actually like woodwork, so no I'm not enjoying this build too much..
The weather hasn't helped, Rob and I can only get bit's done when it's not pissisting it down!
On 11/8/2019 at 10:03 PM, nigel said:
Not a chance my trailer wasn’t big enough we got mr Hobbs with his 7.5 tonner
Yeah it was a bit of a wide load for your trailer
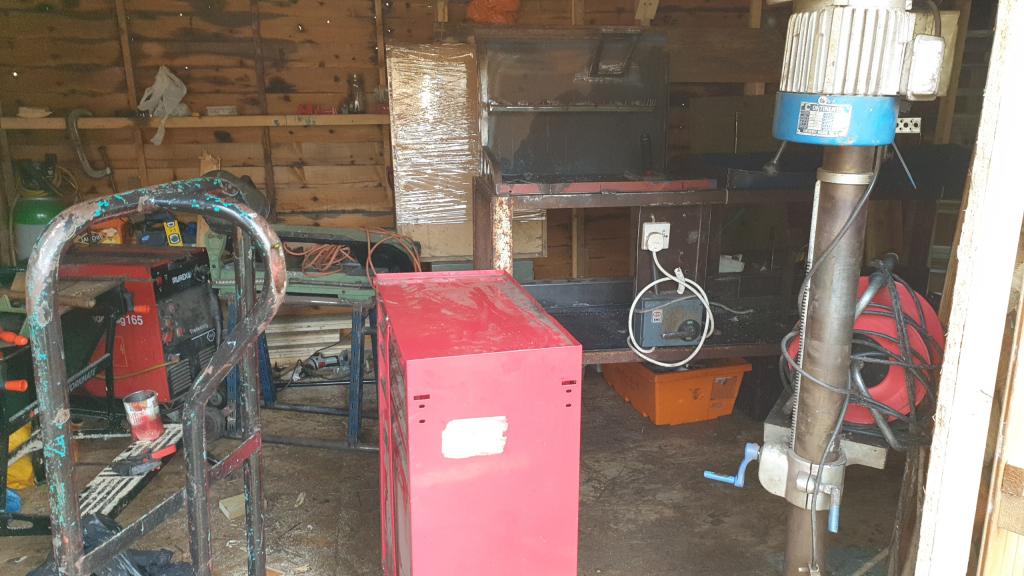
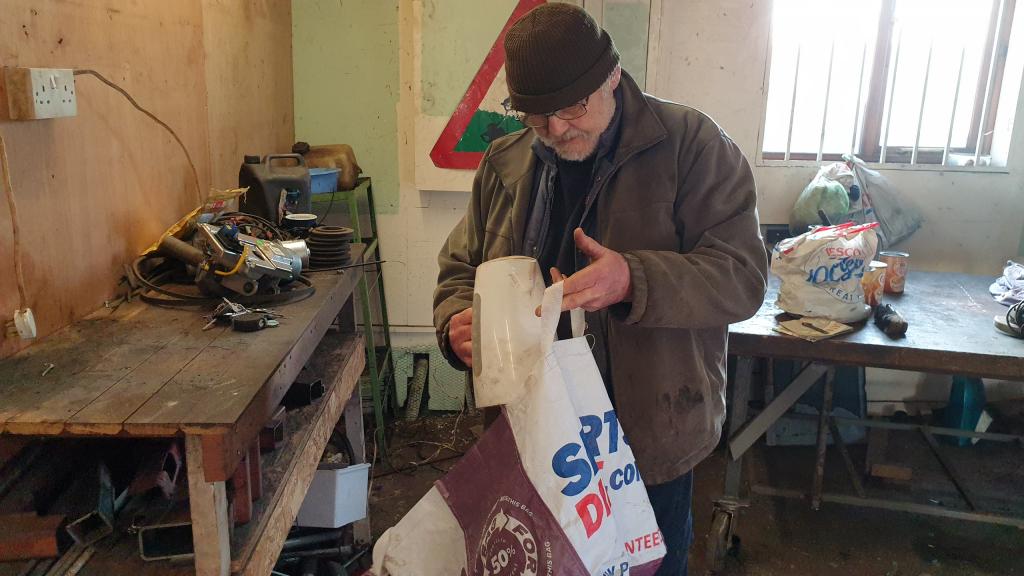
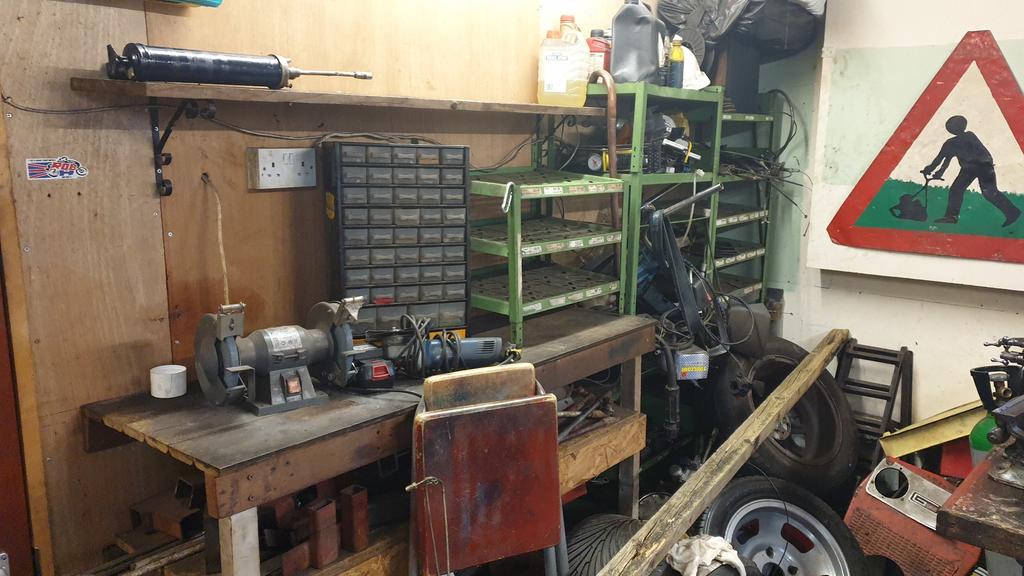
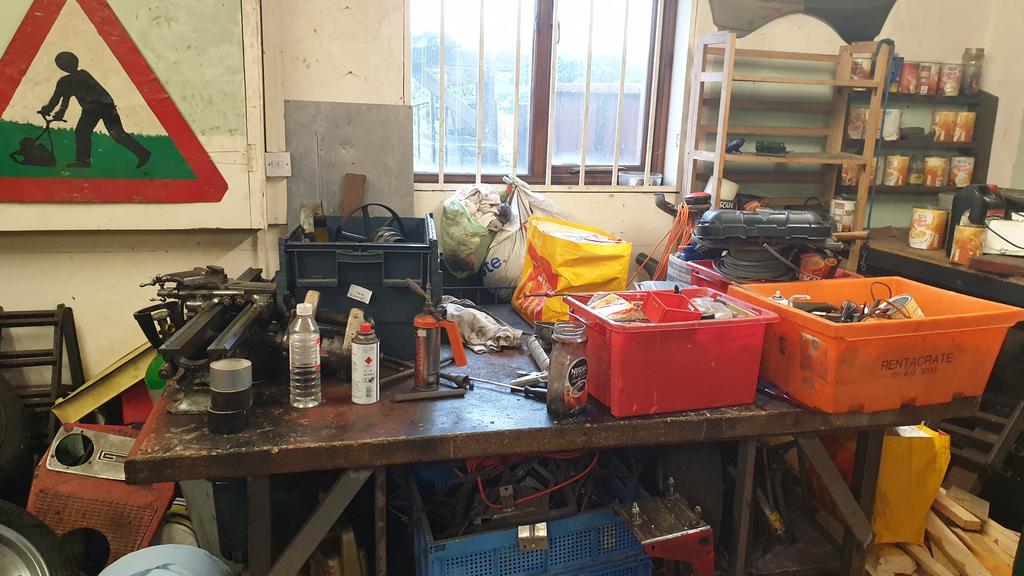
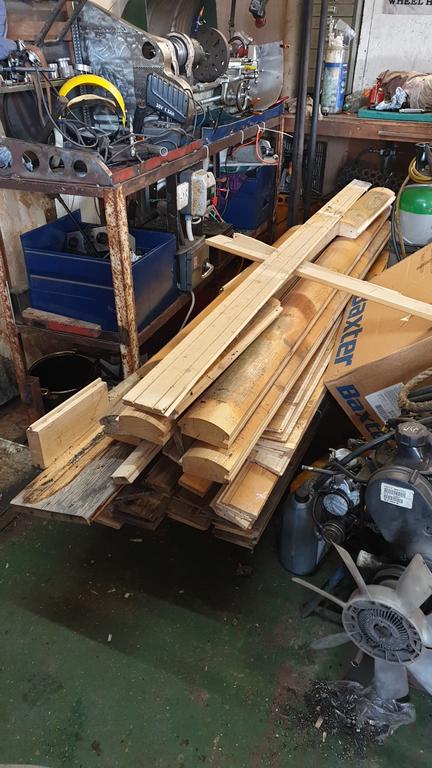
When the weather was nasty I've been spending time at the workshop getting things dismantled and packed into boxes.
It's nice to have some space to do this now all the wood has been moved
A few mostly empty shelves and things like the bench grinder and storage unit unbolted from the bench/wall.
The lathe bench is very empty, taking the lathe off makes it a tad lighter to move.
The lathe is on the big bench along with a few packed boxes.
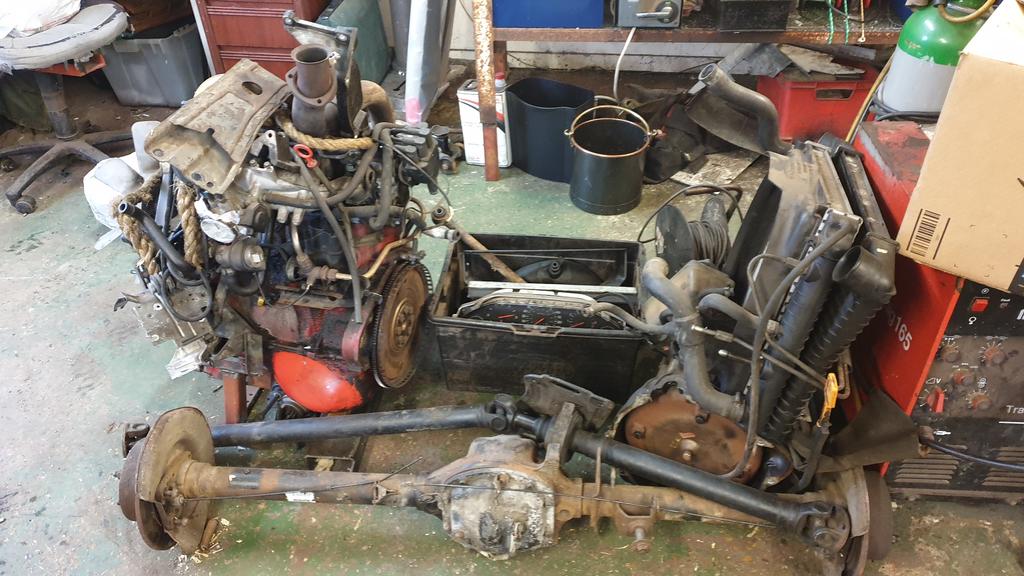
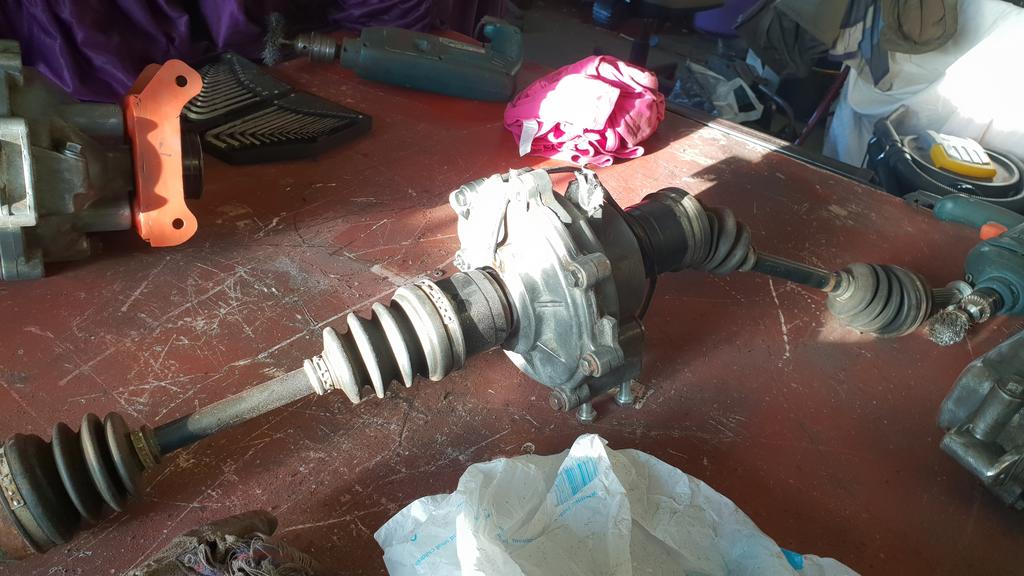
And all the Volvo running gear neatly plonked in one spot..
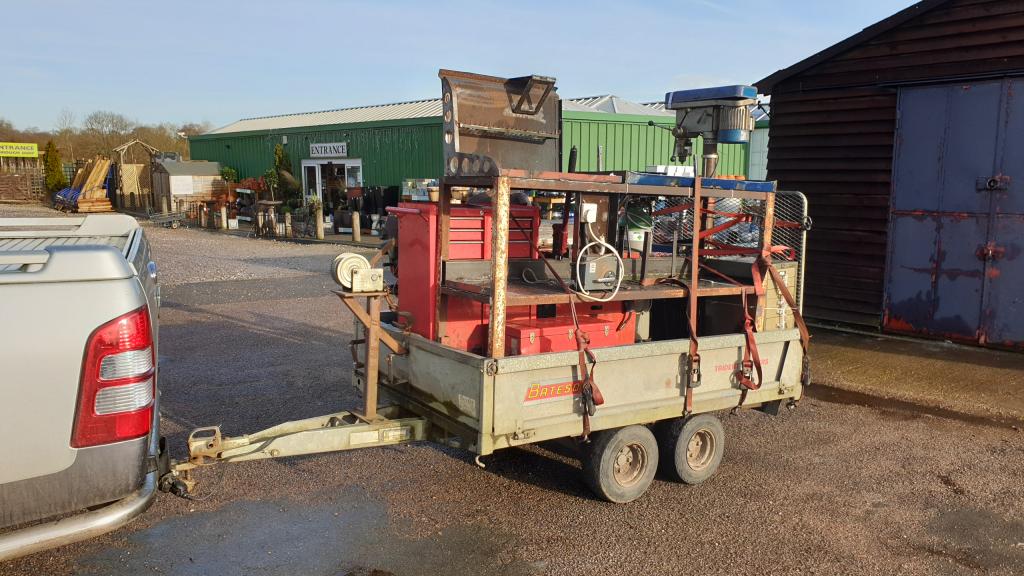
This all changed Saturday, when most of it was put on a pallet ready for a trip to Yorkshire tomorrow.
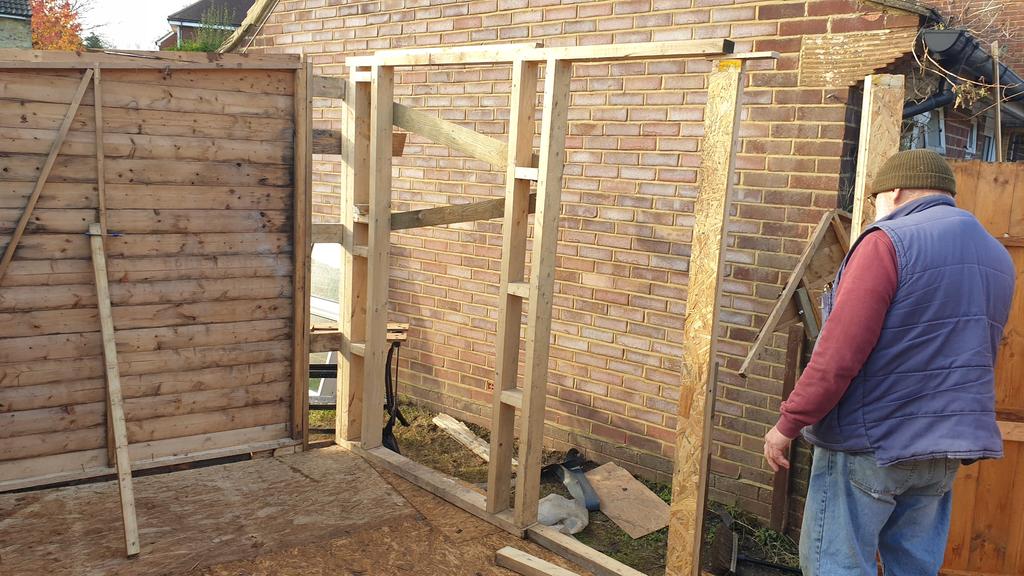
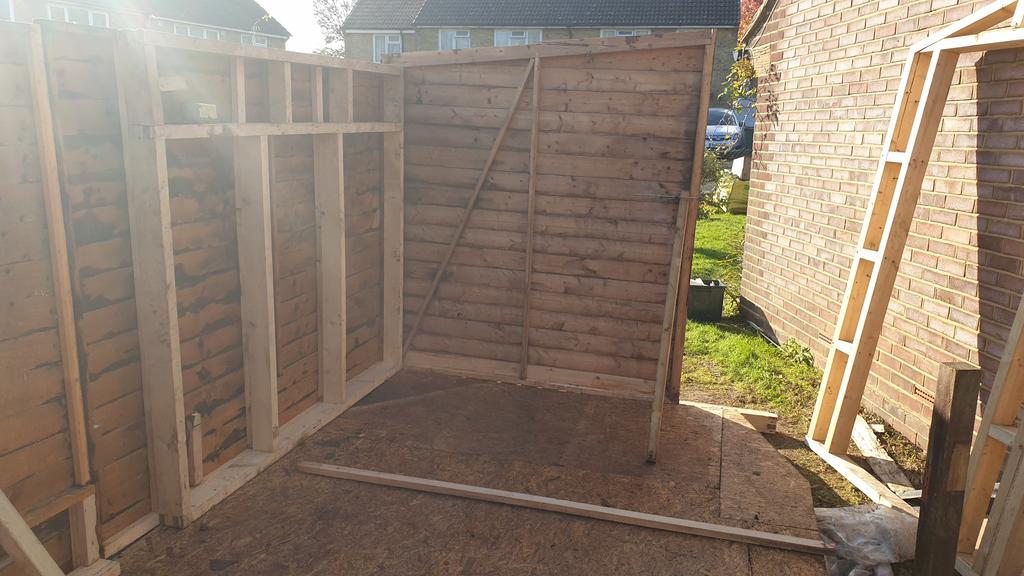
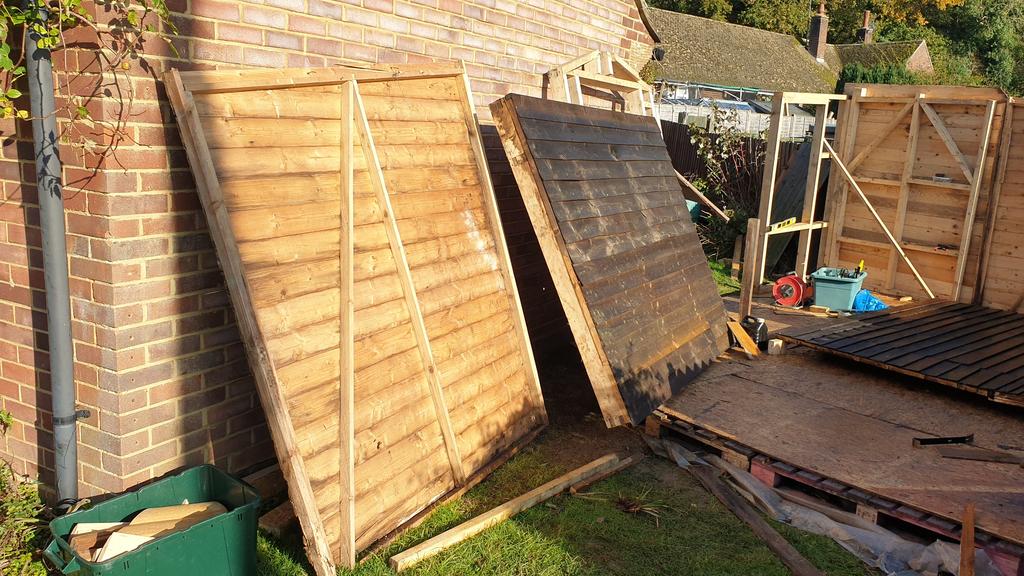
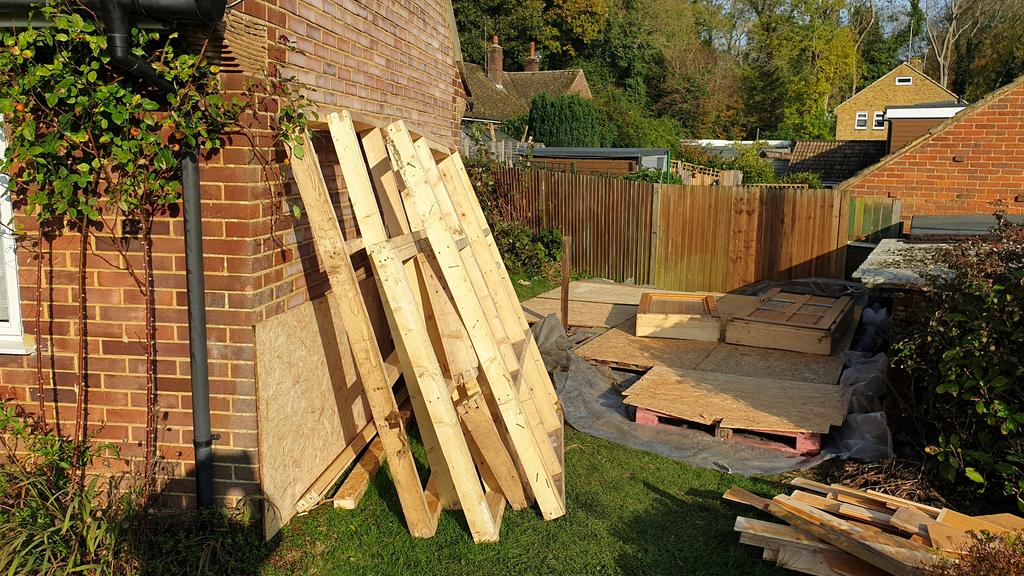
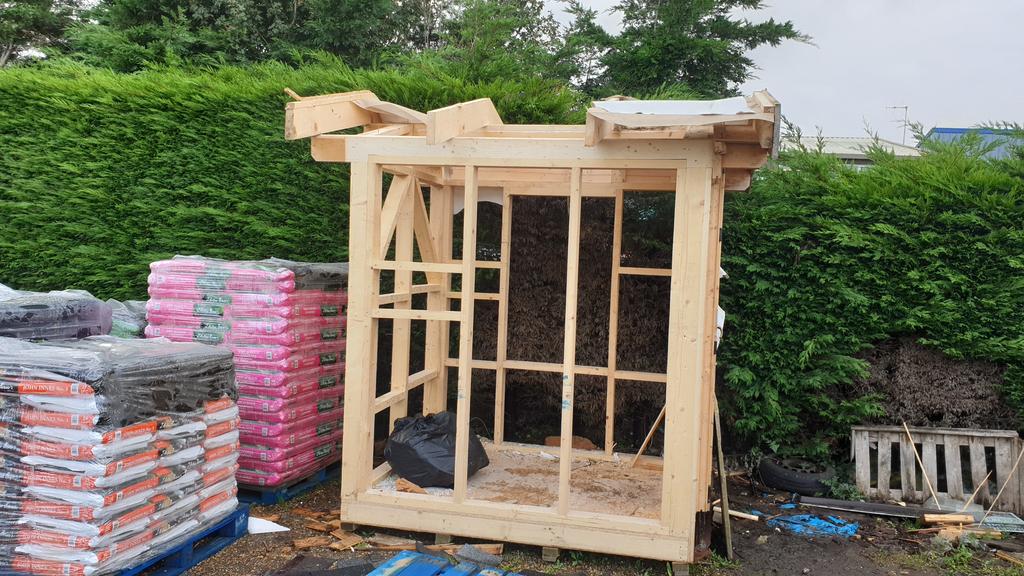
Sooo.. Back to the garden and the workshop and panels are slowly going up.
This is one end wall made from 1 shed side panel, the frame from the back wall of the demo-cabin and a lot of tongue and groove.
Leaning against the wall are one end panel for the small end of the workshop/shed and one of the back wall panels which is made from cabin floor frame and a shed rear panel.
And ready to go up is the other rear wall panel.
This was made using the cabin side wall frame and a side panel from a shed..
You can see where it's been extended in height by 3 boards and lengthened a bit as well.
What is a bit hard to see in the above piccy is the boarded up window opening.
This will get a window put in it at some point, some extra light in the workshop is always a handy thing
Hi all, as most of you will know I'm moving on to pastures er.. smaller, which means a new workshop in my garden.
This is really a tale of 2 sheds and a demo-cabin as you will see..
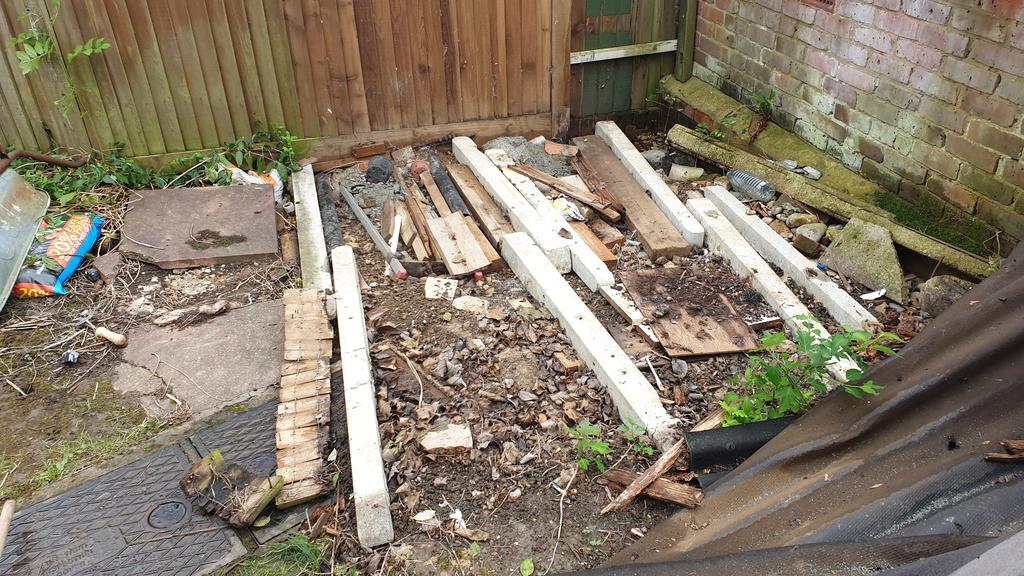
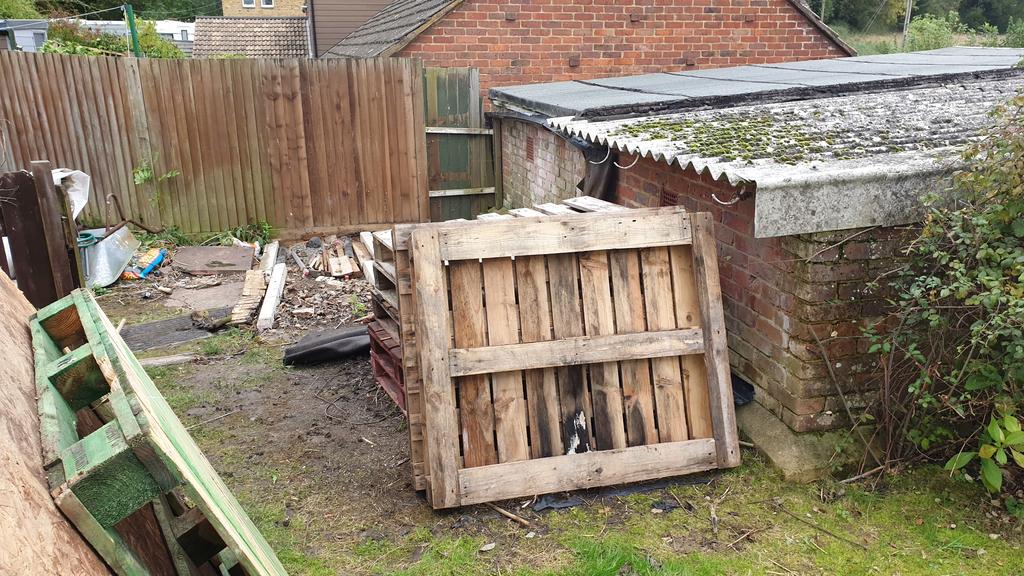
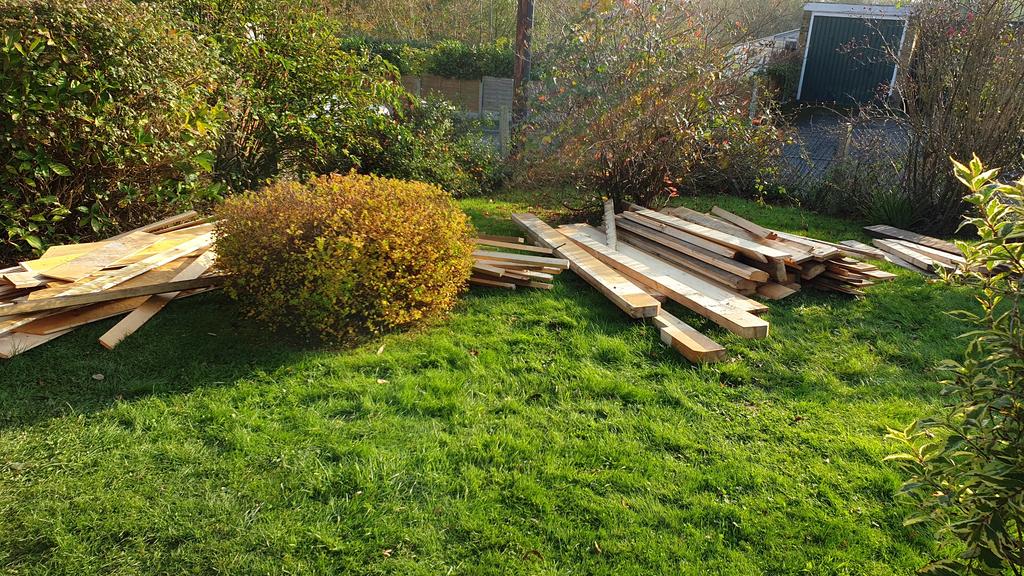
As this is a budget build I needed to find/use as much recycled wood as possible, which is where shed No 1 comes in.
A big thank you to my Wife's daughter Lisa for letting me have a shed that wasn't going to be used..
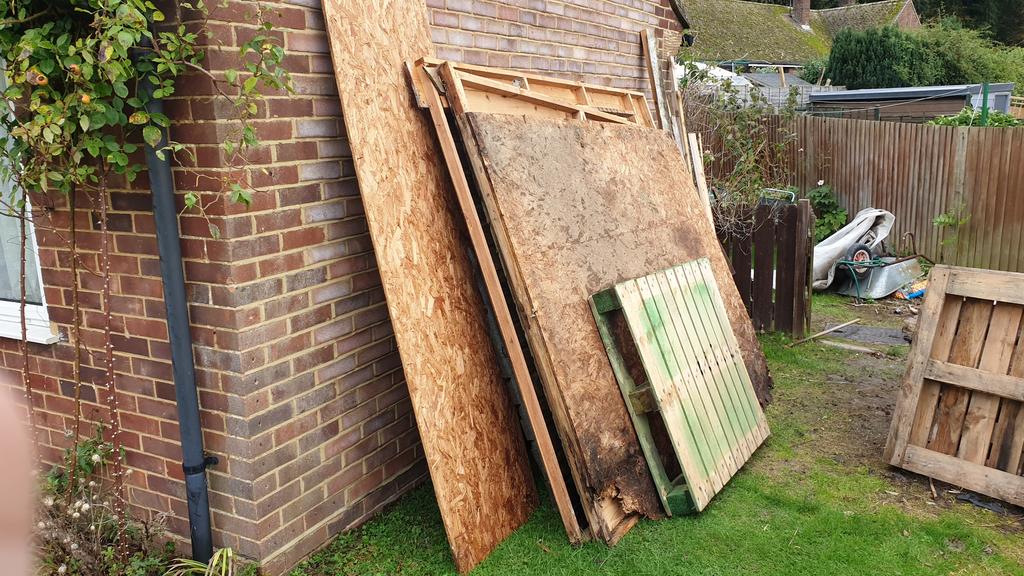
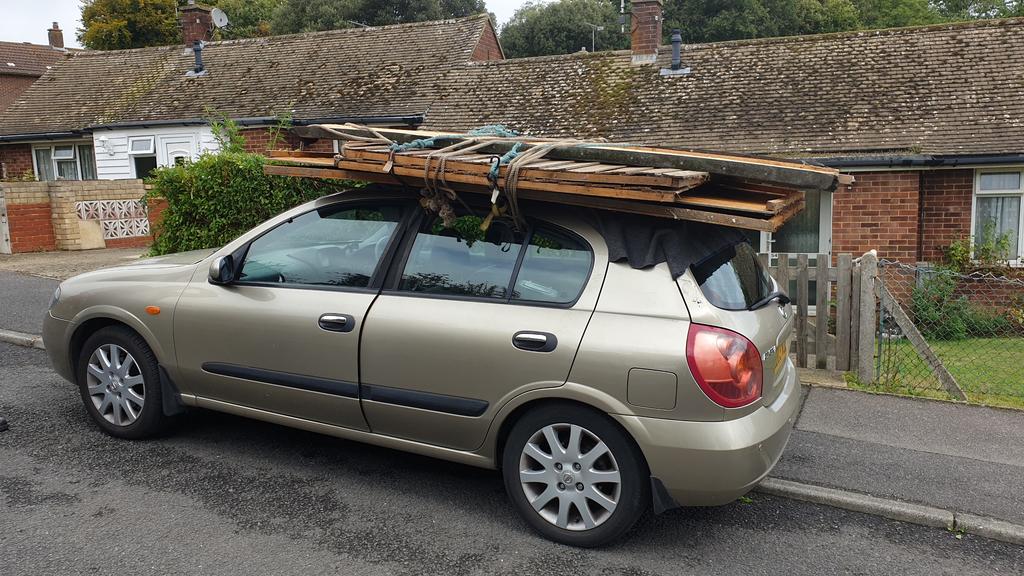
No photo's of it before it was taken down, but here's one showing how it arrived at my place
This is where the demo-cabin comes into things.
There used to be a company trading at the end of the nursery (when my current workshop is) that sold posh wooden cabins..
To show their wares they had a demo cabin built that had different cladding on each side ond inside!
Companys come and go, and this one went leaving the demo cabin behind for at least 5 years, maybe longer....
HHmm... Look at all that usable wood thinks me...
One chat later and I had bought it for the amazing price of £50
Of course no photo's of the cabin before Rob and I started taking it apart, but here's a couple of the naked frame.
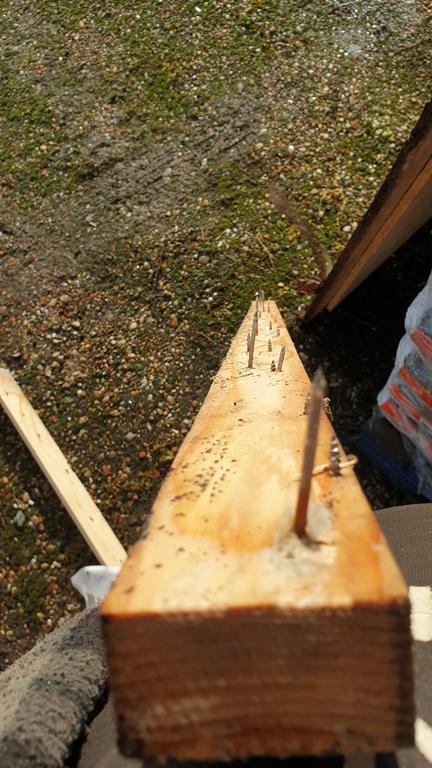
The only problem using used materials is they tend to have lot's of nails/screws/big staples holding them together which means a lot of the timber came off looking like this!
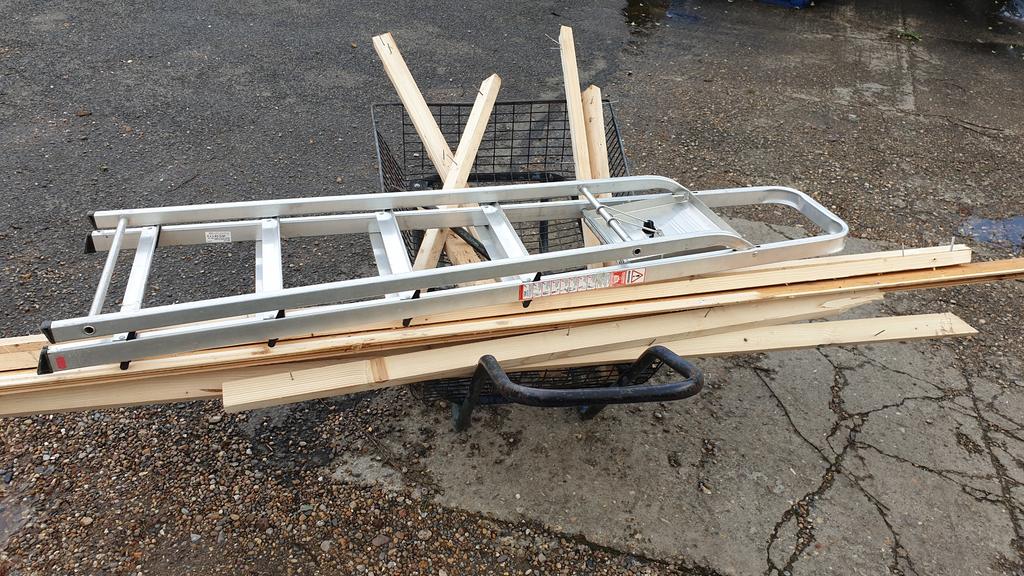
All the wood and tools were transported about the site on this trolley thingy.
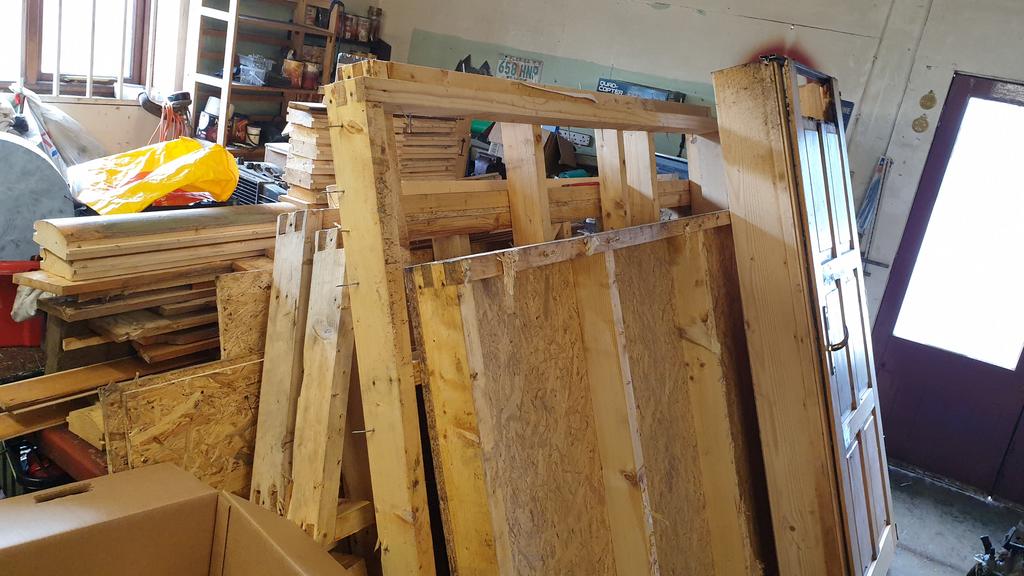
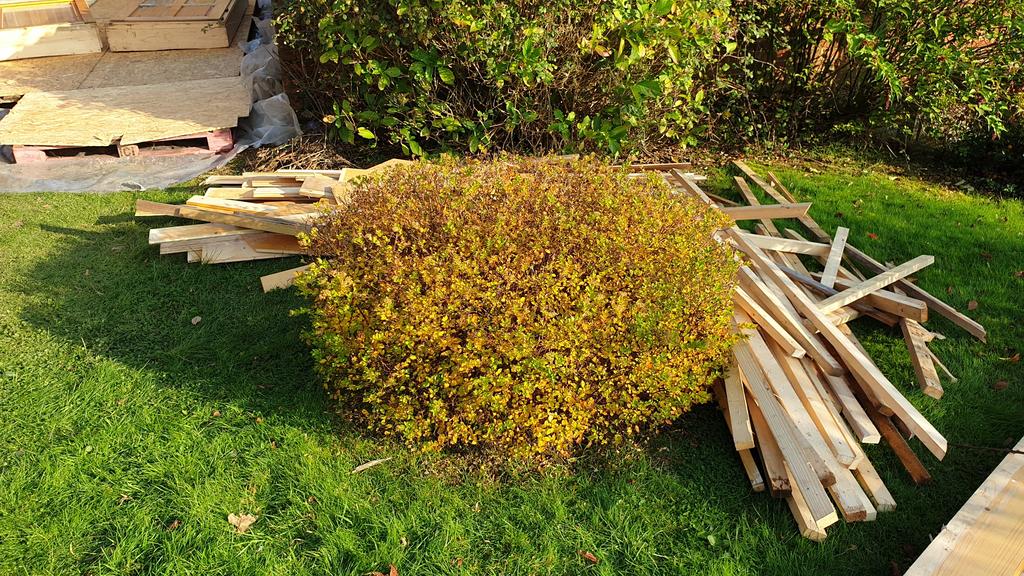
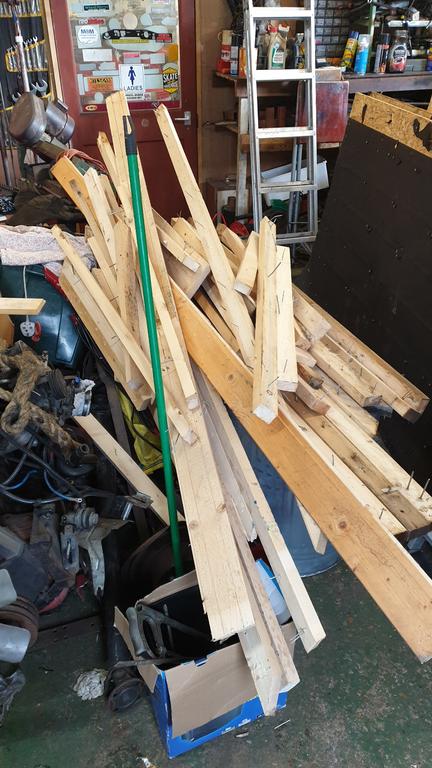
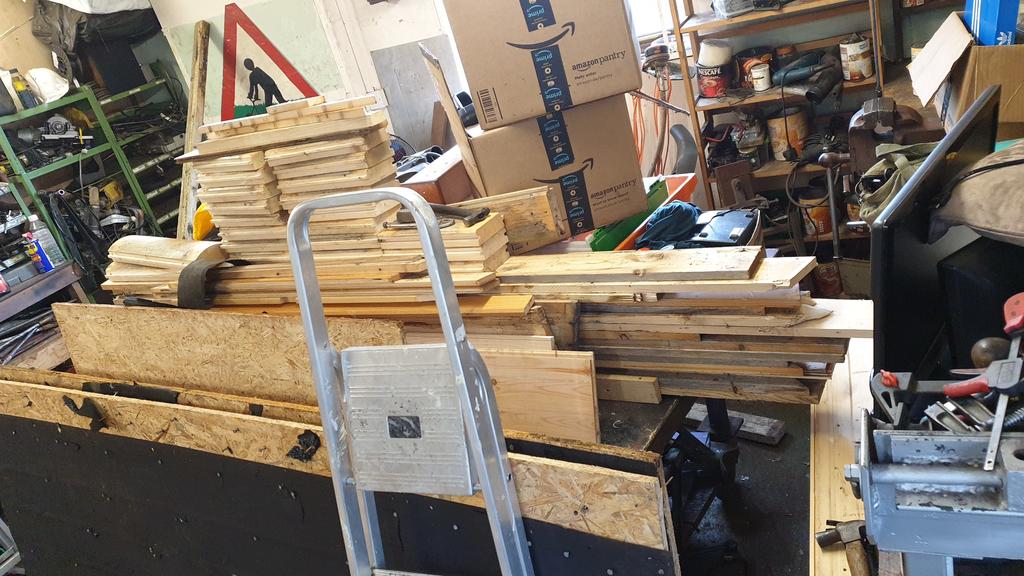
Having taken the timber off it needed to be stored somewhere.. yep the workshop!
This will give you a clue as to the vast amount of wood came off the cabin and this is only the ouside, inside and roof cladding!
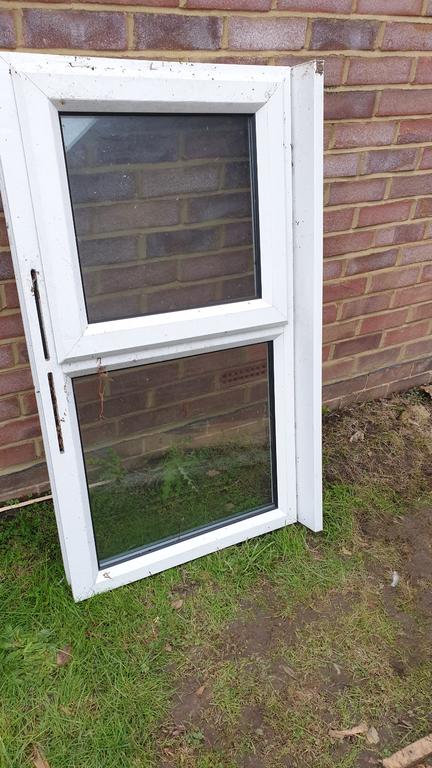
The cabin also coame with this funky double glazed window that opens both ways!
I’m so shocked and surprised to read this Ian i was almost in tears as i read this to Pam. Its a big decision to make and I’ve been close to it myself over the last few months as you know with Pams Health and family problems.
I like to think we’ve had some fun over years and I’ve enjoyed your builds ( and driving them ) as well as the videos.
If you need any help or just want to chat I’m only a phone call away and if your down my way you’re always welcome to coffee.
Best wishes to you and your other half Mate and take care.
Chris & Pam.
Stop that Chris, your bring me to tears!
Yes it was a big decision, but in the end I just had to listen to my knees and hips, and then admit they were right.. They just can't do it any more..
Yep, we have certainly had some great fun over the years
Ta for the offer of help and/or a chat, I need to get skype sorted... (Jot's it down on todays "To Do" list)
I was down your way Monday, time was very short or I'd of sent you a text to put the kettle on..
Next time though..
You both look after yourselves, catch up with you soon.
On 9/17/2019 at 7:13 PM, Stormin said:
Very sorry to hear about the traumatic time you and your better half have been having Ian. It's been a pleasure to have met you and to follow your crazy builds.
The memory of driving your Honda V twin powered creation, will stay with me as long as I can remember.
Wishing you both all the best and hope to see you next time I make it down south.
Thanks Norm, yesterday was a bit of a milestone health wise for my Wife when her Oncologist said, "I hope we never meet again"...
Ahhh yes, I remember you thrashing Wh Not around the track out the back of the nursery, great times.. I always enjoy watching others enjoy my builds
Ta for the best wishes mate, it would be cool to catch up at some point if your down this way
On 9/17/2019 at 8:31 PM, pmackellow said:
Sorry to hear this news Ian, kept meaning to pop down to deepest Hawkhurst and see you and Nigel
Hope all goes well mate, keep in touch
Paul and Wendy
Thanks Paul, feel free to pop in when your in Hawkhurst.. I will still be here, just the other side of the main road
On 9/17/2019 at 8:35 PM, Alan said:
Sorry to hear of your troubles Ian. Don't know you as well as others but liked following your posts and will continue when the new workshop is up and running. Best wishes to you and the Mrs.
Thanks Alan, sometimes life throws curved balls at you, the only option is just to get on with it.
Thanks for following my posts over the years, there will be plenty more posts to come once the new workshop is up and running.
Ta for the best wishes, I shall pass them on to Mandy
On 9/18/2019 at 8:55 AM, expeatfarmer said:
I can only echo the sentiments and best wishes of the others, I have had more than my own share of issues over the last year and now find myself faced with the same decision, having spent many hours enjoying the crazy but technical builds you have put together you will be sorely missed. All the very best to you and your wife.
Thank you Sir... You need to make the decision that's best for you be it physically and/or mentally... I'm really struggling with the physical side of things, but mentally I need something to do to keep the ol brain cells active..
Option 1..
Scale down the things I can build to a size my body can physically cope with to keep the brain active..
Option 2..
Sell everything, spend the rest of my life watching re-runs of Jeremy Kyle and dribbling a lot as the intelligence is slowly sucked out of me!!!
No contest really
On 9/18/2019 at 9:39 AM, nigel said:
Yes ime sorry to see you go Ian we have had a lot of laughs over the years and both done some mad things, but I have watched your struggle every day, and I agree you are doing the right thing by going to smaller projects that you can manage, the only problem is my workshop has just got a lot bigger and ime supposed to be slowing down as well😂
HI mate, yeah it's been a mad few years with plenty of mad builds, but your right, I have become a bit of an old fart over many months..
You slowing down!!! Your collecting stuff to fill up my workshop before I've even left it yet
On 9/18/2019 at 8:48 PM, Anglo Traction said:
Hi Ian , Shame you're having to downsize and localise your operation. It's hard having to deal with these kinds of serious blows.
As mentioned when we last met up, I know exactly what you and and especially your wife have gone through.
I've been doing the same with machines and W/Horses where I only play with small light work now and enjoy the space I now have, but I had a choice, where you perhaps have not.
Chin up and just tick over within your limits. Best wishes for you both.
Hi Richard, it's a shame on the dowsize, but at least I will have a lot less distance to walk to the toilet
I remember that chat well the last time we met!
Don't worry, my chin will stay up
On 9/24/2019 at 1:43 AM, HeadExam said:
You have left a sizable legacy here and should be proud of that, we all have to move on, it's a fact of life. Concentrate on the family and your health, Hoping that happiness will follow .
Thanks dude, I'm not sure about the "sizable legacy" bit, I've just been doing what I like doing and posting it up.
I'm not moving on, more like moving a mile & half closer to home
On 9/24/2019 at 8:42 PM, meadowfield said:
Sad times Ian, we had some good times in the shack and loved bring part of some of your crazy schemes!
the shop might be closing, but the legend lives on... give me regards to Mandy. Really need to get down and see you soon.
Hi mate, yeah some good times were had.. How can we forget the GT-14 bar
The leg end lives on?? What me foot?
Let me know when your down this way.... Curry and chips ok with you?
On 9/27/2019 at 1:18 AM, Triumph66 said:
Ian, sorry to read about this and I must thank you for your warm welcome to MOM a few years ago when I saw your WHs at the Shack.
Best wishes to you both
Andrew
Hi Andrew, that's a bit of a late thank you!
It was a pleasure to have you visit the shack, I will have a shack to visit, it will just be quite a bit small.. same old friendly coffee service though..
On 9/28/2019 at 7:29 PM, Joseph said:
Very sorry to hear about the difficult times you and your wife have been through and your WH builds will be missed. We continue to follow you on your new projects.
Very best wishes
Iain and Joseph
Thanks Guy's, sorry you will miss the WH builds, but I hope you enjoy my new smaller builds, going places I've never gone before..
Hi all, I mentioned in my Hanging up my spurs thread that a certain something I had really enjoyed making had pointed me in a new direction (with the added bonus it can be done in a much smaller space (soon to be built)) to go.
The said build as you will of guessed is a power crossfeed conversion on my lathe..
I didn't take any photo's along the way as it wasn't really a planned build, it just sort of happened slowly over time..
But here's a short video I made out it..
Some of you will remember the coolent system was basically a Ford P100 washer bottle with built in pump.
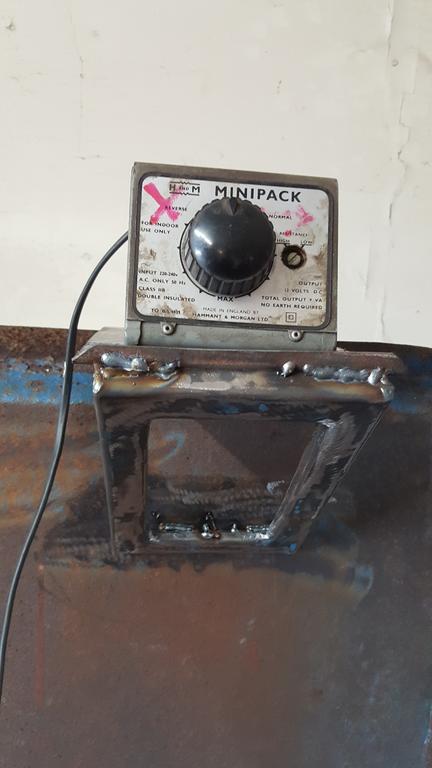
Powered by this model railway controller.
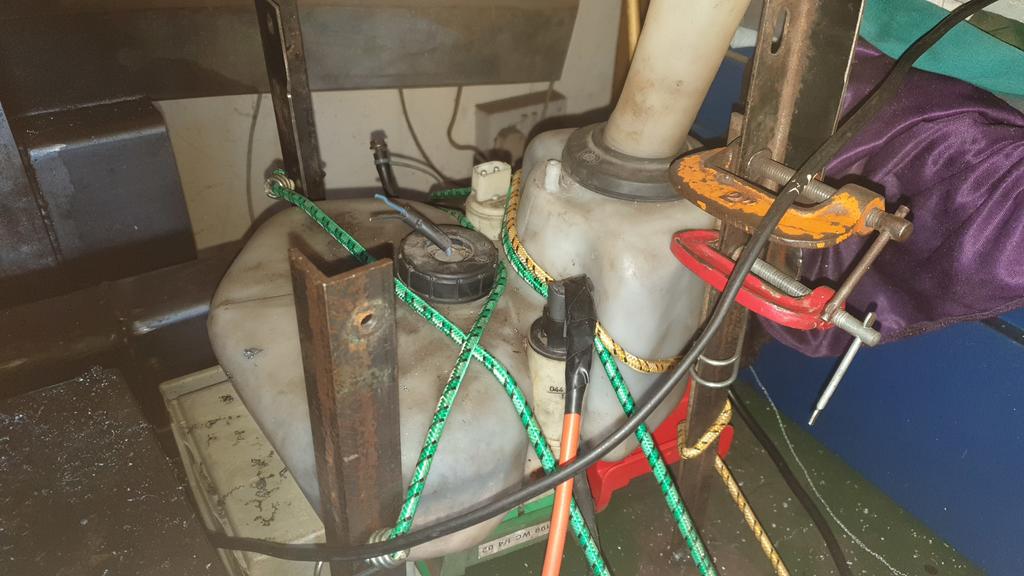
Well, the Ford pump eventually died and as luck would have it I had a twin pump washer bottle from a Volvo kicking about the place.
Only one pump is running at the mo but it is now powered by a twin controller unit which will come in handy for powering the other pump..
Why two lots of coolent you ask?
There are times mostly when drilling through a long length of bar, that the bar starts to get very hot.. So if I can cool the bar as well as the drill action end of things I might as well..
The Volvo washer bottle even has a "low level" warning thingy built in, so I might as well use it and wire in a warning light
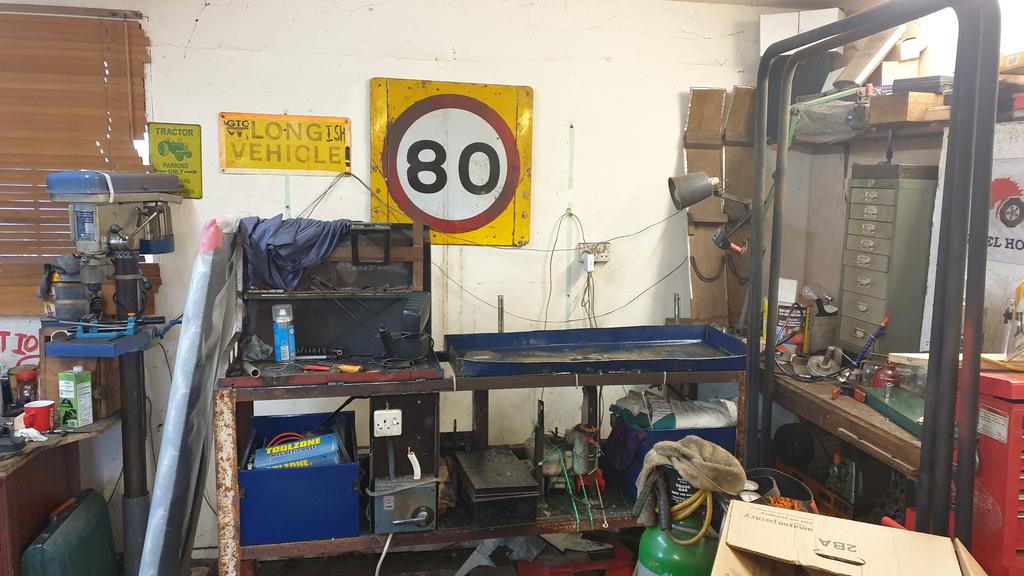
A few pics
The new coolent bottle/pump.
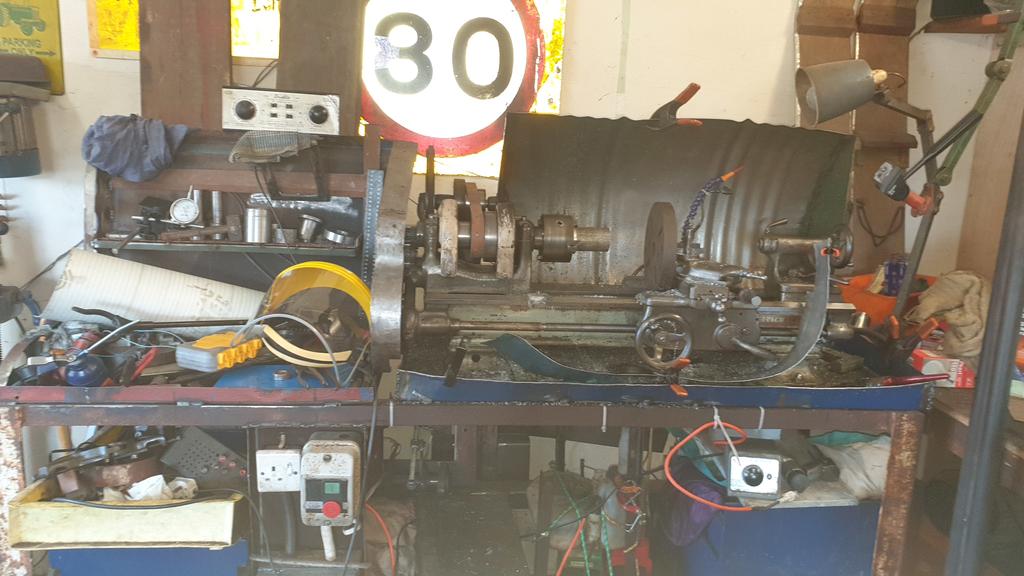
Not the best of photo's, the twin controller is next to the 80mph sign.
You can see the old control unit which is now used for sideways action
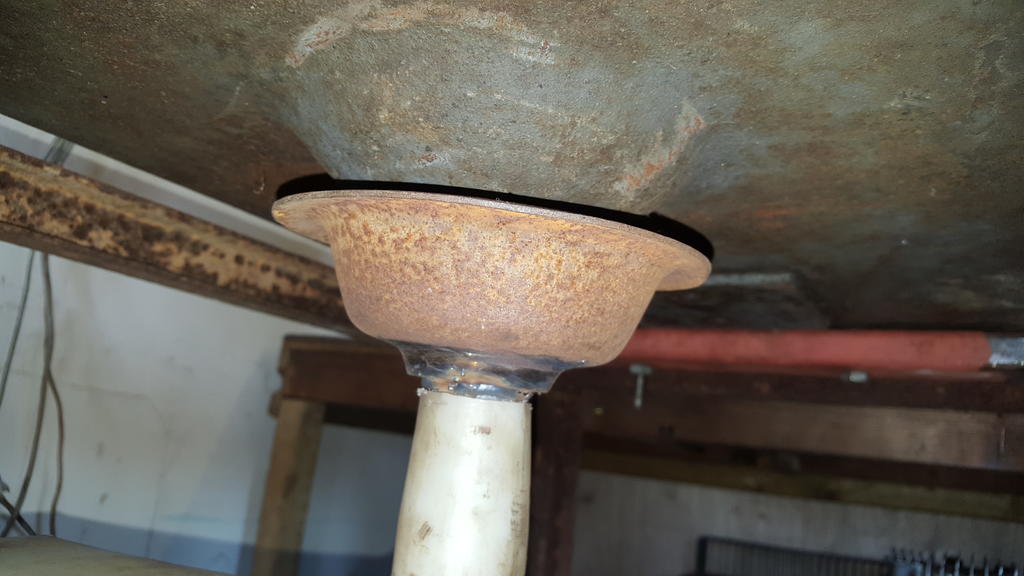
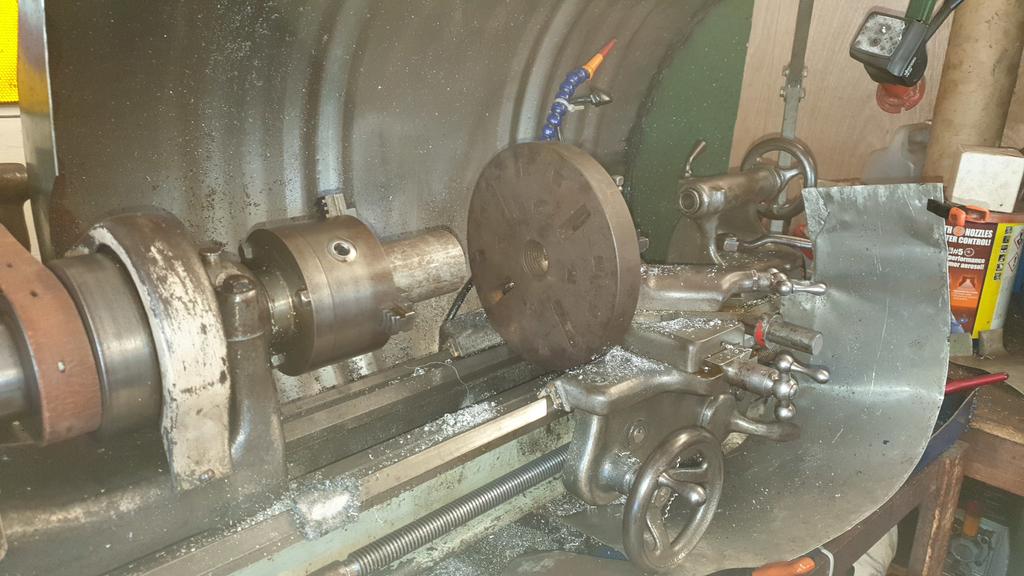
I have been thinking about making a milling plate thingy so I could also use my lathe as a mill, the face plate is only plonked in place to get my brain chewing ideas over..
If you take the lump of ally out the chuck and put in a milling bit you will get the idea of what I'm on about..
The lathe will give me "in & out" an "side to side", but how to do "up & down" and rotate would be nice...
HHmmm..... Some thinking to be done..
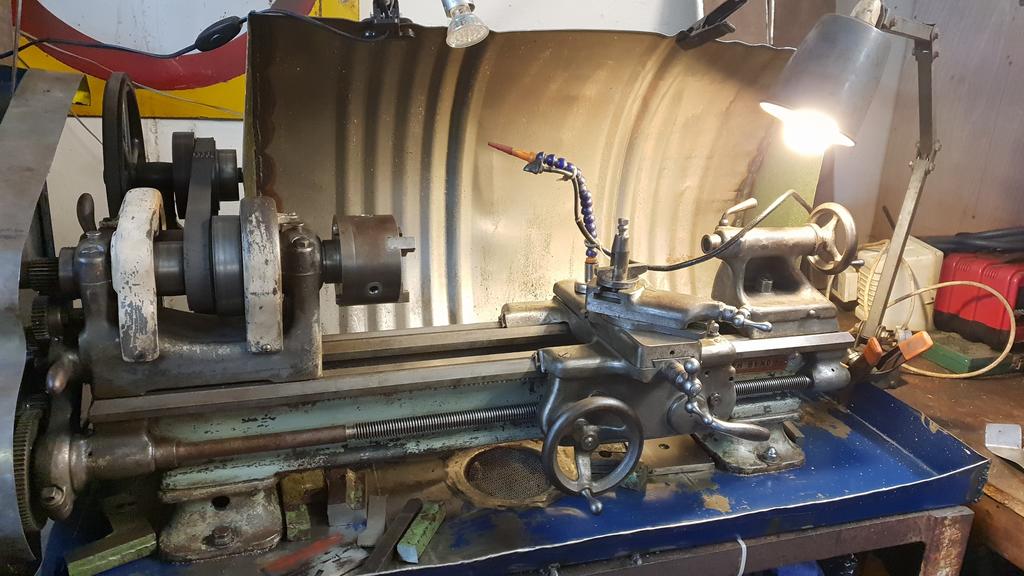
But before any of that happens I need to think about repowering the lathe...
For many many years the little Southbend was powered by this 3/4hp electric motor which I still have tucked away in a box.
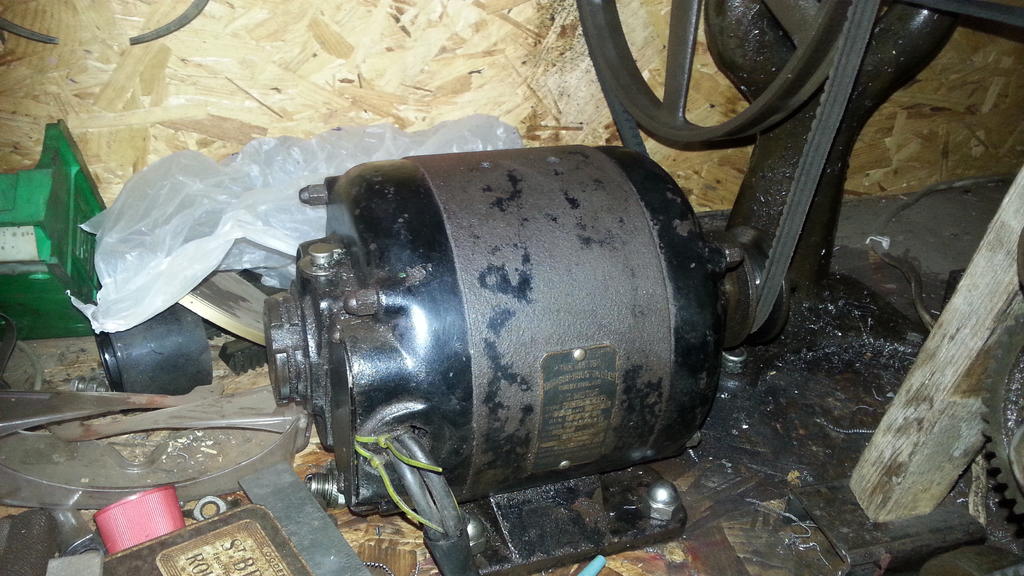
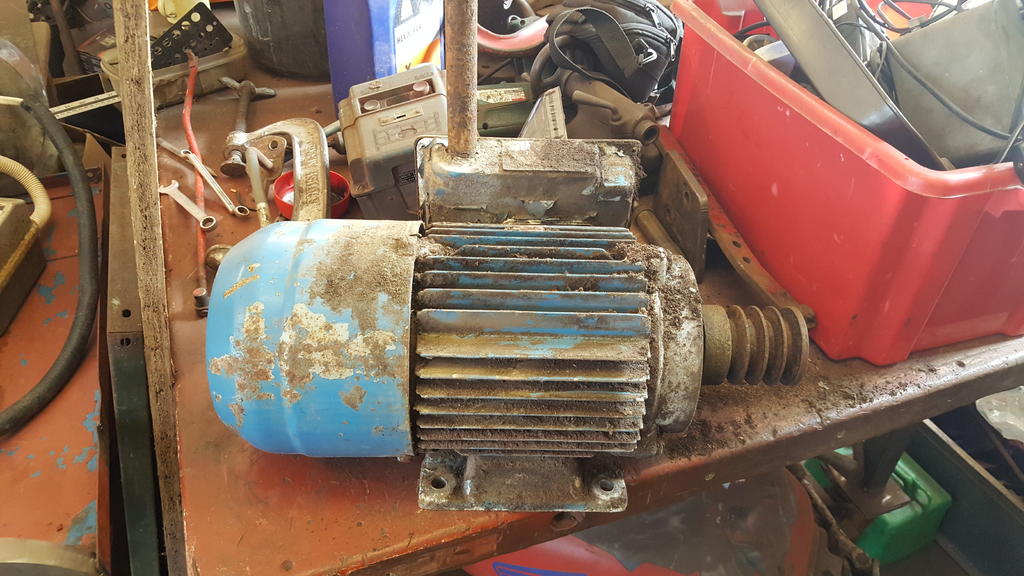
Then 2 - 3 years ago during a lathe bench rebuild it was repowered using this monster (in size) motor taken from a compost mixing/potting machine..
Short of power it's not!
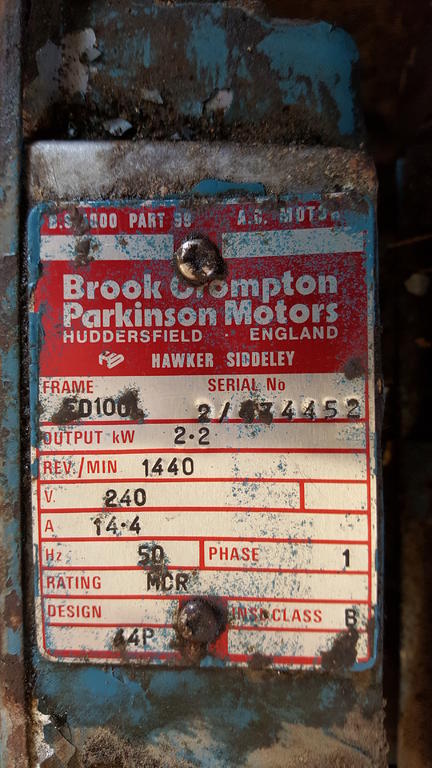
2.2 kw = 2.9911hp so near a damit 3hp!
So why am I thinking of repowering my lathe again? 3HP must be enough!!
Well, there's two reasons...
As all my tools and bit's will be moving to a much smaller space, the current motor on the lathe sticks out the back of the bench a fair way, so the lathe has to be quite a way out from a wall, which would waste space in a small place!
Also the 3HP motor must use a fair amount of electricity, so something that uses less would be better..
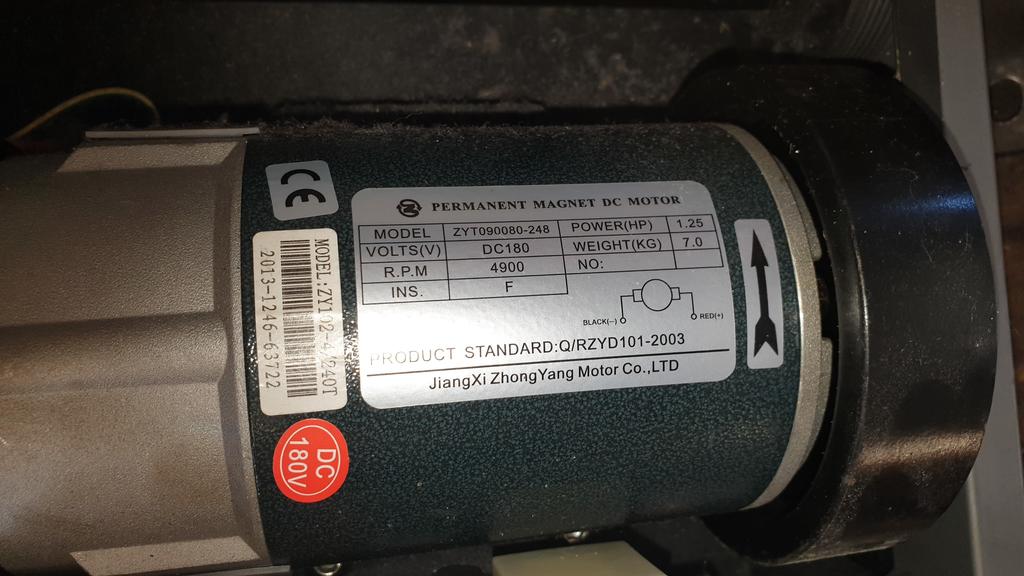
Which is where this lump of metal and motor come in to things.
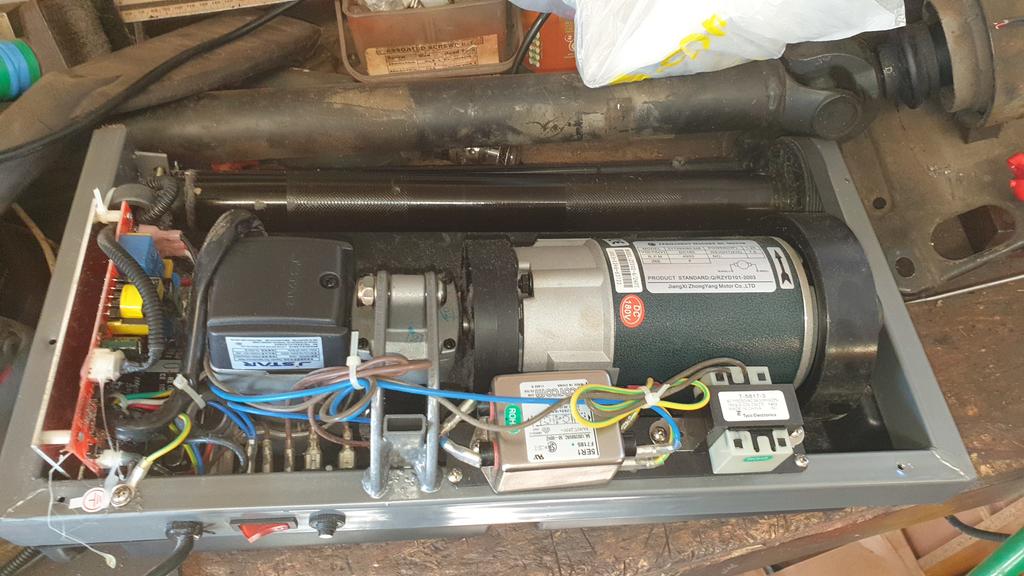
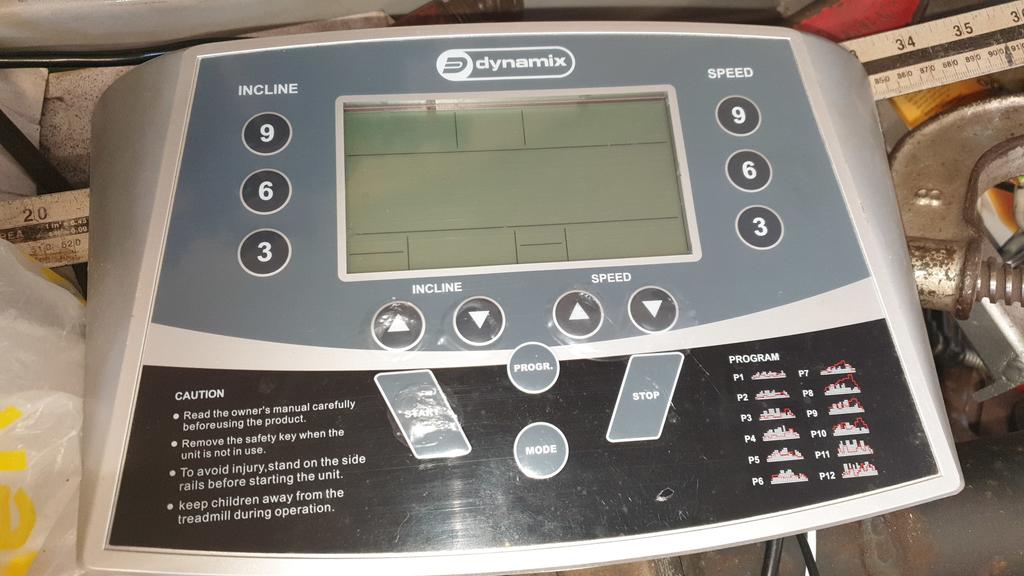
Quite out of the blue I was offer a dyna-mix treadmill the other day, and having seen a few people on the Retro Rides Car Forum use the motors to power something I said yes.
As you can see above the important end was soon chopped of and the rest scrapped.. Apart from the controls of course
The motor is 1 1/4HP but as the original motor was only 3/4HP it should have enough uummpphh!
So what's your thoughts on this repower chaps? Will the motor be up to the job?
What will be nice if it works is speed control at the touch of a button..
I just need to think of a use for the incline motor.
You may or may not of noticed I've not been on this fine forum in over 6 months.. One of those moments that makes you put life on hold happened.
That moment was when my Wife was told she had breast cancer!!
6 months of tears, tests, scans, radiotherepy and sheer panic later she thankfully came out the otherside cancer free (not cured as there is no cure)..
During that 6 months as you would expect I didn't spend much time in the workshop, and when I was there I wasn't really getting anything done...
It's taken a while to admit defeat, but my body just can't cope with the pain that building "big" stuff creates..
I just can't do it anymore!
The next step up painkiller wise would turn me into a zombie , somewhere I've been before and DON'T want to go again..
So, I've given notice at the workshop and have been gathering materials to build (with a lot of help) a small workshop in my garden to do "smaller" bits of engineering..
I will post a new thread about a small project that I managed to do that I enjoyed making so much it's kinda pointed me in the direction I should go...
So yes, UkWheelHorseBloke is hanging up he's spurs, but he will still be making videos of the things I'm building
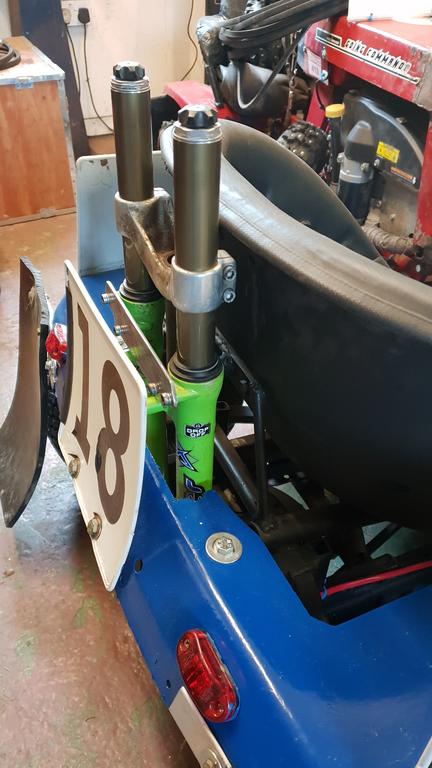
I have been thinking about the suspension, but for a machine who's main roll in life will be to smoke the rear tyres/tires away, I'm not 100% sure it's going to be needed.
with the low height I need there also wouldn't be any real suspension travel, maybe 2-3 inches!
Also no suspension would make the build a tad easier!!
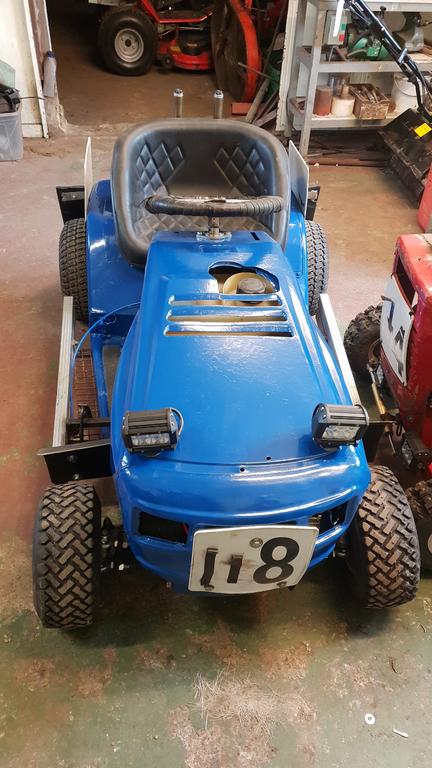
My current thinking is something I saw on a racing mower which I am told works very well and saves a lot of back pain!!
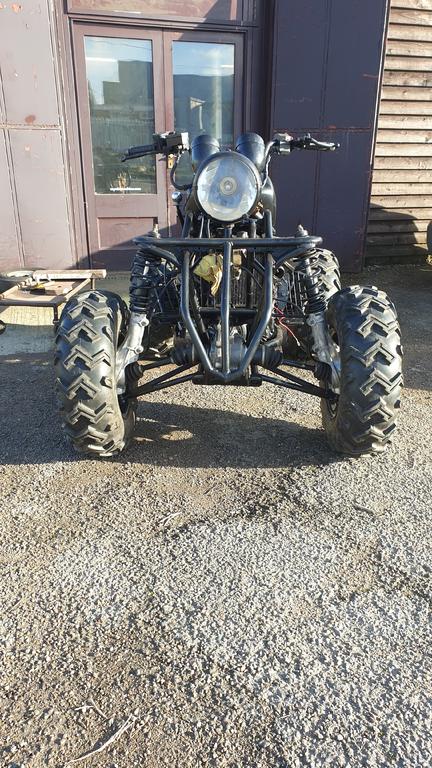
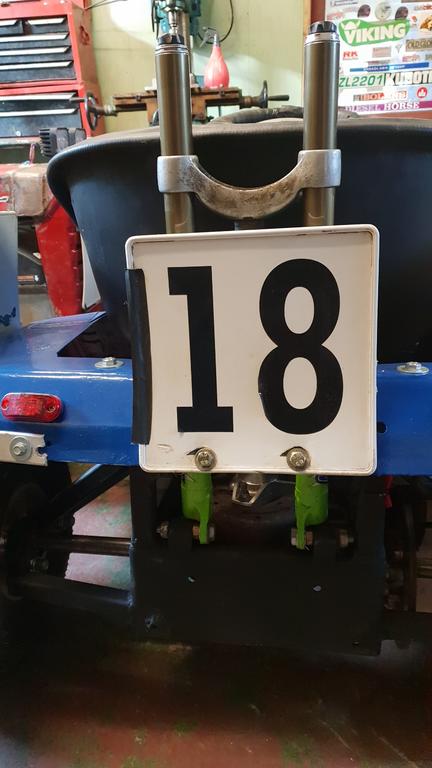
From the front it's hard to spot..
A bit of a give away at the back though
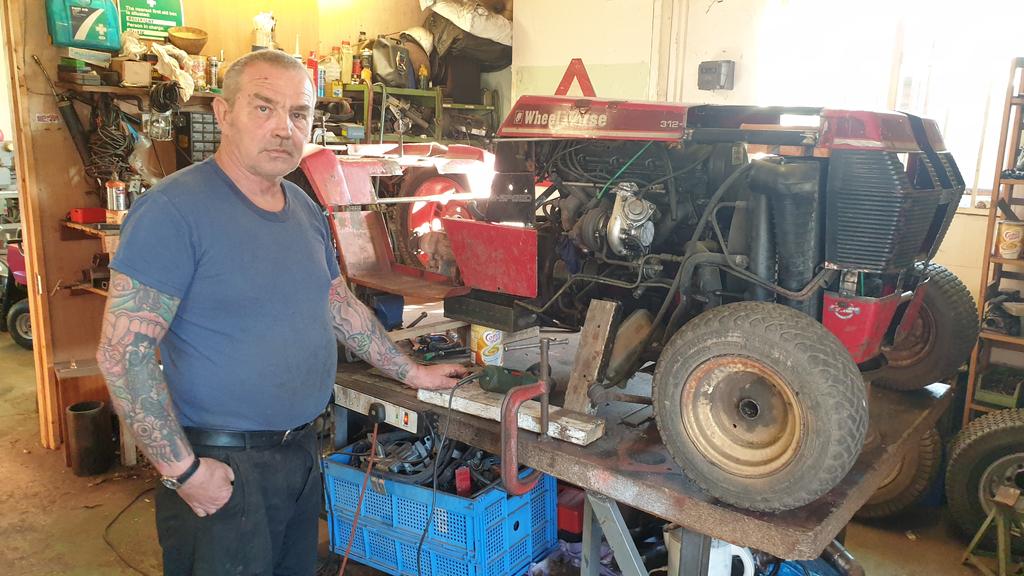
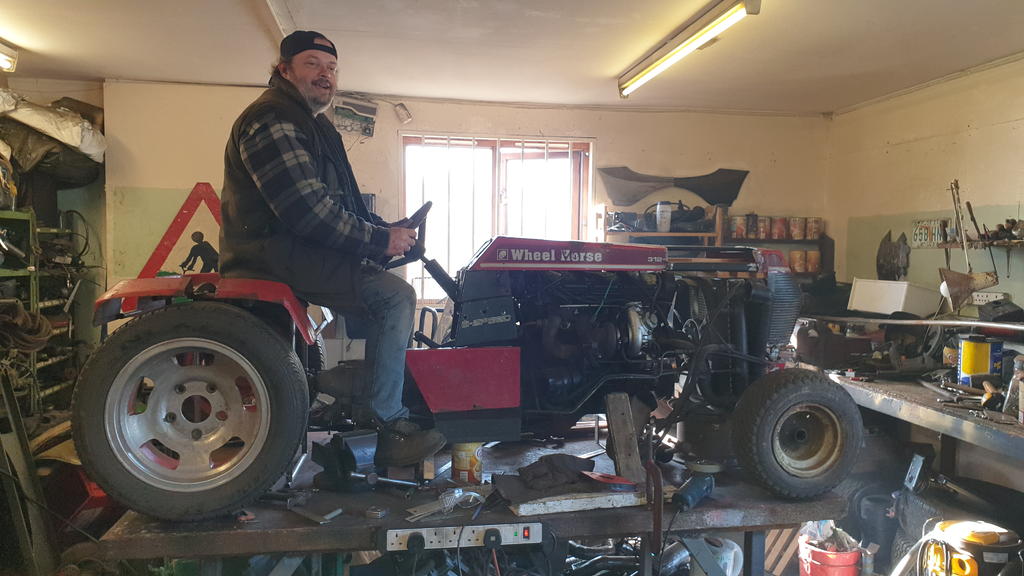
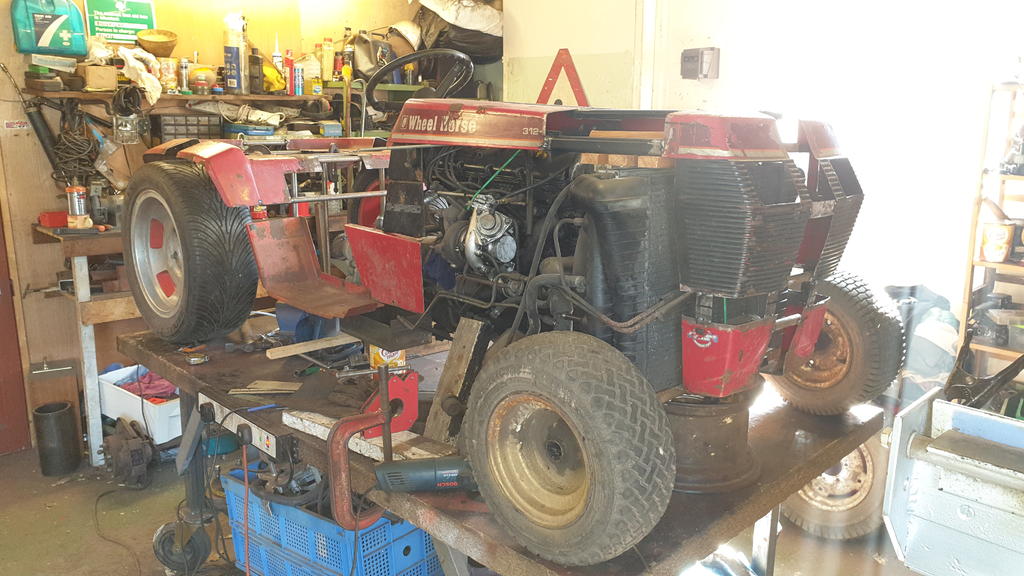
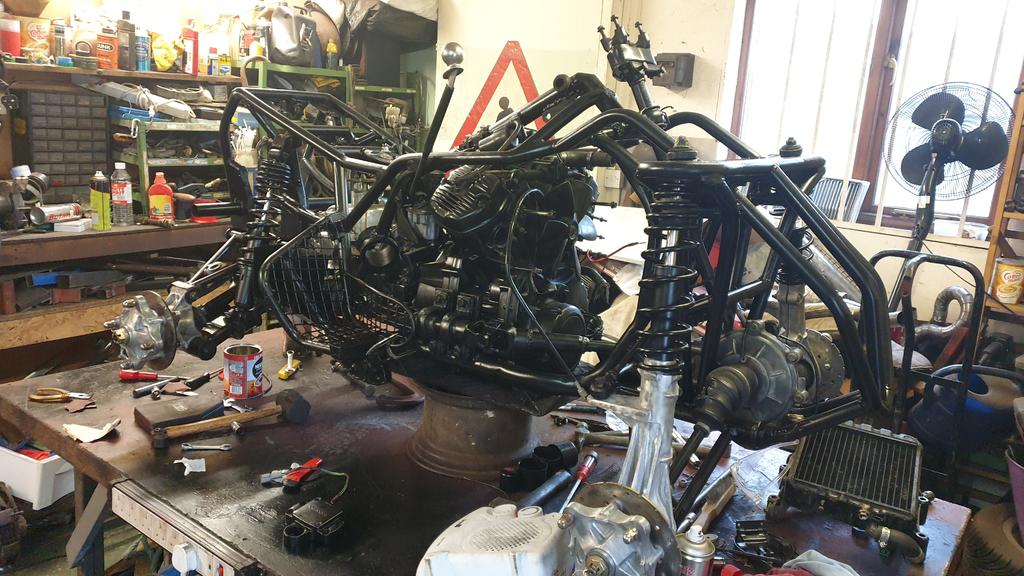
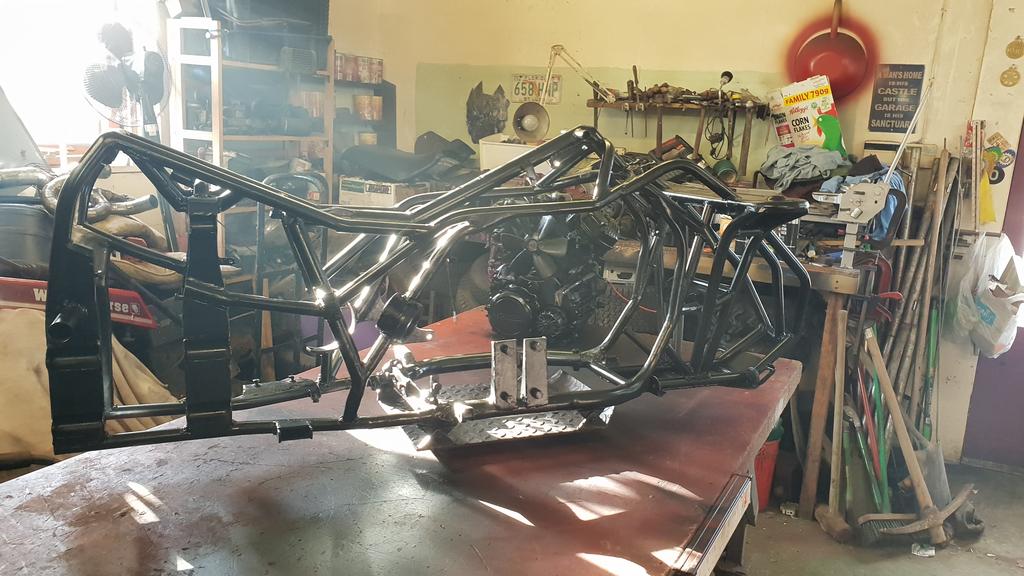
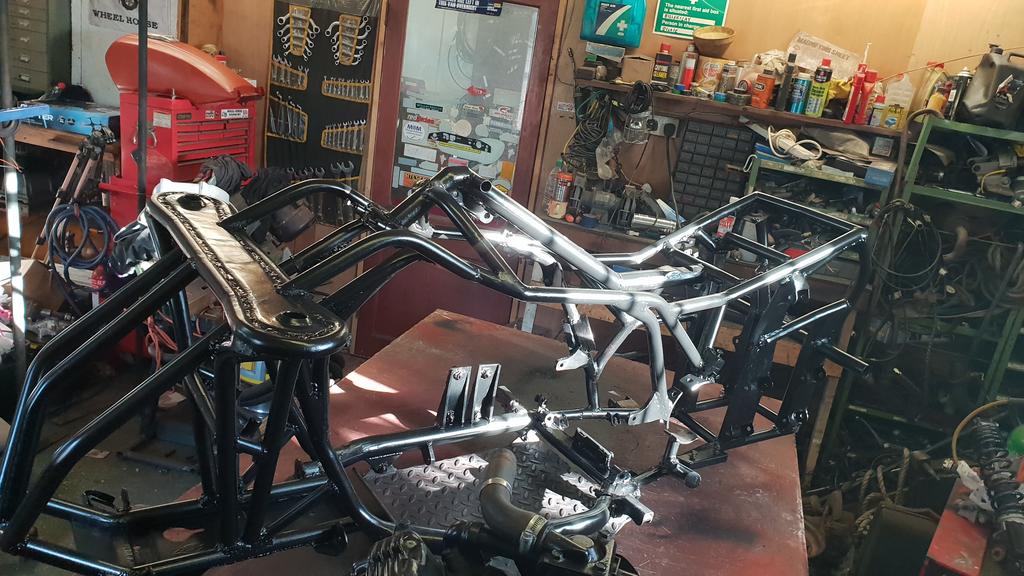
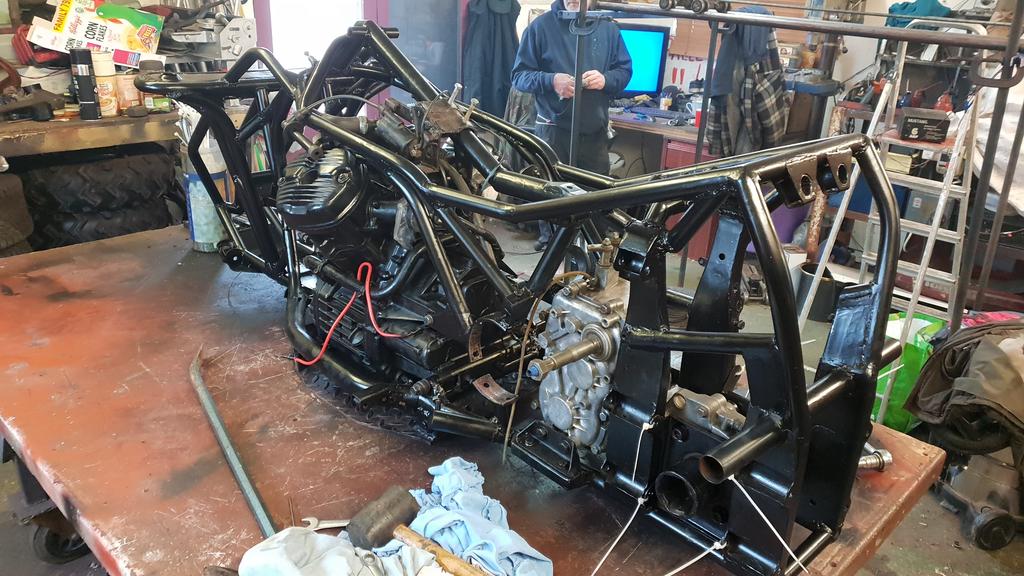
Anyway, I'm not quite at that point in the build yet, but not the far off..... Yes work has finally started on Project Wheel-Vo
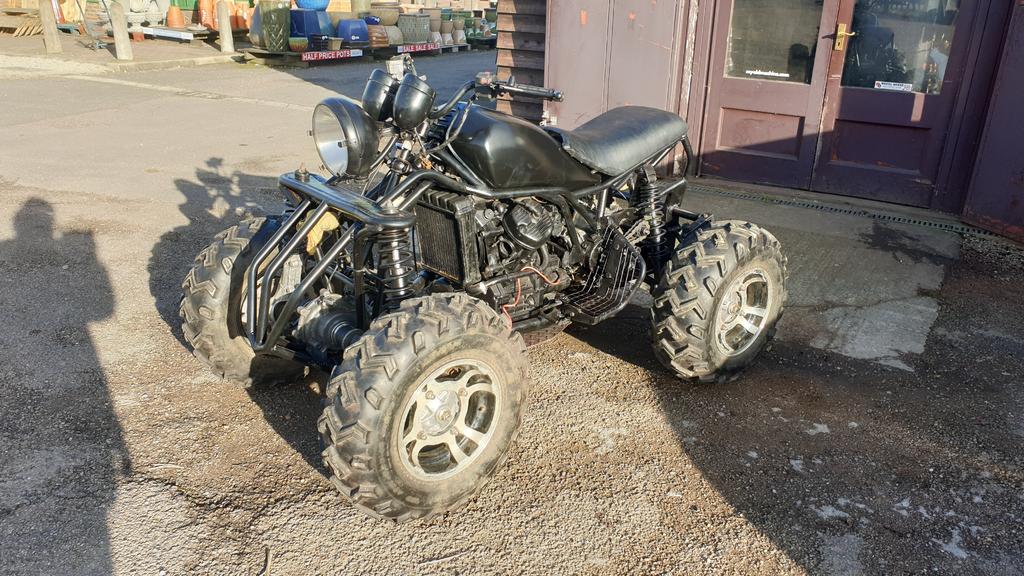
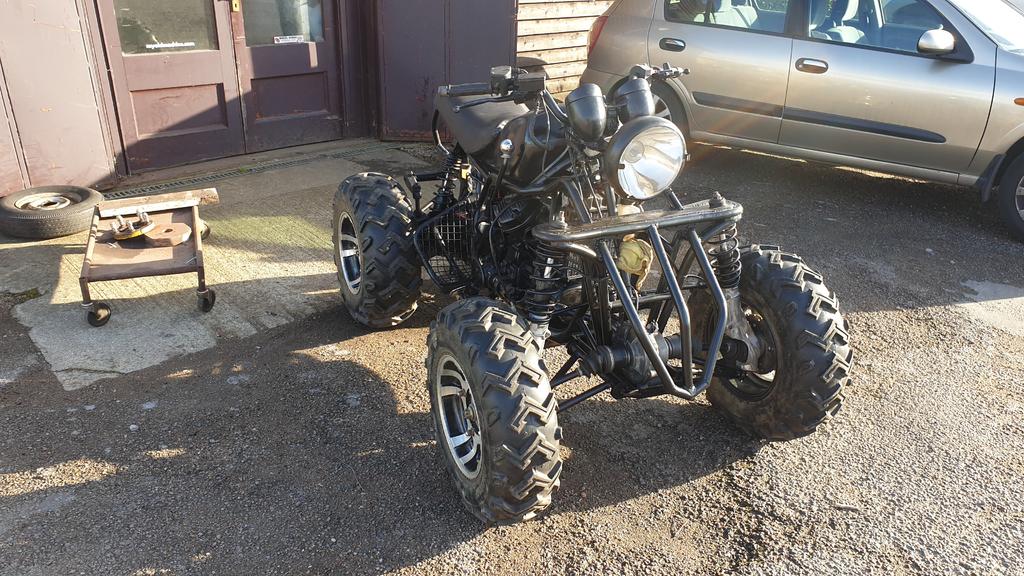
I havn't quite finished my MadTrax quad build yet, but I had got to the point where I needed a few bits to finish it but no cash to buy them.. (Ordered this morning by the way)
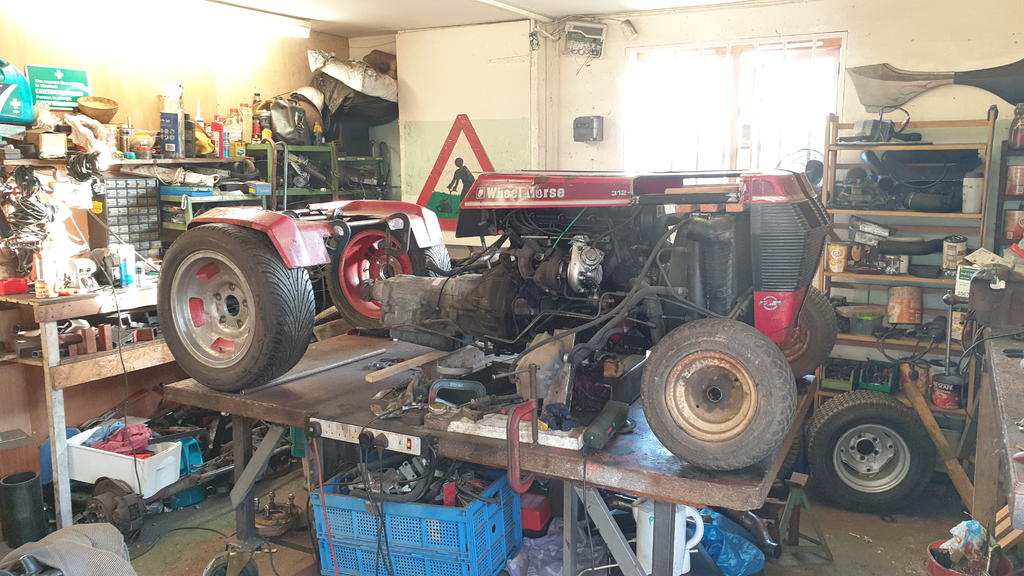
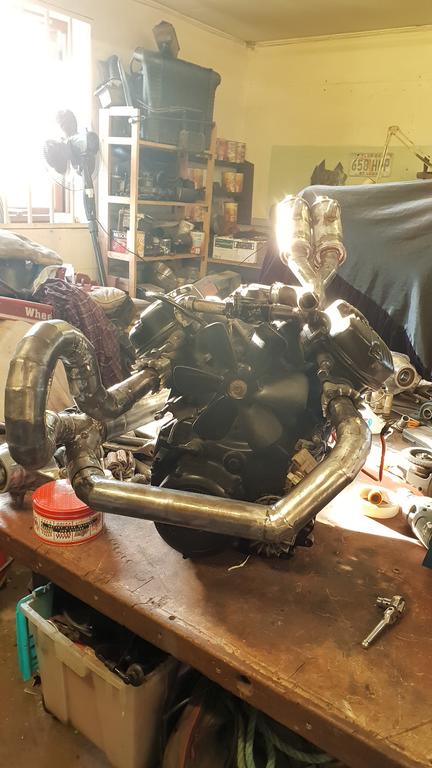
But MadTrax had reached the point where it could come off the bench... And as the bench was empty of course I needed something to put on it
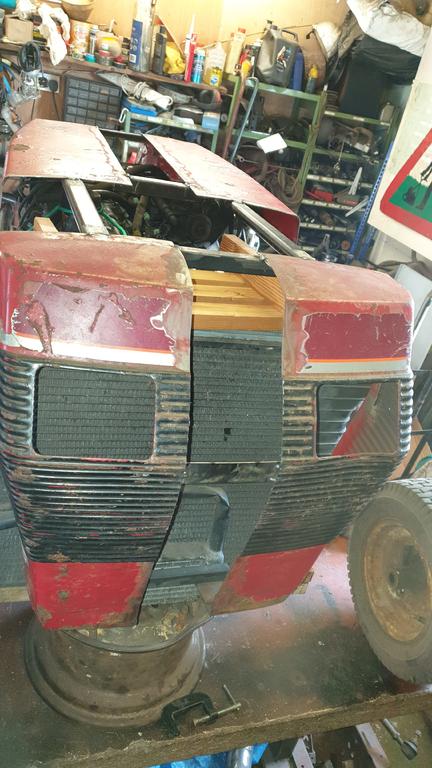
Engine, trans, a few wheels and the bonnet plonked in place..
Although the look is rather grin worthy, there are a few problems such as the bonnet is too short, too wide, and not long enough to not onlt fit over the engine but also cover the radiator, intercooler and tran oil cooler!
Sooo best add 12 inches to the length and 4 inches to the width..
At this point I am not sorting the bodywork out, I just need to stretch things a little until Wheel-Vo looks right hence all the random bit of tube and box holding the bonet together..
"Now with an added Nigel" to help you work out the scale..
This is a good point to drop in a video as it kinda covers all of the above.
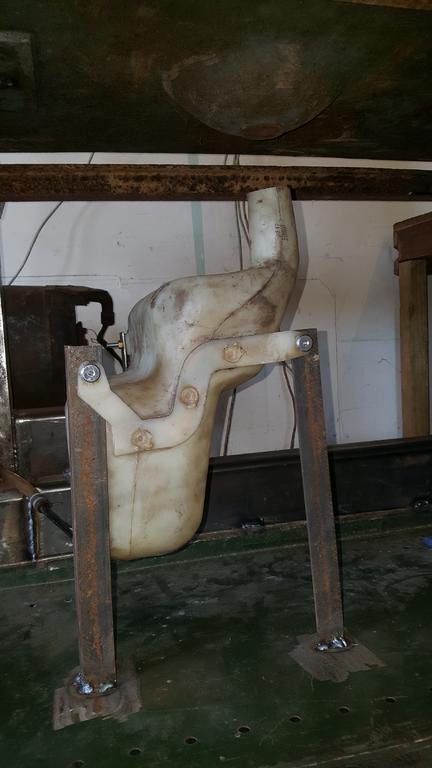
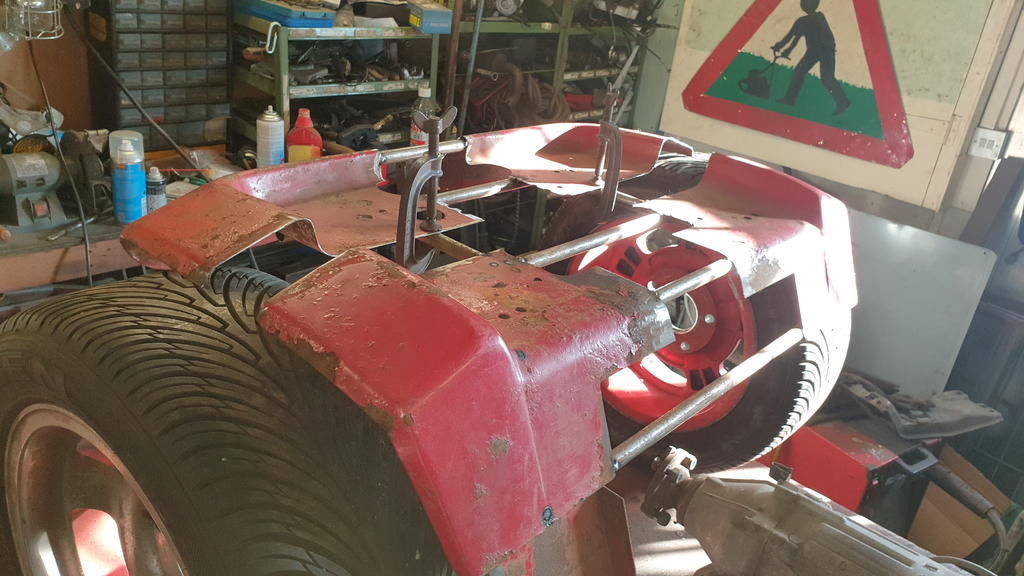
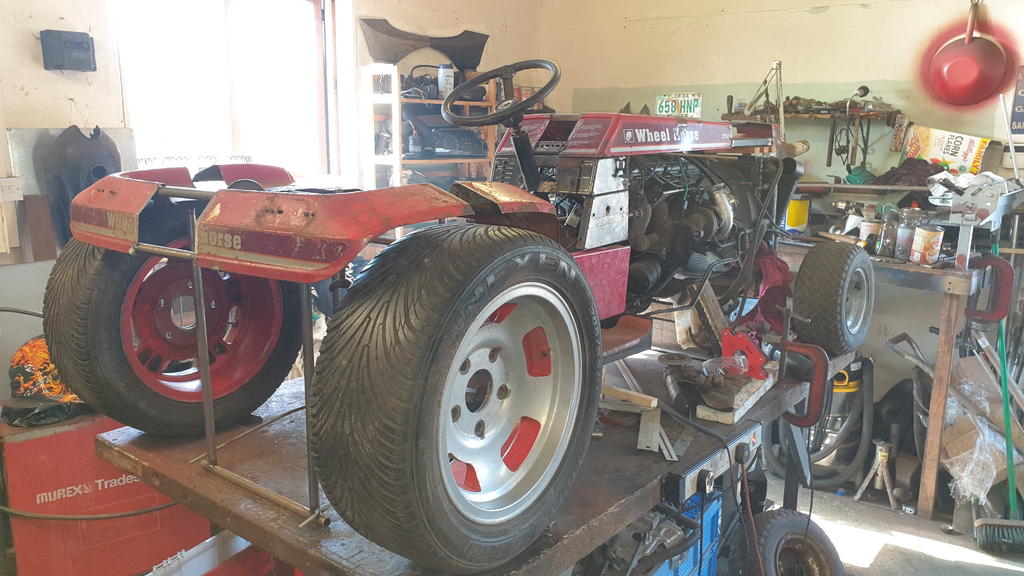
What it doesn't cover is the fender pan getting lengthened a bit..
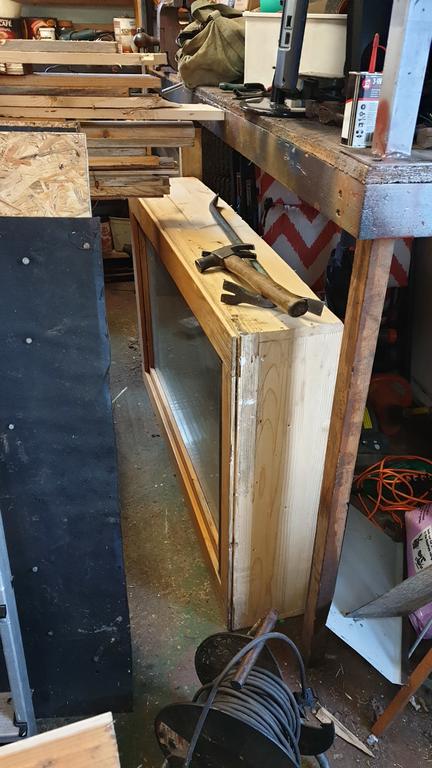
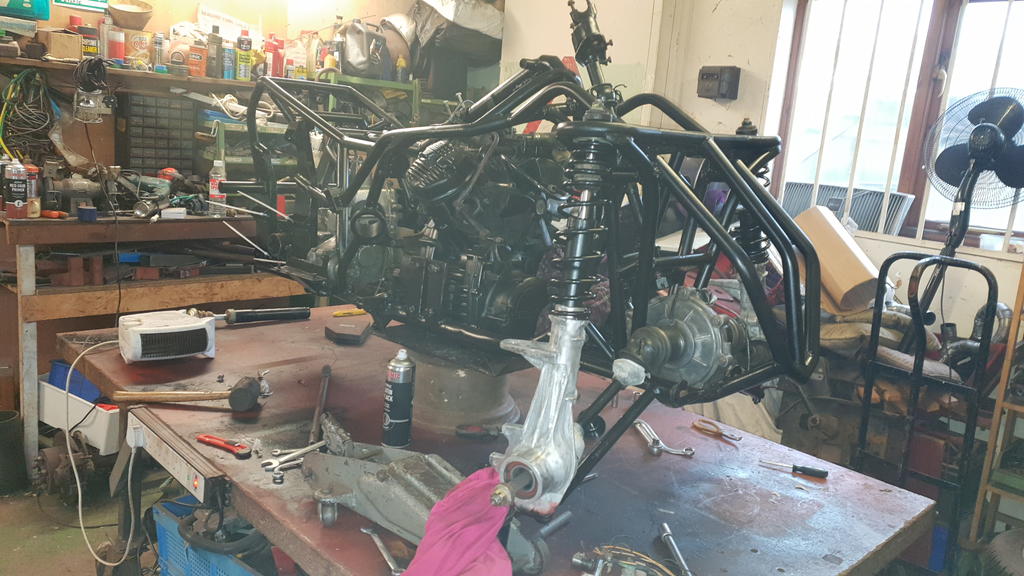
Seeing the fender pan just resting on the top of the tyres was bugging me, so to get it to stay in the right place and height it gained some legs..
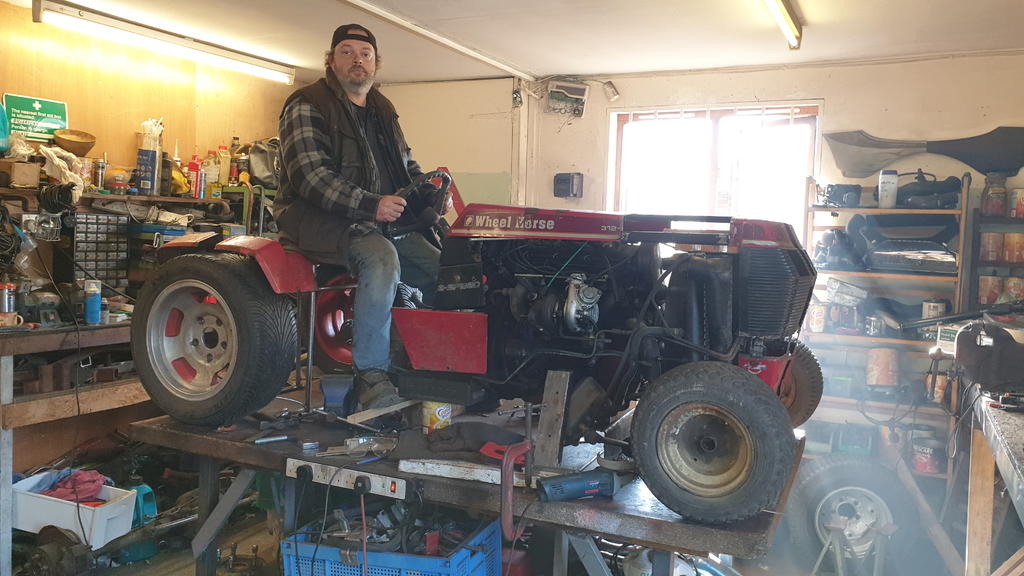
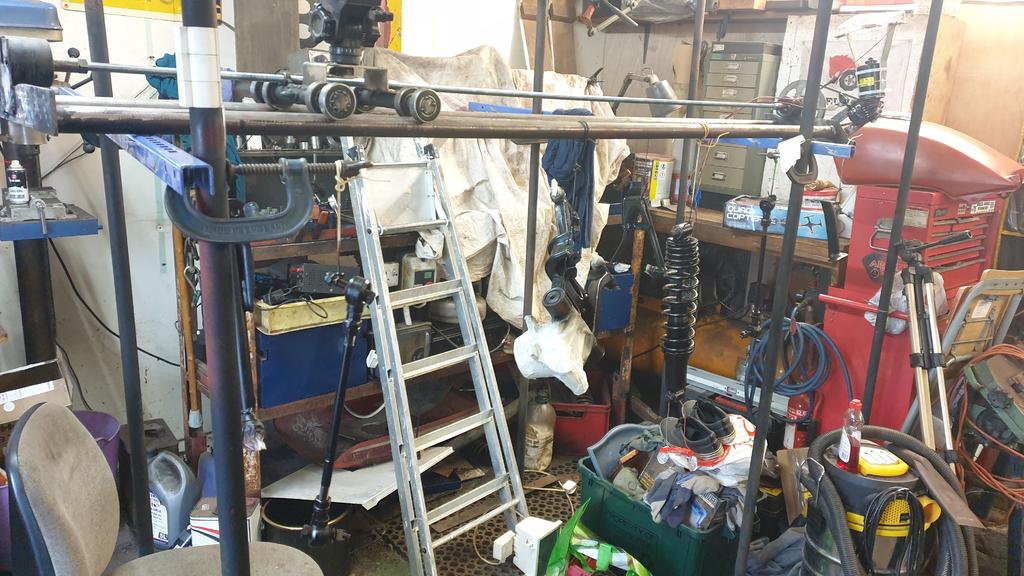
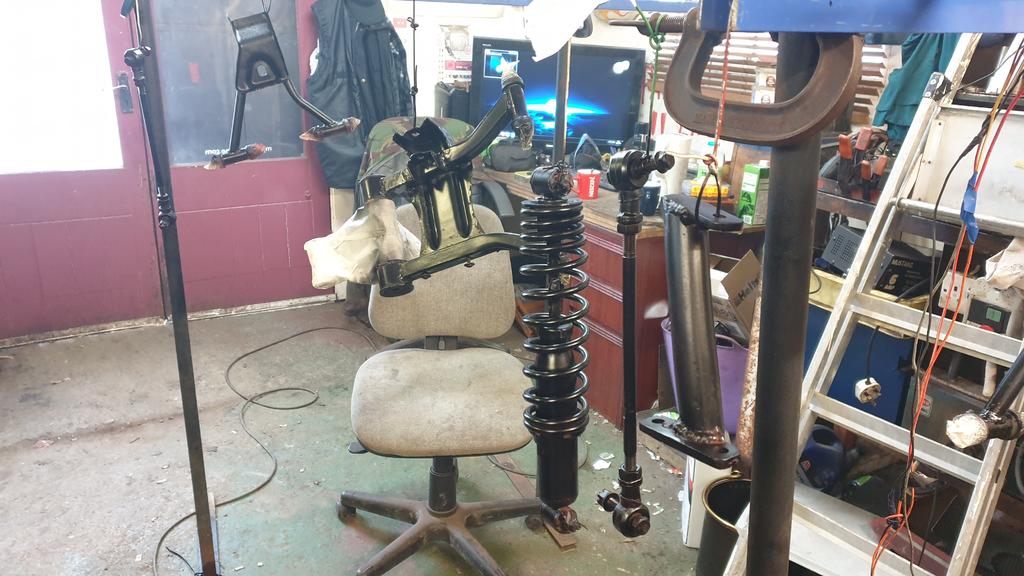
Only one thing for it... Get the ladder out and climb aboard to see how it feels..
The view down the bigger bonnet from the seat is amazing.. You will see it in the next video..
Yes the seating postion looks a bit high, the middle of the fender pan will be chopped out and lowered to get the seat and my vast weight lower..
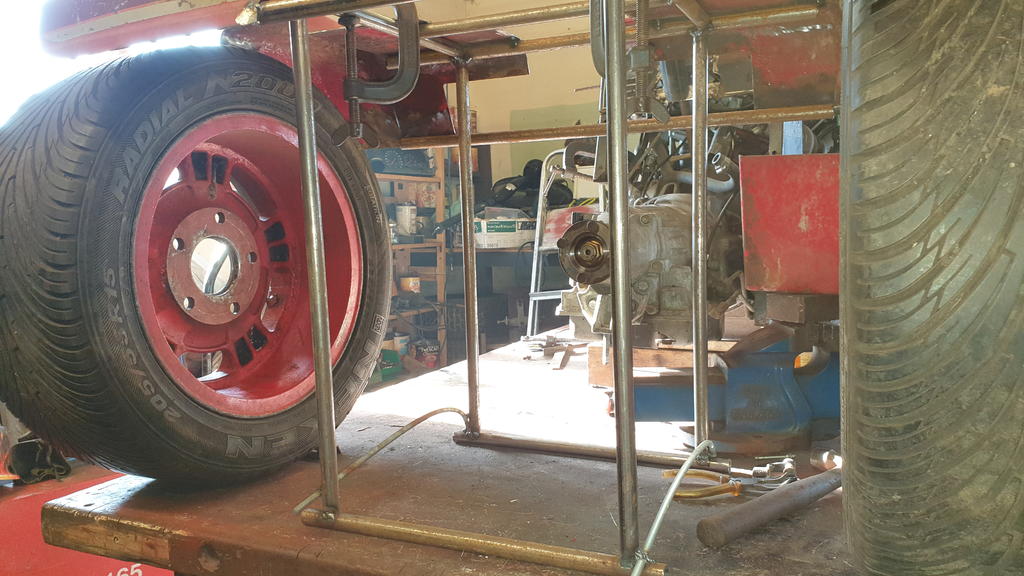
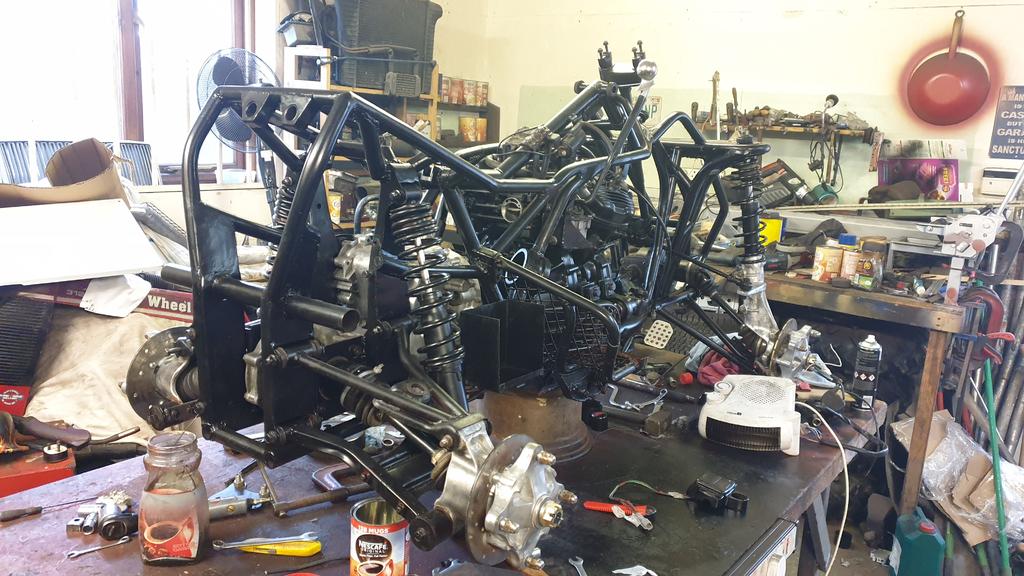
A couple more pic's without the fat bloke...
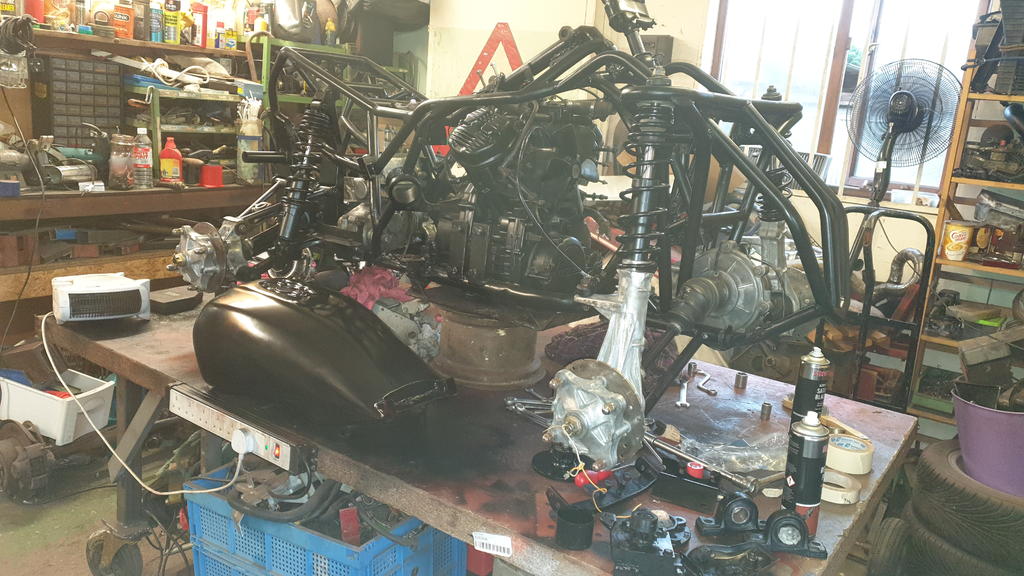
And that's as far as the build has got, the next job is to copy the fender pans lead and makes some legs/stands to hold the engine/trans in the right place and screw it down to the bench.
I still need to tweak the panels around a bit, but I'm not that far off of thinking about the chassis..
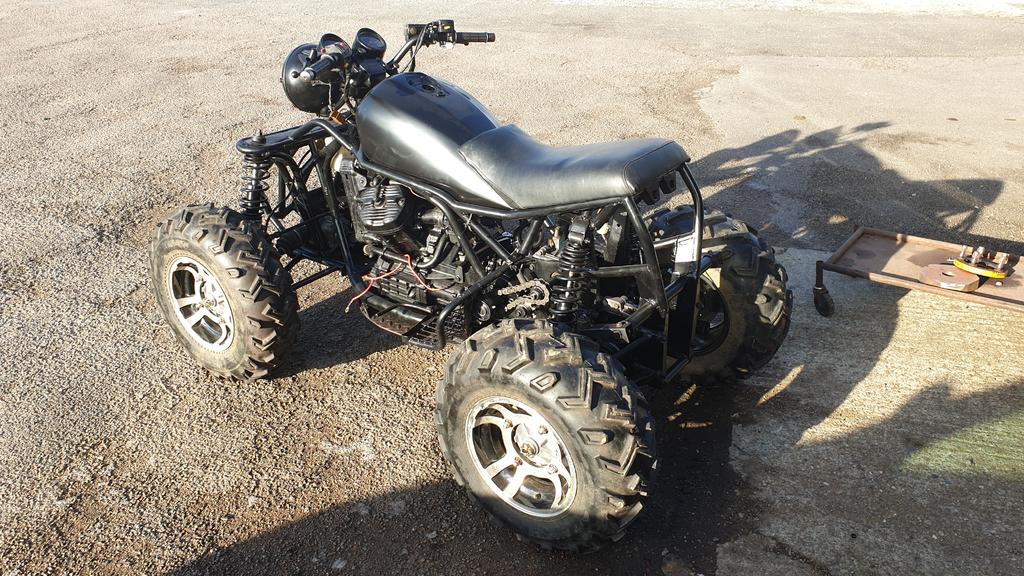
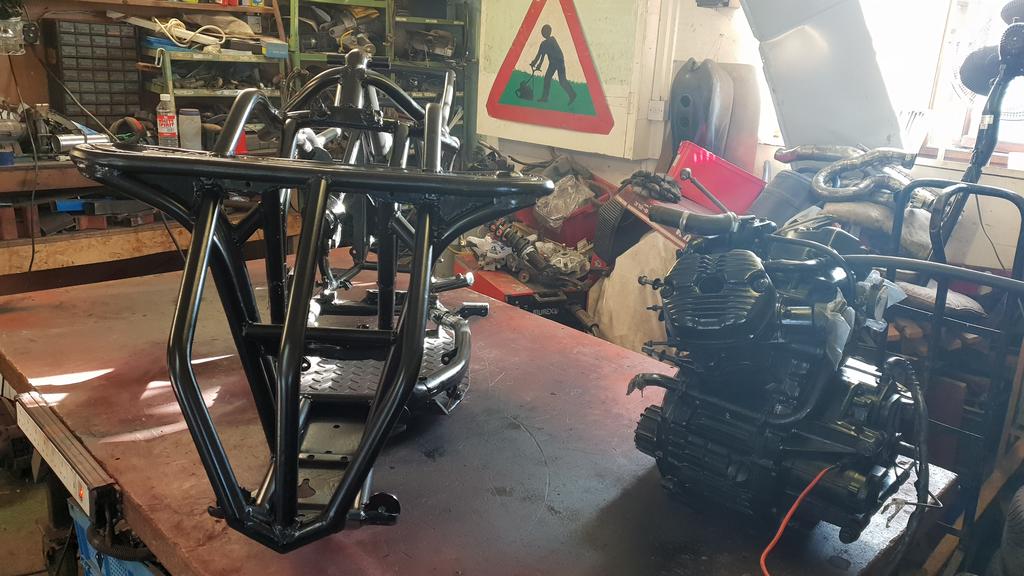
Morning all, well the MadTrax build (or should I say rebuild) has been flying.. Not quite finished yet but not far off
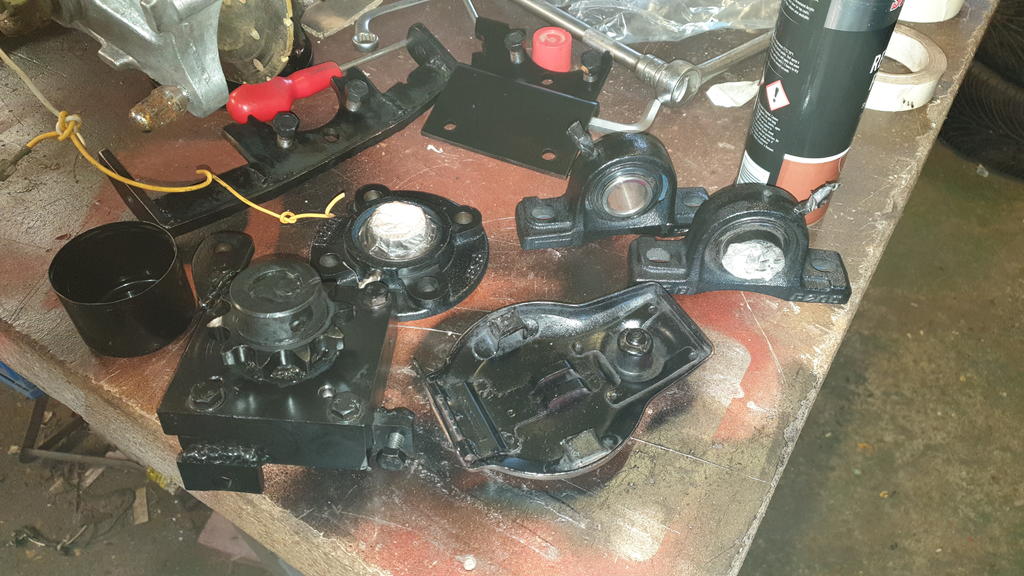
Lot's of parts have been painted and bolted back on to the frame..
A pile of painted parts..
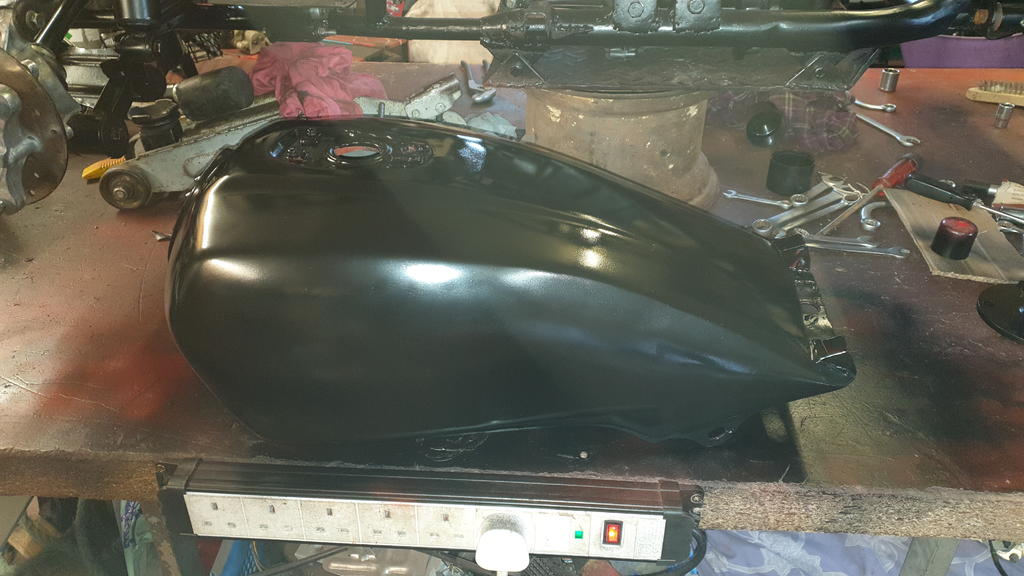
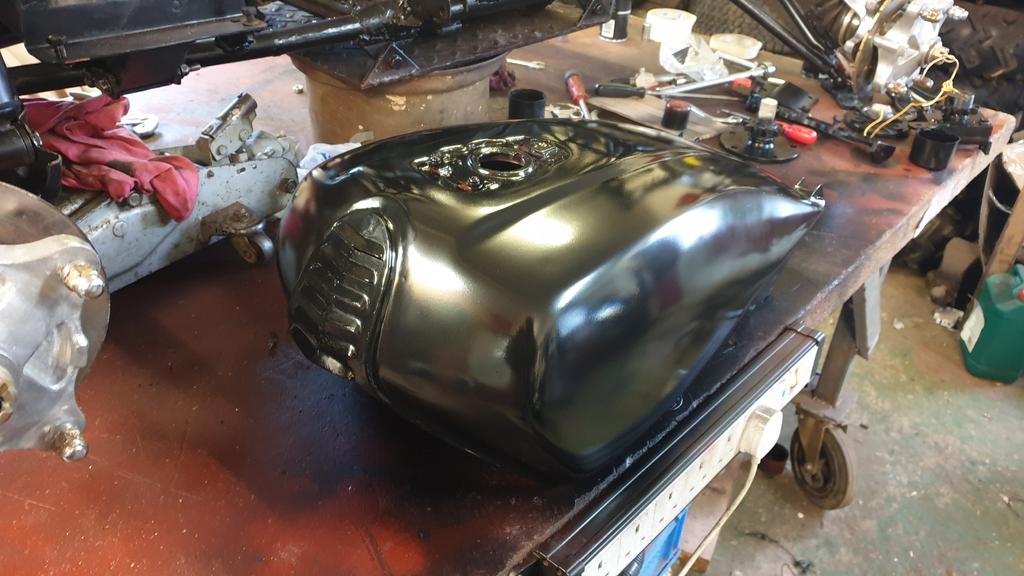
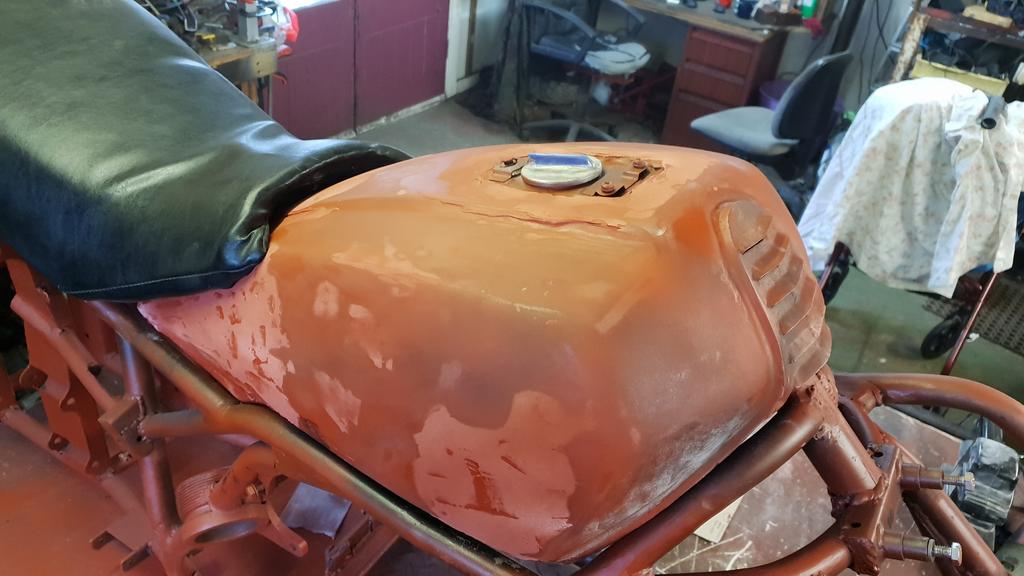
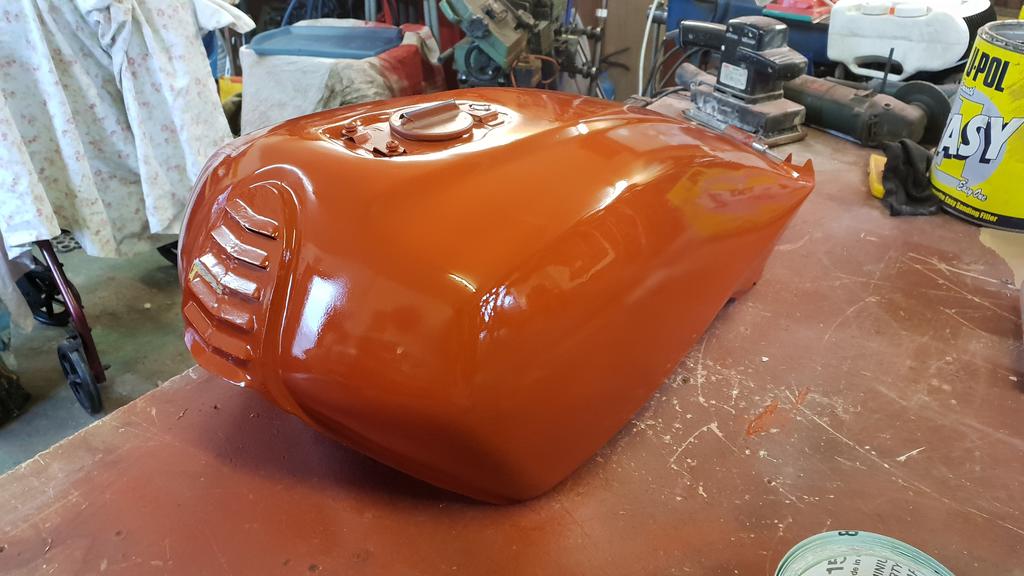
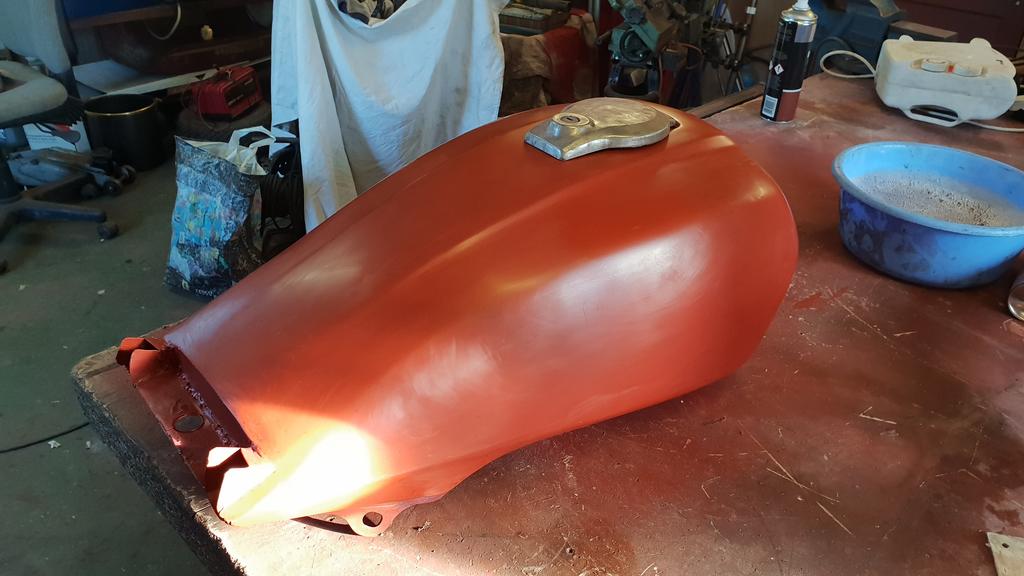
The finish on the fuel tank isn't perfect, as is the way once the top coats go on you can see all the missed bits!!
But overall I'm happy with it..
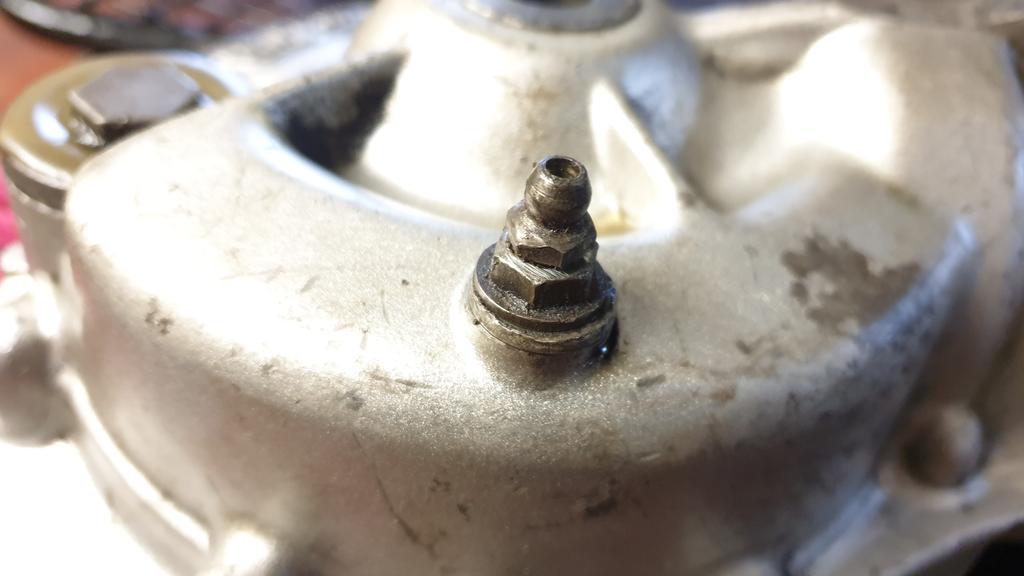
I needed to do a few bit's before the O/S footrest thingy could be bolted back on, one such bit the the 90'd drive in the photo.
The big bolt sticking out the top is the breather.. The trouble is I'm running the unit upside down!
So the big bolt was replaced with something smaller and oil tight..
To stop the drive from blowing oil out through any/all the gaskets I needed to put a breather back in..
This bolt on the bottom (although it's now the top) goes through the casing, so it was drilled and tapped to fit a grease nipple.. The nipple was drilled out to remove the little ball bearing and spring thus making it a breathing nipple?? Handy for putting a bit of pipe on
Not much left to bolt now
To finish off this update, here's the latest video.. enjoy
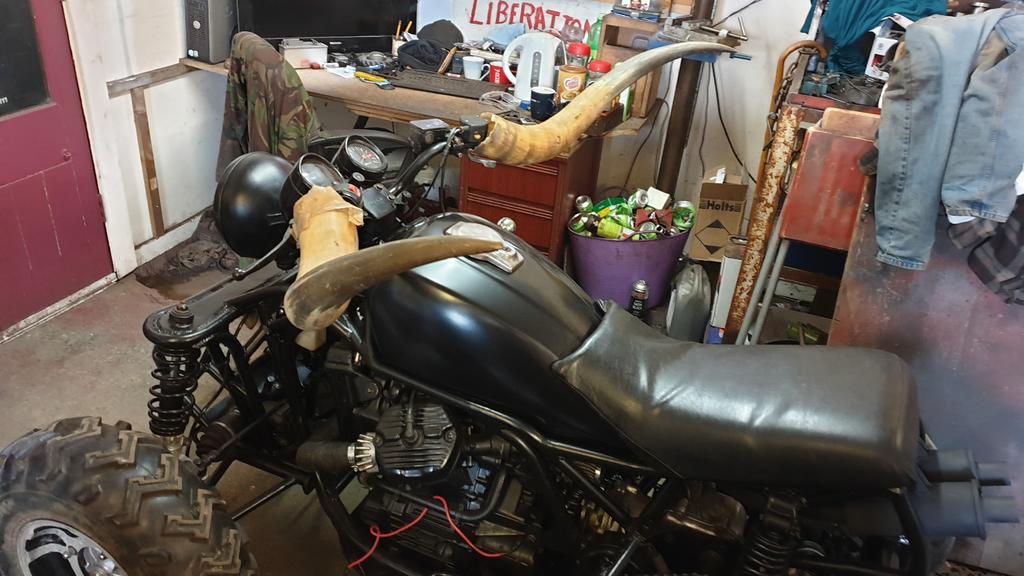
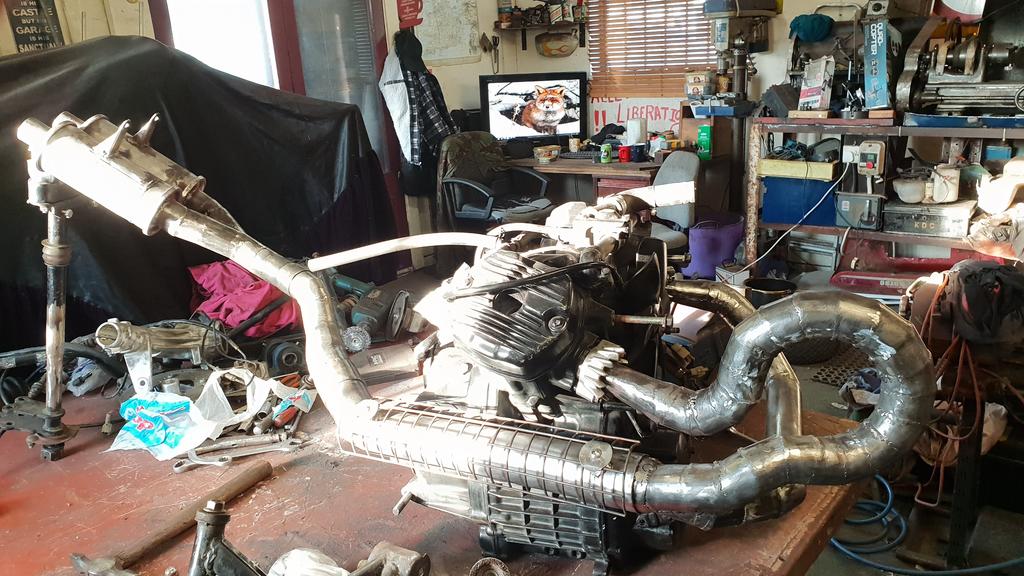
The right hand side reminds me of one of those plastic toy snakes. Nearly picked one up of the steps leading to the farm house one summer, many moons ago. As I bent down to get hold of it, I suddenly realised it was an ADDER, basking in the sun.
Hi Norm, I know which plastic toy snakes your talking about, the ones with lots and lots of bendy joints.. Used to have one a a kid.. And yes I see why the exhaust reminds you of one..
You were lucky with the adder, that could of hurt a bit!
On 1/24/2019 at 11:52 PM, Wallfish said:
NICE!!!!! I love everything about it. Been "out of the loop" for a bit since work takes up too much time but it's fantastic to come back and see this stuff. Can't wait to see the finished product.
Ian, you're getting pretty good at that video stuff and that camera motion thingy was a really cool effect.
Hi John, good to see you back... I'm also struggling to find forum time at the mo.. Why does life has to be so busy???
The finished product isn't too far away now as you will see.
Glad you liked the camera motion thingy, it's gets some more use in the next video
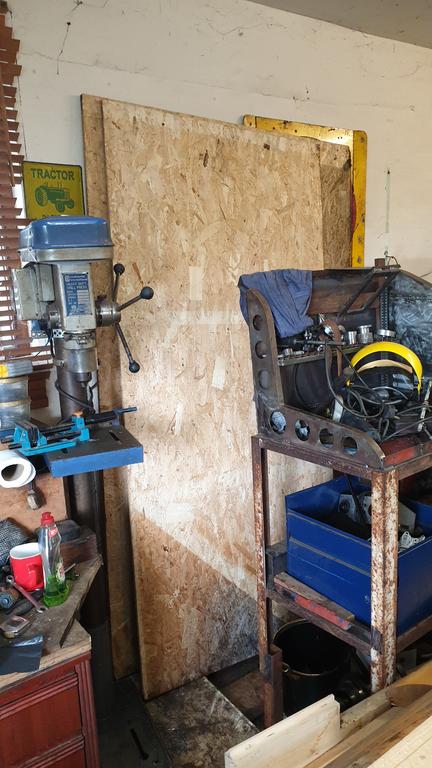
For a few days there wasn't anything I could do on MadTrax until the paint I had ordered turned up, so.....
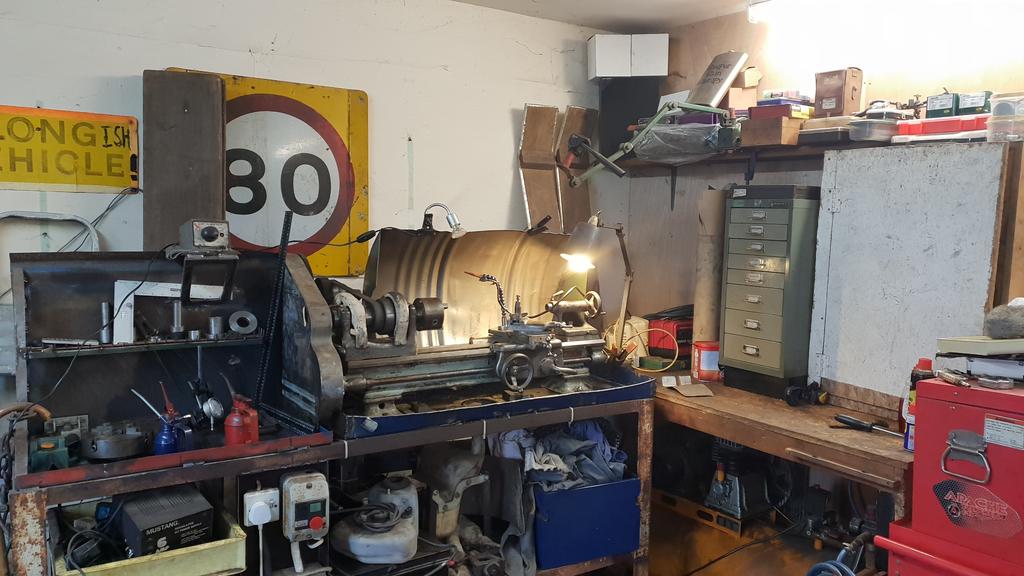
I had a bit of a tidy and clean up in the lathe corner of the workshop.
The white doored paint cupboard came out from the corner behind the lathe and now lives in a place I can actually reach it.
The "lathe shelf" now looks a lot neater and emptier..
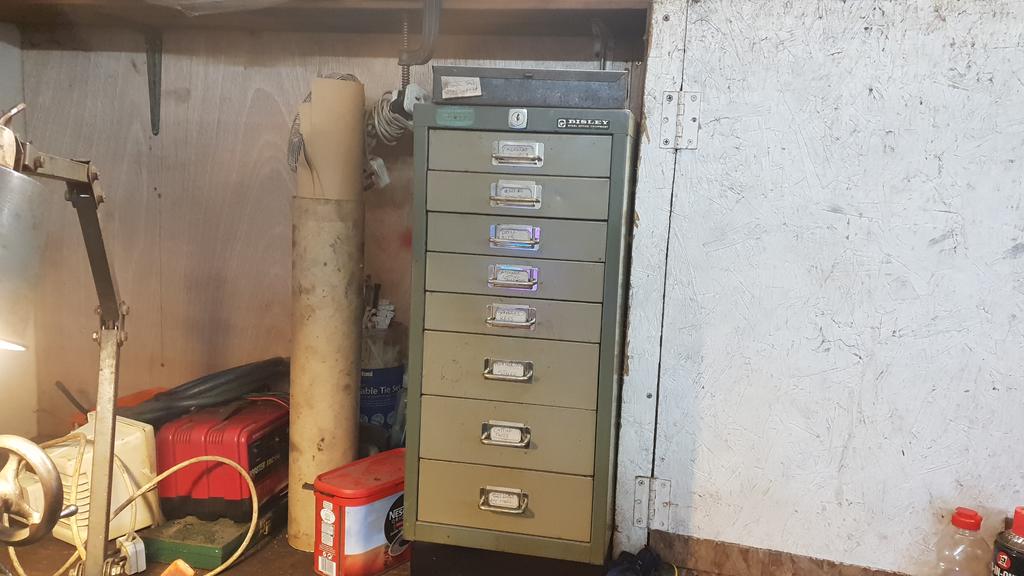
As most of the smaller tools now live in this labeled cabinet..
And to finish off the lathe got a much overdue clean up..
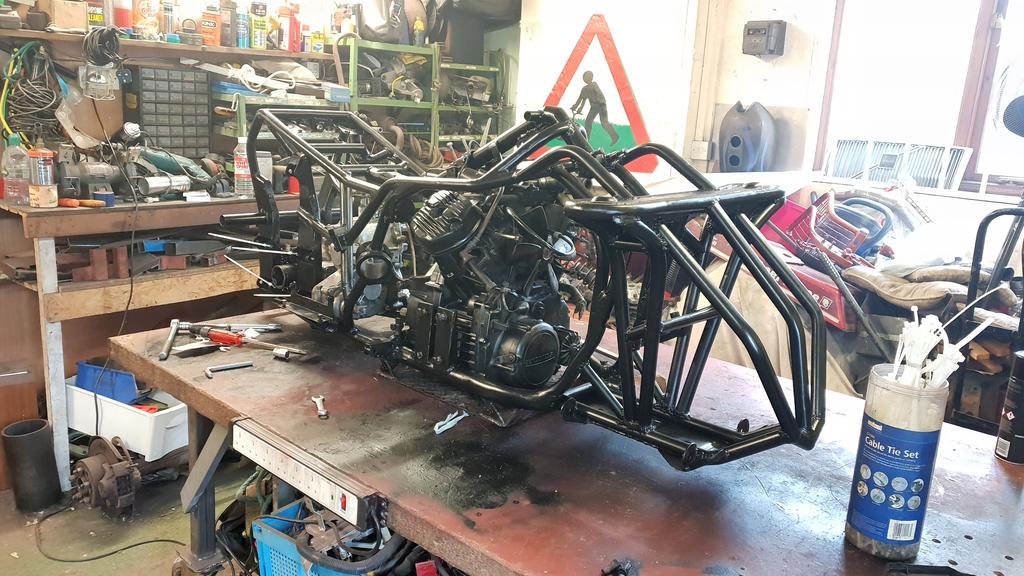
Finally last weekend my long awaited paint turned up, so Monday was paint the frame and engine day
Which made Tuesday "get the engine, transfer box and rear end in" day.. A bit thank you to Rob for all your help with this.. Ta muchly mate..
More parts bolted back on the frame, most of the front end..
A "few" freshly painted parts hanging about the place drying..
And that is where the rebuild has got to as of yesterday..
To finish off this update have a couple of videos..
Morning all, more progress has been made which is a good thing..
A pile of cleaned and primered parts stashed under the bench waiting for a top coat..
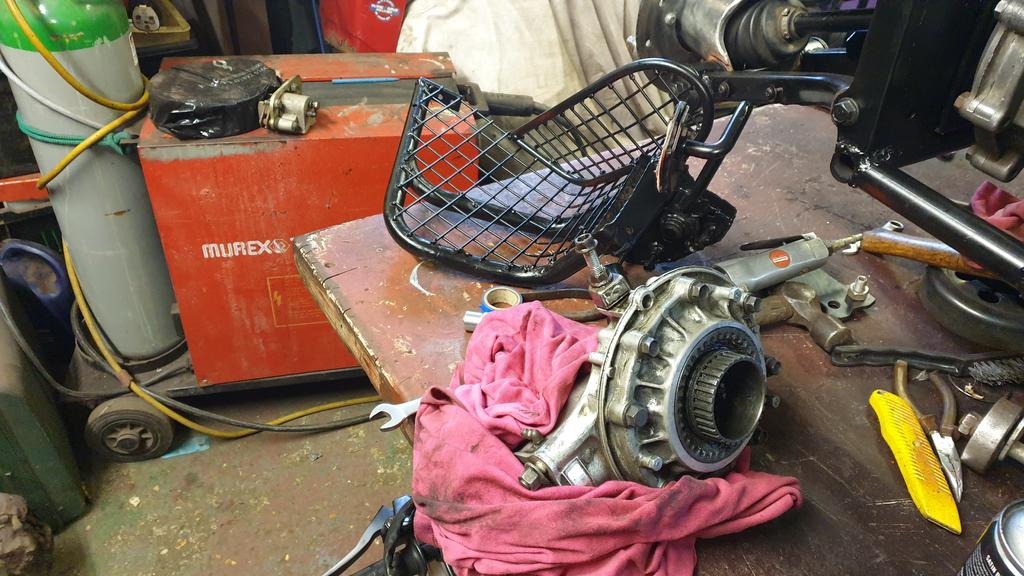
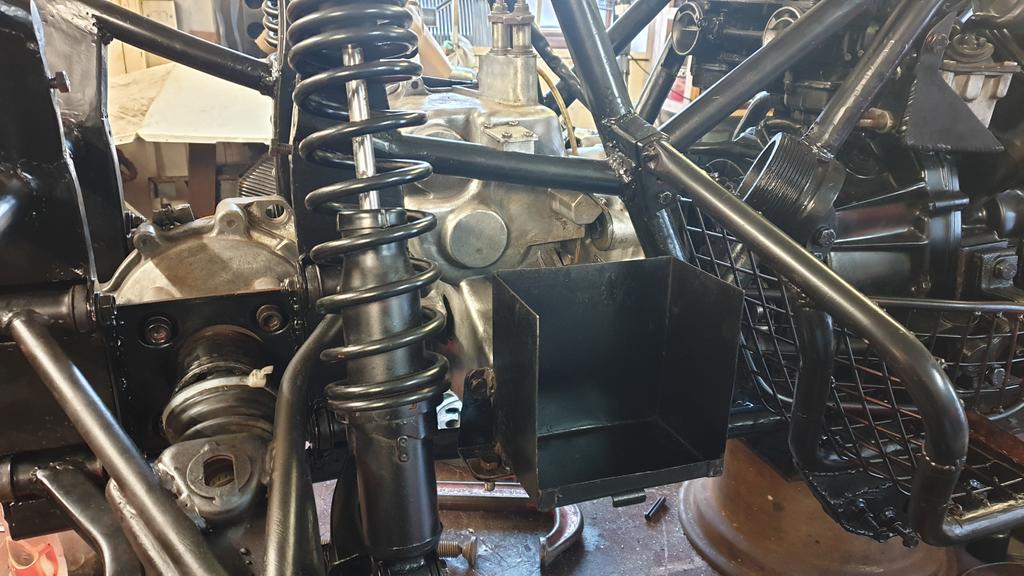
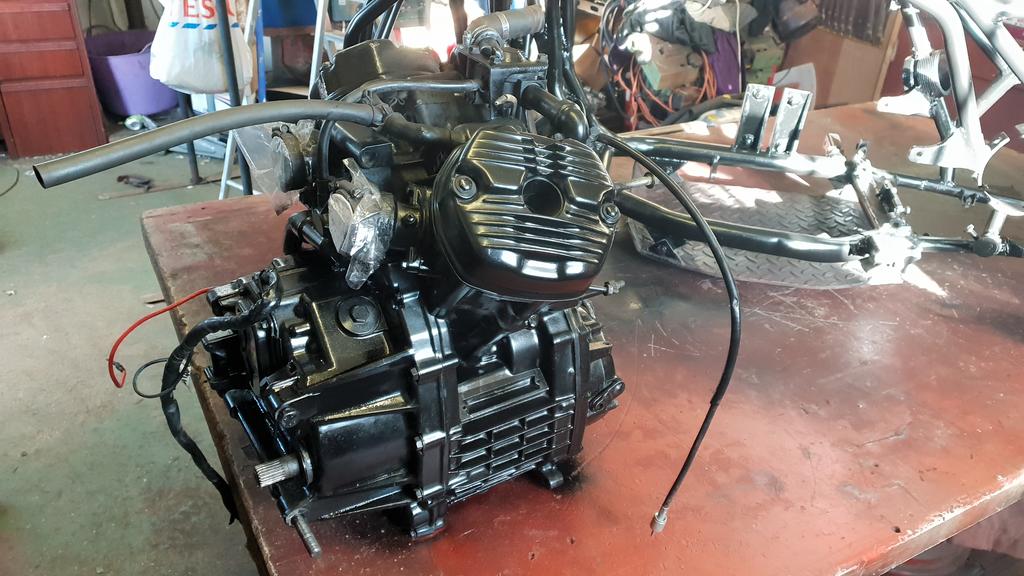
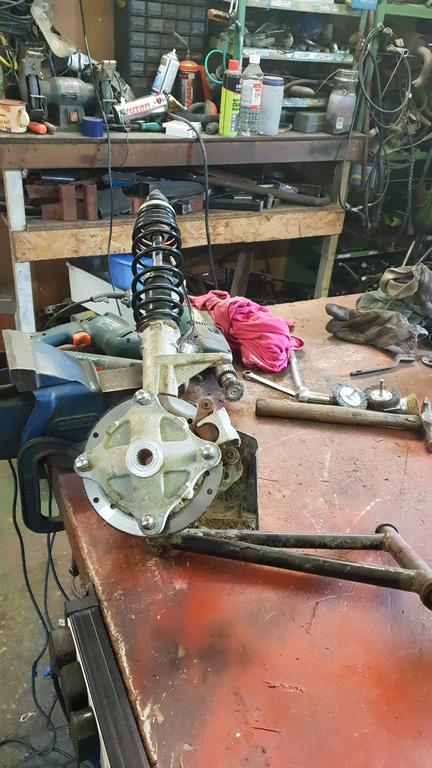
The rest of the suspension components were buried under a bench behind the engine, so of course the engine had to come out..
Might as well plonk it on the bench and have a look..
After cleaning the engine didn't look too bad, only a small bit of paint has come off..
Unsure it needs repainting at this point.. Will have to think on it.
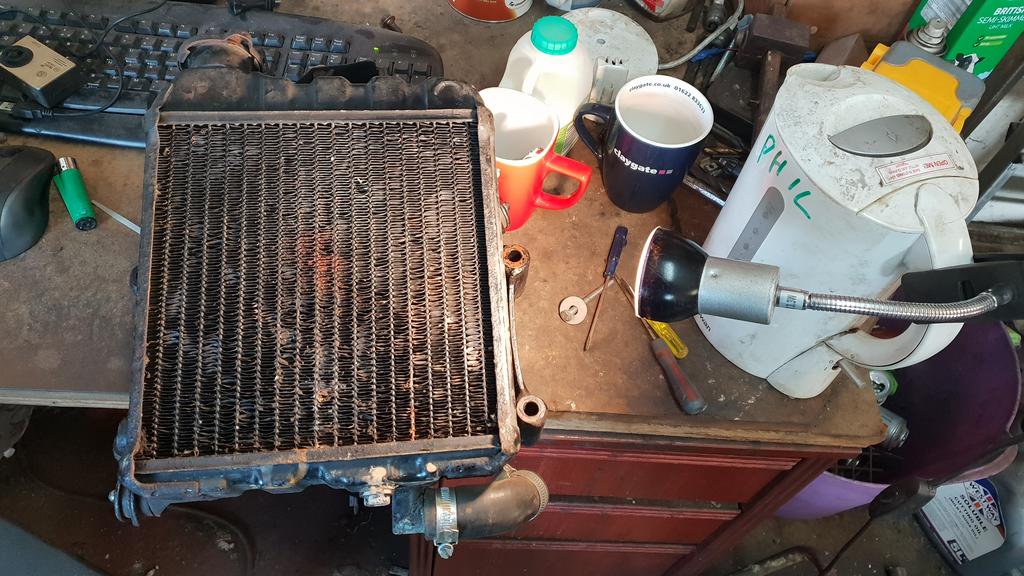
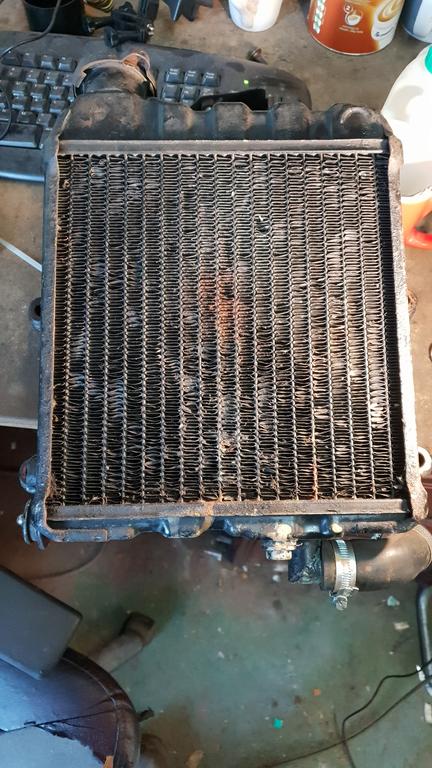
I also made a start sorting the radiator out..
As you can see a lot of fins need straightening out.. it's one of those jobs that gets done a bit at a time sitting at my desk with the heater blowing at me
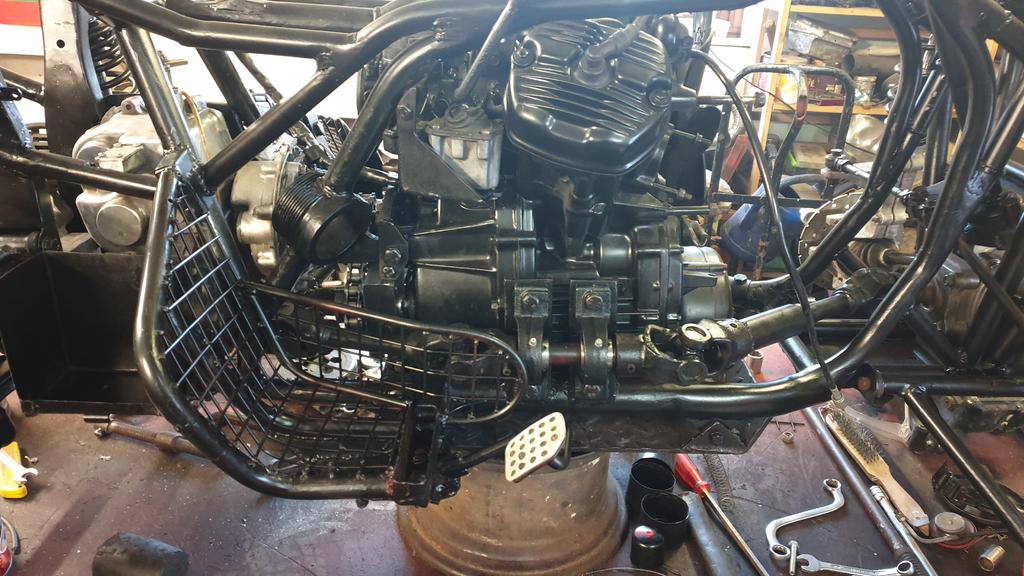
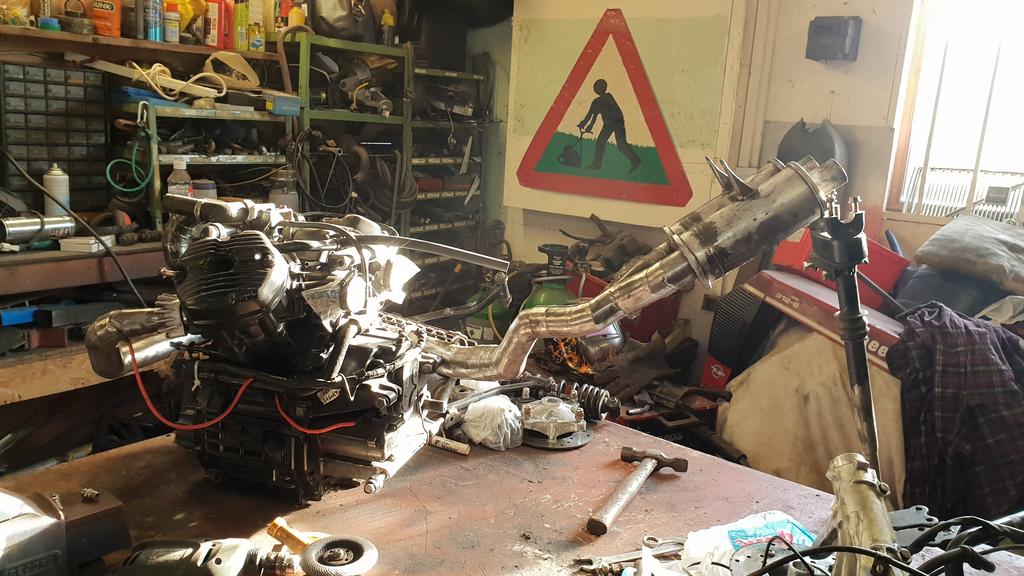
The exhaust system has been cleaned up and any pin holes found (each section was pressurised to find any leaks) and welded up..
Just for a laugh I thought I'd bolt the exhaust on to the engine to have a look...
With the tank and frame stored out the way I had some space on the bench to fill up with parts that need cleaning and painting.
A wire brush on a drill came in handy for cleaning off all the years of crud. It leaves a slightly bright but rough finish which should dull down with age.
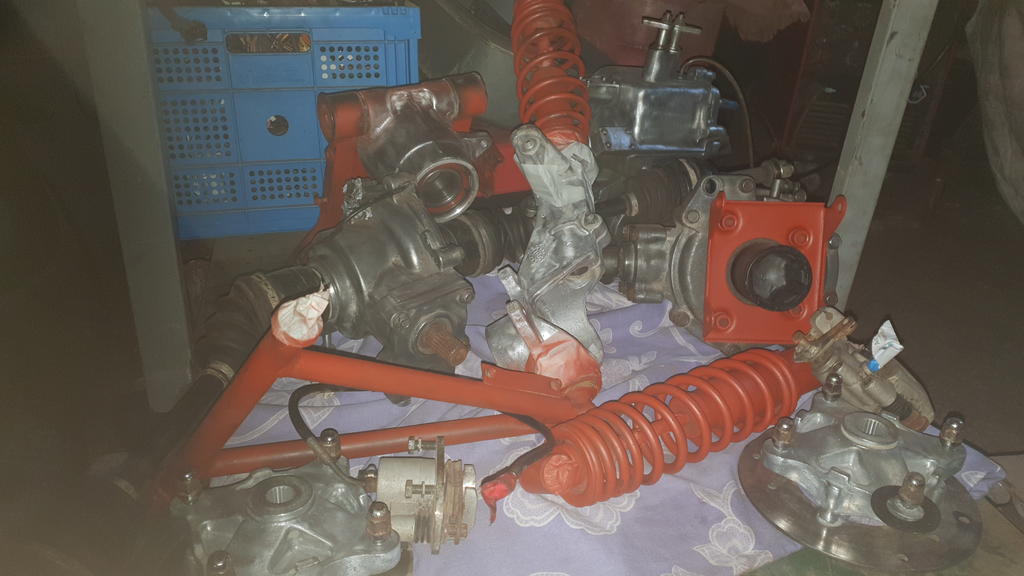
The transfer box.
Front end.
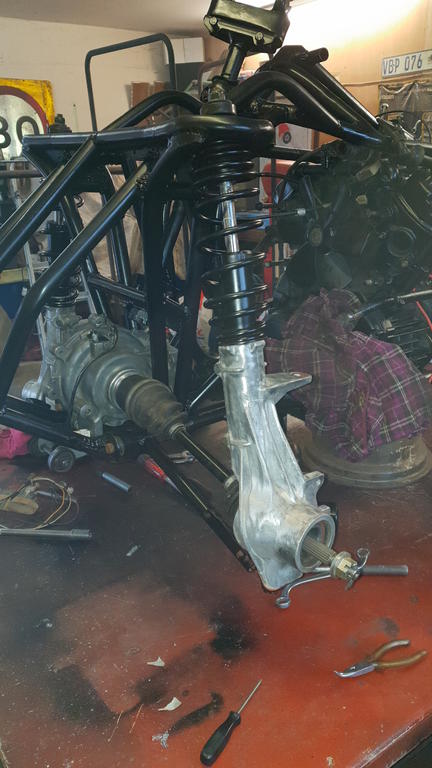
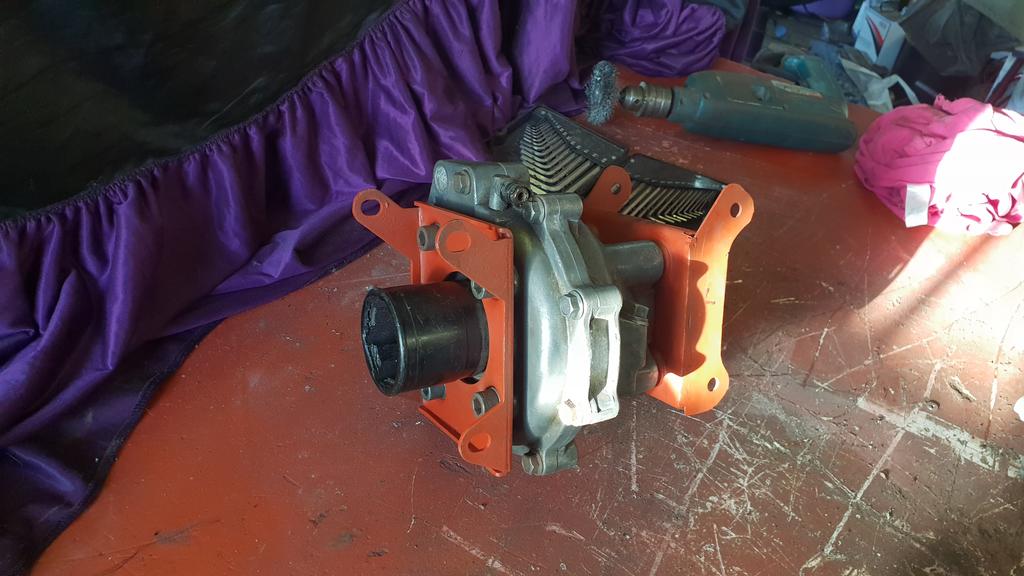
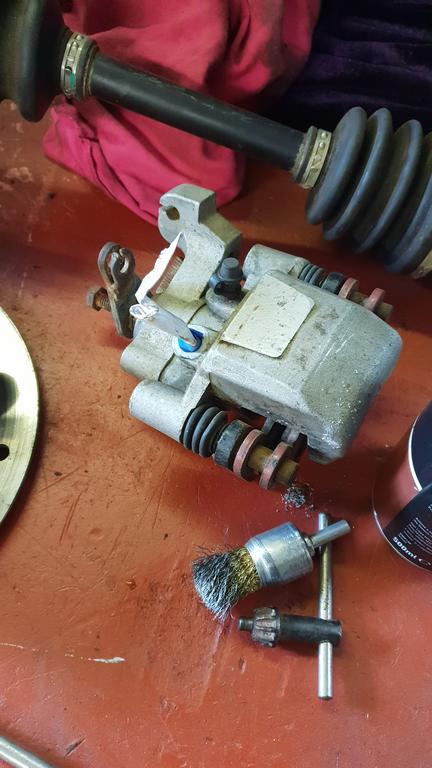
Rear end complete with mounting brackets
A front suspension strut in need of a de-fur and clean up.
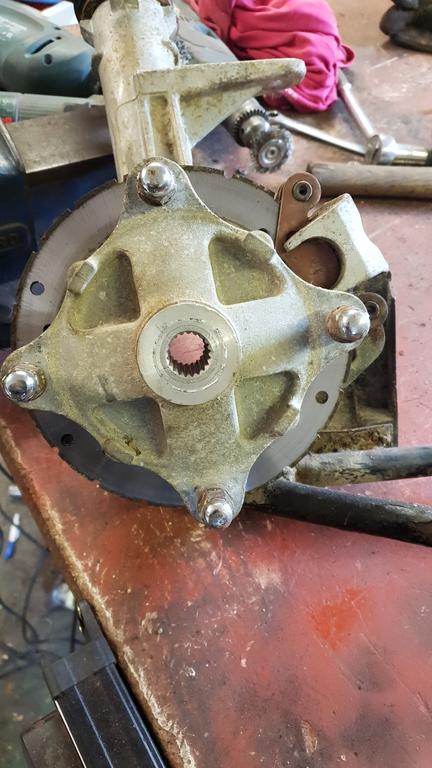
A fury front hub..
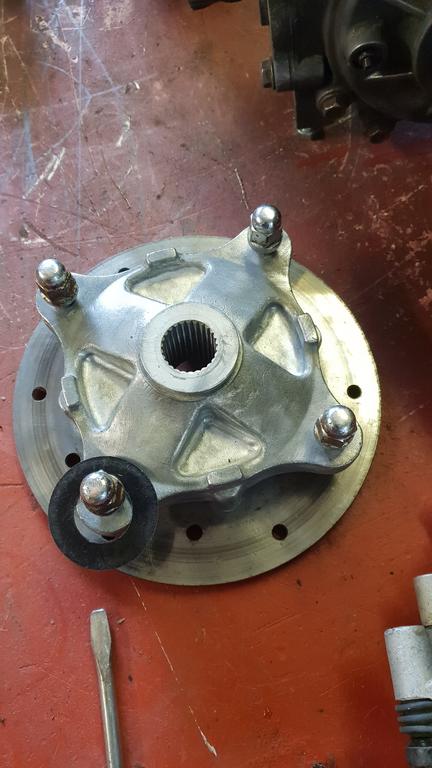
And a cleaned up rear hub
More wire brushing and painting..
At least the calipers clean up really well
And that folks is about where I'm up to at the mo with this build..
Silly season has left me a bit skint but hopefully I can get some paint next week and start getting this beast of a machine back together again..
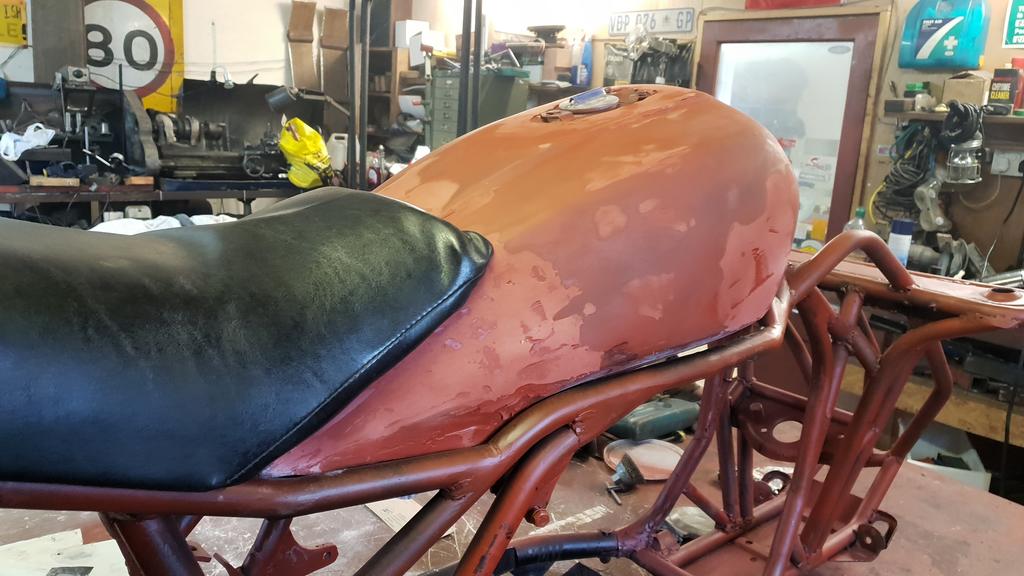
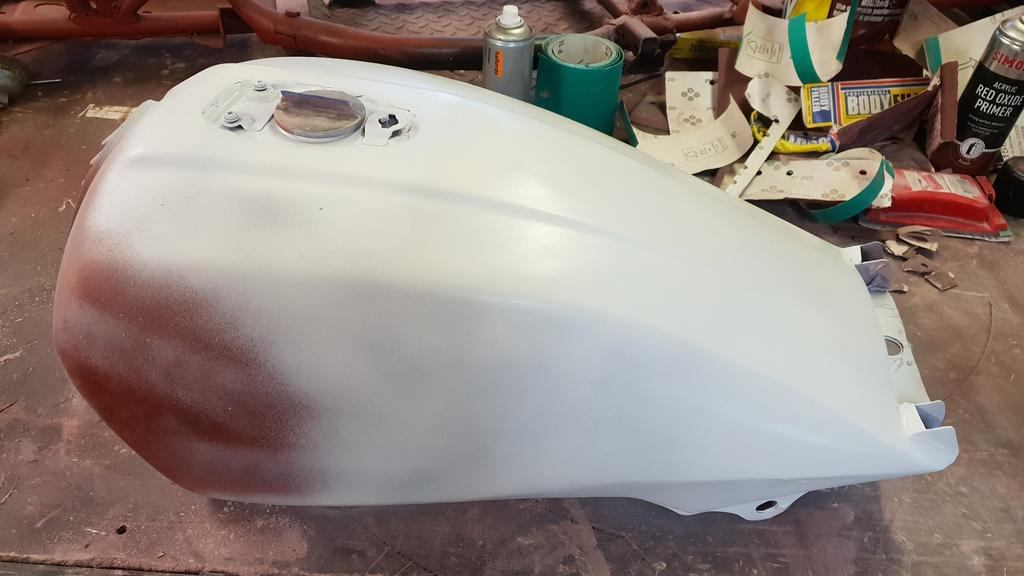
The time had come to sort out the only bit of bodywork on MadTrax, the fuel tank..
At some point I welded on an extension to the back of the tank so it filled a gap left below the seat..
Of course this all now needed to be tidied up, so que the body body filler!
Looking a bit rough here still..
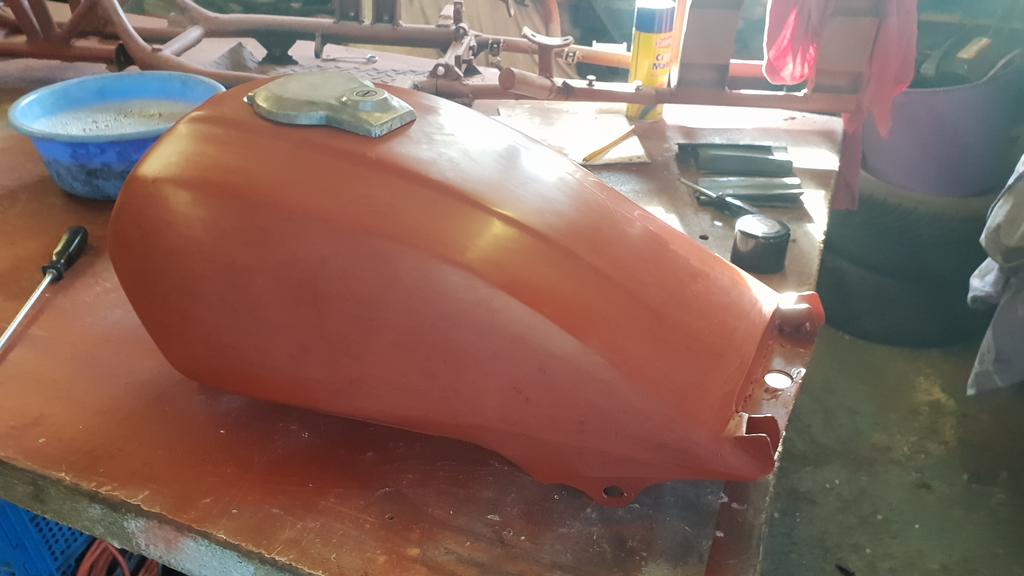
Lots of fillering and sanding later I gave it a squirt of white primer as it's all I had that wasn't red oxide primer!
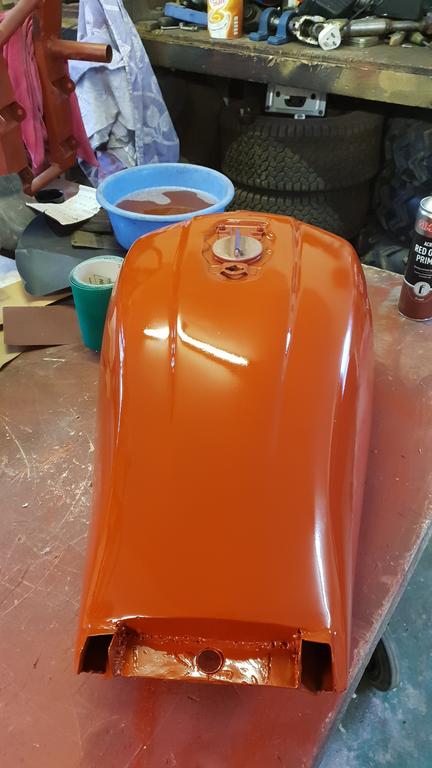
A careful rub down with 800 grade wet 'n' dry later the tank was then hit with 3 heavy red oxide coats...
Once the paint had fully hardened it was them flattened back with 1500 grade wet 'n' dry to get it ready for the top coats.
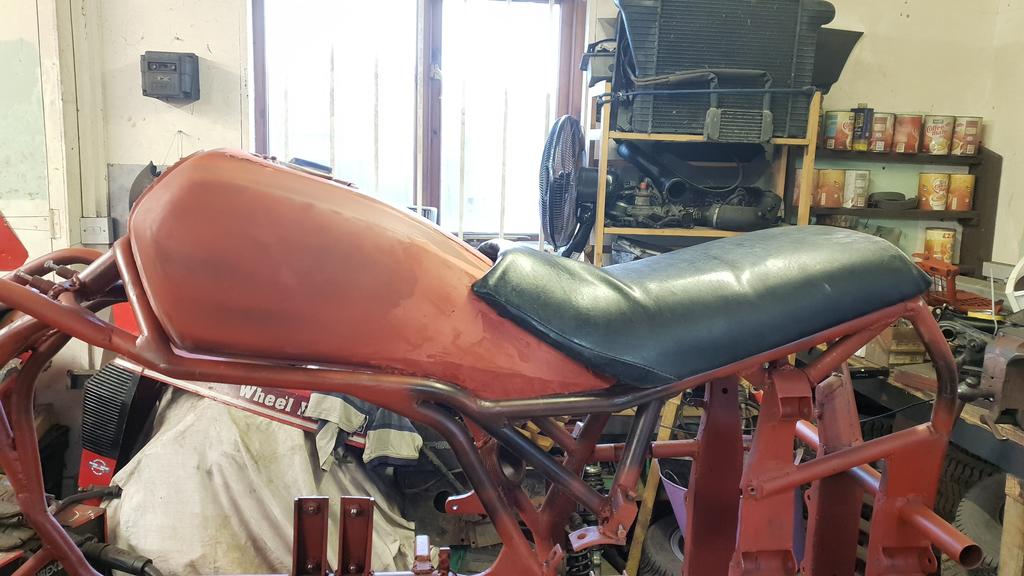
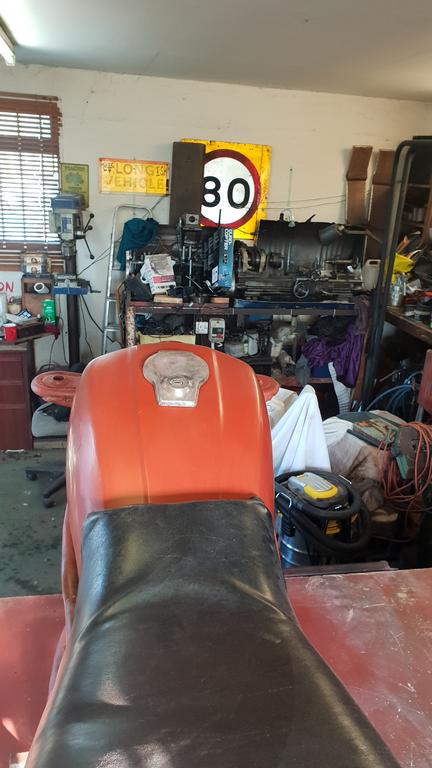
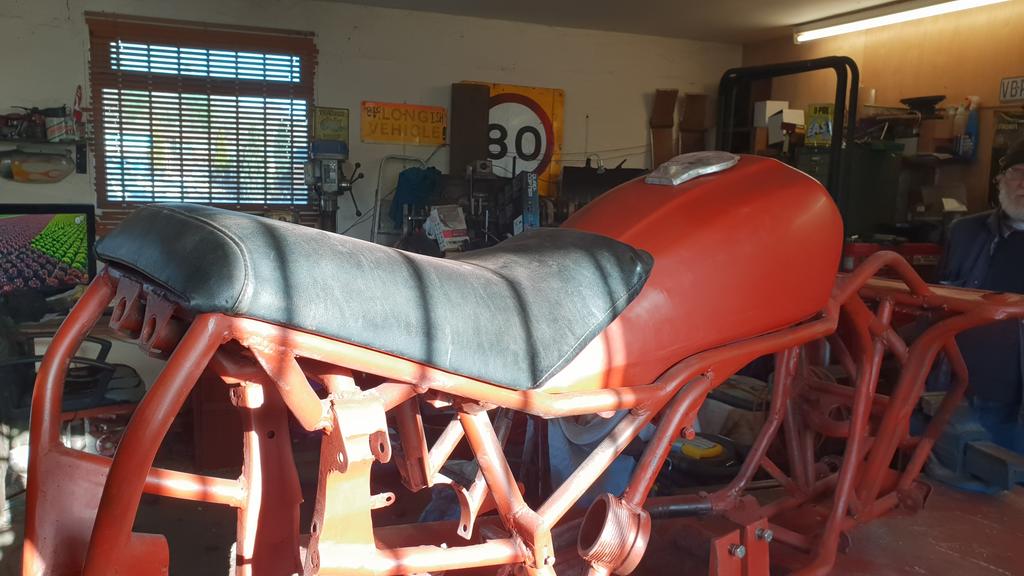
Carefully plonked on the frame along with the seat to have a look... Me likes
As it turned out the frame was the only "out of the way, nothing can get dropped on it" place I had to store the tank, so a sheet was put over to keep the dust at bay..
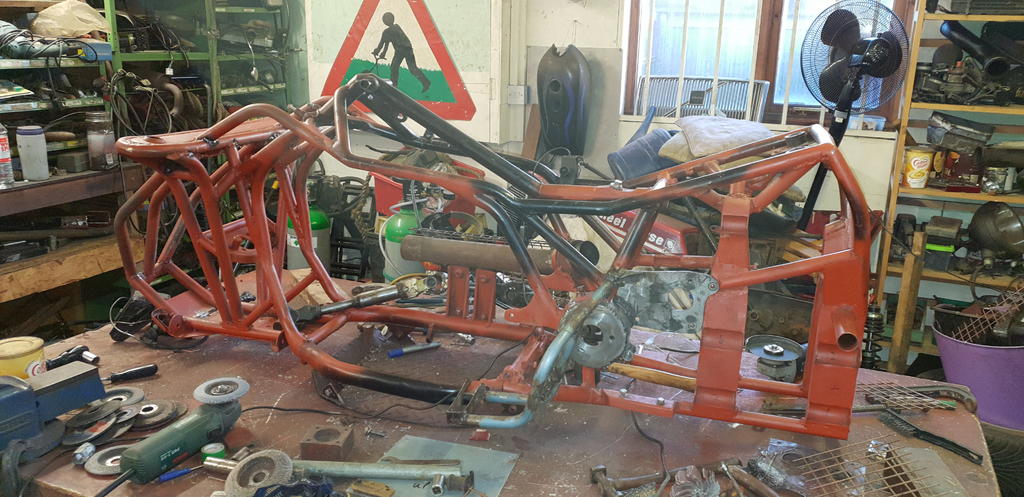
Hi Guy's, sorry it's been a while since the last update..
Life has been a bit er.. busy.. And being "on call" for a month waiting for grandkid No 11 hasn't helped..
Anyway...
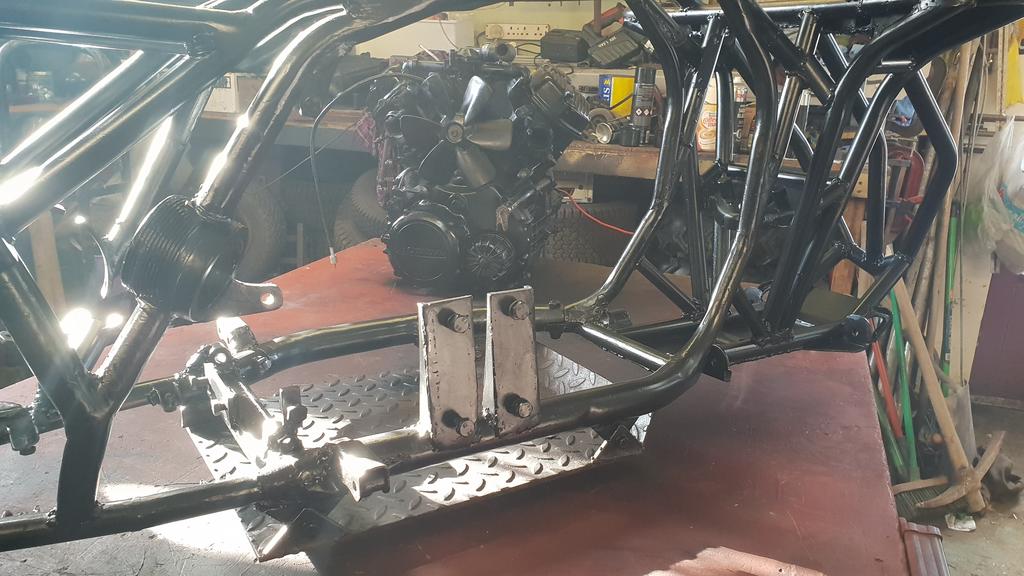
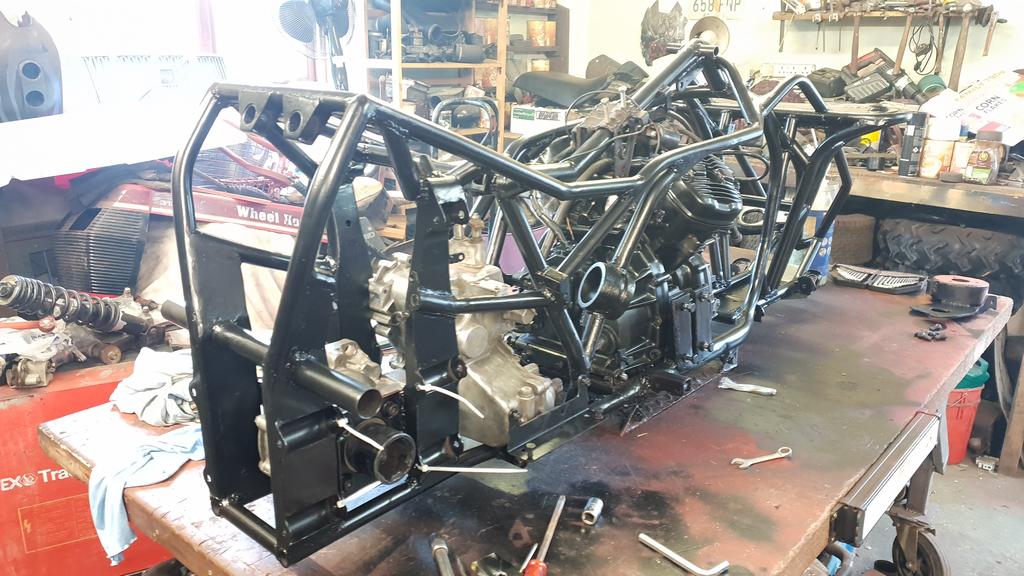
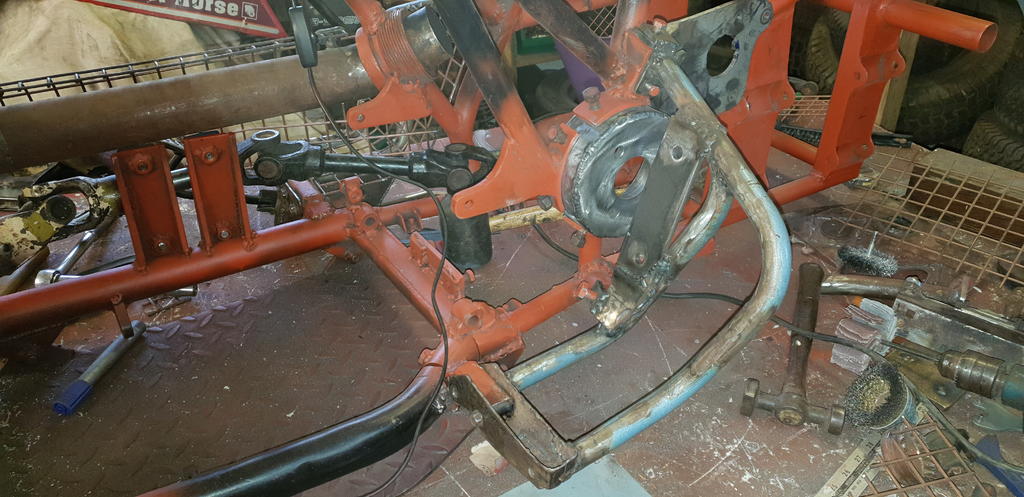
The frame now looks like this with all welding finally done (have I said that before?), and a coat of red oxide in the right places.. Yes the bit I missed at the front has been done
You may notice a few bit's of metal bolted to the frame..
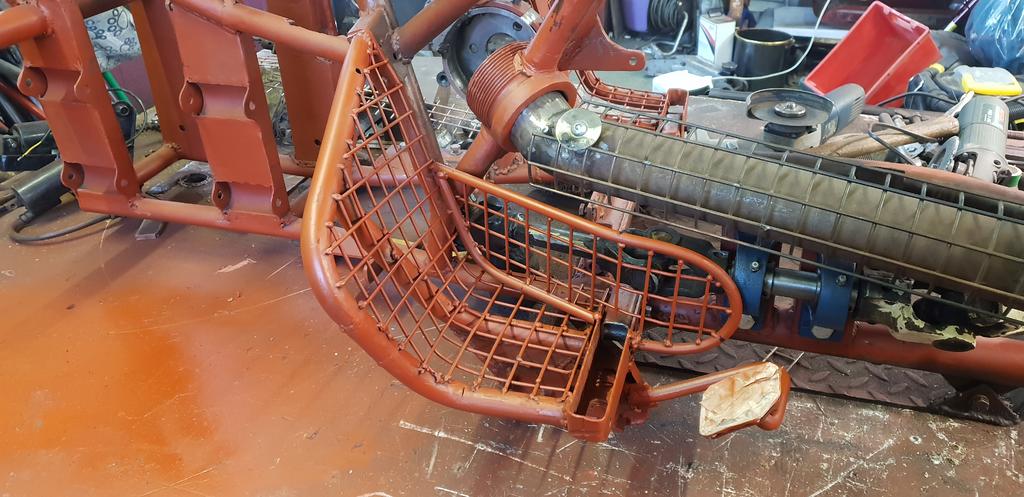
The bit's of metal happen to be foot rests and anything that sticks through them or near them..
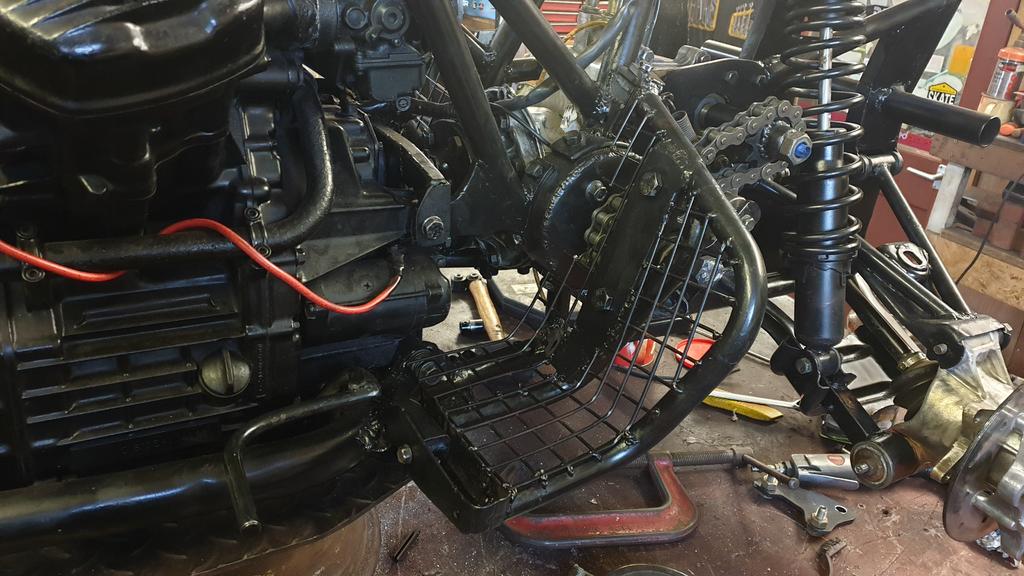
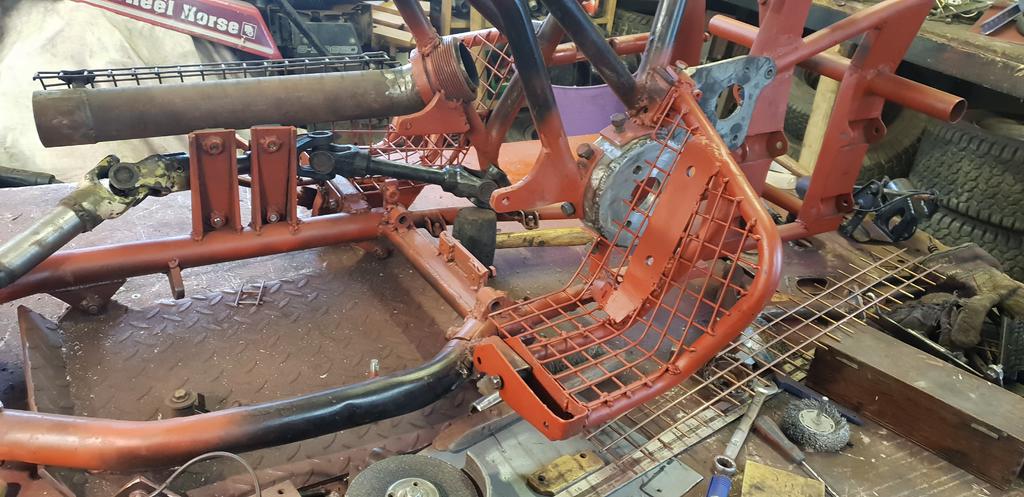
This is the O/S..
Now skinned with some strong steel mesh and given a squirt of the red stuff.
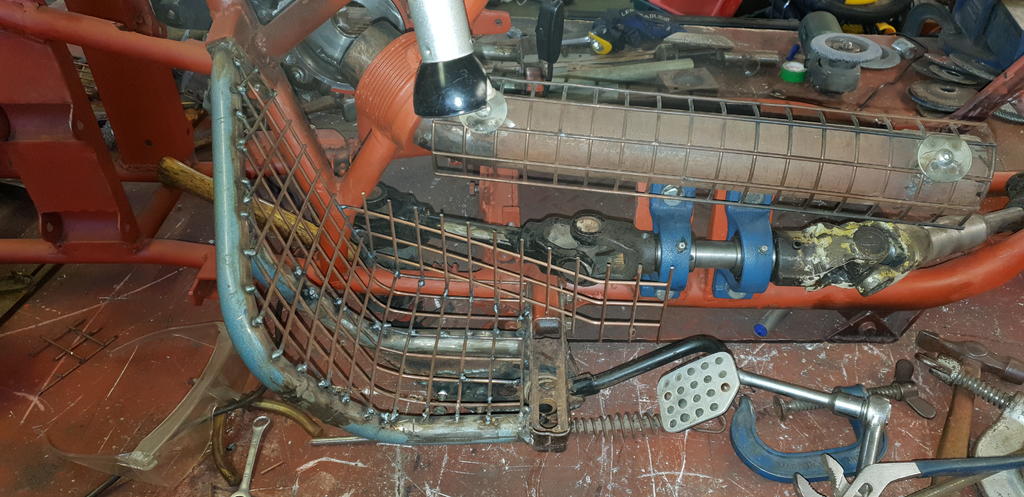
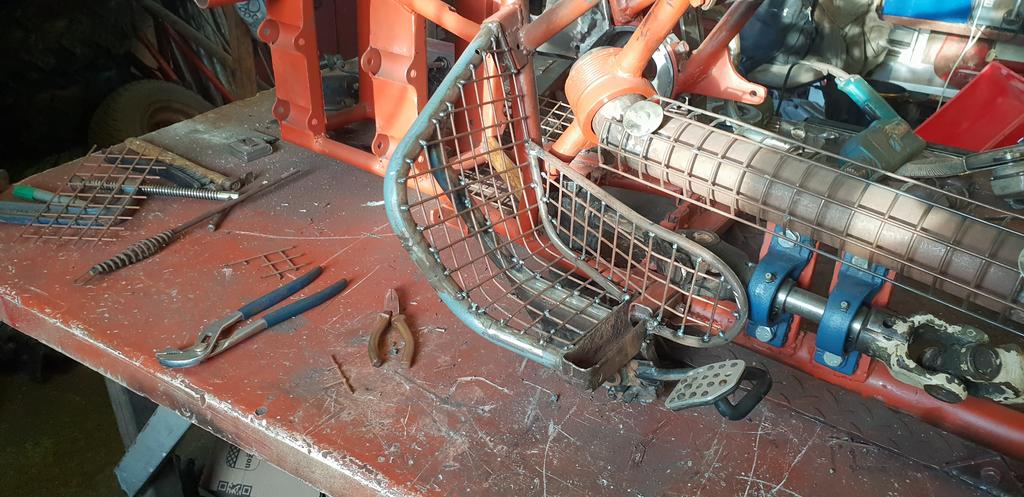
The N/S foot rest thingy taking shape, it also has to hold a a small guard so your legs can't get pulled in by the rotating driveshaft.. Never fun!
That should do the trick
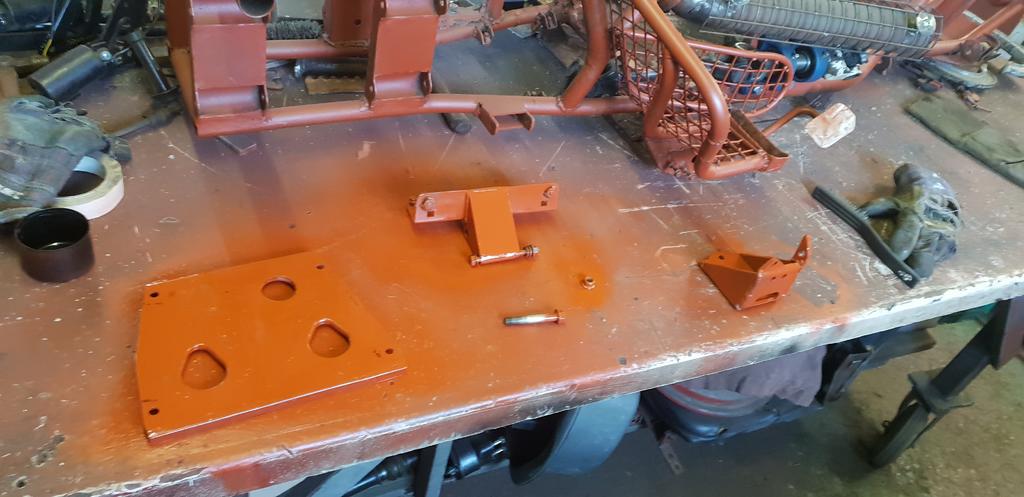
A few parts have been cleaned up and given a coat of the red stuff.
This plate which bolts in the base of the frame to add some extra strength and protection has a lip welded on each end just to make sure it's strong enough for the job.
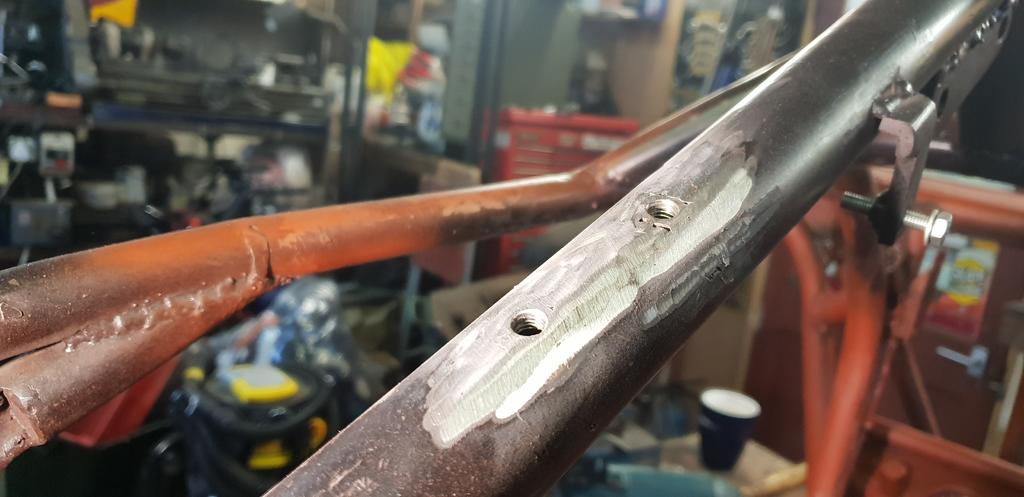
A couple of captive nuts welded in the top tube of the frame..
Yes I did re-weld the top nut once this photo was taken.
The captive nuts are for bolting this bracket on which also bolts to the top of the engine and is quite handy for holding up the coils


") !.
!.


 Don't know you as well as others but liked following your posts and will continue when the new workshop is up and running. Best wishes to you and the Mrs.


")


New Workshop Build
in Home Built Items
Posted
Hi Norm, cosy it certainly will be, but hopefully it won't feel cramped..
Me!! Forget the kettle!!! As if
Thanks Alan, yep slowly getting there.. Here's another update for you all
Thanks mate, I have a few ideas for smaller projects that will make building other projects easier and possible..
After moving lot's of boxes and bit's about the place some space was found!
Even my tatty but comfortable chair was found..
But most importantly this could happen... A moving moment as the 1st coffee's in the new shack were made

The insides of the double doors have been made more wind tight and strenthened with lot's of bit's of batten. They will get double skinned at some point.
Although I need to order some boards to clad the inside, I'm using what wood I have got at the moment..
So this small panel was clad with fake wooden floor stuff
To be continued shortly, the enter keys have both just died on my keyboard!