

slf-uk
-
Content Count
955 -
Joined
-
Last visited
-
Days Won
39
Reputation Activity
-

 slf-uk got a reaction from nigel in BOLENS RIDEAMATIC
Great tractor Andrew, I love it.
The decals on the side of the hood have coloured letters on a transparent background. It looks like they masked around the complete decal before painting so you can see the original colour around the letters. I can't tell from the pictures if that is gold or cream but that is probably my eyesight.
Looks like it has all the belt guards and it is electric start too. Does not get any better. I love the deck and it looks easy to copy.
Fantastic addition to your fleet although I think it would be better in my collection
It does not look out of place in red, in fact it looks like the tractor that WH should have make
Iain
-
 slf-uk got a reaction from Vinnetrow in Bolens G14
I have just bought another Bolens which I plan to collect over the weekend. I not sure how it happened really as I was not planning to buy any more tractors.
It must be a very late G14 as it has a number of differences to my other G14's. It is in very good condition although it does require some work. It comes complete with a 42 inch cutting deck which is not in the greatest condition.
The previous owner has done a very interesting modification to the PTO which overcomes some of the issues with rebuilding the original. It has has a home made tow hitch which is very similar to something I was thinking of making to tow my Ifor.
Pictures to follow when I collect it.
Iain
-

-
 slf-uk got a reaction from Ian in Project "Why Not"
Can't think of anything else to add about the dogs reproductive parts however it really does look great.
Iain
-
slf-uk reacted to Ian in Project "Why Not"
Me too
Good progress has been made made today, both steel blocks have been bored out to take the lengths of steel that pivot in the rose joints..
Jumping slightly forward here as I forgot to take photo's of all the stages..
Both pivot thingys have been drilled and a thread tapped to keep the rose joints in position, and both pivot thingys were press fitted into the block.. a nice tight fit they were too
You may of also noted from the above photo that the whole thing has been put in the lathe so I can cut a few tapers... If your wondering it span quite straight only a 1mm out of true.. Quite chuffed with that
Stub axle installed, another tight pressure fit.. I still need to weld it all together, and yes the bearing will be coming off before the hot sparks fly..
I'm rather happy with how this front end lark is coming together
-
slf-uk reacted to Tom in New addition - Wheel horse 312-8
I put the cultivator behind the 312-8 today just to try it, it works well and will work even better when the tines and wheels are adjusted. The ground was too wet for any cultivating really, I can't wait till we get better weather.
The 312-8 still amazes me at its capabilities and I am very impressed by it. I would love to add 26x12x12 tyres in the future or even some wheel weights. Once our workshop has been finished I am going to de-grease it and wash it right down and give it a good service. I would like to renew engine oil and transmission oil, new air filter, new spark plug, new fuel filter, renew grease in spindles and front axle pivot, weld up hi-low lever, add slot hitch and cable, fabricate a battery holder, either replace or repair seat, potentially add some lights, just give it a birthday really It won't be going anywhere so I want to make it nice.
Tom
-
 slf-uk got a reaction from Triumph66 in Got myself a Cub Cadet
Yes it's true
I am very grateful to Chris for giving me the opportunity.
A good day for Norfolk because Tom has been collecting some toys too.
It won't be coming home yet and will need to wait until Chris has completed the logistics for his latest project.
Iain
-
slf-uk reacted to Ian in Project "Why Not"
Evening all, I was going to do this update later until Tescos had delivered and dinner had been eaten.. But as dinner is currently in the back of a Tescos van which is stuck on a grass verge somewhere (awaiting a tow), I thought I'd make a start now...
I hope you all like lot's of photo's as there's quite a few
I've turned my attention back to the front end, it would be nice to get it rolling so it can be taken off the bench and wheeled outside for a good look...
Anyway, I did a little tweak to the disc hub thingy to create a bit more caliper space inside the wheel.. I'm happy there's plenty of clearance now..
My front end design came from http://www.ronsbits.co.uk a place that sells mower racing parts to... Well, mower racers
My starting point is this lot.. A block of steel that need cutting in half, a length of steel bar that needs cutting in four, and four rather large rose joints, here's two of them..
Steel block sliced in two, one half has been faced off in the lathe to make sure it's square.. Or even rectangular
The trailer spindles I'm using need a little trim in the lathe, here's Nigel trimming one of the spindles..
Ta Daa..
Now for the fun bit.. The block needs a hole bored through it at a 6 degree angle to give me some good steering geometry.. If I had of had a big enough drill bit I could of just set the bed on my pillar drill to the right angle and drilled the hole..
But as I don't have a big enough drill bit I had to work out how to do it on the lathe..
After a lot of thought I came up with a simple solution using a bit of cardboard and something that looks like a tuning fork but minus the handle!
Plonk the block (making sure it's the right way round) in the rectangle conveniently marked out on the cardboard..
Line the ruler up with the other line which just happens to be at the correct 6' degree's to the block..
And add the half of tuning fork until it lines up with the ruler. The end of the fork tips (I need to think of a better name for it ) also has the correct angle to make it line up right...
Clamp everything down firmly (there was a 8mm thick plate under the cardboard for firm clamping), and weld the fork to the block..
-
slf-uk reacted to Ian in Project "Why Not"
Thanks mate
Thanks Norm, yes wheelie bars could be handy
Thanks mate, I couldn't of done it without your help and bead/swage roller Thumbs:
Thanks Andrew, it will be good to catch up with you again..
Who looks nuts??
Thanks Chris, I'm mostly pleased with it.. I may or may not change a few of the lines on the fender pan at a later date.. We shall see..
For you viewing pleasure..... The latest video freshly uploaded this morning..
-
 slf-uk got a reaction from Charlie Smith in Oh dear got the bug just brought a LAWN RANGER
Like you, my only hope when I am pushing up daisy's is that my missus doesn't sell my equipment and tools for what she thinks I paid for them.
BTW. I like the Lawn Ranger
Iain
-
slf-uk reacted to The Fife Plooman in Ploughing and ploughs 2015
Douglas setting up feering poles this one is wrong this one is nearly right but end result is ok
End result the throw out is spot on
I tried out my plough but no success but we know what is wrong{not enough dig} can be fixed
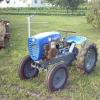
But did not stop a good day one or two pictures of the day the ransome mg was trialling a 2 furrow plough
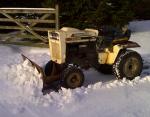
The wheel horse was trialling a ransome single furrow needs more grip. This was our attempt to add weight and it worked HA HA
Ransome making nice job Gutbrod with own plough on making a good job a new member with a Kubota tractor and Clifford plough
I will be back to the drawing board and make some adjustments hope you like
-
 slf-uk got a reaction from Lauber1 in Happy Valentines Day
Far too pink for me but my daughter likes it. I hope she does NOT want me to paint one of my tractors this colour.
-
-
slf-uk reacted to the showman in Stationary Engine Gas-Up
Been at a local stationary engine gas up today which gave me the chance to run my Wheelhorse all day, it was at a garden centre with a nice restaurant so we started the day with a fry up. Here's a few photos
-
-
slf-uk reacted to Ian in Project "Why Not"
My eye's are a bit sore today, which is always a sign I've been doing lot's of welding!! And yes I did use a mask
Starting with something small patch at the front..
Chopped..
And patched back up.. Only a bit longer..
Rear panels mostly tacked in place... I was standing on the GT 14+2's seat to get this high up photo
Mostly welded up and hit with red oxide to get it all one colour.. When I first put the pan back on I wasn't sure I liked the shape or not.. Maybe the "dropped" bit's should of gone down at an angle? Maybe the top of the drops should have more curve?
Anyway, with a seat plonked on and a couple of exhausts sticking it looks a little better.. What do you guy's think?
-
-
slf-uk got a reaction from Ian in Project "Why Not"
Very clever way to overcome the problem, looks great.
I have always fancied one of those bead rolling machines.
-
slf-uk reacted to Ian in Project "Why Not"
Thanks Iain... My plan to get the back looking right? See below
Ta muchly Andrew.. An armchair is an interesting thought, but there isn't the space.. The photo's make things look wider than they are..
This morning started with some cardboard templates to try and work out what would look right..
But before I could turn the cardboard into steel I need to A... Make the center bit first.. And B.. Find some steel to make it out of!
Treasures from the scrap pile
Adding a curve to the center bit.. Yes that is a broom handle I'm about to fold the metal around
As it turned out the curve was a tad too tight so it was reshaped around a scaffold pole..
As Nigel (thanks mate ) has a bead rolling machine I thought I'd put it to good use and roll the traditional Wh swage line in the back..
And now the part which ties the arches and center section together... I need to tweak the shape a little and add the swage line tomorrow, then it can be welded in...
I have to say I'm quite chuffed about how the back end has come together
A view from underneath.. The flanges will be staying as they will add a handy bit of strength to things once they are plug welded together. The flange will also be used for mounting the fender pan, keeping the mounting bolts nicely hidden away..
-
slf-uk got a reaction from Ian in Project "Why Not"
Looking good.
It looks like a hard bit will be to get the back looking right, especially with the shaped bit on the end. What's your plan?
-
slf-uk reacted to Stormin in C-120 refurb.
Got the hood stand finished painted and in place.
The top part is only sitting there while I decide whether or not to leave it silver. Not the best of photo's, but comments welcome?
-
slf-uk reacted to OldBuzzard in Scored on a rare attachment
It uses the same shaft as the tillers.
As for mounting, it looks like it uses the three threaded holes circled in this pic:
-
slf-uk reacted to the showman in Had to buy a commando 8 engine
Had to buy a Commando 8 engine off the well known auction site, but the seller had another listing of spare parts, just seemed silly to go all that way and not buy both listings. Had a look in the boxes and this is what I found
Don't know what the wheels are from, and there's some strange heads
-
slf-uk got a reaction from nigel in Wheel horse D200
Nigel, I don't know the answer to you question however I have heard everything from "just a few" to "loads". If someone is counting, I have one.
Does anyone know the new owner?
Iain
-
slf-uk reacted to Ian in Project "Why Not"
Thanks Doug, that's very kind of you.. For now I will give my home made discs a whirl and see how they work.. If they don't you may well get a PM
With both sides of the fender pan widened but not fully welded..
It was time to sort out the drop in the middle.. A dig through the pile of scrap metal on site produced a couple of metal shelves which were just the right thickness...
A bit of chopping and tack welding later and although not perfect the arches bit were looking good.. They do need to be angled down towards the front a bit more.
Inner arch panels fully welded..
Looking from the inside, I think that could be classed as good welding penetration
And here's how it looked by the end of yesterday. The arch extensions each side have been fully welded and all welds smoothed down. The bit's of steel across the top are only there to hold the arches square until I can get some strength added..
And I was viewer number on your vid the other day
It's not as wide as it looks in the photo's..
Thanks Neil
Ta muchly Iain