Evening all progress on MadTrax's gauges continues..
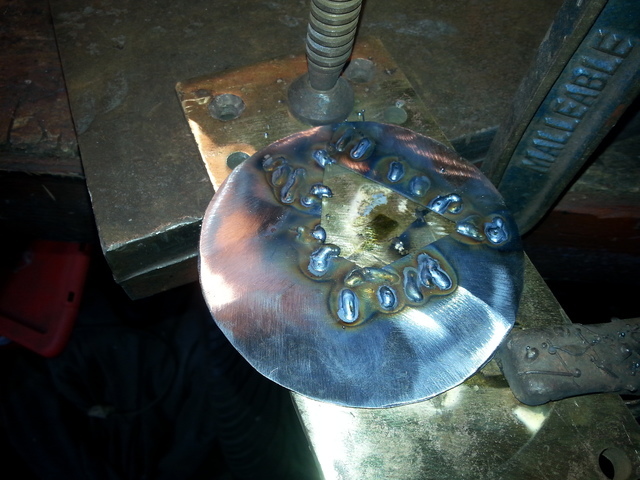
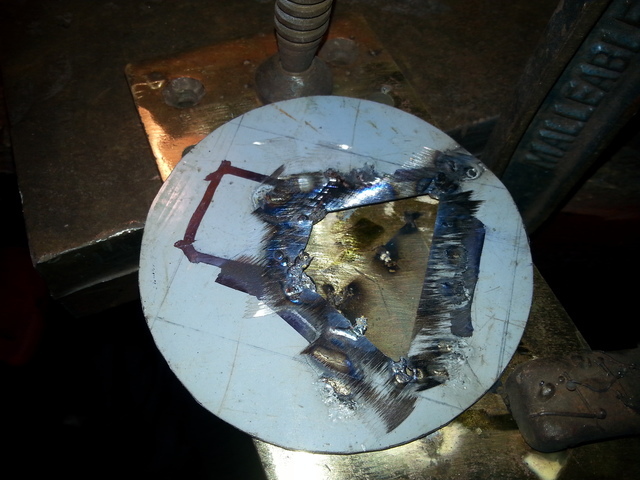
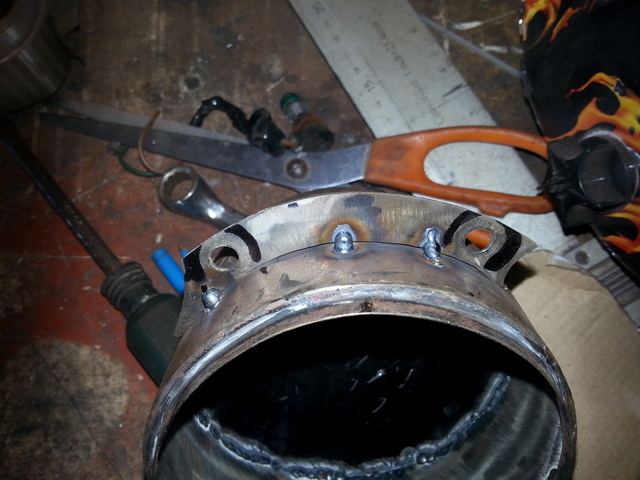
The temp gauge face plate had all the cut/other marks welded up..
To stop me blowing any holes through with the welder the face plate was clamped to a lump of brass.
The rear side, you can see where the weld has filled the gap without sticking to the brass plate.
Once the welds were smoothed a couple of small brackets were welded on which bolt to the temp gauge backing plate.. Quick, easy and does the job a treat.
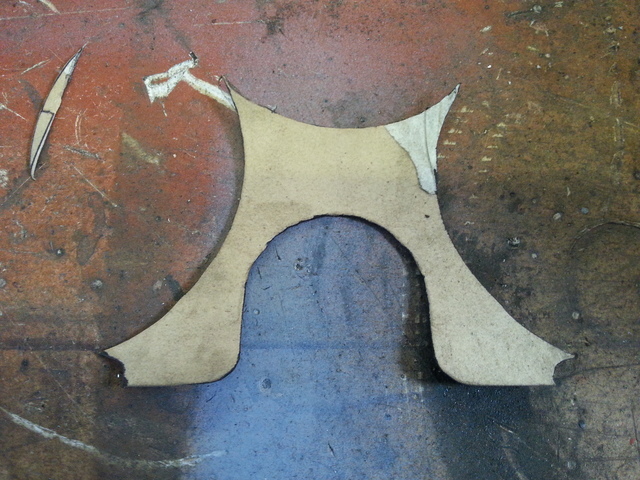
It all started with a cardboard template.
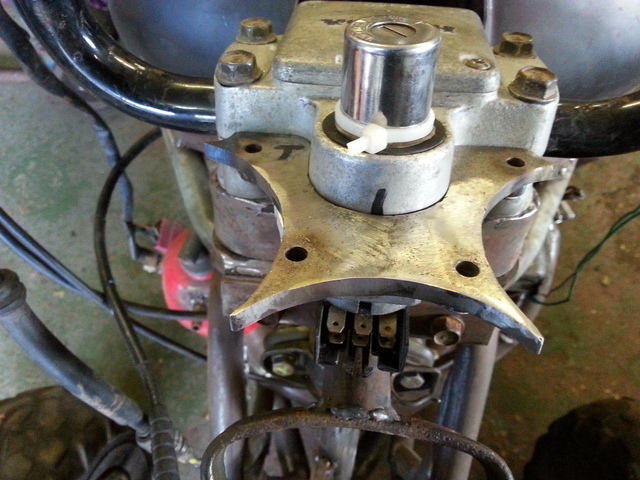
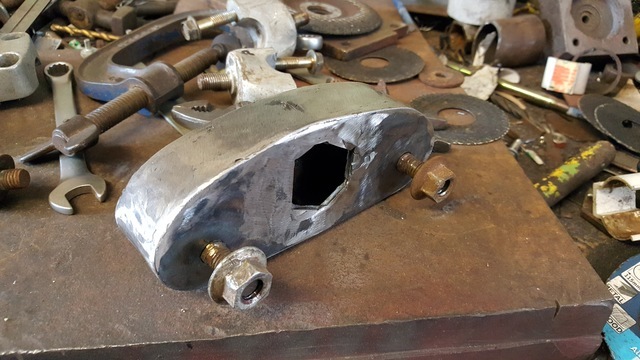
The steel version with 4 captive nuts and two bit's of threaded stud welded on.
The threaded rod is for bolting the ignition barrel on.
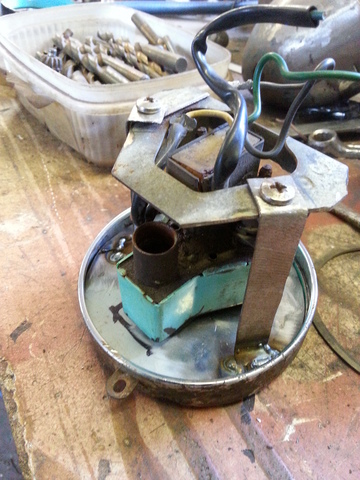
The gauge pods/bowls gained a flange thingy, only tacked on at this point..
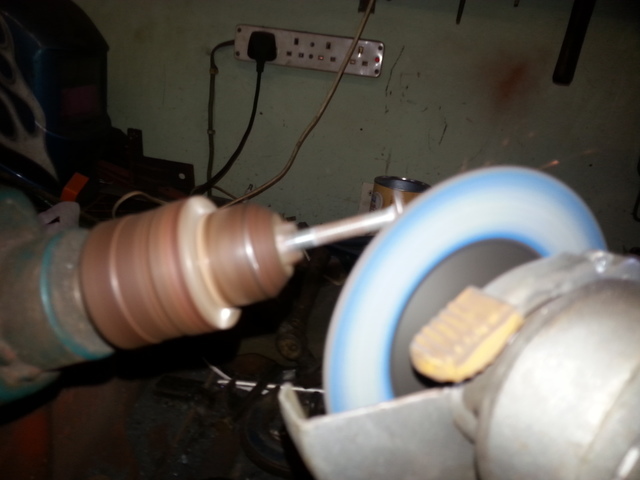
To bolt the pods on I needed a M8 thread but with a bolt head smaller than 10mm, so I dug out a few allen key bolts..
Clamped one in a drill chuck then put the drill in the vice..
With the drill tuned on I fired up the grinder and totally failed to get a good photo of the allen bolt head being ground down to size!
A quick test fit, me likes..
Working out how to mount the bracket that the gauge pods bolt onto has been fun!
In the end I made a couple of brackets that use the same bolts as the headlamp.
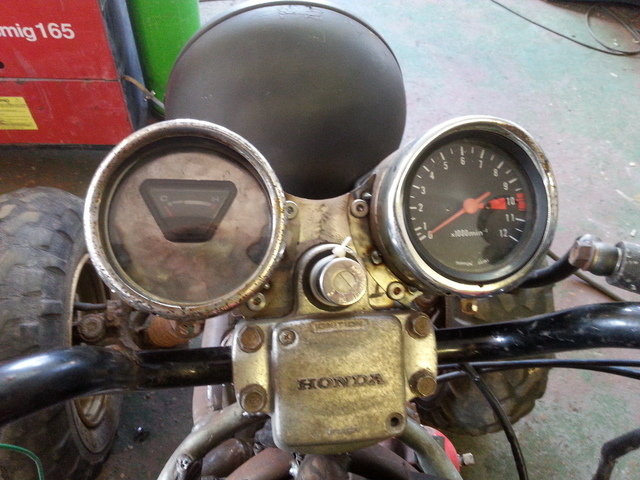
Other than cleaning up a few welds and adding a couple of captive nuts to stop the pod tops from opening, and adding a couple of warning lights the gauges are done.
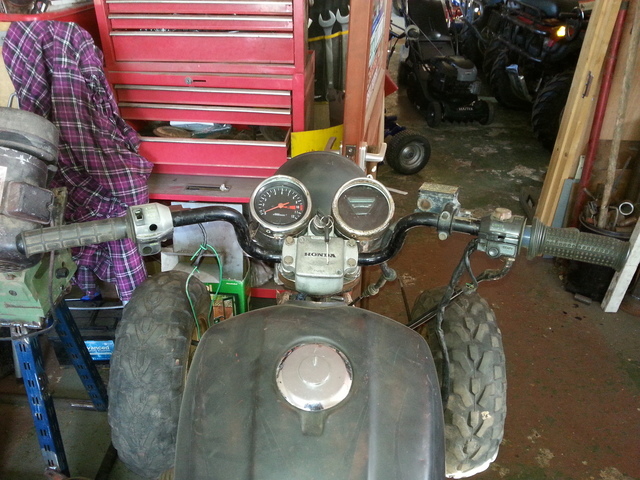
A view from the seat..
You may of noticed in the above photo that the front brakes have gained a bigger master cylinder.. An upgrade that's needed me thinks..
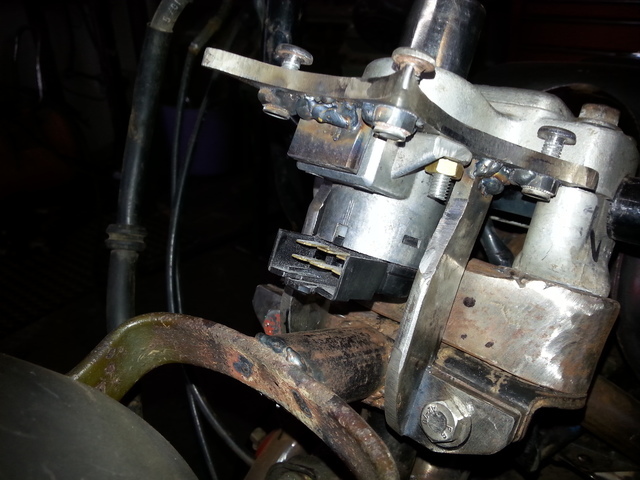
The coils, regulator etc have been mounted under the gas tank, you might say space was tight! Photo's to come when I remember to take some
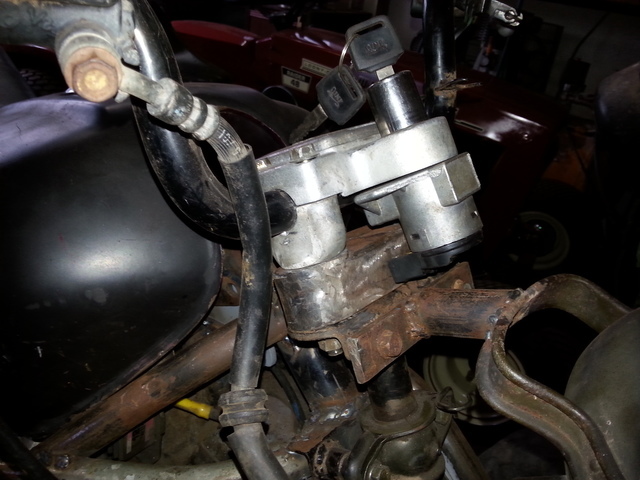
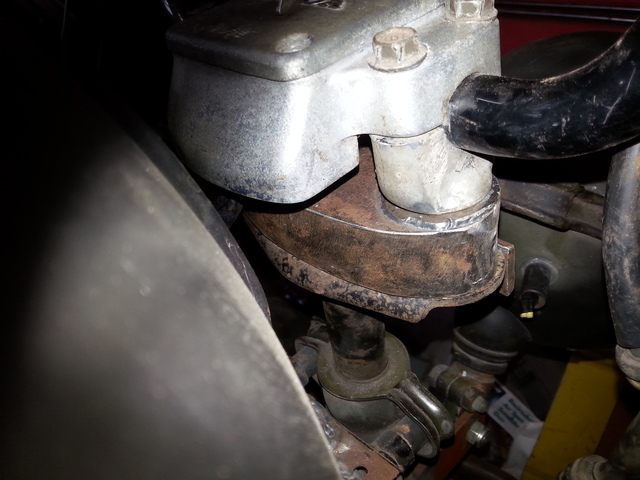
To make enough space to get the ignition barrel in the right place and to stop my thumbs being crushed between the bar and the gas tank I made this handle bar riser thing..
The riser thingy in place.
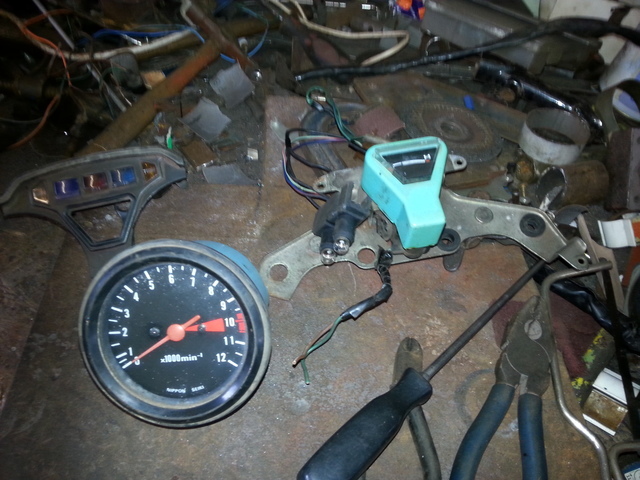
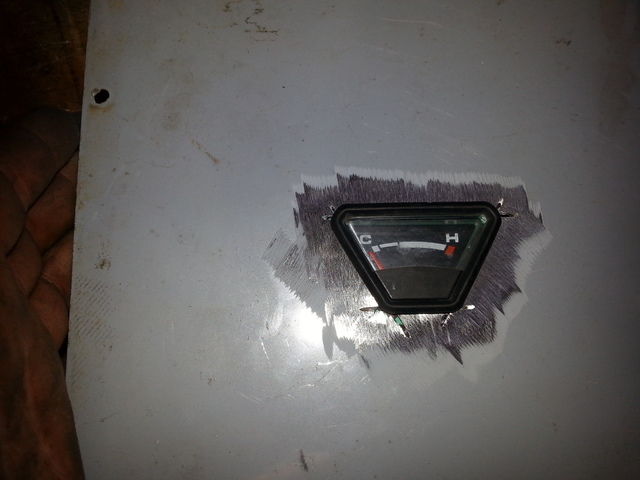
While in the handle bar area I thought I should have a look at getting a rev counter, temp gauge and a couple of warning lights mounted.
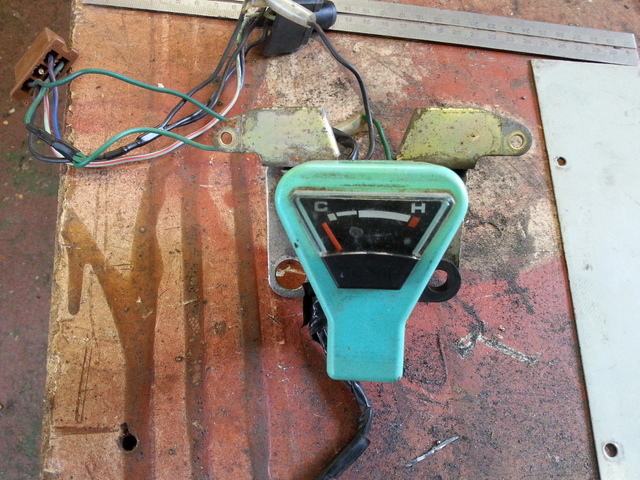
With a bit of trimming of the mounting plate the temp gauge shrunk a bit in size.
Some thick-ish flat steel was needed so I decided it was time the last remaining part of my first Mig welder found a use.. I do have plans for the louvers
Not a bad fit..
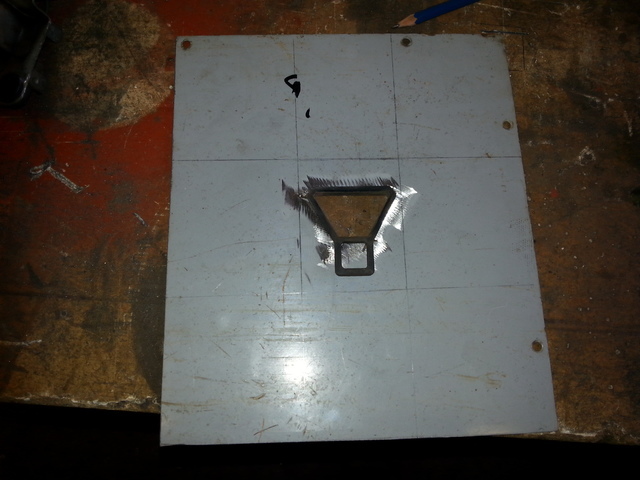
The plan was to mount the temp gauge in a box, I even started to mark out the sheet to do so..
Then Nigel asked if I had thought of fitting the gauges in tube?
Not a bad idea I though and went of the search for a couple of big enough bit's of steel tube..
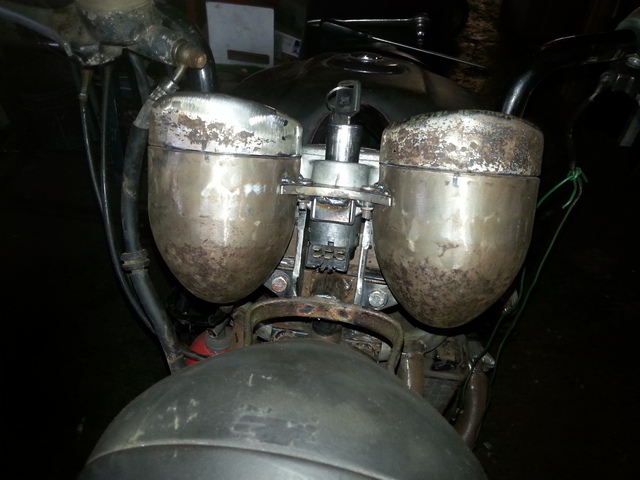
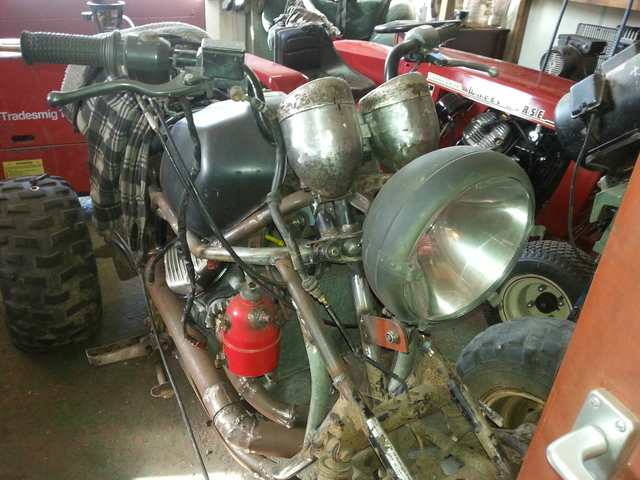
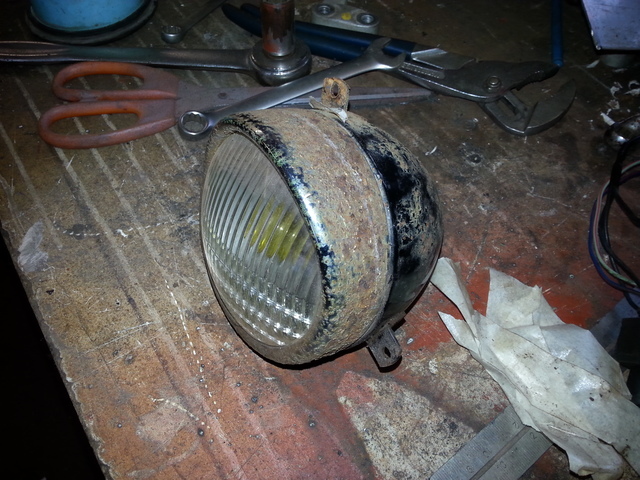
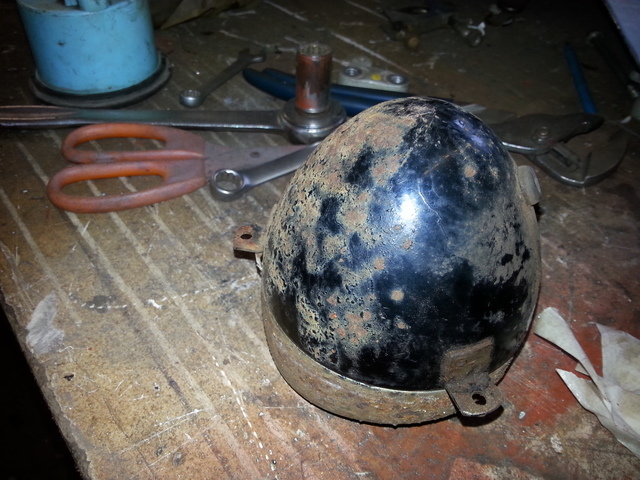
It was at that point that I found a pair of Gutbrod headlamps that have a rather nice shape to them.
Who would of thought a Honda rev counter would be such a good fit in a Gutbrod headlamp!!!
I just need to make them a bit longer
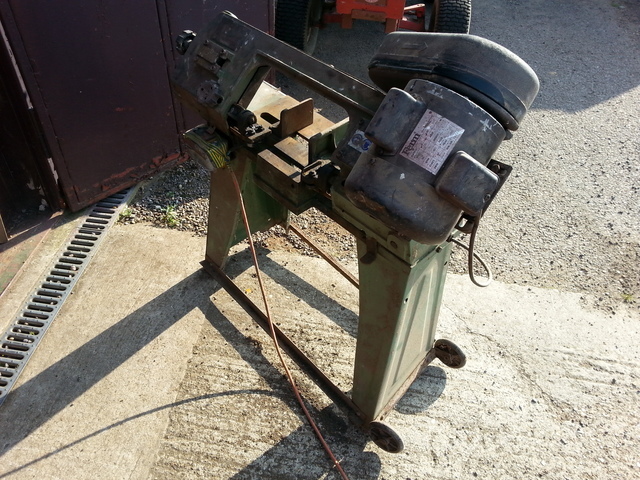
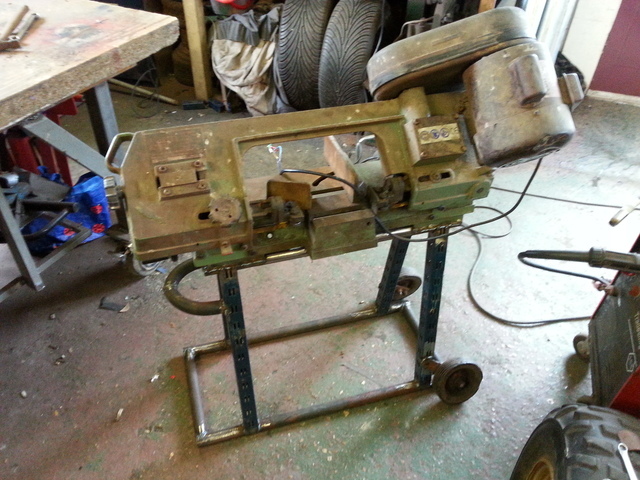
Best thing you could have done - remove the legs , the one i had , if picked up by the front handle to roll it around used to have a mind of it's own .Either trying to flop to one side or more often than not it would try to up end itself , I had to roll it with the stand feet almost toughing the ground .
It cut ok though , Looking at how you have fabricated your new stand , You could easily add a tube under the saws bed with a bolt welded to it loose fixed through the bed .This would enable say a 6 foot length of tube with "A" frame style supports at their extrematies to be inserted at each side of the saw as work supports .The addition of a couple of 6" lengths of tube over the support tubes with simple "T" section support plates welded to them would make a propper job of it .The sliding tube supports could have simple holes and locking pins to enable for quick length changes .And of course due to the bolt through the saw bed , mitre cuts would be easier on long lengths as the swiveling allowed by the bolt enables the support to be turned to the deired angle and still create a solid structure .
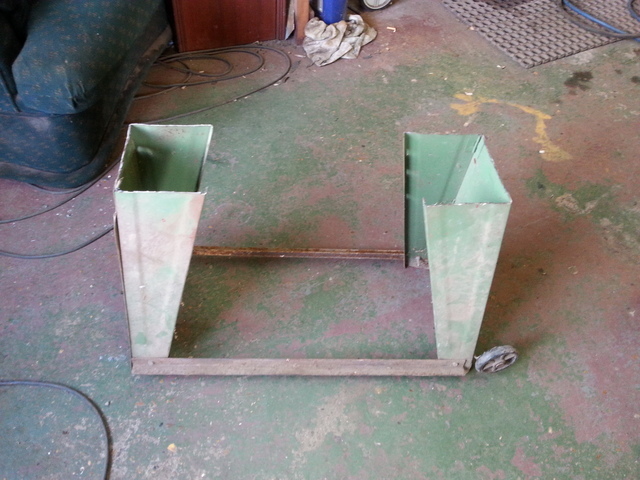
I do plan to make some supports to help hold up longer bit's of tube/box. Thinking on it, it would be quite easy to make something using an office chair just minus the chair bit.. Height adjustable and would move around easy
Though i do not know if yours has been retrofitted with the die carrier or if it was a factory upgrade to make usage easier maybe ! .
I've no idea Chris, it was given to me by someone who didn't know what it was.. It was a mystery to me for many years until Koen came up with the answer.
And here was me thinking quick fit is the place to stay away from!!!
I dread to think what damage the fire inside the tyre/tire did! I certainly wouldn't want to travel in any vehicle that has had tyre/tire repairs done that way!
Hi Guy's, not much of an update as I've been away on holiday recharging the battery's and getting away from Nigel's singing
An expansion/overflow tank was needed, the trouble was there was not the space to fit a battery and the original CX expansion tank.. So I made my own
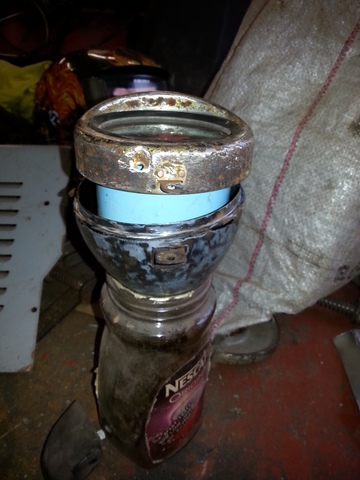
Yep, it's one of those paraffin engine cleaning things with the handle cut off that that you plug into an airline.. I have had it for 12 odd years and never used it, so I found a use for it
Water in at the top, breather/overflow pipe on the right and with a bit of clear pipe put between the two things at the front I will be able to see the water level..
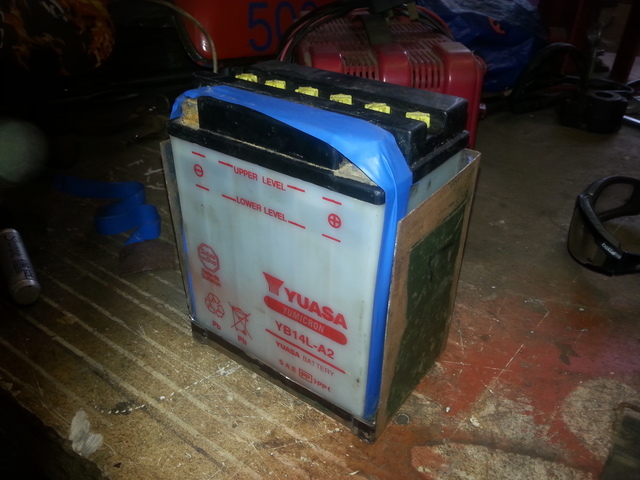
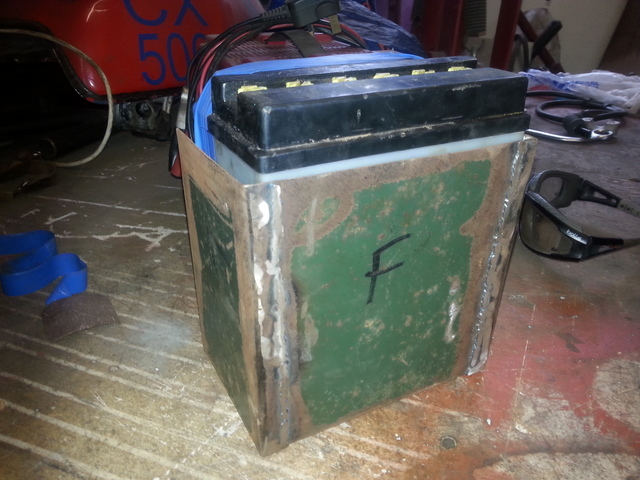
A battery box/tray was needed so I quickly knocked this one up..
The next morning I looked at it and thought it was just too small... Battery tray 2.0 is much better but it will have to wait until MT is back on the bench and I don't have to get on my knees to fit it in the gap between the swing arm and carbs.
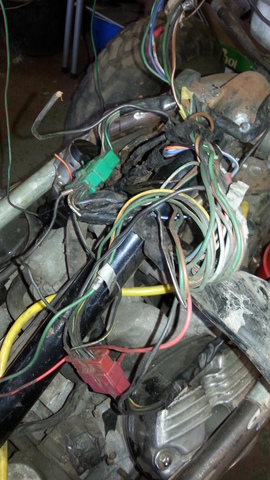
The time has come that I have been dreading... Sorting out this mess of a wiring loom and finding space to mount the coils, regulator etc.. Wish me luck!


 I like mine cooked!
Nuts!
in Ride On's
Posted
Nice gauges, the rev counter is a nice touch