Leaderboard
Popular Content
Showing content with the highest reputation on 02/21/2015 in all areas
-
3 points

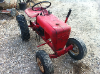
Ransomes MG6
pmackellow and 2 others reacted to Rocboni for a post in a topic
Well, look what crawled out of the shed this afternoon, (pardon the pun) even if it was after a weeks worth of magneto problems! Still got the toolbox and bumper to sandblast and paint, then add some lights and it's done! -
2 points

Three More Wheelhorse's
pmackellow and one other reacted to Ian for a post in a topic
They must of been really panicking when they hit the brake pedal!! -
1 point

Electrolysis works both ways.... DIY electroplating
nigel reacted to meadowfield for a post in a topic
I've been a big fan of e tanks for a while now, they are great labour saving items and work wonders on all manner of things. Here's my small setup on the bench cooking small pieces for bendy. These were lug nuts with 45w of power running through them, you can't see the gassing - but a reasonable amount of hydrogen was being given off So this is only one half of the set up... I looked into electro plating years ago and just couldn't lay my hands on the correct electrolyte. It was a bit Heath Robinson even by my standards About 6 months ago my brother managed to source a kit and has had some pretty good results tarting up parts on his range rover. So I bought the chemicals and some zinc before Xmas. So now the other half is my plating rig, parts go in rusty or bare metal and come out shiny and fairly rust resistant. The camera doesn't do it justice on some of the pieces. Here's a few bits we've done Which means bendy can actually get 5 bolts per wheel, when I get them all cleaned -
1 pointHi all, First off I would like to say a big thank you to Nigel who has kept these bits for me as I couldn't get down South for a few weeks, so thank you Nigel!! I actually bought these implements around a month ago off of a guy who was selling some barford atom stuff to make room for other things. Anyway here are some pictures: Really happy with this haul, I've never seen a cylinder mower before and the discs are quite rare. Plus the cultivator frame is complete which again is quite rare as they are usually incomplete. Hopefully I can get some of it hooked up to my barford atoms soon and have a play! Tom
-
1 pointYes it's true I am very grateful to Chris for giving me the opportunity. A good day for Norfolk because Tom has been collecting some toys too. It won't be coming home yet and will need to wait until Chris has completed the logistics for his latest project. Iain
-
1 pointFunny you should ask, Ian. I was thinking about silver today. I've got the paint.
-
1 pointSo how did the block at an angle look spinning around on the lathe??? Blurred! So I thought I'd better turn the camera flash on which has the power to stop time for a split second The boring drill bit wasn't quite big enough so I had to use a boring bar to take the hole out to the right size.. "NEWS FLASH.... Tescos has just delivered, but as we were starving we had a pizza while we were waiting!" Anyway, have a photo of a spindle stuck in a steel block at just the right angle A quick bit of reassembly to check block to disc clearance.. There be plenty I will be tapering both ends of the block to make it look nice, but also to give a bit more space allowing me to get the block a bit closer to the wheel.. Mounting the calipers should be easy, just make a bracket to bolt on the caliper and weld the other side to the block A bit of mass production, all machined to length. Turned down to the right diameter and one notched.. The notch is for fitting a rose joint.. This will sit about here... I need to bore a 3/4 inch deep hole in the block to sink the steel bar into.. Which will get the rose joint sitting about here... And that folks is this thread up to date once again... Making my own front end (steering and brakes) is certainly a lot of work and lot's of thinking is involved, but I'm really enjoying the challenge.. Your never too old to learn
-
1 pointEvening all, I was going to do this update later until Tescos had delivered and dinner had been eaten.. But as dinner is currently in the back of a Tescos van which is stuck on a grass verge somewhere (awaiting a tow), I thought I'd make a start now... I hope you all like lot's of photo's as there's quite a few I've turned my attention back to the front end, it would be nice to get it rolling so it can be taken off the bench and wheeled outside for a good look... Anyway, I did a little tweak to the disc hub thingy to create a bit more caliper space inside the wheel.. I'm happy there's plenty of clearance now.. My front end design came from http://www.ronsbits.co.uk a place that sells mower racing parts to... Well, mower racers My starting point is this lot.. A block of steel that need cutting in half, a length of steel bar that needs cutting in four, and four rather large rose joints, here's two of them.. Steel block sliced in two, one half has been faced off in the lathe to make sure it's square.. Or even rectangular The trailer spindles I'm using need a little trim in the lathe, here's Nigel trimming one of the spindles.. Ta Daa.. Now for the fun bit.. The block needs a hole bored through it at a 6 degree angle to give me some good steering geometry.. If I had of had a big enough drill bit I could of just set the bed on my pillar drill to the right angle and drilled the hole.. But as I don't have a big enough drill bit I had to work out how to do it on the lathe.. After a lot of thought I came up with a simple solution using a bit of cardboard and something that looks like a tuning fork but minus the handle! Plonk the block (making sure it's the right way round) in the rectangle conveniently marked out on the cardboard.. Line the ruler up with the other line which just happens to be at the correct 6' degree's to the block.. And add the half of tuning fork until it lines up with the ruler. The end of the fork tips (I need to think of a better name for it ) also has the correct angle to make it line up right... Clamp everything down firmly (there was a 8mm thick plate under the cardboard for firm clamping), and weld the fork to the block..
-
1 point
Raider 16 4x4 articulated -aka project bendy
meadowfield reacted to Ian for a post in a topic
You shouldn't have any problems seeing where your going with those lights -
1 point

Raider 16 4x4 articulated -aka project bendy
meadowfield reacted to Stormin for a post in a topic
Spot on. You've also done a good job of repairing the lawn.