Leaderboard


Popular Content
Showing content with the highest reputation on 02/21/2018 in all areas
-
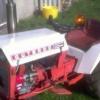
4 pointsNow, back to the wiring... This isn't what's left of the loom, it's all the bit's I didn't need mostly chopped from wires that were too long! As I went along all the crimp connectors were removed and the joints soldered up before being wrapped in tape.. At least I know the loom won't pull apart now Battery end of things. This bit of the loom was a massive mess with lots of crimp connectors! It looks way better now The front end splits nicely into two, it will split nicely into three when the headlamp is wired in.. Speaking of the headlamp, these "not yet connected" wires go to the Quadzilla switch gear and are the very wires that give life to the lighting circuit. And the horn Monday was spent turning this mess.... Into this non mess...... A day well spent
-
3 points

New plough 2018
Old Tankman and 2 others reacted to The Fife Plooman for a post in a topic
Hi all Update on my new plough 2018 trialled it today and I believe I have the beginning of something good, one more trial this weekend at a local charity match, the ground I tried it on was not the best but gave me a start -
3 pointsHaving already mounted the voltage regulator the wrong way ie bolted directly to the frame, I needed to find a good way of rubber mounting it.. Which is where the random bit of Quadzilla comes into play as it has a few holes already with rubber isolating mounts in it... Just not quite in the right places..... Soooooo.. Chop of the unwanted bits. Slice 4mm from the middle. Weld the two halfs back together. That should be strong enough Drill a hole. Bash the bend flat. Drill a second hole then test fit. Cut and grind the bracket to shape. Bolt the regulator back on to the bracket. Bolt the whole thing back on to MadTrax, plug the wires in.... Job done
-
2 pointsThe wiring isn't too bad (well it feels that way now most of it's sorted), only 2 fuses and 2 idiot lights, but I do have a lighting circuits and the 4 wheel drive mode circuit to add.. And as the horn switch works I might as well try and find something loud to wire into it Thanks Ewan, I wasn't sure what she would sound like, but I like what I hear With the wiring (mostly) sorted I couldn't tidy the loom up without knowing where all the wires would run to... All of which means I had to find somewhere to mount the battery! The only place for it to go was just infront of the rear R/S wheel (no pics as it's hard to hold a battery in place and take photo's at the same time), no ideal but it just would not fit anywhere else! I had already built a battery box, but hope to mount it??? This TB mount looks a good start Lot's of chopping and welding later it looked like this Inside view. Outside view. Checking the battery box fits.. TB/Batt mount bolted back on to MadTrax Battery plonked in place.. It feels nice and strong with no movement and will hold the battery in place no problem
-
1 point

Danarm Tornado
Boy from Bushnell reacted to adgecutler for a post in a topic
I picked up this one today. It looks pretty rough but I'm hoping to have it operational again before too long. -
1 pointNice but of kit
-
1 point

Downsizing in Metalwork
nigel reacted to Anglo Traction for a post in a topic
Yeah, I agree Alan. It's a bit nerve wracking with the small sizes. I used a 0.8mm drill for 90% thread engagement and started each thread with a taper Tap, then second and bottom held lightly in a Pin Chuck so the Tap would slip rather than break when it resisted. I've broken 3 Taps on the whole project. 2 x 10BAs in steel and dropped the other . Think I've nearly done all the Tapping work on parts for this thankfully. Just Nuts and Bolts to make. -
1 point
Downsizing in Metalwork
Rayp reacted to Anglo Traction for a post in a topic
Thanks Alan, been very impressed with your work as well...... I'm glad to have been able to get back into this project. Haven't been able to spend much time in the workshop as it's been too cold lately. Can't justify heating it. The Engine has been reduced to a pile of bits now. Lots of parts and jobs to do while reassembling and prepping for paint etc and seemingly relentless additions to the Jobs List. I'm going to join a Model Engineering Club so I can have their Inspectors check the already certified Boiler over while it is in this condition- I would prefer to have this with a Current Certificate when completed in addition to the original Boiler Certificate. Today, I finished drilling and tapping the last of the tiny holes in the Cylinder Block for (18) 14BA Screws for the Insulation Cover Plate. I only had Cheese Head Screws and so had to machine each one down to a rough Round Head shape to finish properly when I finally fit them- I'm only too pleased to have been able to do all the machining work on this accurately, and Drilling, Tapping etc without breaking a Drill or Tap. Just a bit of filing and shaping to finish and it will be ready to fit onto the Boiler. -
1 pointLooking good! Sounds good too
-
1 pointPity your at t'other end of this Septic Isle to me, Ian. I could have helped you out with body work and carb.
-
1 pointDon't you just love modern electrickery. Oh for the days of three fuses, no idiot lights, gadgets and gizmos.
-
1 point

Wheel Horse C-101
Ian reacted to the showman for a post in a topic
Another interesting project to watch in the hands of the master -
1 point
Downsizing in Metalwork
Cub Cadet reacted to Anglo Traction for a post in a topic
Eventually got some time on this recently. Finished fabricating the Stainless Steel Fire Grate (from 25 individual pieces) shown here sitting on it's Ash Pan with stainless retaining Pin-