Leaderboard
Popular Content
Showing content with the highest reputation since 01/08/2025 in all areas
-
4 points

Newest Addition to my Wife's collection
JUST O&R and 3 others reacted to Mike in NC for a post in a topic
Here is the newest addition to her O&R collection. It has a 12VDC port, a 120VDC, and a 120VAC outlet. We bought this from a friend. -
3 points

Lawn boy barn find
WestwoodGazelle and 2 others reacted to Andy0076! for a post in a topic
Lawn-Boy 10650 mower Located in the uk enthusiast required Spares or repair stood for 10 years in a shed Too good to send to the scrap yard Complete with collection bag x2 And manual -
3 points

Newest Addition to my Wife's collection
Mike in NC and 2 others reacted to CNew for a post in a topic
Very cool, great addition to the collection. I was just thinking the other day that things have been a little quiet on here for O&R finds. I’m certainly not having a lot of luck finding any these days. Glad you landed that little generator! -
2 points
-
2 points
1978 Westwood Gazelle
Norman Wilkins and one other reacted to WestwoodGazelle for a post in a topic
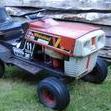
Hi all! Been a while, but I have done some work on my 1978 Westwood Gazelle. I have owned it since 2015 but there's been a few years it wasn't running and I did not have time to do anything with it or sort it. My goal is to get it running, and I would like to fit an underslung exhaust with a rear exit. It's in pretty good shape overall, would be fun to have it running again! -
2 pointsI've finally got around to updating this thread, and this post should bring it up to date. We fitted up the steering bars and pulled the engine over, however it wasn't getting any fuel through. We ended up pulling all of the steering and bonnet off again took most of the fuel system apart, cleaned it all out and reassembled the engine. There was no obvious blockages, however when we pulled the engine over again it pulled fuel through nicely. We then gave it a proper pull, and it went. The Landmaster now runs pretty nicely, it's quite loud, and the swapped pulley makes it scary to drive in 2nd gear but it is entirely functional now. Heres a link to one of my latest videos where we got the Landmaster running: We have had the tractor out since this video and it produced a plume of smoke, which smelt heavily of burning rubber so I think one of our new belts slipped a bit, so we need to look into that again. We are also looking into getting the correct size pulley to make the machine nicer to use, it is too quick for grass cutting at the moment. Heres a couple more pictures of the tractor in its current state: Thanks for reading, Joseph
-
2 points

Suffolk Punch scarifier
pmackellow and one other reacted to BarneyC for a post in a topic
Hi All, I am a new member but hope my content is of interest and may inspire others to use their Suffolk punch mowers. I am a fan among other things of Suffolk punch mowers with Suffolk iron foundry engine. I have attached a picture, both of these 75cc mowers are in use, the 14" mower will be refurbished sometime over the next couple of years, the 12" mower has been re-purposed so it has a new life as a scarifier which is what I would like to talk about in a few forthcoming posts. The 75cc iron engine on the 12" has also been slightly modified using my lathe and milling machine, more to follow... -
1 point

Westwood W11 Mark 1
meadowfield reacted to Norman Wilkins for a post in a topic
Update : Have now got this machine running and driving, carb needed a good clean, and the ignition coil was dead so replaced. Drives very well for a 48 year old ! Steering is a bit loose so next job is to have a look at the fascinating 'chain and gear' set up to see if there is any adjustment. Then a proper clean of all the metalwork and treat with Owatrol oil to preserve the original patina. Only thing I will paint is the deck to return to the correct colour but will use a matt finish so it isnt too obvious. Real pleased with this machine and so glad to save it from scrap. -
1 point

Westwood W11 Mark 1
meadowfield reacted to Norman Wilkins for a post in a topic
I've been collecting and working on Westwood Tractors for some years, and have a few, and yesterday took delivery of a W11 Mark 1 after wanting one for some time. I am very much into original patina so am very pleased with the condition of the paint and decals . The only thing is at some point the gear change has been repaired and although it works well I would like to fit an original lever and leather boot/cover. Does anyone possibly have one they would sell ? The machine has sat unused in the dry for many years so my first job is to get it running , then clean the paintwork and treat with Owatrol oil to preserve it. The deck is nice and solid but has been painted with zinc primer so I will probably return it to original colour. Very pleased with this machine, and looks great parked with my Mark 2 W11, my T1000 and my work horse D1200. Proper engineering these Westwoods ,built to last ! -
1 pointJust realized I never added any photos on here of the TAS pump I picked up awhile back.
-
1 point

Newest Addition to my Wife's collection
Wallfish reacted to Mike in NC for a post in a topic
I think she is up to 21 or 22 now. -
1 pointI never checked if the dc was working. When I put the 2 probles of the meter in the plug socket and put it on continuity it beeped indication of a short.
-
1 pointThat old epoxy is always cracked and brittle so moving the wires can expose the copper wire and cause a "short". Maybe use a meter to confirm the windings are not shorted to each other. Have someone look at this wiring pic for you. It's an open generator with the wiring
-
1 pointI've received them shipped both ways. Full unit in a large box and partially disassembled to fit in a smaller box. Never shipped one of those but i have broken down large tools and shipped in a smaller box. I
-
1 pointNo slack at all. the "epoxy" or whatever it is holds and isolates the winding wires. You can pick it out carefully and solder the wire back but be sure to cover it again. Something like liquid electrical tape should work.
-
1 point

1978 Westwood Gazelle
Norman Wilkins reacted to WestwoodGazelle for a post in a topic
The Gazelle is finally up and running! -
1 pointI just use my fingers. Wind a bunch of wraps then pull on it so it tightens up the coil then pinch it tight again and repeat as many times as it takes. The factory new spring retainer is a piece of steel shaped like a C which keeps it tight in a package and makes then easy to install. You can make one out of a 1/8" sliver of 2 inch pipe. I think even PVC pipe would work. Wind the spring by hand, then let it uncoil into the C shaped retainer. That way it can easily be placed into the recoil housing. Then the retainer is removed while holding the spring down in the housing with your thumb. Let it uncoil slowly in the housing until it's tight
-
1 pointSorry, I did post a pic of the pieces. You should have a 3 piece muffler now so the piece in the center is the spacer and they can be stacked as many as you want
-
1 pointThere's one cap that has the face with the little holes and the rest are the spacers with bent tab holes at the bottom. You can stack as many as you want but you'll need to make a threaded rod piece for whatever length you stack them to retain it. You can typically find longer screws at the hardware store and just bend the end like the one that;s on there now. Pretty sure the thread size is #6
-
1 pointTiny Tiger Generator Operating Instructions Models 5001-1 & 5001-2-1.pdf
-
1 point

Newest Addition to my Wife's collection
Wallfish reacted to Mike in NC for a post in a topic
I will have to check it out and see if it says on it what it is. Thanks for the information. We went to Rough & Tumble two weeks ago and she got a couple more O&R's I will make a new post for them. -
1 pointWhere abouts in Sussex are you ?
-
1 point

Newest Addition to my Wife's collection
Mike in NC reacted to Wallfish for a post in a topic
That's a nice find. Cool little generators It's either a Dyna-Mite or a Life sav r -
1 point

OHV Suffolk punch
BarneyC reacted to Ransomes256 for a post in a topic
Not over interested in the engine however very impressed with the dedication to re invent the design and quality of your work. I manufacture many special parts for the Ransomes MG and also the Triumph TR range of cars. Well done. -
1 pointI repaired the recoil, cleaned and gapped the points, repaired the spark plug wire and put a little gas in the carb and it fired right up. I forgot to plug in a drop light but I will tomorrow as I ran out of time. I will need a diaphragm carb kit, its stiff and dried out. B ut all the parts are there. Except of course the main jet.I don't think I need a reed valve.
-
1 point

Landmaster Ride On Project
pmackellow reacted to Joseph for a post in a topic
6 months later now, and we have finally made some notable progress on the Landmaster. I might not fit all of our progress into this update, we shall see because there is quite a lot to cover. Paul kindly lent us his Landmaster so that we could see what had been modified on ours in the past, which has proven very useful and has uncovered things that we wouldn't have spotted without a similar machine next to ours. The first thing that we noticed was that our front axle was upside down. There is an arch shape in the centre of the axle on one side, which should point upwards. Previously our front axle had been scraping the grille when the axle pivoted, however with the axle flipped over it now has much more space to pivot. You can see the scrape marks in the picture below, and the amount of space gained from flipping the axle over Something else we noticed was that our machine appeared to have its clutch set up wrong. It was set up such that when the clutch pedal is pushed down, an idler pulley is moved away from the drive belt, removing tension from the drive belt and allowing it to slip on the engine pulley. However, from comparing to Pauls machine, we know that the clutch should be set up as a 'push to drive' pedal, where the belt sits on the other side of the idler pulley and when the pedal is pressed down, it tensions the drive belt and drive is provided the gearbox. We have now made this change, which required a slightly longer belt, so it is now up to an A45 belt. Another modification on our machine is that it doesn't have the cast engine pulley that it would have had from the factory. That has been replaced by a pair of taper lock pulleys, which are larger than the original pulley. The deck pulley is only 1/8" larger in diameter, whereas the drive pulley is 1" larger in diameter. This is not too much of a problem, as the pulleys seem to work with the size of belts that we have now We took off the rear fender to get better access to the brake band and the gearbox to make some adjustments. The gear selectors felt stiff, and it was difficult to tell when a gear had been engaged. All it took to sort this was a bit of oil in the 2 oiling points, and both selectors moved smoothly, with a clear difference between each position on the selector. The brake band just needed tightening a bit, and now functions as it should do. Finally for this update, we tackled the handlebars, which had been cut and rewelded at a different angle by a previous owner. Having removed the handlebars, we cut around one of the welds and managed to separate the handlebars into 2 parts We cleaned up the welding on the T-junction, which was pretty messy and rewelded the handlebars in the same position as Pauls Landmaster. Quite a while was spent with the angle grinder making the joins as smooth as possible, and we sprayed it with some zinc galvanising paint. Ignore the pile of Kohlers waiting to be put to use in the background We have made even further progress, but that'll have to wait for another day as my wake up time for sixth form starts with a 5. Joseph -
1 point

Wolseley Rough Cutter
FredaFoley reacted to Rayp for a post in a topic
What you can sell it for is basically dependant upon its condition, i.e. will the engine run, is the gearbox in working order, is the clutch in working order and do all other moving parts move freely. If the engine is in good working order I would be interested in buying it for the engine as I have been looking for a replacement. Given the time it has been standing you will need to ensure that the engine is not seised and preferably do an oil change before trying to start it. -
1 point

Wolseley Rough Cutter
FredaFoley reacted to Rayp for a post in a topic
Hi, It is definitely a Wolseley Scythe and looks like a 23 inch model which has a 5HP Briggs and Stratton engine. However, if its a 27 inch model it will have a 7HP Briggs & Stratton engine. I have one , but it has no engine and I am looking for a replacement engine or to modify another engine to fit as the original engine has a longer crankshaft than usual to accommodate the centrifugal clutch.. -
1 pointThe springs can go in and out so they just need to be set back in place as long as they aren't broken. I don't remember ever seeing a distinct clutch assembly drawing but there may be one on here somewhere, I just couldn't find one. There are a couple of different clutch setups so not knowing exactly what you are working with makes any details or advice difficult. How about posting a picture of it?
-
1 pointThe wire should go to a kill switch button on the handle to shut down the engine by grounding the coil. Location of the switch depends on the model. One port is an air vent. It goes from the bottom of the tank to just inside of the fuel cap. The other port is the fuel feed to the carb. More than likely it will need a new carb diaphragm to run or run correctly. Check the air filter BEFORE trying to start it. If it has that old crusty material inside, it will need to be thoroughly cleaned out. Otherwise it will be sucked into the engine. Not good. If you use the search feature you can find other threads on the Drillgine drills. Here's a link to the search results for "Drillgine" in topics only. There are threads on the early reds and later yellows https://myoldmachine.com/search/?q=drillgine&quick=1&type=forums_topic
-
1 point
-
1 point
-
1 pointA few pics of the collection.
-
1 point

O&R Display at a Show
CNew reacted to Mike in NC for a post in a topic
Here is my wife's O&R display at our local show this year. It was before she got the Aquabug boat engine. -
1 point
From the album: Mikael Jakobsson
-
1 point

Westwood
Norman Wilkins reacted to SuperDumDum for a post in a topic
I don't think this will answer your questions, but I thought I would add this for anyone interested in the history of this machine. In the early 1970's I worked for a company, Garden Mechanisation in High Wycombe. This was the lawnmower sales and service company owned by Gerry Hazlewood, who subsequently went on to form Westwood Engineering. At some point, Westwood had purchased a stock of Dynamark Tractors from the US (I think). These had been shipped to High Wycombe in bulk and stored at the rear of the Garden Mech location on the A40 east of High Wycombe. Problems were; these were not initially sold in any quantity and also their storage location was at the bottom of the yard alongside the River Wye (the Buckinghamshire, not Herefordshire Wye). The river Wye routinely floods in winter, meaning these units were frequently waterlogged for extended periods. As a somewhat junior engineer, I was often tasked with unpacking one of these from their soggy cardboard boxes and trying to get them to function again as tractors. On most occasions I managed it, and these went on to be sold to some unsuspecting customer. Please accept my belated apologies for the condition of your mower, if it was one of mine. -
1 point

Westwood
WestwoodGazelle reacted to DaveRand for a post in a topic
Hello there new member here I've just bought a westwood ride on today I know nothing at all about these machines I'm told it was running last year when last used but that guy recently had major surgery and will never be able to operate it again hence the sale I give £20 for it yes you read that right 20 Quid I thought for that it's worth a punt Can anyone shed any light on these machines ? Places to look for info on them ? Places to buy parts if I need any ect Going to have a go at getting it running tomorrow -
1 pointAs best as I can tell this is a first generation drillgine with the O&R type 100 3/4hp engine (serial 013352). I bought this drill a while back. It was seized up tight. I tried my best to save this one. It sat in my heated ultrasonic for three days vibrating away. I even went to the extent of putting the crankcase in my lathe to cut the cylinder off to save the piston and rod. Sadly the engine was too far gone and it was not meant to be. When my parting tool grabbed the port on the steel liner the crankcase got pulled out of the chuck on my lathe and bye bye went the crankcase. I was able to save the crankshaft from this mess. I am not going to get around to this project anytime soon so I figured I would offer it up for parts should someone be needing them for their drillgine, or if someone wanted to be ambitious and rebuild this one. I did find one repair on the drill which actually looks well done. The drill case has been tig welded up and someone added a little bent steel bracket to better support the handle. I realize this is not in great shape, and I am not looking to get rich on it. I will ship this drill anywhere in the USA. Please send me a private message if interested with your offer. Thanks Chris
-
1 point

Westwood Gazelle
Norman Wilkins reacted to meadowfield for a post in a topic
fab stuff, so can we say mk1 had flat footrests and central gear select before moving to column change and sloping footrests? I note the main dash decal stayed the same for quite a while, but the ignition, lights and warning decals changed a few times? -
1 point
One of the first Westwood Gazelles
Norman Wilkins reacted to Alan for a post in a topic
A very similar one dragged out of it's burial ground yesterday. Same gear lever arrangement, footrests, exhaust, hood. 8 hp engine on this one. The front and rear wheels are the same diameter although with different tires. Turned on it's side to remove the remains of the cutting deck. The exhaust can be clearly seen. Track rod broken.


