Leaderboard
Popular Content
Showing content with the highest reputation on 01/09/2016 in Posts
-
6 points

Woodstore / Shed makeover
Ian and 5 others reacted to the showman for a post in a topic
4 or 5 years ago i was clearing pallets from a ride-on tractor dealer, they were what the new tractors came in and were nicely made of thick wood. I had so many at one point i had to put up a store to put the wood in to keep it dry before we could burn it in the stove. As the wood pile went down I sneaked a few Wheehorse parts in there but just recently i seem to have more in-coming than out-going so decided to give it a makeover and make it more accessible and watertight . Some photos to follow shortly for Stormin -
6 points
Project C1-4x6
Ian and 5 others reacted to diggerjames for a post in a topic
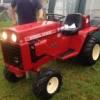
Hi all been busy on the tractor I thought to my self before I go any further on the project I would test drive it and test the articulation with the chain on etc bearing in mind I don't want it to twist to far and let the chain slip so I've tested it on a ramp and took a few measurements on the angle and I'm quite pleased with the results of the first test !http://youtu.be/Ru7qvO6TIyA After that test I've decided to take the rear load body off and make a new fuel tank which I have made out of a big old ransomes mower diesel tank it was to big so I cut it in half and welded it back together again here is what I have done so far Now that the tank is nearly done I have not got to think about the bonnet and steering console etc because the kubota. Engine is a big lump it sticks proud of the original alignment of the bonnet so I have lifted the bonnet 3 inches on the bonnet and and 2 inches at the moment on the console. I put longer bolts in the con sole with nuts on under the console so I can make adjustments so I no my exact size I need to make the plates etc -
5 points

Diff rebuild
Alan and 4 others reacted to meadowfield for a post in a topic
Here's engineering on a tiny scale. Just rebuilt the diff on Finns losi micro rc car. Good job my eyes still work! -
4 points

Ransomes MG2 number 137
Alan and 3 others reacted to expeatfarmer for a post in a topic
Floorboards, U bolts and front bumper ( force drying over the Aga ) -
2 pointsWe've had a bit of snow, unfortunately I was at work when it started and many cars were been stuck, but the snow is no match for the Amarok!
-
2 pointsAfter struggling to weld thin stuff with the arc welder scince my Mig packed up, my boss said he'd buy me a new one if I was willing to do the odd welding job for him aswell. Here it is, got to say that it welds absolutely amazingly, even someone who is as bad at welding as I am can get a nice run down, its nearly as good as the 3phz ones I used at college a few years ago.
-
2 pointsLots of small boring jobs done then it was decided to tackle the badly damaged dash tower. Nothing available this side of the pond and the very few which popped up in the US were very pricey plus horrendous postage costs and were all also damaged to some extent. Speaking of nothing available in the UK, I have not seen or heard of any other of these larger Sears / Roper tractors. Various RT 8 and 10's but nothing larger. I expect they will start popping up now. Both sides of the dash were held together with alloy plates and enormous pop rivits. As I had a stock of plastic sheet "Plasticard" in various thicknesses left over from my radio controlled model boat building days, it was decided to use this for the repair. A lot of the lower sides were cut off so that a simple butt joint could be made using the first bonded on sheet to give extra support. As I was not sure if the glue I had was compatible with the moulded dash, ( found out later it was ) the first plasticard sheet was bonded on with araldite after roughing up both surfaces. The other sheets, to build up the side thickness and the shape at the corners were glued together using normal plasticard glue. Lots of cutting, filing and sanding and the dash finished up looking a lot healthier. There were a lot of cracks around the various switch, lever etc holes which were also reinforced. Finally it was trial fitted and after making sure it was sitting at the correct angle it was marked and drilled for the mounting bolts. This last photo, lots of reflections, is after painting and the moulded lettering gone over with white paint. A fiddly job.
-
2 points
Woodstore / Shed makeover
Triumph66 and one other reacted to Alan for a post in a topic
Some of that wood looks familiar. I wondered where it had gone. -
2 points
-
2 points

Woodstore / Shed makeover
Ian and one other reacted to the showman for a post in a topic
And a few more -
2 points

Woodstore / Shed makeover
Ian and one other reacted to the showman for a post in a topic
Here's some pictures -
2 points

Project C1-4x6
diggerjames and one other reacted to meadowfield for a post in a topic
It's a short frame box too, I think it's a commando 8 one from Ian... They are narrower track. -
2 points

Project C1-4x6
diggerjames and one other reacted to C-101plowerpower for a post in a topic
i think because they aren't wheel horse wheels and have a different backspacing -
2 points

1978 SEARS / ROPER GT16
Joe the small engine man and one other reacted to the showman for a post in a topic
That all looks a right mess, you did well to save it all. Looking good after some black paint -
2 pointsAfter most of the main components had been removed work started on cleaning up the chassis. Lots of crud, rust and dead wildlife which seemed to take forever. Some area's were difficult to reach due to various welded on brackets etc. The front axle and steering parts were removed after these photo's were taken. After painting the underside. Countless other operations, not all recorded, before joining up the chassis sections and transmission. This was a potential finger trapping job but luckily they survived. Very fiddly getting some of the nuts and bolts into position due to almost nil clearance between the inside of the chassis and the transmission. I can imagine when built, the frame would have been assembled first, upside down, then the transmission unit dropped in. Not practical for me with no overhead lifting gear or extra hands. I had lots of room in my garage then. Not now due to one of my son's moving back home, as they do, bringing loads of stuff with him, plus I have collected numerous "will be used one day" bits and pieces myself.
-
2 points
1978 SEARS / ROPER GT16
Triumph66 and one other reacted to Alan for a post in a topic
After transporting the tractor home and having a good look at the damage and missing parts, it was decided that a near enough non original option was the way to go. One of the first jobs was to remove the blacksmith "repair parts". The frame around the upper grill was a surprisingly good fit held on by nuts and bolts. The door butt hinges were welded on, for welded just imagine bird poop splatter, as one hinge had already parted company. The frame and the upper grill. The bit of tin at the bottom of the grill replaced the original hinge mount which had broken away. The box sections which replaced the lower grill were only firmly welded along the front face and were quickly removed with the help of a bar and G clamps. Some of the welds were good, others bird poop. Almost as if two different people had been at work. The engine was lifted off using the same bar. The heavy welded on plate which supported the box sections can be seen. I cut most of this off before realizing later that I could have reused it to mount the new lower grill. The tow bar extension, seen on an earlier photo was removed, two bolts and more poop spatter, to reveal more damage. The original tow pin hole ripped out and the plate cracked for about 1/2 the width along the bend. Could have been repaired but I went for a different option of which more later. After spending ages, on and off, trying all the usual ways to remove the well rusted on steering wheel, I resorted to cutting a slot in the hub and used a wedge to slightly open the slot. This freed the hub from the shaft. Other options suggested on various forums were a lot more drastic. Once the wheel was off and after taking lots of photo's to help with reassembly the major dismantling started. -
1 pointI have been intending to post this restoration since joining MoM last year but seem to have spent most of my time helping friend John dispose of his Bolens etc stash. As most of the stash has now been cleared I now have slightly more free time, so here goes. The number on the Roper ID plate,T5828DR, I have not been able to trace but the tractor appears to be identical to Sears 917- 257050. The Sears parts list, engine number etc confirms this. The tractor was a mess when dragged from the undergrowth at John's place about three years ago. Lots of damage, parts missing etc and a blacksmith repair job in various places. John was told when he bought it that it had been run into a post, smashing the grill and pushing the hood back which in turn badly damaged the plastic dash tower. As can be seen the damage was "repaired" via a heavy metal frame and alloy plates pop riveted on plus steel box section in place of the lower grill. One of the first things found was that there was no spark plug in the front cylinder of the horizontal Briggs twin. Hardly surprising as there was very little thread left in a hole which resembled a cone. Managed to fit a heli coil at a later date. Since then I have been given a pair of cyl heads. Also found that the starter motor was jammed when trying a first start. One magnet had come unstuck from the case. Stuck it back on with Araldite then found it ran in the wrong direction. Wondered if this was because of the glue used. Using a Westwood ? motor with the Sears mounting bracket and a temporary fuel tank got the engine running on one cylinder. A drive around showed that all the gears were OK. As the tractor looked do-able, with a LOT of work, the next step was to transport it to my garage so that I could get at it without 44 mile round trips to John's. Before the restoration bits, a photo of my great grandson Mini Alan trying it out for size.
-
1 point

is this a Bolens G8
Joe the small engine man reacted to wurzel for a post in a topic
Hi can anyone identify this tube frame thanks nick -
1 pointAlan, Good to see you're posting your restoration on your Roper; you did a fabulous job on it as I can testify when I dropped in back in June.
-
1 point

Woodstore / Shed makeover
Alan reacted to the showman for a post in a topic
Its gone to good use Alan -
1 point
-
1 point

New Welder
S1g reacted to meadowfield for a post in a topic
Is it an inverter mig? Looks like my sip one. -
1 pointI wish my boss would buy me something like that. No chance she will though.
-
1 point
-
1 point

Project C1-4x6
nigel reacted to diggerjames for a post in a topic
thy was the only wheels I had but I'm gonna put bigger wheels on and a spacer plate to bring out or swap boxes for an 8 speed exactly Koen it's the very Same mark cheers mr haulage man -
1 point
Project C1-4x6
diggerjames reacted to nigel for a post in a topic
whats the reason that the back wheels are narrower james -
1 point

Project C1-4x6
diggerjames reacted to meadowfield for a post in a topic
Nice work, be finished next week... -
1 pointThe dash appears (to my sorry eyes at least) to be a 750, wonder if they patched the hole in the dash tower or it rotten away, hard to say what they might have done. It looks like someone got real creative.
-
1 pointVery interesting Bolens, I may be able to add some further information. It look like some parts have been added from another model which makes the identification harder. It looks to have two drive pulleys which would make it a 650,750 or 850. It should also have two pulleys on the drive shaft. Normally it would have a belt fitted to each of the drive pulleys and a lever through the bottom of the dash tower to move the tensioner onto one or other belt, giving high or low range. The shaft appears to be present near the pulleys but no hole in the dash tower or lever. I would have expected a 3 speed rear end so I suspect a 6 speed is a later addition. A 850 has a Wisconsin engine so my guess is that it is either a 650 or 750 with a rear end and maybe a dash tower from something like a 1050. 650 is a 184-01 (B&S 6hp 146402-014801) or 185-01 (B&S 6hp 146401-014701) made in 1966 750 is a 171-01 (B&S 7hp 170402-013001) or 172-01 (B&S 7hp 170401-013101) made in 1967 650 is manual start and so is a 750 171-01. As such if the engine is original I think it is a 750 model 172-01, just as Nigel suggested. If you are unable to identify the model number as Alain suggested hopefully the engine numbers are readable. I hope this helps Iain
-
1 point

is this a Bolens G8
Joe the small engine man reacted to HeadExam for a post in a topic
You might try and use a lead pencil over the data plate to reveal numbers -
1 point

is this a Bolens G8
Joe the small engine man reacted to OldBuzzard for a post in a topic
It's definitely NOT a G8, as the G8 was a small (stamped) frame tractor. It could be a G9, G10, or G11. G9 = 8HP B&S 190417-065301 G10 = 10HP B&S 251417-015901 (1976 and 1977. The 1973-1975 G10 had the TEC HH100-115181D) G11 = 11 HP B&S 252417-013201 I think you are closer to being right than am. Fender pan isn't right for the G9, G10, G11. But with the cobbled up seat, anything is possible. Getting the proper engine spec would be the key. -
1 point
1978 SEARS / ROPER GT16
Joe the small engine man reacted to Alan for a post in a topic
Thanks Joe and Richard. Perhaps Restoration is not the correct word to use as it was not returned to it's original factory finish. -
1 pointI took some time to drive the Bolens H16 and then wash it up after sitting in the shed for a few month, also scrubbed and sanded the deck. It's got a first coat, next it will get a vigorous sanding, filling primer, and finish coat with poly converter added for hardness and gloss retention. The white specks are ash from the burn barrel, paint was more than dry

