Leaderboard
Popular Content
Showing content with the highest reputation on 04/12/2020 in all areas
-
2 points

It was just lying there.
Cub Cadet and one other reacted to Stormin for a post in a topic
A year and a half ago, contractors were working in the field opposite me. They cut down some trees and just pushed them to the field edge. So today I fitted the tote box to the Sears/Roper, hitched up the trailer and went firewood gathering. Tomorrow I'll go for some more. -
1 pointSources for new reproduction Carb Diaphragms USA, contact either @Wallfish or @CNew by personal message (PM). UK & Europe, contact me @factory by personal message (PM). O&R Carb Repair Tutorial The tutorial below was copied from the original thread from the old forum saved by the internet archive, tutorial courtesy of laserscottman. Here we go! The first pic in this thread shows how it all began. Following are the things I encountered along the way, during cleaning. After receiving the new diaphragm in the mail, I fully used Webhead's excellent instructions to reassemble the Primer/Diaphragm Valve Assembly successfully, with the following pictures detailing how I understood it. Got a block of soft wood and gently screwed the valve body down to hold it still to work on it. Fashioning a suitable 'filament' to thread through as shown, the filament is then used to lift the Diaphragm Arm Spring ends to allow the Diaphragm Roller to be laid in it's place at the right time in the assembly sequence. Then the Disc, Diaphragm and Cover are assembled. The gum package is just a dark background to show the loop on the filament end to better grasp it. A non-magnetic pair of tweezers helped lay the roller in when it was time. The dental tool made it easy to pull/lift/move the Diaphragm Arm Spring to the various positions during assembly. This is a detail view of how the spring will end-up over the roller in the end. Good practice to 'feel' how those spring ends will react to the filament tugging them. Now the Spring is lifted and stays at this position, to allow for installing the Diaphragm Arm. Note that the Roller and the Diaphragm Valve Ball are in place before the Arm is laid in place. The next part is tricky. Using the dental tool to push the Spring over the Lever toward the Roller, you must help the Spring tips over the Roller by using the filament, and helping the Lever to stay draped over the cross pin, until the big end of the Spring is seated well in the Lever short end, and the Spring ends are capturing the Roller. All this is done kind of simultaneously, according to the position of the parts. You will be glad you only need 1 hand to hold the filament, and that you have a fine tool like the dental tool! Perfectly aligned, and will stay if the Lever Arm is not lifted all the way up--which is what got me in this jam in the first place! Now, you must carefully remove the filament. I cut the long end near the Lever Arm, and gently removed the filament. There it is! Then you can sequentially assemble the remaining parts. Be sure to install the screws with fingers, loosely, to avoid bunching up the Diaphragm in the threads. Don't overtighten the screws; the cover can be warped a bit, and may "bite" through the rubber Diaphragm. This assembly then gets the thick Gasket and Diaphragm Valve installed with the clear plastic valve against the body, covering the hole. This is a one-way valve that opens and closes rapidly during operation. The Needle Valve Assembly and the long screw mount the Primer Diaphragm Valve Assembly to the "Quadrant" Carburetor Assembly (carb body). Remember you are tightening a hollow brass part to an aluminum part! Snug, but not overly so. Kinda looks like the Starship Enterprise, don't it? Now this Dinosaur fits in among his smiling friends! Little, but MIGHTY! Many thanks to Webhead for his patient guidance and sharing of parts and resources! And thanks for this forum! Cheers! Extra Information Another important post courtesy of Webhead who you can contact on here to buy replacement carb diaphragms. "One thing that Scott mentioned that is VERY important- do not over tighten the brass needle valve assembly! I use a nut driver and give it a slight snug. In my earlier days, I snapped off two or three by using a 5/16" wrench. With a wrench, it seems like you always want to give it a little more and then snap!" David Edited; Nov 28 2014 to add the pictures to the forum. Dec 07 2020 to update diaphragm sourcing info.
-
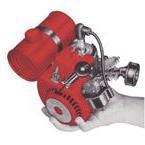
1 pointMight tackle this one next. Has some original Octura brochures and a few parts. The engine mount and prop assembly are both genuine Octura.
-
1 point

Westwood D1200 puncture
Bob paterson reacted to Joseph for a post in a topic
We started the day with a simple puncture repair on the Westwood D1200 which we were not planning to video. Due to an interesting discovery we thought we would share what we found. -
1 point

Hayter Osprey gasket set
Rayp reacted to Anglo Traction for a post in a topic
Hi Ray, Just checked Jacks small engines online with your engine type number -LINK- And the Parts Manual (1979) I have for that engine model It shows the Gasket Set part number to be 299577 ?. My old 'Osprey' thread is in the 'Other Garden Machines' Forum section if it is any help for reference. - OSPREY- Regards -
1 pointIt's a very, very wet field, Alan. When they came harvest it, the self propelled forager got bogged down 6 times. They gave up after 2hrs and went elsewhere.
-
1 point
It was just lying there.
pmackellow reacted to Alan for a post in a topic
A year and a half ago Norm. Why the wait. ? Just as well Chris didn't know. -
1 point

It was just lying there.
Stormin reacted to pmackellow for a post in a topic
Seems a shame to waste good firewood Norm Love the box on the front of the Roper -
1 point

Westwood D1200 puncture
Bob paterson reacted to Wristpin for a post in a topic
32 was the greatest number of thorns that I pulled out of a customer’s tyre a few years ago when he complained that the tyre sealant wasn’t working ! I laid them out in a line on a piece of card with a strip of clear tape over them and presented it to him with the bill. ********* Safety issue . Never inflate a tyre on the flat , especially with your face immediately above it. Stand the wheel on edge at “ right angles” in front of you . That way if the tire blows off the rim it goes left or right and not back at you. -
1 point

Winter Project
the showman reacted to Joseph for a post in a topic
Looks fantastic, great job with the paint -
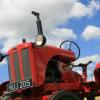
1 pointAll cleaned up and back together...
-
1 point

Winter Project
the showman reacted to TITCH for a post in a topic
Let the paint dry Chris, but I guess it's baked on after yesterday!! Keep Up The Good Work!! Titch -
1 pointI have many 4 cycle engines that smoke when using straight 30w, but no smoke when using 10w30. I also have engines that run poorly on 89 octane ethanol, but not on 87 octane non ethanol. I think an engine likes what it likes. Great job on getting this kit back in shape.


