Leaderboard

Popular Content
Showing content with the highest reputation on 02/10/2016 in Posts
-
3 points

Ransomes ITW
Rocboni and 2 others reacted to expeatfarmer for a post in a topic
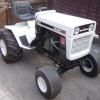
All done! Went for a ride up the road to the next farm. Starts really well from cold or hot, seems to lack power but hey who cares it moves and smoke is minimal. Steers well on grass and gravel bit sluggish to steer severely on tarmac but then new tyres etc. Throttle still a bit stiff but again newness in the governor and I am certainly not going to mess about with it. First two pictures are engine ticking over at 510 rpm, third picture is full bore at 2100 rpm. Does smoke more under load but again it is 4 degrees here. -
2 pointsOur club contacted the chap on the homemade tractor and asked him if he would put on a working display of mini tractors. As far as I know he was trying to organise a club to encourage younger people to join our hobby, I didn't get a chance to have a word with him to see how he was getting on. There was a good mix of tractors working and everyone looked to be enjoying themselves. I particularly liked the Kubota B6000 with the blade on it.
-
2 pointsLucky for me he didn't As we found out mate, it wouldn't of quite happened like that! As it turned out the only way we could get the mix (a strong TVO mix, 50/50 paraffin and petrol) to light was in the workshop in controlled conditions! Which means we put a very small amount in a tin lid and checked to see if the spark plug would light it. It did!! But pump the warmed up mix into the end of an exhaust and give it a spark... No Joy! Even trying to light it with a blow torch didn't work, it just kept blowing the torch out even at tick-over! And there chaps is the root of the flame thrower problem, the exhaust gasses are so great they blow the spark on the plugs out! I could change the spark plugs for glow plugs, but as a blow torch won't light it I can't see that glow plugs would! Sooooo.... Flames are out I'm afraid but.... I do have another idea.. I won't give anything away other than despite spending a long time trawling the internet, I can't find any sign of anyone anywhere trying this or even asking if it's possible In other news I have a pair of small headlamps for Why Not... I'm sure some of you can guess where they came from They need a bit of work, the chrome is too far gone with deep rust pitting for them to be re-chromed and the yellow bulbs just have to go.. It was a bit hard to hold a lamp in place and take a photo at the same time, but this will give you an idea... I need to mock up some brackets and roll WN outside so I can get a good look, hopefully they won't make WN look all "Toy Town"
-
2 points
Ride ons at Rosemount 2015
HeadExam and one other reacted to Chris for a post in a topic
Good pics. Like the massy............err its a pimped up bolens!! -
1 point

my new massey
the showman reacted to harryt for a post in a topic
I got this last week. I bought it off the second owner from the restoration, it was restored in late 2013 to an extremely high standard, one of the best i have seen, all it needs is a choke cable fitting, i was given the before pictures as well. Here are a couple of pics -
1 pointWon't they get a bit mucky that low?
-
1 point

my new massey
meadowfield reacted to HeadExam for a post in a topic
These really do a great job cutting grass, there gear box deck with the solid rear stripping roller and heavy built deck is far superior to other smaller machines. Massey Ferguson never made a riding mower or any other piece of lawn and garden equipment, they subcontracted the building to outside manufacturers. This series of of Massey Ferguson outdoor power equipment was known as the MF line and ran from 1966-1976 and was produced by AMF at their plant in West Des Moines Iowa. The first Massey Ferguson L&G tractors were the Massey 7 and Massey 8 Executives, they were yellow and they were built by the Duro corp in 1964 and 1965. Massey also produced a small 8 hp garden tractor for export, actually built in Europe, called the Massey ELF, also yellow, it was based on a small Gutbrod tractor. After the MF line had run its course a new line appeared, this group was built by McDonough Power equipment who built Snapper riding mowers, this line which features 8 to 18 hp lawn and garden tractors maybe some of the rarest as they were only produced for a few years, from 1977-1980. -
1 pointIan and Nigel were trying to keep their next project secret. Don't tell them we know.
-
1 point

massey 590
DevonianRedneck reacted to Ian for a post in a topic
I've just found this photo in my PotatoBucket account, I think it's a 500 series (hard to see the decals), dirty and rusty but still putting in a full days work loading round bales in the fields behind where I used to live 6 or 7 years ago. -
1 point

my new massey
harryt reacted to the showman for a post in a topic
Thats a nice Tractor and its red so would blend in with my others very well -
1 pointsexy MF
-
1 pointBTW, the first four numbers, in this case 1590, is the model series number for the MF-7 series, the MF-10 series model number is 1446 then the unit number follows. The series number for the Massey MF-14 is 1944. When they reproduced and watermarked my list the didn't get the prefixes, lol, and I didn't supply them later. It's not hard to figure out, but each model has its own identifier and within each model number the variants,m, such as 3 speed or hydro have their own set of production numbers
-
1 pointYou're right Chris, it's a Bolens. Mind you I had to look at it twice to pick it out. Nevertheless, a very nice conversion.
-
1 pointA little bit more has been done over the past few weeks , mostly cleaning up various parts and painting, here are some photos. The wheels and brake/ clutch pedal after sandblasting. After a coat of etch primer A previous owner of the tractor had stripped all of the threads off of the light switch and so the nut had to be cut off. After cutting the nut off I discovered this. Luckily we managed to save the light switch by cutting new threads
-
1 point

Lancaster chain saw
pmackellow reacted to factory for a post in a topic
Here is a advert from 1973 found online that has two O&R powered Lancaster chainsaws, the 20SLA Automatic that Lee has and the 15SLA Mini Automatic that I have. Also attached are some pictures of my smaller Lancaster 15SLA Mini Automatic with the 13B engine. The air filter is different to the standard ones fitted to O&R's, also the instructions aren't quite right as the chain oiler is automatic. David -
1 pointi think he would have gone up in flames if i had chris
-
1 point
Project "Why Not"
Ian reacted to the showman for a post in a topic
Looks like a lot of vapour, did you try throwing a fag butt at it ? -
1 pointThanks Max, that gives me hope that the jets won't suddenly turn into a molten puddle Before the flame jets were fitted the exhausts got a good clean up and a coat of red oxide.. Red oxide isn't a "high temperature" paint, but the over spray that had got onto the pipes hadn't burnt or flaked off despite WN getting lots of muddy thrashings about the place, so I thought a coat wouldn't hurt and help keep any possible future rust at bay. One of the jets welded in.. Well, the nut not the jet Speaking of jets, I needed to give the home made jets a smoke test to see how they flow... That should do Nigel dug out his brake pipe flaring tool.. I've no idea on the make but it is very old, very well made and easy to use.. A proper tool in this age of cheap tat! Here it is in action flaring a short section.. Which Nigel then soldered into the jet. A steam Punk exhaust.. The fencing wire won't be staying, once I know the flames work then I will make some weld on clips to stop the brake pipe from moving. That fits well.. Fitting the flame fuel tank took a bit of thinking about.. I could of just welded a couple of bits of box to the tank and bolt them to the frame... But I didn't want to spoil the look of the tank which is a nice shape, so I made up some nice brackets.. Fitted but not fully welded.. I'm happy with how it fits in the small space that's the only place left to fit it The final spark set-up.. This produces very good sparks at both plugs and as Nigel and I found out yesterday it has no problem lighting TVO....... On the bench that is.. With all wiring and plumbing done on the flame set-up there was only one thing left to do...... Yep try it out.... No flames just lots of smoke and TVO pouring out the exhausts!! A bit of over fueling me thinks that just floods the spark plugs! That should be an easy fix tomorrow... The smoke looked good though
-
1 pointBeen busy today cleaning up the chassis and painting, here's some pictures. I'm pleased with the result after a coat of etch primer, it feels like I'm getting somewhere now To help fill the rust pits I'm brushing on red oxide primer. My new toy arrived last week so hopefully it should speed up the restoration and hopefully I will be able to achieve a good clean surface so I can use etch primer.