Leaderboard


Popular Content
Showing content with the highest reputation on 11/18/2016 in all areas
-
3 points

Tri rib tyre advice
HeadExam and 2 others reacted to slf-uk for a post in a topic
It looks like I may need to fit Tri-ribs to the front of one of my Bolens Ride-a-matic’s which has a standard tyre size of 4.00-8. The easy options appear to be Trelleborg T513 from bigtyre https://www.bigtyres.co.uk/4-00-8-4-ply-trelleborg-t513.html or unnamed brand from Allterraintyres (although the pictures appears to show a Kenda tyre) http://www.allterraintyres.co.uk/index.php?main_page=product_info&cPath=1087_1242_1248&products_id=5034 I know I have asked a couple of you for advice previously however I am getting old and have forgotten what was said, sorry. Joseph is concerned that we have to buy the right tyres but I am unsure what he considers to be right or wrong. I would really welcome some advice and if anyone has a picture of either or both of the options above that would be great. Some advice from our US based tyre expert would be cool too, as long as it is not to tell me I have spelt tyre incorrectly Thanks Iain -
2 points

Tri rib tyre advice
slf-uk and one other reacted to Cub Cadet for a post in a topic
http://www.unitytyreonline.co.uk/turf_small.html I bought Duro HF257 tri ribs from here £15.60 each and mine came with tubes, i've used them on two tractors and highly recommend them. This photo shows what they look like -
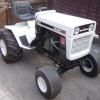
1 pointpicked this up the other day, every thing was seized up on it, but it has compresion so thought i would strip it and get it working again
-
1 point

Happy Birthday Ranger
ranger reacted to the showman for a post in a topic
Many happy returns Doug, hope you have a good day, and a big cake. -
1 pointI've the Trelleborg's from BigTyres on the Black Horse. Check 121 rebuild thread for photo's.
-
1 pointHappy birthday
-
1 pointIt was to his registered eBay address, but eBay's policy is for the seller to always issue a refund. They say they have a seller protection, but that entails video taping the package being put into the box and sealed shut in front of the postmaster or another witness equal to a public notary. Here in the US small claims judgments are pretty worthless unless you want to spend hundreds of dollars worth of time and money to collect, the courts don't involve themselves in those matters. Our legal system, and maybe all legal systems favor the rich and the devious. tomorrow is my day. I wonder if he will make another demand for his refund?I wonder why has not communicated on this matter? This seems very odd.
-
1 pointI only collect single cylinders, but I ended up winning the auction on this Wheel Horse D-200 twin cylinder at a very reasonable price. So now I see a Bolens HT20 in my future as well. Someone took two Brinly single gang discs and a Brinly three point sleeve hitch adapter and married them to make a nice double gang disc.
-
1 pointA great buy Alain, looks better than my D-200. Like Andrew, I didn't know about the thrust washers. When I rebuilt the steering on my D-160 I thought that the steering needed thrust washers so I added some, clearly I was thinking along the same lines as the WH engineers (which is a worry ). The Ross steering box on these D-series is not great and if you feel the need to do a rebuild all the parts are on the shelf cheaply at a JD dealer, as some models used the same steering box. I believe I posted the part numbers on RedSquare ages ago, but let me know if you need them. When I get some tractor time I plan to rebuild the steering box on my D-200. Now who do I know that works for a JD dealer who might be able to get me a discount on the parts... Iain
-
1 pointAlain, Generally, any Tube Frame deck will fit any Tube Frame tractor, the only exception I’m aware of is 600 decks and tractors. The two things you need to take into account is the way the deck attached to the tractor and that you are looking to put a deck from a hydro lift tractor onto a manual one. The earlier tractors had rectangular brackets fixed to the underside mounting plate, circled in red in the picture below. On the very early tractors like an 800 the back of the deck attached to the rear axle attachment fixings. If your deck needs these rectangular brackets you just need to take them off the original tractor and put them on the 850. Later tractors used attachment pins which fix onto the bottom holes on the underside mounting plate. I seem to recall that as standard a 1556 uses this method (although as Chris has all the 1556’s in the UK, this is just an assumption ). Again you just need to remove these pins from the 1556 and put them on the 850. Pins look like this. The deck lift bracket is different on a hydro lift to a manual lift and in order to put the 1556 deck on the 850, the bracket needs to be changed. They come up all the time on the auction site. In the picture below the bracket with the blue text is the part on the deck that the lift lever fits on. The two brackets with yellow text are the lift brackets, which as you can see are very different for manual or hydro. For a 850 you need the one on the left, the one on the right is for a hydro. I hope this helps and my rambling makes some sence. Iain
-
1 pointHappy birthday, have a good one Iain
-
1 pointHappy birthday Doug ave a good one
-
1 pointAll the Best Doug. Have a good day.
-
1 pointI bet he was exhausted after all that work.
-
1 pointEvening all, time for a long overdue update on this camera panning jig thingy, and quite a lot has changed.. But first.. You saw the masking tape template of the part I forgot to photograph, well here's the part finally photographed.. Screws go though the cog and screw into captive threads in the 6 sided er... boss which is welded to the shaft. It has been re-welded since this photo was taken.. With the winding shafts sorted so they run parallel with each other the whole lot was welded to one end of the rails. The other end got a pulley.. One of the shafts was then taken back off for some serious strengthening and a few guiding washers. The green garden string I had bought was useless and kept breaking, so I tried some thin fencing wire which I happened to have kicking about the place. The system worked just fine for panning along side to side though the fencing wire was starting to develop lots of little kinks.. So I thought I'd best try things up and down.. Yes I was in position to catch the video camera should anything fail and gravity makes things plummet during testing.. These two photo's were taken in record time As the electric motor at the time was 12 volt, it made it easy to try it out outside.. With it back on the bench for more testing the thin fencing wire decided it had had enough of having lots of little kinks forced onto it and showed it by snapping! I also wasn't that happy with how the pulleys worked. The ultra slow side of things was really ultra slow like the camera moved 1 ft every 20 mins sort of ultra slow! The New Holland tractor wiper motor made all sorts of squealing sounds when it's speed was turned down and it would of been a pain in the 'orse to have to disconnect the drive wire/string from one pulley shaft to another to get different speeds... Sooooo, a rethink was needed... Hidden under the yellow rag (which is wrapped around to try and quieten gear noise a bit) is the 18 volt motor from the rechargeable drill that gave up it's speed controls. It powers the kiddys electric car gearbox to turn a single shaft which is now held up one end by a bearing and plate that came from a Webb cricket pitch mower years ago.. It pays to throw nothing away As you can see the whole thing is now rubber mounted to the rails to reduce the amount of running sounds the camera picks up. A big thank you to Matt for donating some strong fishing line to the cause, it now winds both ways on the shaft, so when one side is winding in the other is winding out. The speed control is a work of art and is more than worthy of the two photo's it's getting As I am using the trigger speed control from the 18 volt rechargeable drill I needed to find an accurate way of applying pressure of varying amounts to the trigger and keep it there.. The easiest way I could think of was a clamp of some sort.. Like the exhaust clamp with a bit ground out to fit the trigger.. Just tighten the nuts to increase the speed. A washer was welded on to house a master on off switch Power is now supplied by this 18.5 volt HP power pack that I found in a box in the workshop.. No idea where or when I got it, but it has come in handy So with everything finally ready to go, the jig thingy was put in a position up high, video camera clamped in place on the carriage and the comical electrical system plugged in... It was at the point I managed to knock a stand which was holding up one end and it all came crashing down with a loud bang! Nigel and Matt came running to see if I'd done anything nasty, but soon hastily retreated once they saw me stomping about the place swearing a lot! Somehow my video camera didn't get broken, not even a scratch, but the jig thingy did need some repairs! One of which was to repair the end of the winding shaft which had had a threaded end sheered off! To make the shaft long enough again I had to lengthen it.. It was at this point I had an idea and left the shaft over length for another idea.. More on that when it happens. So does the camera panning jig thingy work? Well, here's a couple of snaps after some successful testing, but your going to have to wait until the next MadTrax video to see the results
-
1 point

1960 Wheel Horse Suburban
Anglo Traction reacted to Ian for a post in a topic
Evening all, a few photo's of Nigel's exhaust repairs.. Starting with a bit of pipe. A bit of beating... Taking shape. You can just about make out the "holes circles" in this photo.. Snip snip. Some welding and quite a bit of drill later.. The welds around the side still need a bit more grinding back in this photo. Old verses new.. I know which one looks better -
1 pointQuick pit stop for taking the pics then Andrew Shame I did not have the time to finish it off for you
-
1 pointA good buy at that price and no I didn't know about the thrust washers. I am excited about your forthcoming Bolens HT20 when you source one. If it is like anything like the others you have collected it will be a fabulous example.
-
1 pointLast weekend I collected my 850 from Chris and at the same time dropped off his 600 and an engine I picked up for him a while back. Good to have a catch up with Chris too.
-
1 pointThanks Andrew, I saw the low hours, the dual brakes, rear PTO, three point, and finish mower and put a bid of 1100 on it, the other bidder went to 1000 and it pushed my bid to 1050, one more bid and he would have ha d it, oooh so close. Did you know the C and D wheel Horse tractors had thrust washer bearings under their spindles?