| |
-
Don't know how old your engine is Gareth, but it look's like the low 250-650cc original early Jap engines onwards used the same size Exhaust Flange Nut?.
I don't know if Villiers made any chnges ?.
Could the TPI be 20?. and the outer dia across the threads be 2" or 50.8mm (actual). If so, then the Thread form could be BSF (0.0500" pitch and thread height of 0.032".
This will give a Core dia (or Tapping diameter) of 1.937" (49.2mm).
There appears to be a worldwide search by many for used versions, as the price of a new (manufactured) one is silly money. See this link where the numbers seem to merge ok if 20 tpi-
http://de.vintage-motorcycle.com/index.php?language=en&site=4&pid=24&id=26427&limit=0
They can be made!.
-
Hi Gareth, your right that it is not the standard BSP size, as everything (normally) over nominal 1" is 11TPI.
I presume the inclusive thread angle is 55 degrees?.
Is the Outlet a threaded insert, or part of a Casting?. I'm wondering if they machine cut the thread to a special size.
A picture would be good if you can provide one.
-
Hi Karl, Can you clear my Purchase History for Supporter. Got around to buying another year, but it just hangs.
Thanks.
Richard
-
If one of the bushes you require is #28 in Mark's diagram above, I may be able to help. If I remember rightly, that Bronze Bushing is 1/2" bore x 9/16" x 3/4" flange (part nbr 6229).
I need to make one myself .
If you need others like PTO Lever Rod bushes or the Fender Seat pivot bushes on the earlier models (different sizes and part nbrs), I also have made these for my Tractors.
I'll have to check my stock of Gunmetal Bronze, but sure I have enough to make a few more.
Send me a PM of you need any more help.
-
Thanks..
Will be good to get them working under steam again. I'm sure you'll do all the safety checks first with old engines.
Often the rubber seals like on the Sight Glass are perished and suspect the Seals/Glands on the Piston, Valve and Regulator Rods may need checking.
They were likely packed with Graphited Yarn. Not sure how/if Norm's Dad's Engine had the Steam Oil administered for the Piston and Valve?, as I can't see a lubrication system
in the pics. Hope the book helps.
Some engines like to have a mix of Coal and Charcoal, or just the latter to produce good heat. Also the Grate gaps size can be the cause, or so I have read!.
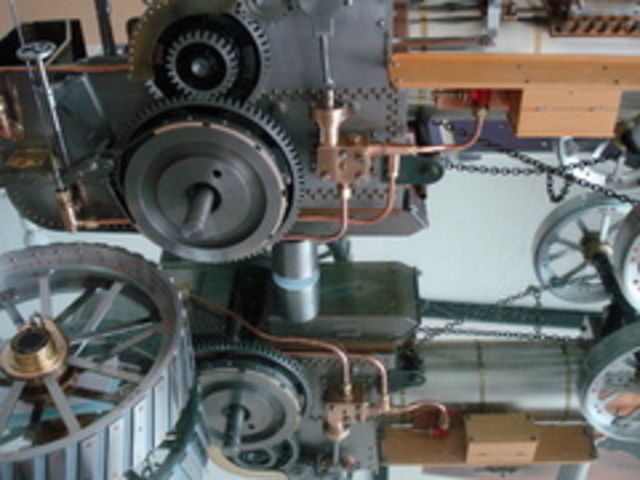
Done a little more on mine. Made up all the Pipe work and fittings for the Water Pump-
-
-
-
Yes Neil and thanks all.
Used the 'Accessories' Drawings from a 1 1/2" Scale Alchin TE design for dimensions and reduced them all by 2/3rds, as well as the Fowler style Lamps etc .
Got to make spanners and sockets for the tiny nuts and bolts yet.
Your Father's (very nice example) Engine is a Henry Greenly design Norm. I believe it was published in 1933 in Model Engineer Mag. Based on a Road Tractor design like the Ramsomes (solid Flywheel and Canopy). Shame you had to part company with it, but I may have the same issue at some stage.
I've used Len Mason's Minnie TE design and Castings. I've heavily altered the design to represent an 1890's version and increased the detail (some may say foolishly with the extra work involved).
Yes I do, I have the Book by John Haining on Model T.E. Construction and I have L,C Mason's book on Construction of my engine. Both include Chapters on setting the Valve Timing, running and maintaining them.
Will look to acquire some good Welsh Steam Coal from a Local Model Rail Club when I'm ready.
Good thing is, I went and bought a professionally built Boiler back in 1985, so I have a Proper Boiler Certificate for it.
Wasn't competent enough, or had the equipment to make my own at the time...really bumps up the value though !.
Regards
-
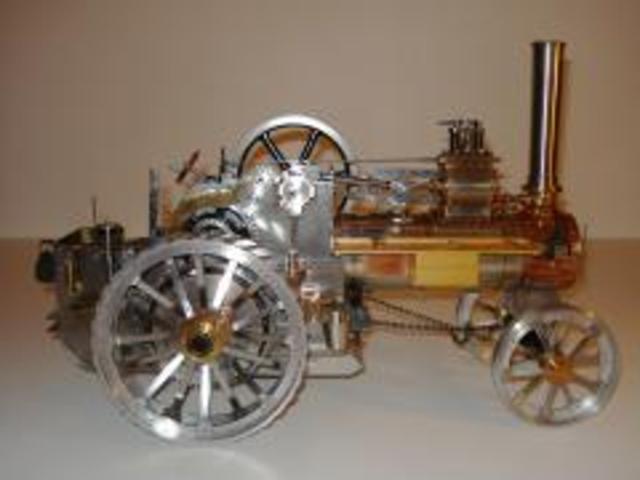
Looking to finish this 'Mothballed' 1 inch Scale design TE project while I still only need the occasional use of a weak Magnifying Glass !., so it's top of the jobs list now.
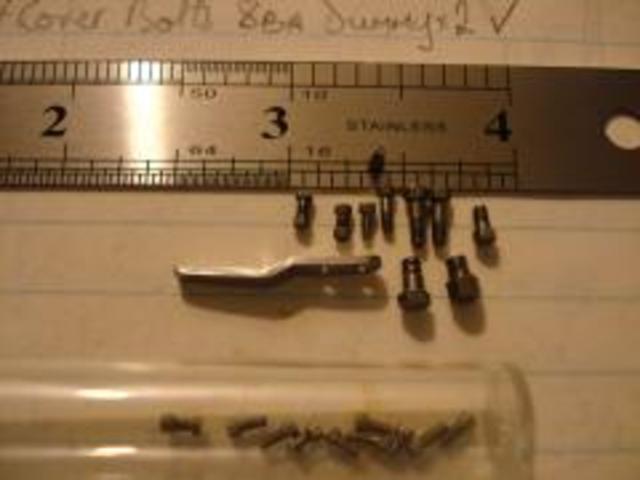
I've been recently making loads of small Nuts and Bolts for parts that were temporarily fitted. Smallest size is 0.0669" (1.62mm) AF Steel hexagon rod with 12BA thread.
The metal plate in the Pic is one of 3 Oil Lamp brackets that require these small bolts-
-
-
From the album: Anglo's Images
Work now in progress to finish this project which was started in 1984 !.
© RCS 2016
-
Sorry, won't let me post images any more. It has allowed me to upload Manuals, so, assuming you don't have either of these, I've posted both the Illustrated Parts List and Operators Manual for 1975 C Series. Will cover nearly all (or should do) of your Model.
Part (Belt Cover) is shown in Figure 8 of parts Man.
How to adjust Belt Tabs/Guides for clearance is on page 16 (fig22) of the Operators Manual.
Regards.
-
Version 1.0.0
18 downloads
Covers several model versions from 1973-1975, but likely to be differences on Belgium Built Tractors.
-
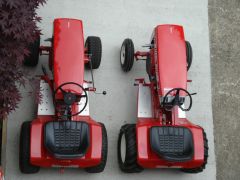
Good progress on your project. Hate to be the bringer of an issue (if you haven't already spotted it), but I feel you will have problems with the Clutch/Drive disengagement from the engine.
Assuming you have repaired the Clutch Idler issue I mentioned previously, I noticed you are also missing the essential Top Tab on the Belt Cover Panel that controls the drive belt tension on the Engine pulley. It needs to be there to release the Belt engagement when the clutch is operated/depressed.
-
If you are restoring back to original spec , rather than a refurbish, I presume you will be removing those Drive Belt Control bodges.
If you need to know what was there originally to control the Clutch/Belt operation,
use this link to my images and dimensions of the missing bit that is welded to the Clutch Idler Pulley Arm - http://s1190.photobucket.com/user/AngloTraction/library/OddsnSods?sort=3&page=2
Good luck with your project
-
There's a few images that may also help in this thread-
http://myoldmachine.com/topic/1675-kohler-k-series-starter-motor-issues/
-
May have been better to post this in the Forum's Engines Section (O&R) section. The guys in the U.S, will be best placed to offer advice.
Edit=== I now see it was
-
Glad the previous info helped you.
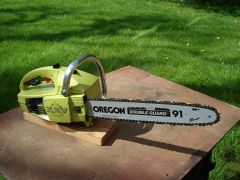
Not much to go on, but this Site has a wealth of info on All Chainsaws if you have a few hours to kill surfing the InterWeb.
This link will take you directly to the Spec details of your model (if you don't know them already). ....Image is not very helpful with decals.
http://www.acresinternet.com/cscc.nsf/ed1d619968136da688256af40002b8f7/a2116b63e2416f7a88256b4e0065068f?OpenDocument
-
Just wondering about that myself.
From your pics Stephan, the bore look's reasonable with a bit of carbon scoring here and there.
Most of that Valve corrosion is from Atmospheric moisture from non use with the valves open.
.
The Crankcase Oil seal on the output side where your stubborn Coupling is look's dry, so no leaks or worn bearing issues yet.
If the Oil that comes out of (if any) the Crankcase is not emulsified with water, then to get an idea of 'Big End' wear you could use a Dial Indicator on the Piston top and checking the amount of Crank rotation before registering any movement just to satisfy your curiosity.
Flush the Crankcase, or just replenish with fresh Oil.
All the Valve work and Valve Chest/Breather clean should be able to be/can be done without Crankcase invasion.
So you may at least leave the Coupling on the Shaft for the time being in order to get the engine running ?.
I don't know if you have applied any Penetrating Oil to that Coupling (look's dry in your pic), but it would be the first thing to do and leave it to soak.
I see evidence of previous attempts to bash the Coupling off by the lip nearest the Crankcase in the same pic.
If you succeed in getting the engine to run ok, then using the machine will/should assist in loosening that well oiled coupling a tad should you need to disturb it again.
Only suggestions to minimise initial evaluation............... If it runs ok, you can always take it down for a big service later!.
-
I know what it's like Alan, same here where really sad unfortunate events affect people and you have to change your direction. Got to lose some of my 'Fold' and downsize this year as well.
1/2 size sounds a good project .
-
If you haven't found a Manual yet, here is a link (virus checked) from a reliable site-
http://www.asos1.com/tecumseh4hp/Tecumseh.pdf
You'll have to search for the Carb data/part lists, as I can't find that Dellorto Carb version listed in the Engine Manual or the separate Carb Manual.
That's why I had a problem recognising the strange Filter set up. Not familiar with these later 'Built under License' versions.
Only familiar with Earlier U.S. 'H' series Engines and Lauson Carbs.
Plenty of Info on FHC 2013a out there though. Hope you find what you need and get it sorted and working.
-
'S' ........Couldn't resist it!. Seriously though. I seem to find that people/sellers don't use the 'S' when they're flogging Aftermarket parts.
However Kohler for example use/d the same part number suffix system of using '-S' , and earlier with prefix of 'A- and X-' .
This 'S' Suffix letter was dropped on many later revisions retaining the same number or an updated one.
Usually just entering the numbers in a 'Search' will show results with the suffix as well.
-
Welcome Stephan (Like your Username meaning ).
Nice Project there, a few parts to obtain I see.
I tend to also suspect it is a Techy Engine with an unusual Air Filter?.
Carbureter on them can be a challenge to set on some versions, but Engine Manual is available to download and some parts still available.
Look forward to seeing it running and working.
-
It is still in a Field Building down in Sussex. I'm hoping to get it and several other machines out and up to my workshop this Spring when I can find some transport.
Land is being sold and has no main access yet. Got to make space first (and some money).
The Osprey will probably need a good going over again though.
-
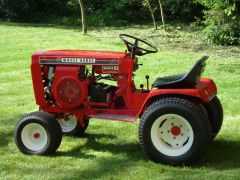
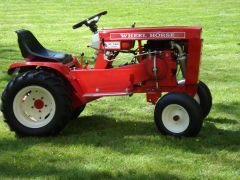
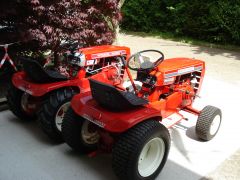
Nice old 70s example there. It reminded me I have one at the stash in Billingshurst. Paint colour I believe is Fern Green. Next time I'm down there, I'll check it out as the cast alloy base and paint is in excellent nick.
As for a Muffler, if it's a 3.5hp with 1/2" NPT thread, then a B&S 'Screw In' one should sort it (if you can get the old lock nut undone and the pipe out).
Part number would be Briggs & Stratton 89966 .....type that into a search box for lots of buying options.
|
|